

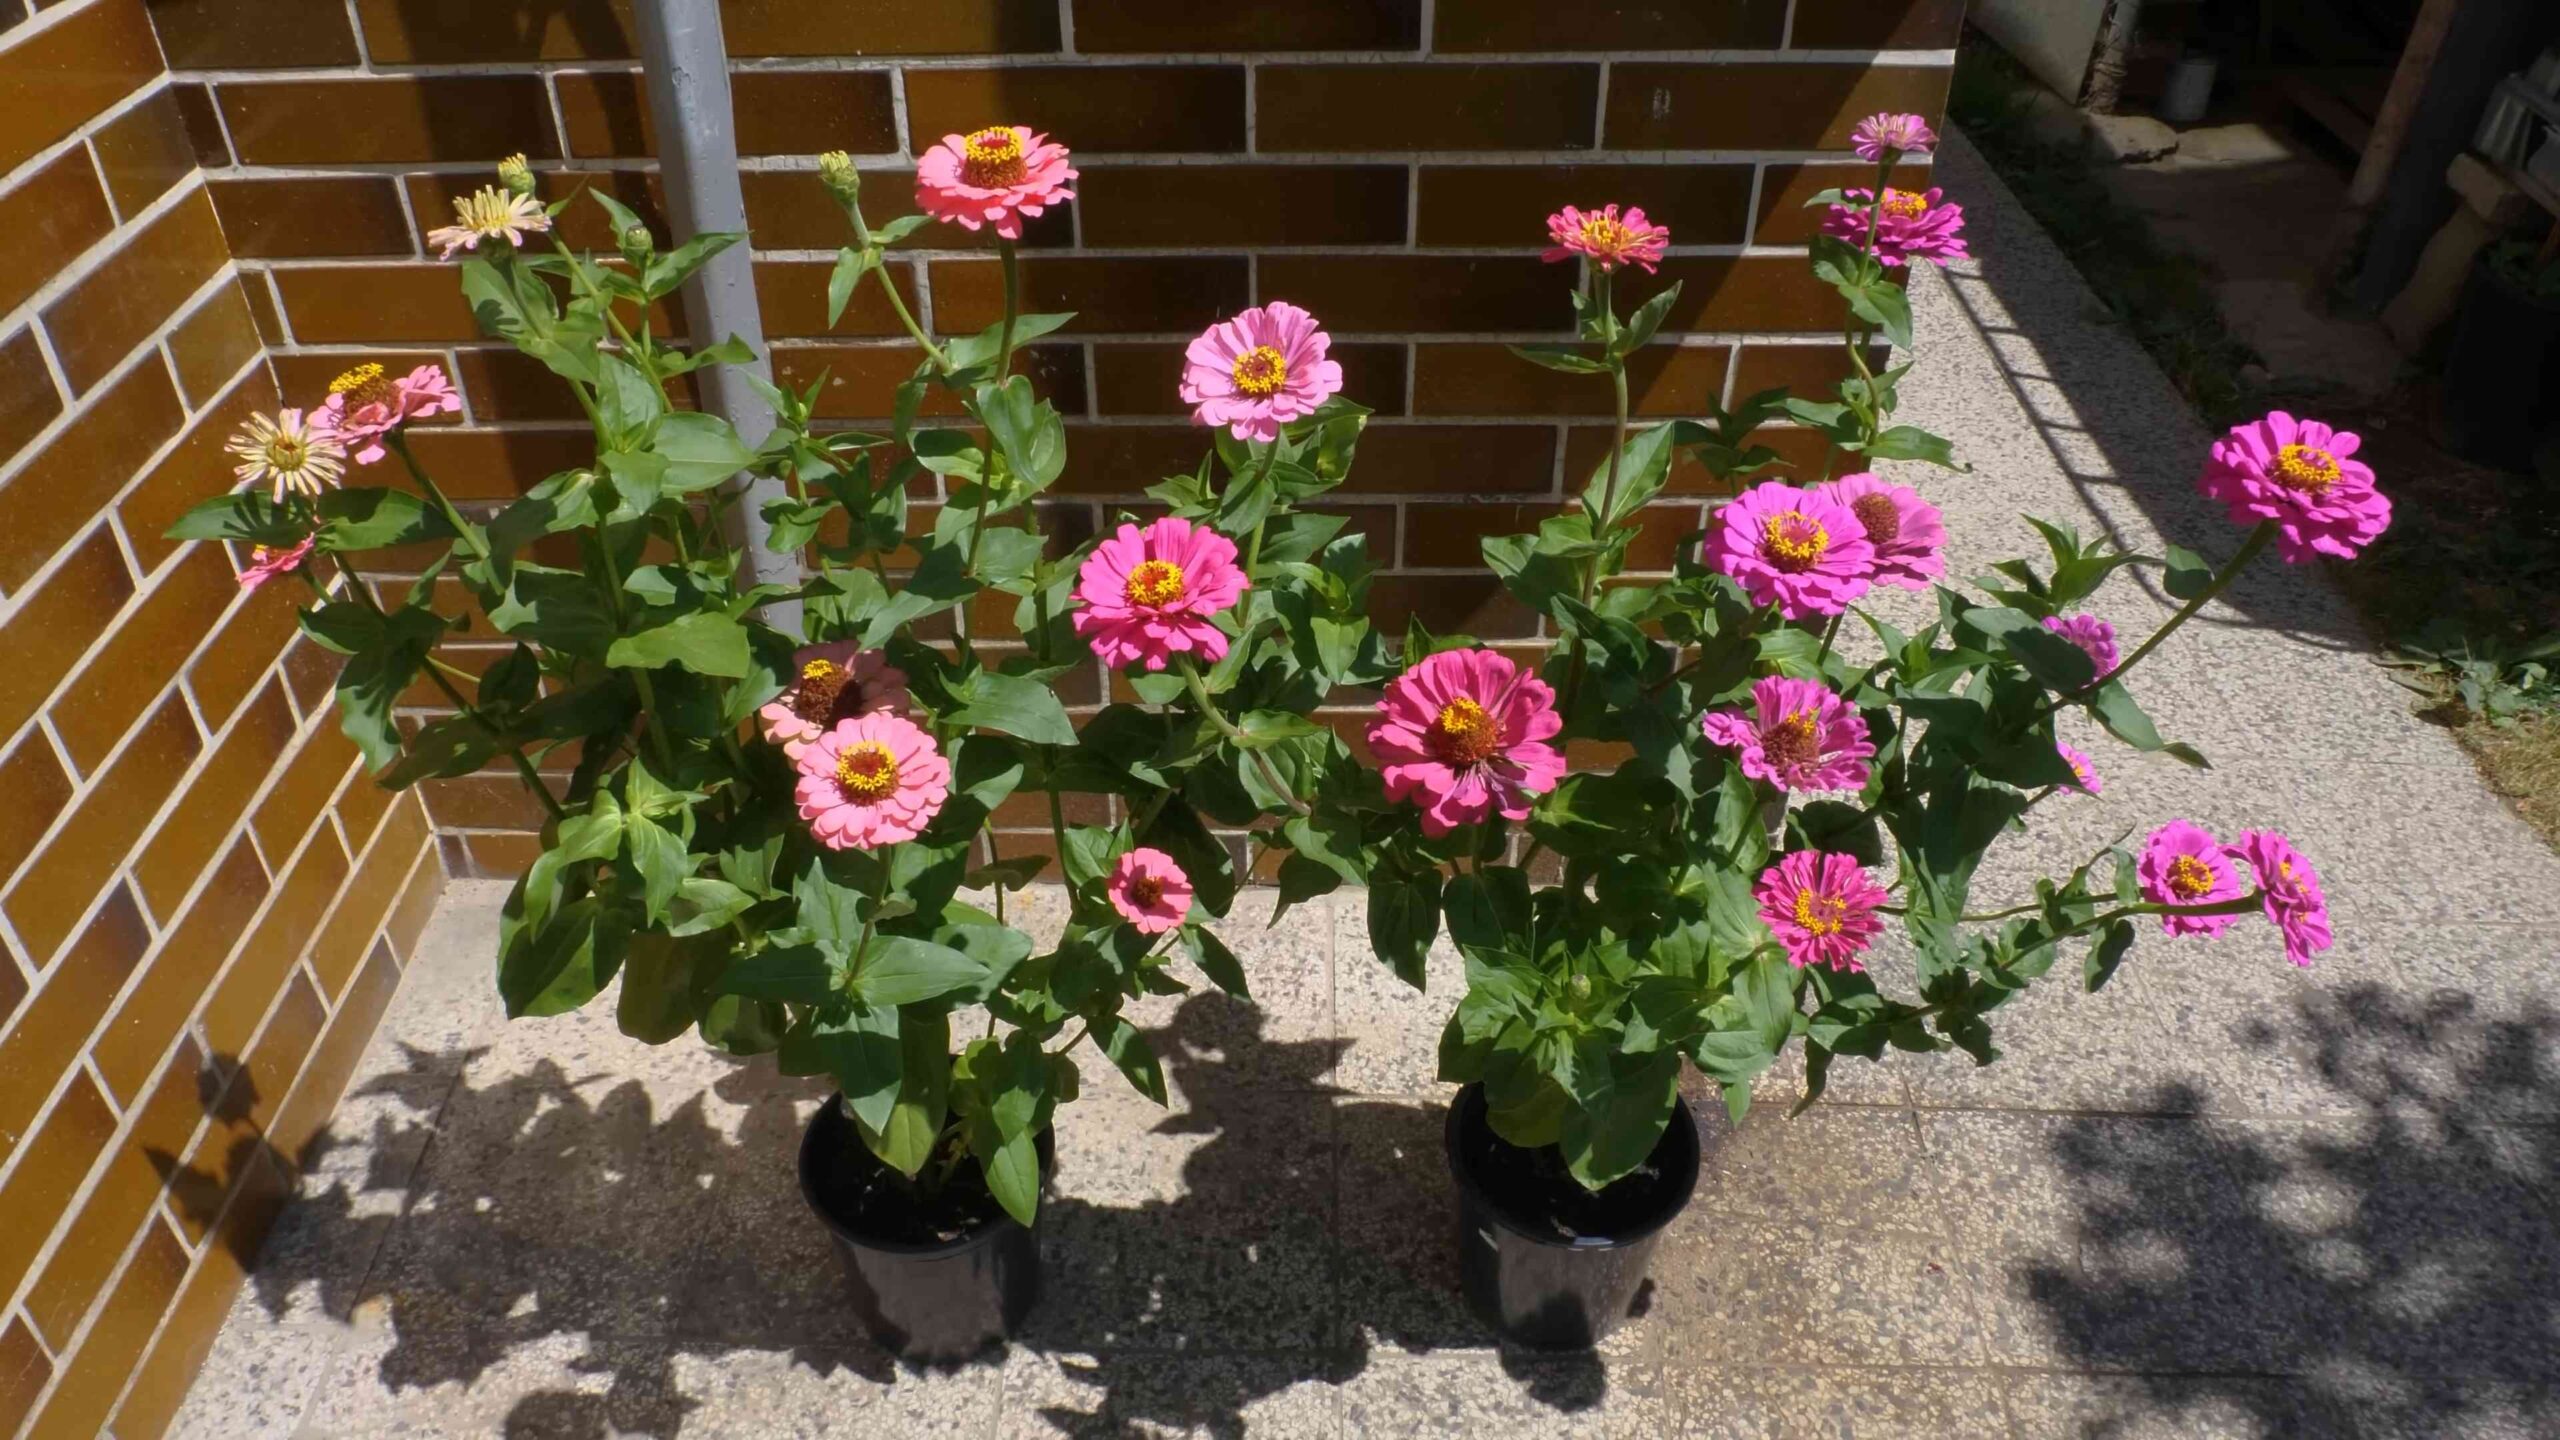
Zinnias in containers! Aren’t they just the cheeriest little bursts of sunshine you could ask for? I’ve always been captivated by their vibrant colors and how effortlessly they brighten up any space. And guess what? You don’t need a sprawling garden to enjoy these beauties. That’s right, growing zinnias in containers is totally doable, even if you’re short on space or just starting out with gardening.
For centuries, zinnias have been cherished for their ornamental value. Originating in Mexico, they were initially considered rather unattractive weeds by European botanists. Can you believe it? It wasn’t until the 18th century that they were truly appreciated and cultivated for their stunning blooms. Now, they’re a global favorite, symbolizing remembrance and affection.
But why should you bother with growing zinnias in containers? Well, besides their obvious aesthetic appeal, they’re incredibly low-maintenance and attract pollinators like butterflies and bees, adding life and vibrancy to your patio or balcony. Plus, let’s be honest, there’s something incredibly satisfying about nurturing a plant from seed to bloom. In this article, I’m going to share my favorite DIY tricks and hacks for successfully growing zinnias in containers, ensuring you have a season full of colorful blooms. Get ready to unleash your inner gardener!
Growing a Riot of Color: My Guide to Container Zinnias
Okay, let’s talk zinnias! These vibrant, cheerful flowers are a total game-changer for any garden, and the best part? You don’t need acres of land to enjoy them. I’m going to walk you through everything you need to know to grow gorgeous zinnias right in containers. Trust me, even if you’re a beginner, you can totally nail this.
Choosing the Right Zinnia Variety
First things first, not all zinnias are created equal, especially when it comes to container gardening. You’ll want to pick varieties that are naturally more compact and bushy. Here are a few of my favorites:
* Profusion Series: These are disease-resistant and bloom like crazy. They come in a range of colors and stay relatively small, making them perfect for pots.
* Zinnia elegans ‘Thumbelina’: As the name suggests, these are tiny! They’re ideal for smaller containers or window boxes.
* Zinnia ‘Magellan’: These are a bit larger than the Profusion series, but still manageable in a decent-sized pot. They have large, dahlia-like flowers that are absolutely stunning.
* Zinnia ‘Crystal White’: If you’re looking for a classic white zinnia, this one is a winner. It’s compact and produces tons of blooms.
* Zinnia ‘Star Orange’: For a burst of bright orange, this variety is hard to beat. It’s relatively compact and very floriferous.
Important Tip: Always check the plant tag or seed packet for the mature height of the zinnia variety. You want to choose something that won’t outgrow your container too quickly.
Gathering Your Supplies
Before we get our hands dirty, let’s make sure we have everything we need. Here’s my checklist:
* Zinnia Seeds or Seedlings: Choose your favorite variety (or a mix!) from the list above.
* Container: Select a pot that’s at least 12 inches in diameter and 12 inches deep. The bigger, the better, as it will give the roots more room to grow. Make sure it has drainage holes!
* Potting Mix: Use a high-quality potting mix, not garden soil. Potting mix is lighter and drains better, which is crucial for container plants.
* Slow-Release Fertilizer: This will provide your zinnias with a steady supply of nutrients throughout the growing season.
* Watering Can or Hose: For, well, watering!
* Gardening Gloves: To keep your hands clean and protected.
* Trowel: For planting and transplanting.
* Optional:
* Mulch: To help retain moisture and suppress weeds.
* Plant Markers: To label your different zinnia varieties.
* Pruning Shears: For deadheading (more on that later).
Planting Your Zinnias: Step-by-Step
Alright, let’s get planting! Whether you’re starting from seed or transplanting seedlings, the process is pretty straightforward.
Starting from Seed:
1. Fill the Container: Fill your container with potting mix, leaving about an inch or two of space at the top.
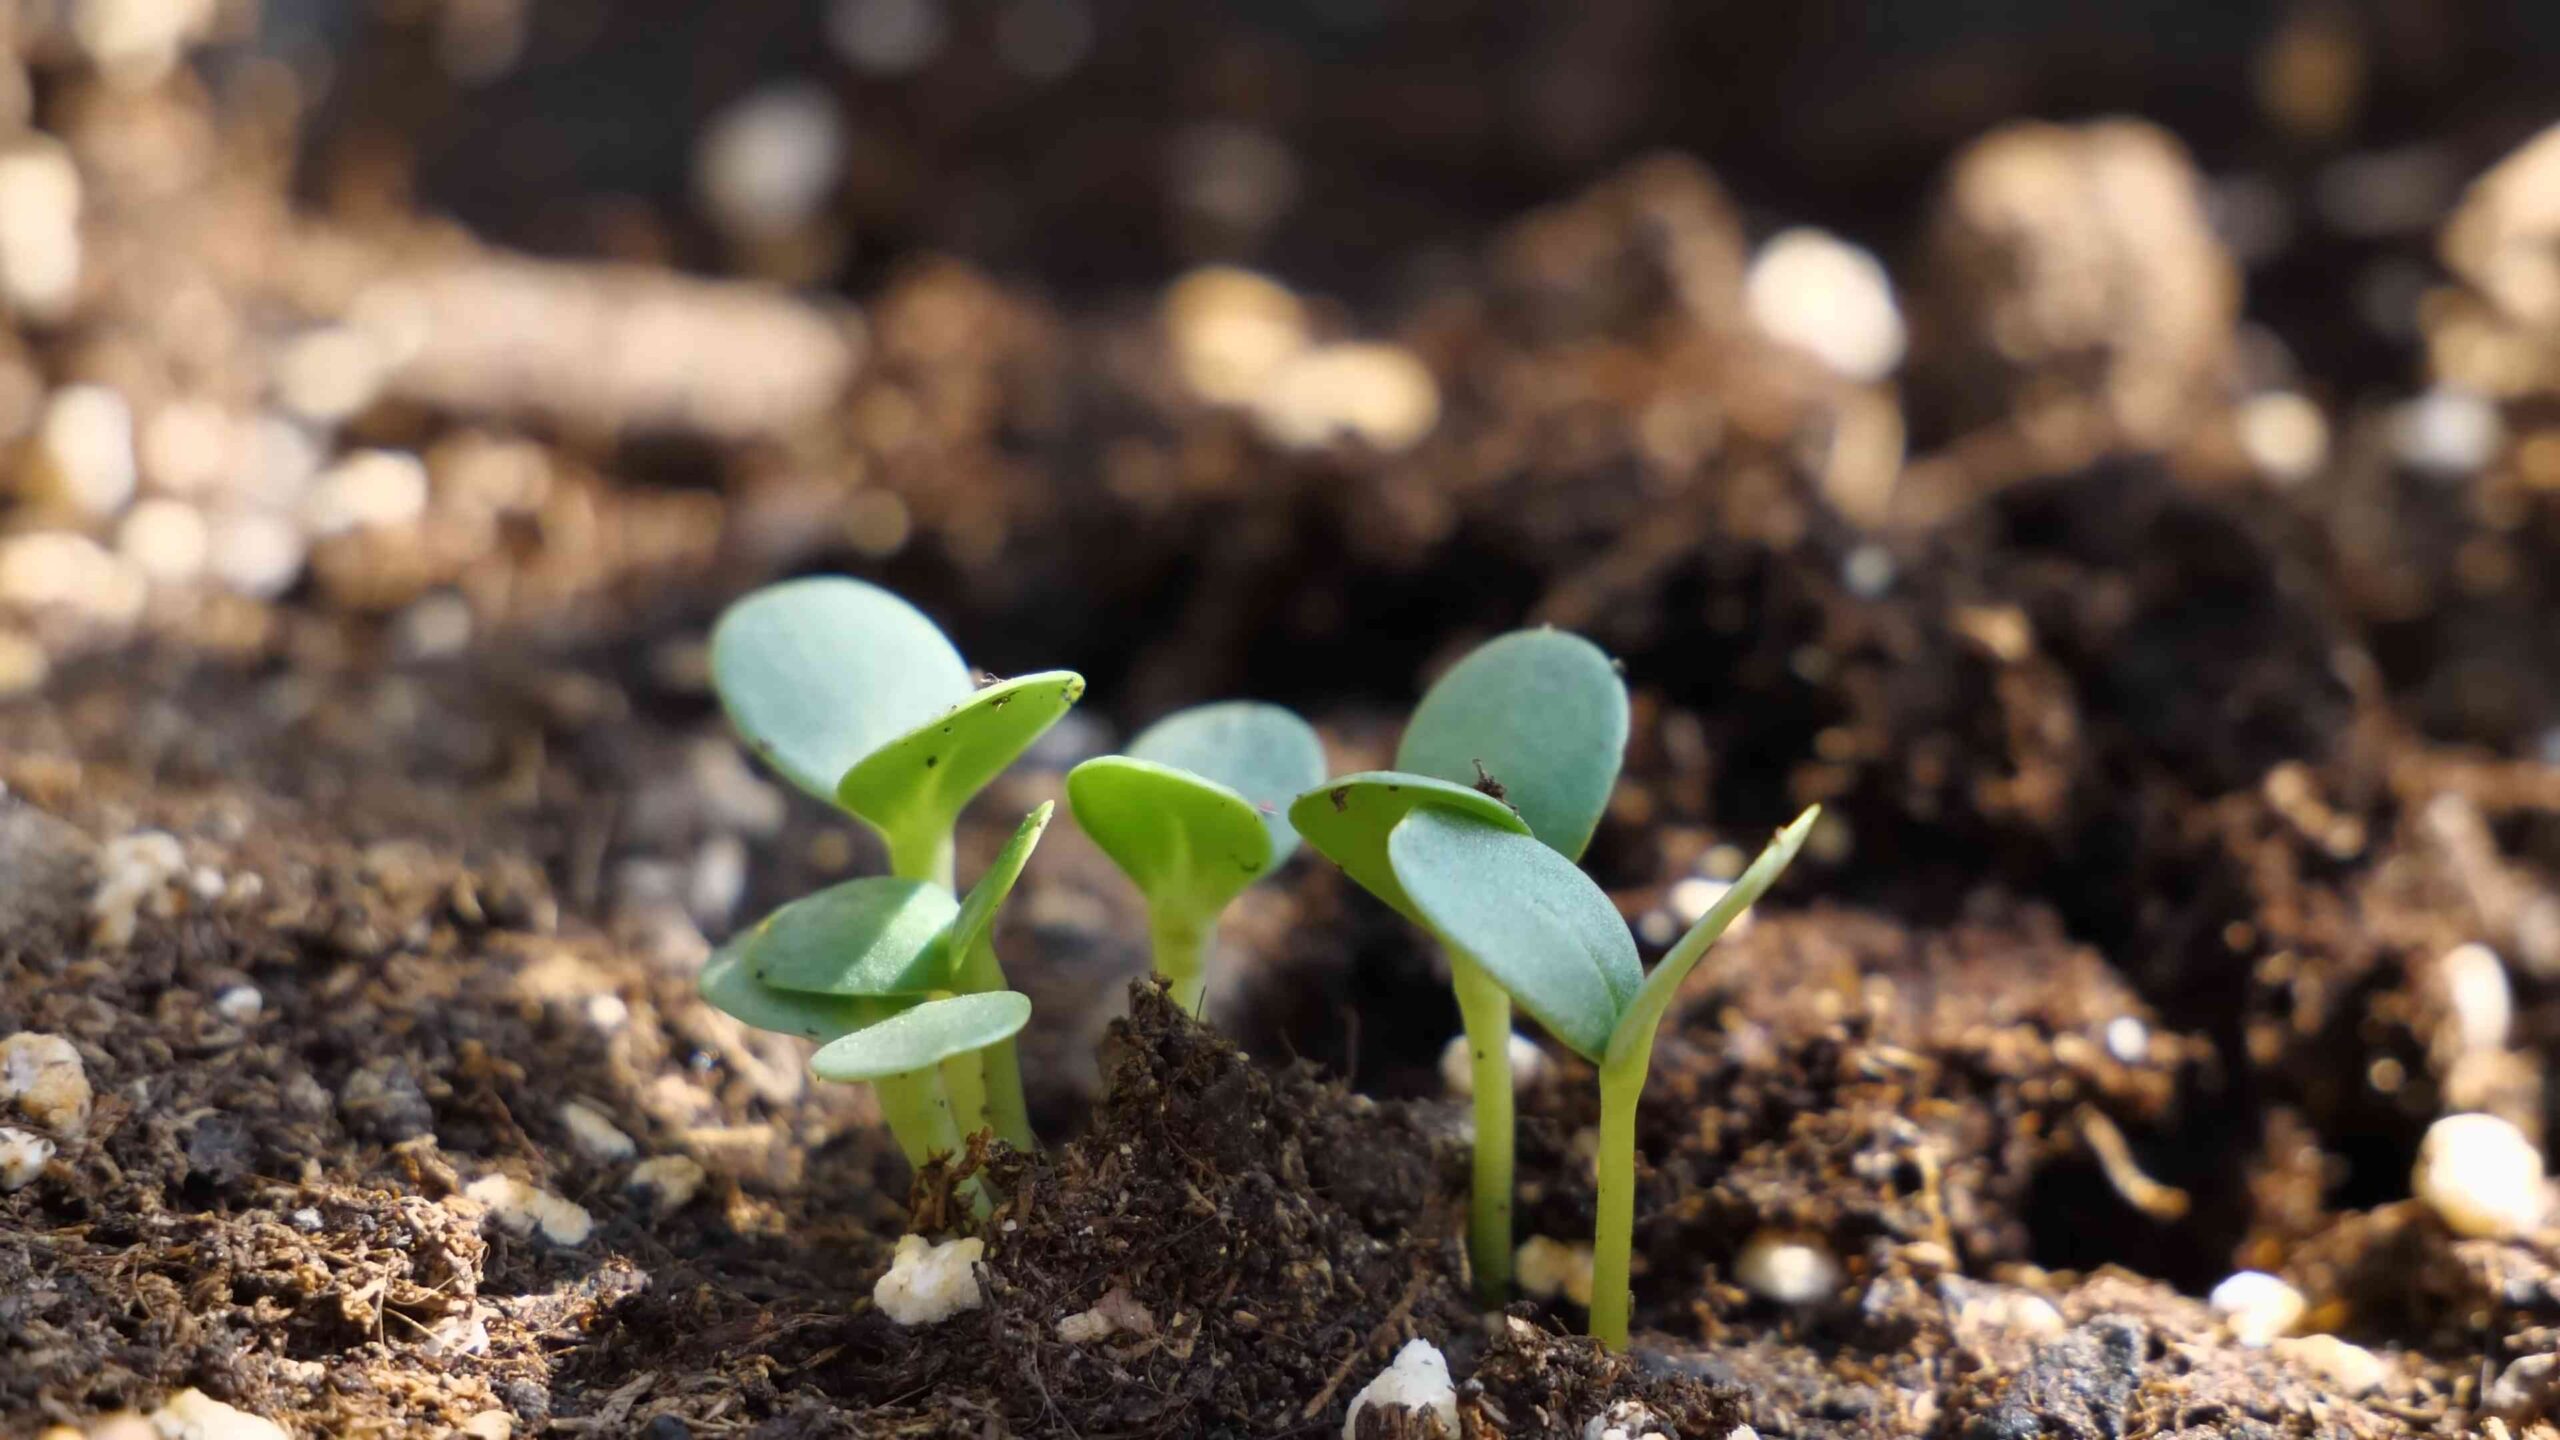
2. Sow the Seeds: Sprinkle the zinnia seeds evenly over the surface of the soil. I usually plant a few extra, just in case some don’t germinate.
3. Cover the Seeds: Gently cover the seeds with a thin layer of potting mix (about 1/4 inch).
4. Water Thoroughly: Water the soil gently but thoroughly, making sure to moisten the entire surface.
5. Keep it Moist: Keep the soil consistently moist, but not soggy, until the seeds germinate. You can cover the container with plastic wrap to help retain moisture, but be sure to remove it once the seedlings emerge.
6. Provide Sunlight: Place the container in a sunny location that receives at least 6-8 hours of direct sunlight per day.
7. Thin the Seedlings: Once the seedlings have a few sets of true leaves, thin them out, leaving only the strongest plants. Space them about 6-8 inches apart.
Transplanting Seedlings:
1. Prepare the Container: Fill your container with potting mix, leaving about an inch or two of space at the top.
2. Dig a Hole: Dig a hole in the soil that’s slightly larger than the root ball of the seedling.
3. Remove the Seedling: Gently remove the seedling from its nursery pot, being careful not to damage the roots. If the roots are tightly bound, gently loosen them with your fingers.
4. Place the Seedling: Place the seedling in the hole, making sure the top of the root ball is level with the surrounding soil.
5. Fill the Hole: Fill the hole with potting mix, gently firming the soil around the base of the plant.
6. Water Thoroughly: Water the soil thoroughly, making sure to moisten the entire root zone.
7. Provide Sunlight: Place the container in a sunny location that receives at least 6-8 hours of direct sunlight per day.
Caring for Your Container Zinnias
Now that your zinnias are planted, it’s time to give them the TLC they need to thrive. Here’s my care routine:
* Watering: Zinnias need consistent moisture, especially when they’re actively growing and blooming. Water them deeply whenever the top inch of soil feels dry to the touch. Avoid overhead watering, as this can lead to fungal diseases. I prefer to water at the base of the plant.
* Fertilizing: Since you’ve already added slow-release fertilizer, you shouldn’t need to fertilize too often. However, if you notice your zinnias aren’t blooming as much as they should be, you can give them a boost with a liquid fertilizer diluted to half strength every few weeks.
* Sunlight: Zinnias are sun-worshippers! They need at least 6-8 hours of direct sunlight per day to bloom their best. If you live in a particularly hot climate, you might want to provide some afternoon shade to prevent the flowers from scorching.
* Deadheading: This is crucial for keeping your zinnias blooming all season long. Deadheading simply means removing the spent flowers. When a flower starts to fade, cut it off just below the flower head, at the next set of leaves. This encourages the plant to produce more blooms.
* Pest and Disease Control: Zinnias are generally pretty easy to grow, but they can be susceptible to a few pests and diseases. Keep an eye out for aphids, spider mites, and powdery mildew. If you spot any problems, treat them promptly with an appropriate insecticide or fungicide. I prefer to use organic options whenever possible.
* Support: Taller zinnia varieties might need some support, especially if they’re grown in a windy location. You can use stakes or a small trellis to keep them from flopping over.
Troubleshooting Common Problems
Even with the best care, you might encounter a few challenges along the way. Here are some common problems and how to fix them:
* Yellowing Leaves: This could be a sign of overwatering, underwatering, or nutrient deficiency. Check the soil moisture and adjust your watering accordingly. If the soil is consistently moist, you might be overwatering. If the soil is dry, you need to water more often. You can also try fertilizing with a balanced fertilizer.
* Powdery Mildew: This is a fungal disease that causes a white, powdery coating on the leaves. It’s more common in humid conditions. To prevent powdery mildew, avoid overhead watering and provide good air circulation. If you see signs of powdery mildew, treat it with a fungicide.
* Lack of Blooms: This could be due to insufficient sunlight, lack of fertilizer, or failure to deadhead. Make sure your zinnias are getting enough sunlight, fertilize them regularly, and deadhead spent flowers.
* Leggy Growth: This means your zinnias are stretching towards the light and becoming tall and spindly. This is usually a sign of insufficient sunlight. Move your container to a sunnier location.
* Aphids: These tiny pests can suck the sap from your zinnias, causing them to weaken and become distorted. You can control aphids with insecticidal soap or neem oil.
Enjoying Your Beautiful Zinnias
And that’s it! With a little bit of care and attention, you can enjoy a riot of color from your container zinnias all season long. Don’t forget to cut some of the blooms to bring indoors and brighten up your home. Zinnias make excellent cut flowers and will last for several days in a vase.
I hope this guide has been helpful. Happy gardening!
Conclusion
So, there you have it! Growing vibrant, bountiful zinnias in containers is not only achievable but also incredibly rewarding. This DIY approach unlocks a world of floral beauty, allowing you to enjoy these cheerful blooms even with limited garden space. We’ve covered everything from selecting the right container and soil to providing optimal sunlight and water. But the real magic lies in the simple yet effective techniques we’ve shared, empowering you to create a thriving zinnia haven right on your patio, balcony, or even windowsill.
Why is this DIY trick a must-try? Because it puts you in control. You get to choose the exact varieties of zinnias you adore, ensuring a personalized display of color and form. You can tailor the growing conditions to perfectly suit your local climate and micro-environment. And, perhaps most importantly, you experience the satisfaction of nurturing these beauties from seed to stunning bloom. Forget relying on pre-grown plants from the nursery – embrace the joy of creating your own zinnia paradise!
Consider these exciting variations to further personalize your zinnia container garden:
* Vertical Zinnia Garden: Utilize a vertical planter or trellis to train your zinnias upwards, creating a dramatic wall of color. Choose compact varieties for this method.
* Companion Planting: Interplant your zinnias with herbs like basil or marigolds. These companions can help deter pests and attract beneficial insects, creating a healthier ecosystem in your container.
* Color Themes: Create a cohesive look by selecting zinnias in a specific color palette. Think vibrant oranges and yellows for a sunny display, or soft pinks and purples for a romantic touch.
* Mixed Container Gardens: Combine zinnias with other flowering plants that share similar growing requirements. Petunias, calibrachoa, and verbena are excellent choices for creating a diverse and visually appealing container.
* Succession Planting: Stagger your planting times to ensure a continuous bloom throughout the growing season. Plant a new batch of zinnia seeds every few weeks to keep the color coming.
Don’t be afraid to experiment and find what works best for you. The beauty of container gardening is its flexibility and adaptability. And remember, the most important ingredient is your enthusiasm and care.
We are confident that with a little effort and the tips we’ve shared, you’ll be amazed at the results. Imagine stepping onto your balcony and being greeted by a riot of color, the buzzing of bees, and the sweet scent of zinnias. It’s a truly magical experience.
So, what are you waiting for? Grab your containers, soil, and zinnia seeds, and get started today! We can’t wait to see your creations. Share your zinnia container gardening journey with us on social media using #DIYZinniaContainers. We’d love to see your photos, hear your tips, and celebrate your successes. Let’s spread the joy of growing these beautiful blooms together! This DIY project is a great way to get started with gardening.
Frequently Asked Questions (FAQs)
What is the best size container for zinnias?
The ideal container size for zinnias depends on the variety you choose. For smaller, compact varieties, a container that is at least 12 inches in diameter and 12 inches deep will suffice. However, for larger, taller varieties, opt for a container that is 18 inches or more in diameter and depth. The key is to provide enough space for the roots to develop and support the plant’s growth. Insufficient space can lead to stunted growth, reduced flowering, and increased susceptibility to pests and diseases. Also, consider the material of the container. Terracotta pots, while aesthetically pleasing, tend to dry out faster than plastic or glazed ceramic pots, so you may need to water more frequently.
How often should I water my container zinnias?
Watering frequency depends on several factors, including the weather, the size of the container, and the type of soil you’re using. Generally, zinnias in containers need to be watered more frequently than those planted in the ground. Check the soil moisture regularly by sticking your finger about an inch into the soil. If it feels dry to the touch, it’s time to water. Water deeply until water drains out of the bottom of the container. Avoid overhead watering, as this can lead to fungal diseases. Instead, water at the base of the plant. During hot, dry weather, you may need to water daily, while during cooler, wetter periods, you may only need to water every few days.
What kind of soil is best for zinnias in containers?
Zinnias thrive in well-draining soil that is rich in organic matter. A good potting mix specifically formulated for containers is ideal. Avoid using garden soil, as it can be too heavy and compact, leading to poor drainage and root rot. You can also amend your potting mix with compost or other organic matter to improve its fertility and drainage. A slightly acidic to neutral pH (around 6.0 to 7.0) is optimal for zinnia growth.
How much sunlight do zinnias need in containers?
Zinnias are sun-loving plants and need at least 6-8 hours of direct sunlight per day to thrive. Place your container in a location that receives plenty of sunlight. If you live in a particularly hot climate, you may need to provide some afternoon shade to prevent the plants from scorching. Insufficient sunlight can lead to leggy growth, reduced flowering, and pale foliage.
Do I need to fertilize my container zinnias?
Yes, zinnias in containers benefit from regular fertilization. Use a balanced, water-soluble fertilizer diluted to half strength every 2-3 weeks during the growing season. Avoid over-fertilizing, as this can lead to excessive foliage growth at the expense of flowering. You can also use a slow-release fertilizer at the time of planting to provide a steady supply of nutrients throughout the season. Look for a fertilizer with a higher phosphorus content (the middle number in the NPK ratio) to promote abundant blooming.
How do I prevent pests and diseases on my container zinnias?
Regularly inspect your zinnias for signs of pests or diseases. Common pests that affect zinnias include aphids, spider mites, and Japanese beetles. You can control these pests with insecticidal soap, neem oil, or by handpicking them off the plants. Fungal diseases, such as powdery mildew and leaf spot, can also be a problem, especially in humid conditions. To prevent these diseases, ensure good air circulation around the plants, avoid overhead watering, and remove any infected leaves promptly. You can also use a fungicide if necessary.
Can I grow zinnias from seed directly in containers?
Yes, you can grow zinnias from seed directly in containers. Sow the seeds about ¼ inch deep and keep the soil moist until they germinate. Zinnias germinate quickly, usually within 7-10 days. Once the seedlings emerge, thin them out to the desired spacing. Starting zinnias from seed is a cost-effective way to grow a large number of plants.
How do I deadhead zinnias in containers?
Deadheading is the process of removing spent flowers to encourage more blooms. To deadhead zinnias, simply cut off the flower stem just below the spent flower head. This will prevent the plant from putting energy into seed production and instead direct it towards producing more flowers. Deadheading regularly will keep your zinnias blooming profusely throughout the season.
Can I move my container zinnias?
Yes, you can move your container zinnias, but it’s best to do so when the plants are young and the root system is not yet fully established. Avoid moving them during the hottest part of the day or when they are in full bloom, as this can stress the plants. Water the plants thoroughly before and after moving them. If you are moving them to a different location with different sunlight conditions, gradually acclimate them to the new environment to prevent shock.
What are some good zinnia varieties for containers?
There are many zinnia varieties that are well-suited for containers. Some popular choices include:
* ‘Profusion’ series: These are compact, disease-resistant zinnias that come in a variety of colors.
* ‘Zahara’ series: These are also compact and disease-resistant, with large, daisy-like flowers.
* ‘Thumbelina’: This is a dwarf variety that is perfect for small containers.
* ‘Magellan’ series: These are larger zinnias with double flowers that come in a range of colors.
* ‘Queen Lime’ series: These zinnias have unique lime-green flowers that add a touch of elegance to any container.
Choose varieties that are appropriate for the size of your container and your personal preferences.
Leave a Comment