

Tomato Growing Tips: Ever dream of biting into a sun-warmed, juicy tomato fresh from your own garden? I know I have! There’s just something incredibly satisfying about nurturing a plant from seed to delicious fruit. But let’s be honest, sometimes growing tomatoes can feel like a real challenge. From blossom end rot to pesky pests, it’s easy to get discouraged. But don’t worry, I’m here to help you unlock the secrets to a bountiful tomato harvest!
The history of the tomato is actually quite fascinating! Originating in South America, it wasn’t always the beloved garden staple it is today. In fact, it was once feared and even considered poisonous in some parts of Europe! Thankfully, we now know better, and tomatoes are a cornerstone of cuisines worldwide.
That’s why I’ve put together this collection of DIY tricks and hacks to make tomato growing tips accessible to everyone, regardless of your experience level. Whether you’re a seasoned gardener or just starting out, these simple yet effective techniques will help you overcome common challenges and maximize your yield. Imagine the satisfaction of serving up homemade salsa with tomatoes you grew yourself! So, grab your gardening gloves, and let’s dive in!
DIY Tomato Growing Secrets: From Seed to Sauce!
Hey there, fellow gardening enthusiasts! I’m so excited to share my tried-and-true methods for growing the juiciest, most flavorful tomatoes you’ve ever tasted. Forget those bland supermarket tomatoes – we’re going to create a tomato paradise right in your backyard (or even on your balcony!). This guide is packed with tips and tricks I’ve learned over the years, and I promise, even if you’re a complete beginner, you’ll be harvesting a bumper crop in no time.
Choosing the Right Tomato Variety
Before we even think about planting, let’s talk about tomato varieties. This is crucial because different tomatoes thrive in different climates and have different uses.
* **Determinate vs. Indeterminate:** This is the first big decision. Determinate tomatoes grow to a certain size and then produce all their fruit at once, making them great for canning. Indeterminate tomatoes, on the other hand, keep growing and producing fruit throughout the season. I personally prefer indeterminate varieties because I love having a continuous supply of fresh tomatoes.
* **Heirloom vs. Hybrid:** Heirloom tomatoes are open-pollinated varieties that have been passed down through generations. They often have unique flavors and colors, but they can be more susceptible to diseases. Hybrid tomatoes are bred for specific traits like disease resistance and higher yields. I usually grow a mix of both!
* **Consider Your Climate:** If you live in a short-season area, choose early-maturing varieties. If you have a long, hot summer, you can experiment with later-maturing varieties.
* **Think About Your Needs:** Do you want tomatoes for slicing, sauces, or salads? Beefsteak tomatoes are great for sandwiches, while Roma tomatoes are perfect for sauces. Cherry tomatoes are ideal for snacking.
Some of my personal favorites include:
* **’San Marzano’ (Indeterminate):** The king of sauce tomatoes!
* **’Brandywine’ (Indeterminate Heirloom):** Huge, flavorful beefsteak tomatoes.
* **’Early Girl’ (Determinate):** A reliable early-season producer.
* **’Sungold’ (Indeterminate):** Incredibly sweet and addictive cherry tomatoes.
Starting Your Tomato Seeds Indoors (Optional but Recommended)
Starting your tomato seeds indoors gives you a head start on the growing season, especially if you live in a cooler climate. I highly recommend it!
* **When to Start:** About 6-8 weeks before the last expected frost.
* **What You’ll Need:**
* Seed starting trays or small pots
* Seed starting mix (not regular potting soil!)
* Tomato seeds
* A spray bottle
* A heat mat (optional, but helpful)
* A grow light (essential if you don’t have a very sunny window)
**Step-by-Step Instructions:**
1. **Prepare Your Seed Starting Trays:** Fill your seed starting trays or pots with seed starting mix. Gently tap the trays to settle the mix.
2. **Sow the Seeds:** Make a small indentation (about 1/4 inch deep) in the center of each cell or pot. Place 2-3 tomato seeds in each indentation. This increases the chances of at least one seed germinating.
3. **Cover the Seeds:** Gently cover the seeds with seed starting mix.
4. **Water Carefully:** Use a spray bottle to moisten the soil. Avoid overwatering, which can lead to damping off (a fungal disease that kills seedlings).
5. **Provide Warmth:** Place the trays on a heat mat (if using) and cover them with a humidity dome or plastic wrap to create a humid environment.
6. **Provide Light:** Place the trays under a grow light or in a very sunny window. If using a grow light, keep it a few inches above the trays and adjust it as the seedlings grow.
7. **Monitor and Water:** Check the soil moisture daily and water as needed to keep it consistently moist but not soggy.
8. **Remove Humidity Dome:** Once the seedlings emerge (usually within 7-14 days), remove the humidity dome or plastic wrap.
9. **Thin the Seedlings:** Once the seedlings have their first true leaves (the leaves that look like miniature tomato leaves), thin them to one seedling per cell or pot. Choose the strongest, healthiest-looking seedling and snip off the others at the soil line. Don’t pull them out, as this can disturb the roots of the remaining seedling.
10. **Fertilize:** Once the seedlings have their second set of true leaves, start fertilizing them with a diluted liquid fertilizer specifically formulated for seedlings. Follow the instructions on the fertilizer label.
11. **Harden Off:** About a week before you plan to transplant the seedlings outdoors, you need to “harden them off.” This means gradually exposing them to outdoor conditions to help them adjust. Start by placing them outside in a sheltered location for an hour or two each day, gradually increasing the amount of time they spend outdoors. Protect them from direct sunlight and strong winds.
Preparing Your Garden Bed
Tomato plants need plenty of sunshine and well-drained soil. Here’s how to get your garden bed ready:
* **Choose a Sunny Location:** Tomatoes need at least 6-8 hours of direct sunlight per day.
* **Improve the Soil:** Tomatoes thrive in rich, well-drained soil. Amend your soil with compost, aged manure, or other organic matter. This will improve drainage, aeration, and nutrient content. I like to add a generous amount of compost to my tomato beds each year.
* **Check the Soil pH:** Tomatoes prefer a slightly acidic soil pH of around 6.0-6.8. You can test your soil pH with a soil testing kit and amend it accordingly.
* **Consider Raised Beds:** Raised beds are a great option if you have poor soil drainage or limited space. They also warm up faster in the spring.
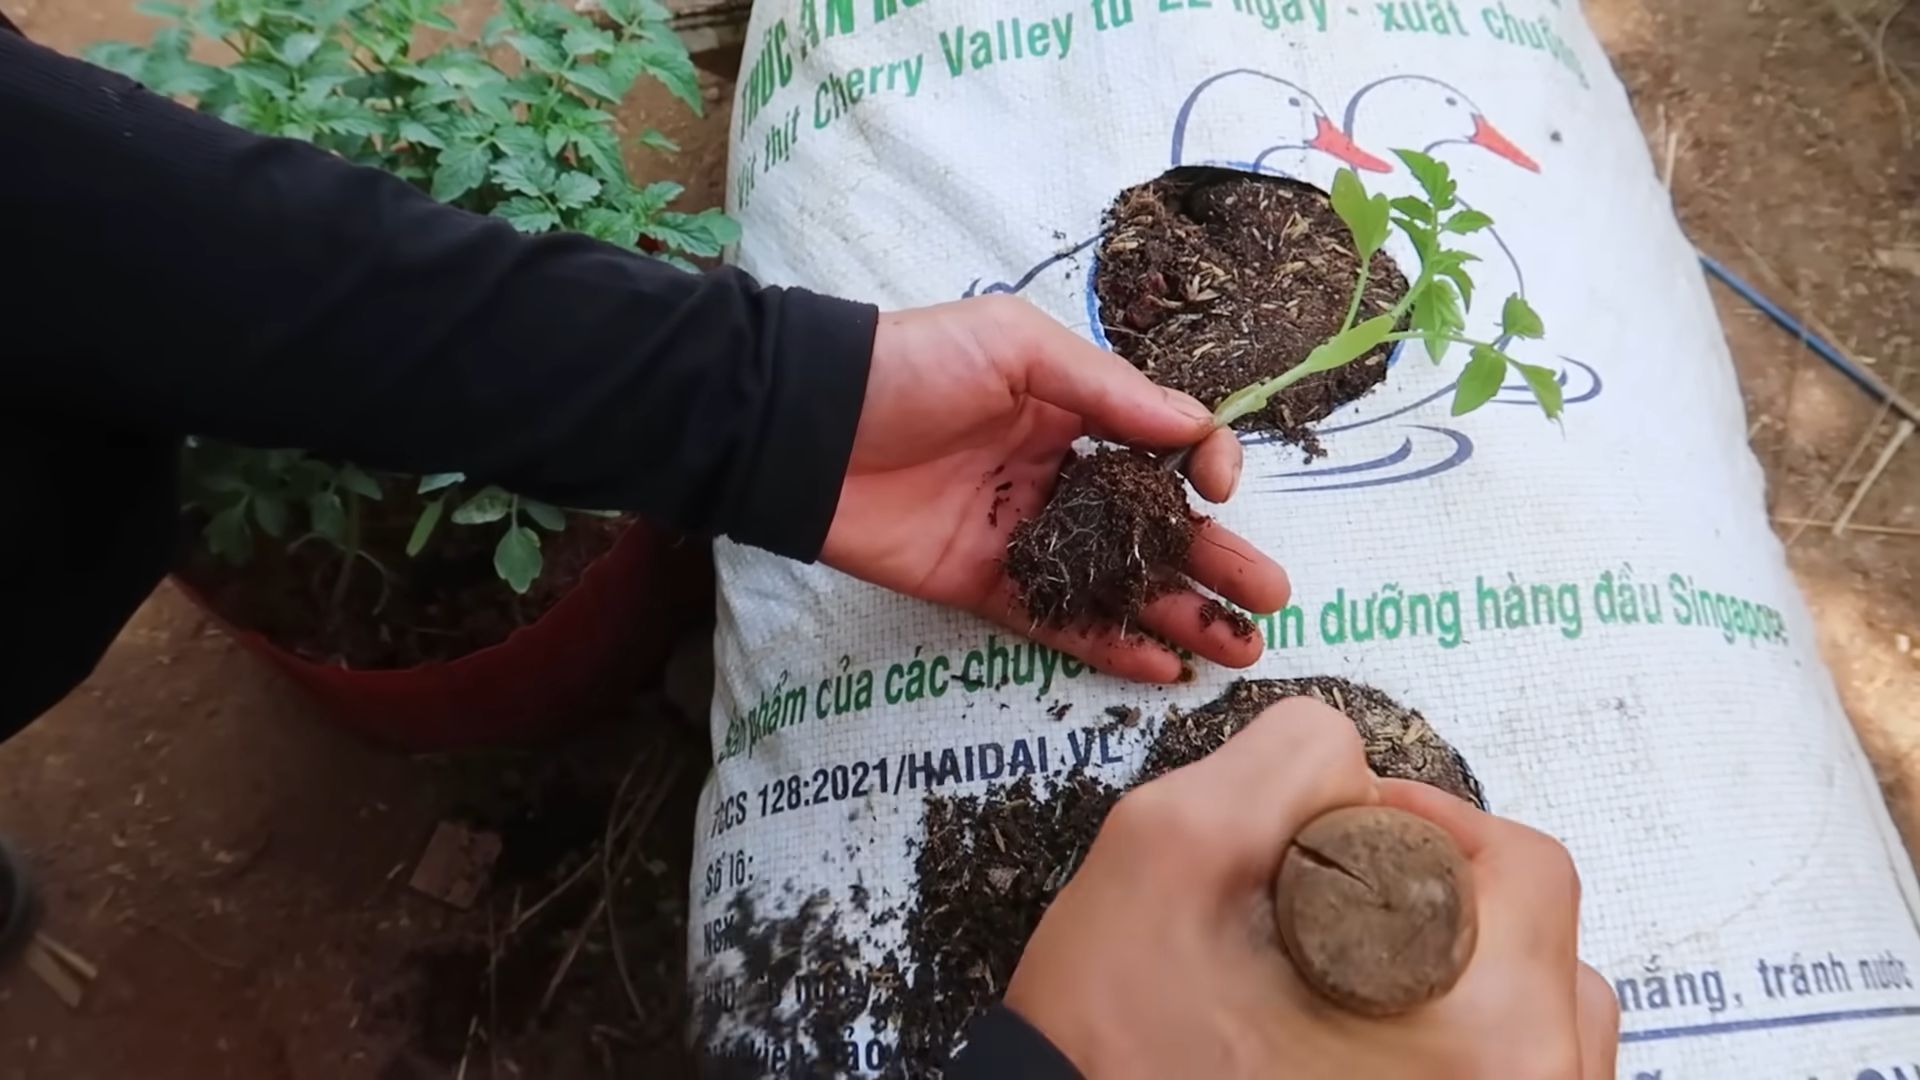
Transplanting Your Tomato Seedlings
Now for the exciting part – planting your tomato seedlings in the garden!
* **Wait for Warm Weather:** Don’t transplant your tomato seedlings until the danger of frost has passed and the soil has warmed up to at least 60°F (15°C).
* **Dig the Holes:** Dig holes that are deep enough to bury the bottom third of the tomato seedling’s stem. This encourages the plant to develop more roots along the buried stem, resulting in a stronger, healthier plant.
* **Plant Deep:** Remove the tomato seedling from its pot and gently loosen the roots. Place the seedling in the hole and bury the bottom third of the stem.
* **Add Support:** Immediately after planting, insert a stake, cage, or trellis next to each tomato plant. This will provide support as the plant grows and prevent the fruit from touching the ground. I prefer using tomato cages because they’re easy to install and provide good support.
* **Water Thoroughly:** Water the newly transplanted seedlings thoroughly.
* **Mulch:** Apply a layer of mulch around the base of the plants to help retain moisture, suppress weeds, and regulate soil temperature. I like to use straw or shredded leaves.
Caring for Your Tomato Plants
Proper care is essential for a bountiful tomato harvest.
* **Watering:** Water your tomato plants deeply and regularly, especially during hot, dry weather. Aim to water at the base of the plant to avoid wetting the foliage, which can lead to fungal diseases.
* **Fertilizing:** Fertilize your tomato plants every 2-3 weeks with a balanced fertilizer or a fertilizer specifically formulated for tomatoes. Follow the instructions on the fertilizer label.
* **Pruning:** Pruning is important for indeterminate tomato varieties. Remove the suckers (the small shoots that grow between the main stem and the branches) to encourage the plant to focus its energy on producing fruit. I usually prune my tomato plants every week or two.
* **Pest and Disease Control:** Keep an eye out for pests and diseases. Common tomato pests include aphids, tomato hornworms, and whiteflies. Common tomato diseases include early blight, late blight, and blossom end rot. Treat any problems promptly with appropriate organic or chemical controls. I prefer to use organic methods whenever possible.
* **Blossom End Rot Prevention:** Blossom end rot is a common problem caused by calcium deficiency. To prevent it, ensure your soil has adequate calcium and water your plants consistently. You can also add calcium to the soil by mixing crushed eggshells or bone meal into the planting hole.
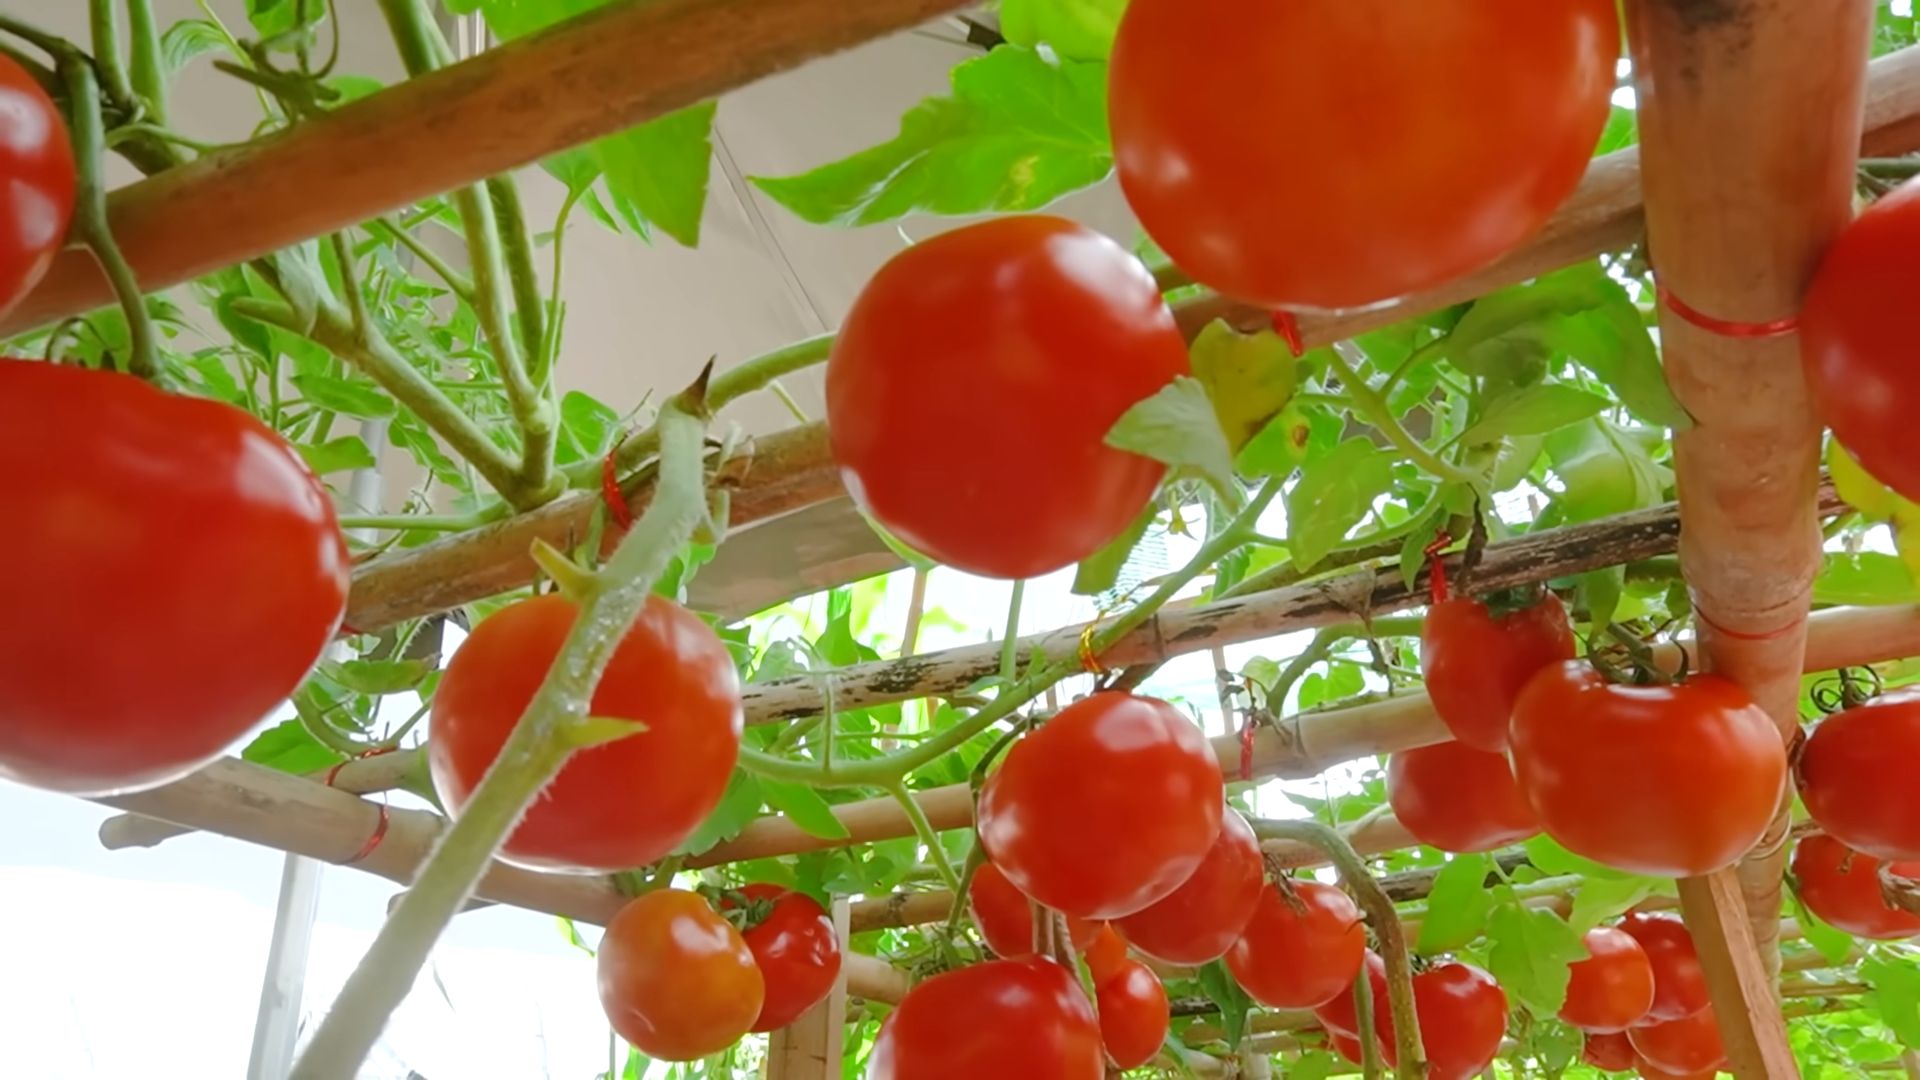
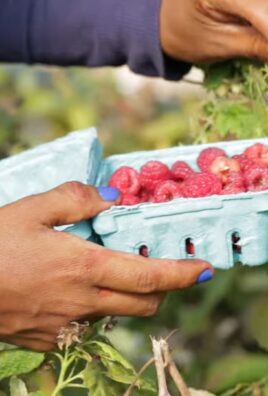
Harvesting Your Tomatoes
The moment you’ve been waiting for!
* **When to Harvest:** Harvest your tomatoes when they are fully colored and slightly soft to the touch. They should easily detach from the vine.
* **How to Harvest:** Gently twist or cut the tomato from the vine.
* **Storage:** Store ripe tomatoes at room temperature. Avoid refrigerating them, as this can affect their flavor and texture.
Troubleshooting Common Tomato Problems
Even with the best care, you might encounter some problems along the way. Here are some common issues and how to address them:
* **Yellowing Leaves:** This can be caused by a variety of factors, including nutrient deficiencies,
Conclusion
So, there you have it! Transforming your tomato-growing game with this simple yet powerful DIY trick is not just about saving money; it’s about unlocking the full potential of your plants and reaping a harvest that’s bursting with flavor. We’ve explored how this method can significantly improve drainage, aeration, and nutrient availability, leading to healthier, more robust tomato plants and, ultimately, a more abundant yield.
Why is this a must-try? Because it addresses some of the most common challenges faced by tomato growers, regardless of their experience level. Whether you’re a seasoned gardener or just starting out, this technique is accessible, affordable, and incredibly effective. It’s a proactive step towards preventing root rot, promoting strong root development, and ensuring your plants have the best possible foundation for success.
But the beauty of this DIY approach lies in its adaptability. Feel free to experiment with variations to suit your specific needs and preferences. For instance, if you’re growing in containers, consider adding a layer of gravel at the bottom for even better drainage. Or, if you’re dealing with particularly poor soil, you might want to incorporate some compost or other organic matter into the planting hole along with your chosen drainage material. You could even try different materials for drainage – perhaps crushed shells if you live near the coast, or even repurposed packing peanuts (ensure they are biodegradable!).
Another variation to consider is the addition of mycorrhizae fungi to the planting hole. These beneficial fungi form a symbiotic relationship with the tomato plant’s roots, helping them absorb nutrients and water more efficiently. This can be especially helpful in less-than-ideal soil conditions.
Don’t be afraid to get creative and tailor this DIY trick to your unique gardening environment. The key is to understand the principles behind it – improved drainage, aeration, and nutrient availability – and then adapt the method to best suit your specific circumstances.
We are confident that this simple addition to your tomato planting routine will make a significant difference in the health and productivity of your plants. Imagine biting into a juicy, sun-ripened tomato that you grew yourself, knowing that you played a crucial role in its success. That’s the reward that awaits you when you embrace this DIY trick.
Now, it’s your turn! We wholeheartedly encourage you to try this method in your own garden. Plant a few tomatoes using this technique and compare their growth and yield to plants grown using your traditional method. We’re confident you’ll see a noticeable difference.
And most importantly, we want to hear about your experience! Share your results, variations, and any tips you discover along the way in the comments section below. Let’s create a community of tomato growers who are passionate about sharing their knowledge and helping each other succeed. Your insights could be invaluable to other gardeners who are just starting out. Let’s all learn together and grow the best tomatoes possible! This simple **tomato growing tip** can make all the difference.
FAQ
Q: What exactly does this DIY trick do for my tomato plants?
A: This DIY trick primarily focuses on improving drainage and aeration around the root zone of your tomato plants. By creating a layer of drainage material at the bottom of the planting hole, you prevent water from pooling around the roots, which can lead to root rot and other fungal diseases. Improved aeration allows the roots to breathe, promoting healthier growth and nutrient uptake. Essentially, it creates a more favorable environment for the roots to thrive, leading to stronger, more productive plants.
Q: What materials can I use for the drainage layer?
A: There are several options you can use for the drainage layer, depending on what’s readily available and affordable for you. Some popular choices include:
* **Gravel:** A classic and effective option, providing excellent drainage.
* **Small Rocks:** Similar to gravel, but make sure they’re not too large, as they can take up too much space.
* **Broken Pottery Shards:** A great way to recycle broken pots and provide drainage.
* **Coarse Sand:** While sand can sometimes compact, coarse sand can still provide some drainage benefit.
* **Perlite:** A lightweight volcanic glass that improves drainage and aeration.
* **Expanded Clay Pebbles (LECA):** Another lightweight option that provides excellent drainage and aeration.
* **Pine Bark Fines:** Adds organic matter and improves drainage over time.
* **Biodegradable Packing Peanuts:** An eco-friendly option, but ensure they are truly biodegradable and won’t leach harmful chemicals into the soil.
Avoid using materials that can decompose quickly or retain too much water, as this can defeat the purpose of the drainage layer.
Q: How much drainage material should I use?
A: A good rule of thumb is to create a layer that’s about 2-4 inches thick at the bottom of the planting hole. This should be sufficient to provide adequate drainage without taking up too much space for the roots to grow. Adjust the amount based on the size of your planting hole and the drainage properties of your soil. If you have particularly heavy clay soil, you might want to use a slightly thicker layer.
Q: Can I use this trick for container-grown tomatoes as well?
A: Absolutely! In fact, this trick is even more important for container-grown tomatoes, as containers often have limited drainage. Make sure your container has drainage holes, and then add a layer of drainage material at the bottom before adding your potting mix. This will help prevent waterlogging and ensure your container tomatoes thrive.
Q: Will this DIY trick prevent blossom end rot?
A: While this trick primarily focuses on drainage and aeration, it can indirectly help prevent blossom end rot. Blossom end rot is often caused by calcium deficiency, which can be exacerbated by inconsistent watering. By improving drainage and aeration, you create a more stable soil environment, which can help the plant absorb calcium more effectively. However, it’s still important to ensure your soil has adequate calcium levels and to water your plants consistently.
Q: What if I don’t have any of the suggested drainage materials?
A: If you don’t have any of the suggested materials on hand, don’t worry! Get creative and look around your property for alternatives. Small twigs, wood chips (untreated), or even crumpled leaves can provide some drainage benefit in a pinch. Just make sure the material is relatively inert and won’t decompose too quickly.
Q: How often should I water my tomatoes after using this trick?
A: The watering frequency will depend on several factors, including the weather, soil type, and the size of your plants. However, the general rule of thumb is to water deeply and less frequently, rather than shallowly and more often. Check the soil moisture level before watering by sticking your finger about an inch or two into the soil. If it feels dry, it’s time to water. If it feels moist, wait a day or two and check again. The improved drainage provided by this trick will help prevent overwatering, but it’s still important to monitor the soil moisture level regularly.
Q: Can I use this trick when transplanting tomato seedlings?
A: Yes, this trick is best implemented when transplanting tomato seedlings. Prepare the planting hole as described, add the drainage layer, and then carefully transplant your seedling into the hole. This will give your plants the best possible start and set them up for success.
Q: Will this trick work for other plants besides tomatoes?
A: Yes, this trick can be beneficial for other plants that are susceptible to root rot or prefer well-drained soil. Some examples include peppers, eggplants, and herbs like rosemary and lavender. Just be sure to adjust the amount of drainage material based on the specific needs of the plant.
Q: I tried this trick, but my tomatoes still aren’t doing well. What could be the problem?
A: While this trick can significantly improve tomato growth, it’s not a magic bullet. There could be other factors affecting your plants, such as nutrient deficiencies, pests, diseases, or insufficient sunlight. Make sure your plants are getting at least 6-8 hours of sunlight per day, fertilize them regularly with a balanced tomato fertilizer, and inspect them regularly for signs of pests or diseases. If you’re still having trouble, consult with your local garden center or extension office for further assistance.
Leave a Comment