

Remove Sticker Residue Salt – sounds like a magic spell, doesn’t it? Well, in a way, it is! We’ve all been there: you finally peel off that pesky price tag or label, only to be greeted by a sticky, gooey mess that seems impossible to get rid of. It’s frustrating, time-consuming, and can ruin the look of your favorite items. But fear not, fellow DIY enthusiasts, because I’m about to share a simple yet incredibly effective trick using something you probably already have in your kitchen: salt!
The quest to banish sticker residue is as old as stickers themselves! From ancient Egyptians using natural adhesives to modern-day packaging, the struggle against sticky remnants has been a constant. While commercial solvents exist, they can be harsh, expensive, and sometimes even damage the surface you’re trying to clean. That’s where our humble salt solution shines.
Why is this DIY trick so essential? Because nobody wants to live with sticky residue! Whether it’s on a new glass jar you want to use for homemade jam, a cherished piece of furniture, or even your car window, sticker residue is an eyesore. This simple hack not only saves you money but also protects your belongings from potentially harmful chemicals. Plus, it’s incredibly satisfying to watch that stubborn goo disappear with just a little bit of elbow grease and the power of remove sticker residue salt. So, let’s dive in and learn how to reclaim your surfaces, one grain of salt at a time!
DIY Sticker Residue Removal with Salt: A Surprisingly Effective Hack!
Hey there, fellow DIY enthusiasts! We’ve all been there, right? You peel off a sticker, feeling all accomplished, only to be greeted by that sticky, gooey residue that just won’t budge. Ugh! I’ve tried countless methods over the years, from harsh chemicals to scraping with my fingernails (ouch!), but I recently stumbled upon a surprisingly effective and gentle solution: salt! Yes, plain old table salt. I know, it sounds too good to be true, but trust me, it works wonders.
This method is particularly great because it’s non-toxic, readily available, and won’t damage most surfaces. Plus, it’s super cheap! So, ditch those expensive residue removers and let’s get started on this simple yet powerful DIY hack.
What You’ll Need:
Before we dive in, let’s gather our supplies. This is a pretty minimal list, which is always a win in my book!
* **Table Salt:** The coarser the salt, the better, but regular table salt will do just fine.
* **Cooking Oil:** Any cooking oil will work – vegetable oil, olive oil, canola oil, even coconut oil. I usually grab whatever I have on hand.
* **Soft Cloth or Sponge:** Microfiber cloths are my go-to, but any soft cloth or sponge will work. Avoid anything too abrasive, as you don’t want to scratch the surface.
* **Warm Water:** Just regular tap water will do.
* **Bowl or Small Container:** To mix the salt and oil.
* **Optional: Hair Dryer:** For stubborn residue on certain surfaces.
* **Optional: Plastic Scraper or Credit Card:** For gently lifting softened residue.
Step-by-Step Instructions:
Alright, let’s get that sticky residue gone! Follow these steps, and you’ll be amazed at how easily it comes off.
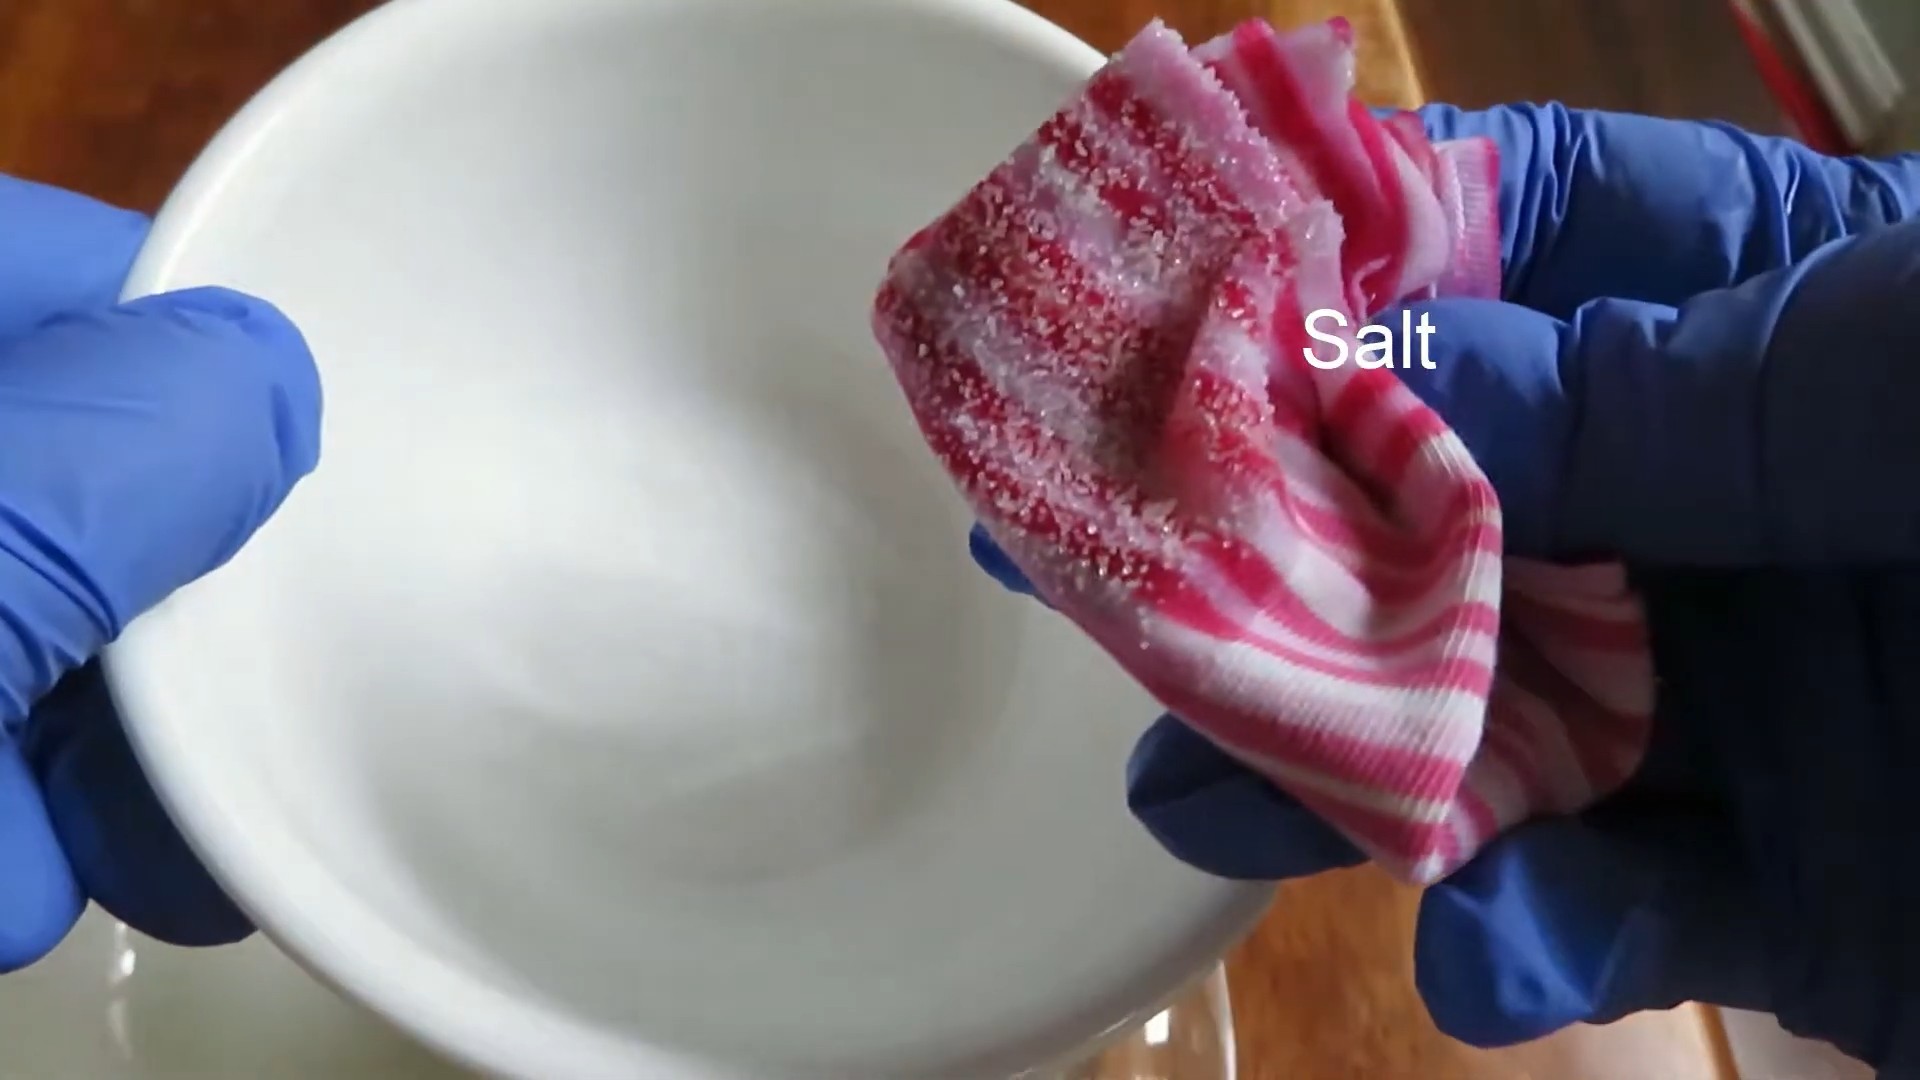
1. **Prepare the Salt and Oil Mixture:** In your bowl or small container, mix together the salt and oil. You want to create a paste-like consistency. I usually start with about 2 tablespoons of salt and 1 tablespoon of oil, then add more of either ingredient until I get the right texture. The mixture should be thick enough to stick to the residue but not so dry that it crumbles.
2. **Apply the Mixture to the Residue:** Generously apply the salt and oil mixture to the sticker residue. Make sure you completely cover the sticky area. Don’t be shy! The more you cover, the better the salt can work its magic.
3. **Let it Sit (the Waiting Game):** This is the most crucial step! You need to give the salt and oil mixture time to break down the adhesive. I usually let it sit for at least 15-30 minutes. For really stubborn residue, you might even want to let it sit for an hour or two. The longer it sits, the easier the residue will come off.
4. **Gently Scrub:** After the waiting period, take your soft cloth or sponge and gently scrub the area in a circular motion. You should start to see the residue lifting and breaking down. Don’t apply too much pressure, as you don’t want to scratch the surface. Let the salt and oil do the work!
5. **Wipe Away the Residue:** As you scrub, the residue should start to clump together. Use a clean part of your cloth or sponge to wipe away the loosened residue. You might need to repeat the scrubbing and wiping process a few times to remove all the sticky stuff.
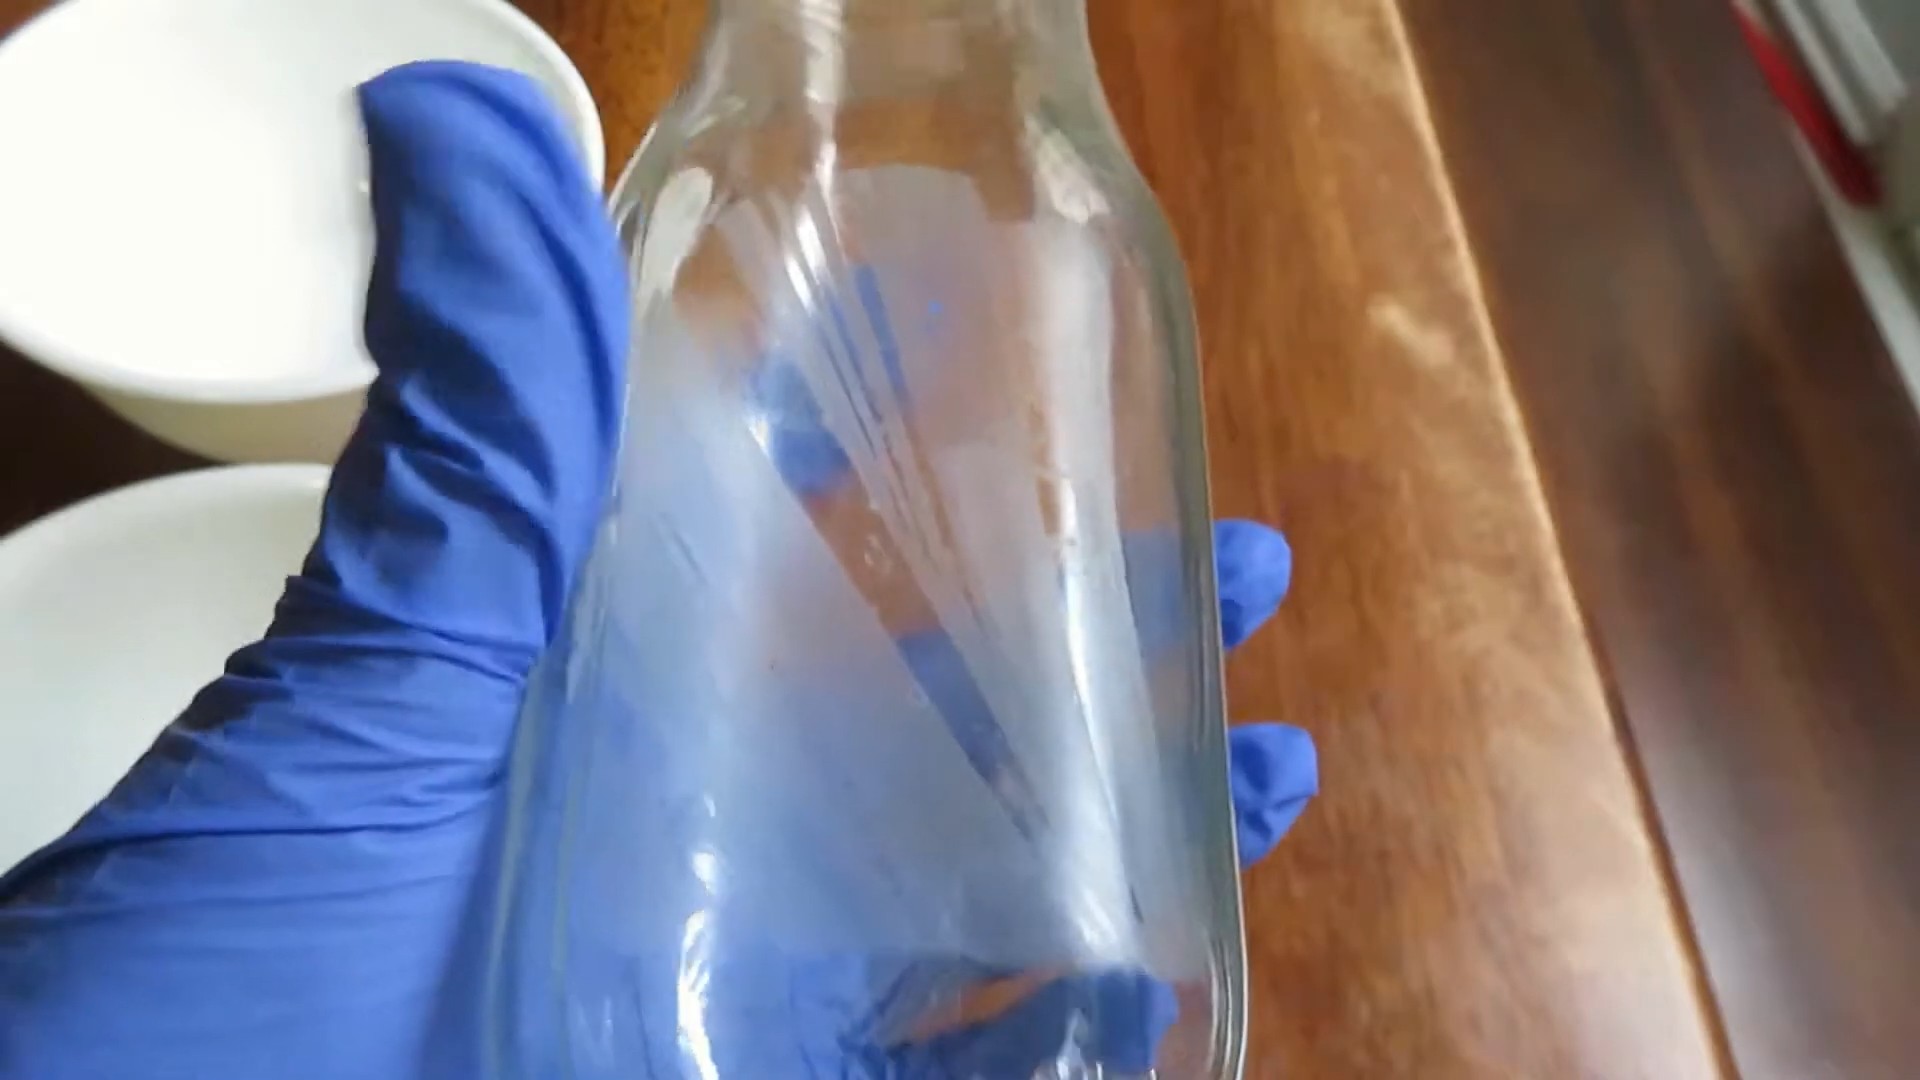
6. **Clean with Warm Water:** Once you’ve removed the majority of the residue, use a clean, damp cloth with warm water to wipe away any remaining oil and salt. This will leave the surface clean and smooth.
7. **Dry the Surface:** Finally, dry the surface with a clean, dry cloth. And voila! Your surface should be sticker residue-free!
Dealing with Stubborn Residue:
Sometimes, the residue is particularly stubborn and requires a little extra effort. Here are a few tips and tricks I’ve learned along the way:
* **Heat it Up (Hair Dryer Method):** If the residue is proving difficult to remove, try using a hair dryer to gently heat the area before applying the salt and oil mixture. The heat will help soften the adhesive, making it easier to break down. Hold the hair dryer a few inches away from the surface and move it back and forth to avoid overheating. After heating, apply the salt and oil mixture as described above.
* **Gentle Scraping (Plastic Scraper or Credit Card):** After letting the salt and oil mixture sit, you can try gently scraping the residue with a plastic scraper or an old credit card. Hold the scraper at a slight angle and gently lift the softened residue. Be careful not to apply too much pressure, as you don’t want to scratch the surface. This works best in conjunction with the salt and oil mixture, not as a standalone method.
* **Reapply and Repeat:** If the residue is still lingering, don’t give up! Simply reapply the salt and oil mixture and let it sit for a longer period. Then, repeat the scrubbing and wiping process. Sometimes, it just takes a few tries to completely remove the residue.
Surfaces to Be Cautious With:
While this method is generally safe for most surfaces, there are a few things to keep in mind:
* **Painted Surfaces:** Be extra gentle when scrubbing painted surfaces, as excessive scrubbing can damage the paint. Test the method in an inconspicuous area first to ensure it doesn’t affect the paint.
* **Delicate Plastics:** Some delicate plastics can be scratched by the salt. Again, test in an inconspicuous area first. You might want to use a finer salt or reduce the amount of scrubbing.
* **Wood Finishes:** While the oil can actually be beneficial for wood, be sure to wipe away any excess oil after cleaning. You might also want to test in an inconspicuous area first to ensure it doesn’t affect the finish.
Why This Works: The Science Behind the Magic
You might be wondering why this simple salt and oil mixture is so effective. Here’s a little breakdown:
* **Oil as a Solvent:** The oil acts as a solvent, helping to dissolve the adhesive in the sticker residue. It penetrates the sticky layer and breaks down the chemical bonds that hold it together.
* **Salt as an Abrasive:** The salt acts as a gentle abrasive, helping to lift the softened residue from the surface. The small salt crystals provide just enough friction to break the bond between the residue and the surface without causing damage.
* **The Combination is Key:** The combination of the oil and salt is what makes this method so effective. The oil dissolves the adhesive, and the salt helps to lift it away. It’s a powerful one-two punch against sticker residue!
Other Uses for This Hack:
This salt and oil mixture isn’t just for sticker residue! I’ve found it to be effective for removing other sticky substances as well, such as:
* **Tape Residue:** Works great on tape residue left behind from packing tape or masking tape.
* **Gum:** Can help loosen gum stuck to surfaces.
* **Crayon Marks:** Can help remove crayon marks from walls and other surfaces (test in an inconspicuous area first).
* **Price Tag Residue:** Perfect for removing those annoying price tag stickers from new items.
Final Thoughts:
So there you have it! A simple, effective, and inexpensive way to remove sticker residue using just salt and oil. I hope you found this DIY hack helpful. Give it a try, and let me know how it works for you! Happy cleaning! Remember to always test in an inconspicuous area first, and be gentle when scrubbing. With a little patience and elbow grease, you can say goodbye to that sticky residue for good!
Conclusion
So, there you have it! This simple, yet incredibly effective, DIY trick using salt to remove sticker residue is a game-changer. Forget harsh chemicals, sticky messes, and endless scrubbing. This method is not only eco-friendly and cost-effective, but it’s also surprisingly quick and easy. The abrasive nature of salt gently lifts the adhesive without damaging most surfaces, making it a safer alternative to many commercial residue removers.
Why is this a must-try? Because it works! We’ve all been there, battling stubborn sticker residue on everything from newly purchased glassware to cherished family heirlooms. This method offers a practical solution using an ingredient you likely already have in your pantry. It’s a win-win!
But don’t stop there! Feel free to experiment with variations. For particularly stubborn residue, try creating a paste of salt and oil (olive oil, coconut oil, or even vegetable oil work well). Apply the paste, let it sit for a few minutes to soften the adhesive, and then gently scrub. You can also try using different types of salt. Coarse sea salt provides more abrasion, while finer table salt might be gentler on delicate surfaces. Remember to always test a small, inconspicuous area first to ensure the salt doesn’t scratch or damage the material.
Consider the type of surface you’re working with. For delicate surfaces like painted wood or certain plastics, a gentler approach is best. You might want to use a finer salt and apply very light pressure. For tougher surfaces like glass or metal, you can be a bit more aggressive with your scrubbing.
Ultimately, the key to success with this DIY trick is patience and persistence. Don’t expect the residue to disappear instantly. Apply the salt, scrub gently, and repeat as needed. You’ll be amazed at how effectively this simple method can remove even the most stubborn sticker residue.
We are confident that this method will become your go-to solution for removing sticker residue. It’s a simple, effective, and environmentally friendly way to tackle a common household problem. So, ditch the harsh chemicals and embrace the power of salt!
Now, we want to hear from you! Give this DIY trick a try and let us know how it works for you. Share your experiences, tips, and variations in the comments below. Did you find a particular type of salt worked best? Did you discover a new surface that this method works wonders on? Your feedback will help other readers discover the full potential of this amazing DIY trick. Let’s build a community of residue-free homes, one grain of salt at a time! Don’t forget to share this article with your friends and family so they can benefit from this simple yet effective solution. Let’s spread the word about the power of salt in removing sticker residue!
Frequently Asked Questions (FAQs)
What kind of salt works best for removing sticker residue?
The type of salt you use can depend on the surface you’re cleaning and the stubbornness of the residue. Table salt, sea salt, and Epsom salt can all be effective. Table salt is a good starting point for most surfaces as it’s readily available and relatively fine, minimizing the risk of scratching. Sea salt, especially coarse sea salt, provides more abrasion and can be helpful for tougher residues on durable surfaces like glass or metal. However, be cautious when using coarse salt on delicate surfaces as it can potentially cause scratches. Epsom salt, while technically a mineral compound, can also work due to its crystalline structure. It’s generally considered gentler than sea salt. Experiment to see what works best for your specific situation. Always test in an inconspicuous area first.
Will salt scratch the surface I’m trying to clean?
The potential for scratching depends on the type of salt, the surface material, and the pressure you apply. As mentioned above, coarse salt is more likely to scratch than fine salt. Delicate surfaces like painted wood, certain plastics, and polished metals are more susceptible to scratching. To minimize the risk, start with a fine salt and apply gentle pressure. You can also dampen the salt slightly to create a paste, which can reduce its abrasive effect. Always test the method in an inconspicuous area before applying it to the entire surface. If you notice any scratching, switch to a finer salt or try a different method altogether.
Can I use this method on all types of sticker residue?
While this method is effective for many types of sticker residue, it may not work on all of them. Some adhesives are particularly stubborn and may require stronger solvents. This method works best on residues that are relatively fresh or haven’t been exposed to extreme heat or sunlight. Older, hardened residues may be more difficult to remove. For particularly stubborn residues, you can try combining the salt with oil (olive oil, coconut oil, or vegetable oil) to create a paste. The oil helps to loosen the adhesive, while the salt provides the necessary abrasion. Let the paste sit on the residue for a few minutes before scrubbing gently. If the residue still persists, you may need to resort to a commercial adhesive remover.
How long should I scrub the residue with salt?
The amount of time you need to scrub will depend on the type of residue and the surface you’re cleaning. Start with gentle scrubbing and gradually increase the pressure if needed. Avoid scrubbing too aggressively, as this can damage the surface. It’s better to scrub for a longer period with gentle pressure than to scrub forcefully for a short period. If the residue is particularly stubborn, you may need to repeat the process several times. Remember to dampen the salt or use a salt and oil paste to help loosen the adhesive.
What if the salt method doesn’t completely remove the residue?
If the salt method doesn’t completely remove the residue, there are a few things you can try. First, make sure you’re using the right type of salt and applying enough pressure. You can also try letting the salt sit on the residue for a longer period before scrubbing. If that doesn’t work, try combining the salt with oil to create a paste. If the residue is still persistent, you may need to resort to a commercial adhesive remover. Always follow the manufacturer’s instructions when using commercial products. After using any type of solvent, be sure to clean the surface thoroughly with soap and water to remove any remaining residue.
Is this method safe for all surfaces?
While this method is generally safe for most surfaces, it’s always best to test it in an inconspicuous area first. Avoid using this method on delicate surfaces like painted wood, certain plastics, and polished metals without testing. Coarse salt can scratch these surfaces, so use a finer salt and apply gentle pressure. Also, avoid using this method on surfaces that are sensitive to moisture, such as unfinished wood or fabrics. If you’re unsure whether this method is safe for a particular surface, consult the manufacturer’s instructions or contact a professional cleaner.
Can I use this method to remove sticker residue from clothing?
While salt can be used to remove some stains from clothing, it’s not the best method for removing sticker residue. The abrasive nature of salt can damage delicate fabrics. Instead, try using a mild detergent or dish soap to gently rub the residue. You can also try using a solvent like rubbing alcohol or nail polish remover, but be sure to test it in an inconspicuous area first to ensure it doesn’t damage the fabric. After removing the residue, wash the clothing as usual.
Does the salt have to be wet or dry?
You can use salt both wet and dry, depending on the situation. Dry salt provides more abrasion and can be effective for removing fresh or lightly adhered residue. Wet salt, or a salt paste, is gentler and can be helpful for loosening stubborn residue or cleaning delicate surfaces. When using wet salt, be sure to wring out any excess water to prevent damage to the surface. Experiment with both methods to see what works best for your specific situation.
How do I prevent sticker residue in the first place?
Preventing sticker residue is always better than having to remove it. When applying stickers, try to use stickers with removable adhesive. These stickers are designed to be easily removed without leaving behind any residue. If you’re using stickers with permanent adhesive, try to avoid applying them to surfaces that are difficult to clean. If you must apply a sticker to a delicate surface, consider using a layer of removable tape underneath the sticker to protect the surface. When removing stickers, peel them off slowly and carefully. If you encounter any resistance, stop and try using a heat gun or hairdryer to soften the adhesive before continuing.

Leave a Comment