

Harvesting Backyard Pumpkins – the moment you’ve been waiting for! Remember those tiny seeds you carefully planted months ago? Well, get ready, because it’s almost time to reap the rewards of your hard work and enjoy the vibrant colors and delicious flavors of homegrown pumpkins.
For centuries, pumpkins have held a special place in cultures around the world. From Native American traditions where they were a vital food source, to the spooky jack-o’-lanterns of Halloween, these gourds are steeped in history and symbolism. But beyond their cultural significance, growing your own pumpkins is incredibly rewarding. There’s nothing quite like the satisfaction of nurturing a plant from seed to harvest, knowing exactly where your food comes from.
But when is the right time to harvest? And how do you ensure your pumpkins are perfectly ripe and ready for carving, baking, or decorating? That’s where this DIY guide comes in! I’m going to share my top tips and tricks for harvesting backyard pumpkins like a pro. We’ll cover everything from identifying signs of ripeness to proper harvesting techniques, ensuring you get the most out of your pumpkin patch. So, grab your gardening gloves, and let’s get started on this exciting journey to pumpkin perfection!
Harvesting Backyard Pumpkins: A Step-by-Step Guide
Okay, pumpkin lovers! So you’ve nurtured your pumpkin patch all summer, and now those glorious gourds are finally turning that beautiful shade of orange. But how do you know when they’re *really* ready to be harvested? And what’s the best way to do it without damaging them? Don’t worry, I’ve got you covered! This guide will walk you through everything you need to know to successfully harvest your backyard pumpkins.
Determining Pumpkin Ripeness
Before you even think about grabbing a knife, you need to make sure your pumpkins are actually ripe. Prematurely harvested pumpkins won’t store well and might not even develop that rich, sweet flavor we all crave. Here’s what to look for:
* **Color:** This is the most obvious sign. Your pumpkins should be a deep, uniform color – typically orange for most varieties, but it could also be red, yellow, or even green depending on the type you’re growing. The color should be consistent across the entire pumpkin.
* **Hard Rind:** Gently press your fingernail into the pumpkin’s skin. If it’s ripe, the rind should be hard enough that your nail doesn’t easily puncture it. A soft rind means the pumpkin needs more time to mature.
* **Dry Stem:** The stem (also called the peduncle) should be dry, hard, and starting to turn brown. A green, pliable stem indicates that the pumpkin is still drawing nutrients from the vine.
* **Sound Test:** Give your pumpkin a gentle thump. A ripe pumpkin will sound hollow. This isn’t a foolproof method, but it can be a helpful indicator.
* **Vine Condition:** The vine itself will likely be starting to wither and die back. This is a natural part of the pumpkin’s ripening process.
Gathering Your Supplies
Alright, so you’ve confirmed your pumpkins are ripe and ready for harvesting. Now it’s time to gather your supplies. Here’s what you’ll need:
* **Sharp Knife or Pruning Shears:** A sharp tool is essential for making a clean cut and preventing damage to the pumpkin and the vine. I prefer pruning shears because they’re easier to maneuver in tight spaces.
* **Gloves:** Gardening gloves will protect your hands from dirt, thorns, and any potential irritants on the vine.
* **Clean Cloth or Towel:** You’ll need this to wipe off any dirt or debris from the pumpkins before storing them.
* **Wheelbarrow or Wagon (Optional):** If you have a lot of pumpkins or they’re particularly large, a wheelbarrow or wagon will make transporting them much easier.
* **First Aid Kit:** Just in case you accidentally cut yourself, it’s always a good idea to have a first aid kit handy.
Harvesting Your Pumpkins: Step-by-Step
Okay, let’s get to the fun part! Follow these steps to harvest your pumpkins safely and effectively:
1. **Choose a Dry Day:** Harvesting pumpkins on a dry day is ideal. Wet pumpkins are more susceptible to rot and disease during storage. If it’s been raining, wait for the pumpkins to dry out completely before harvesting.
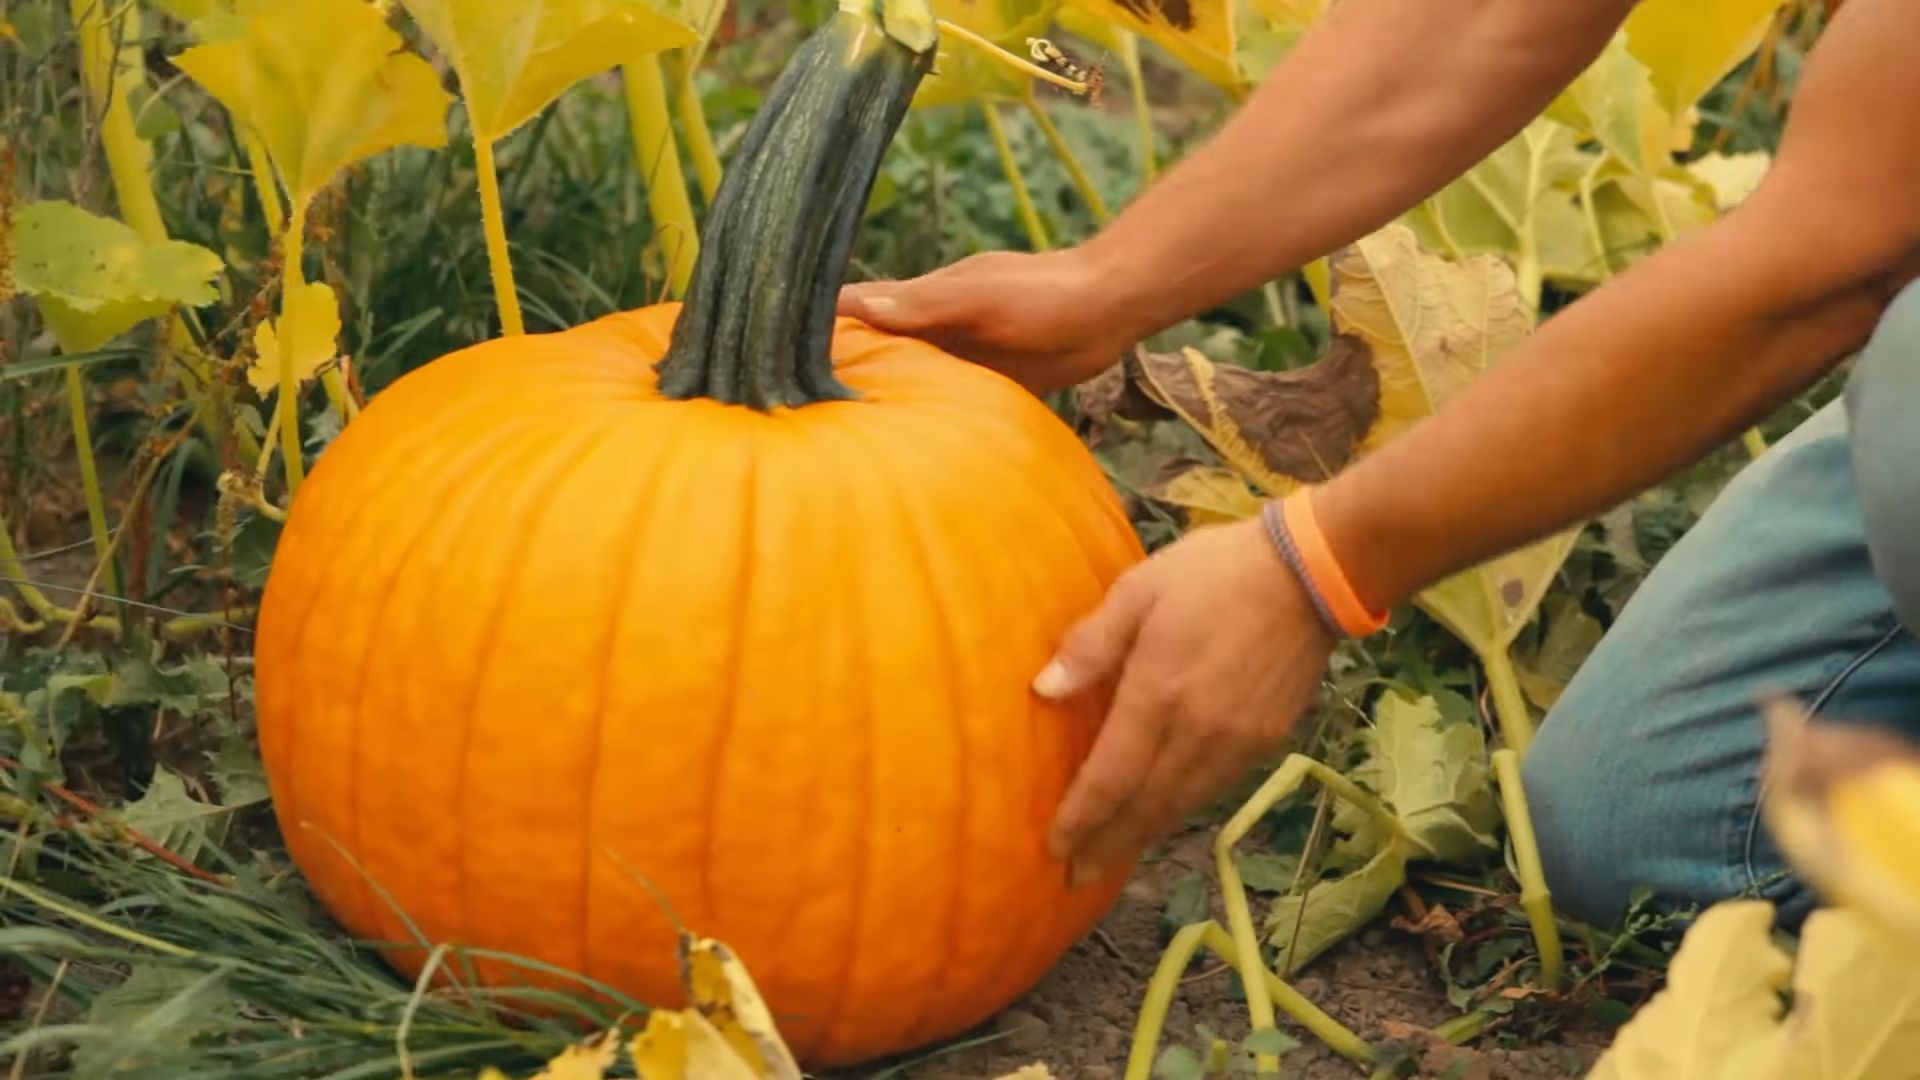
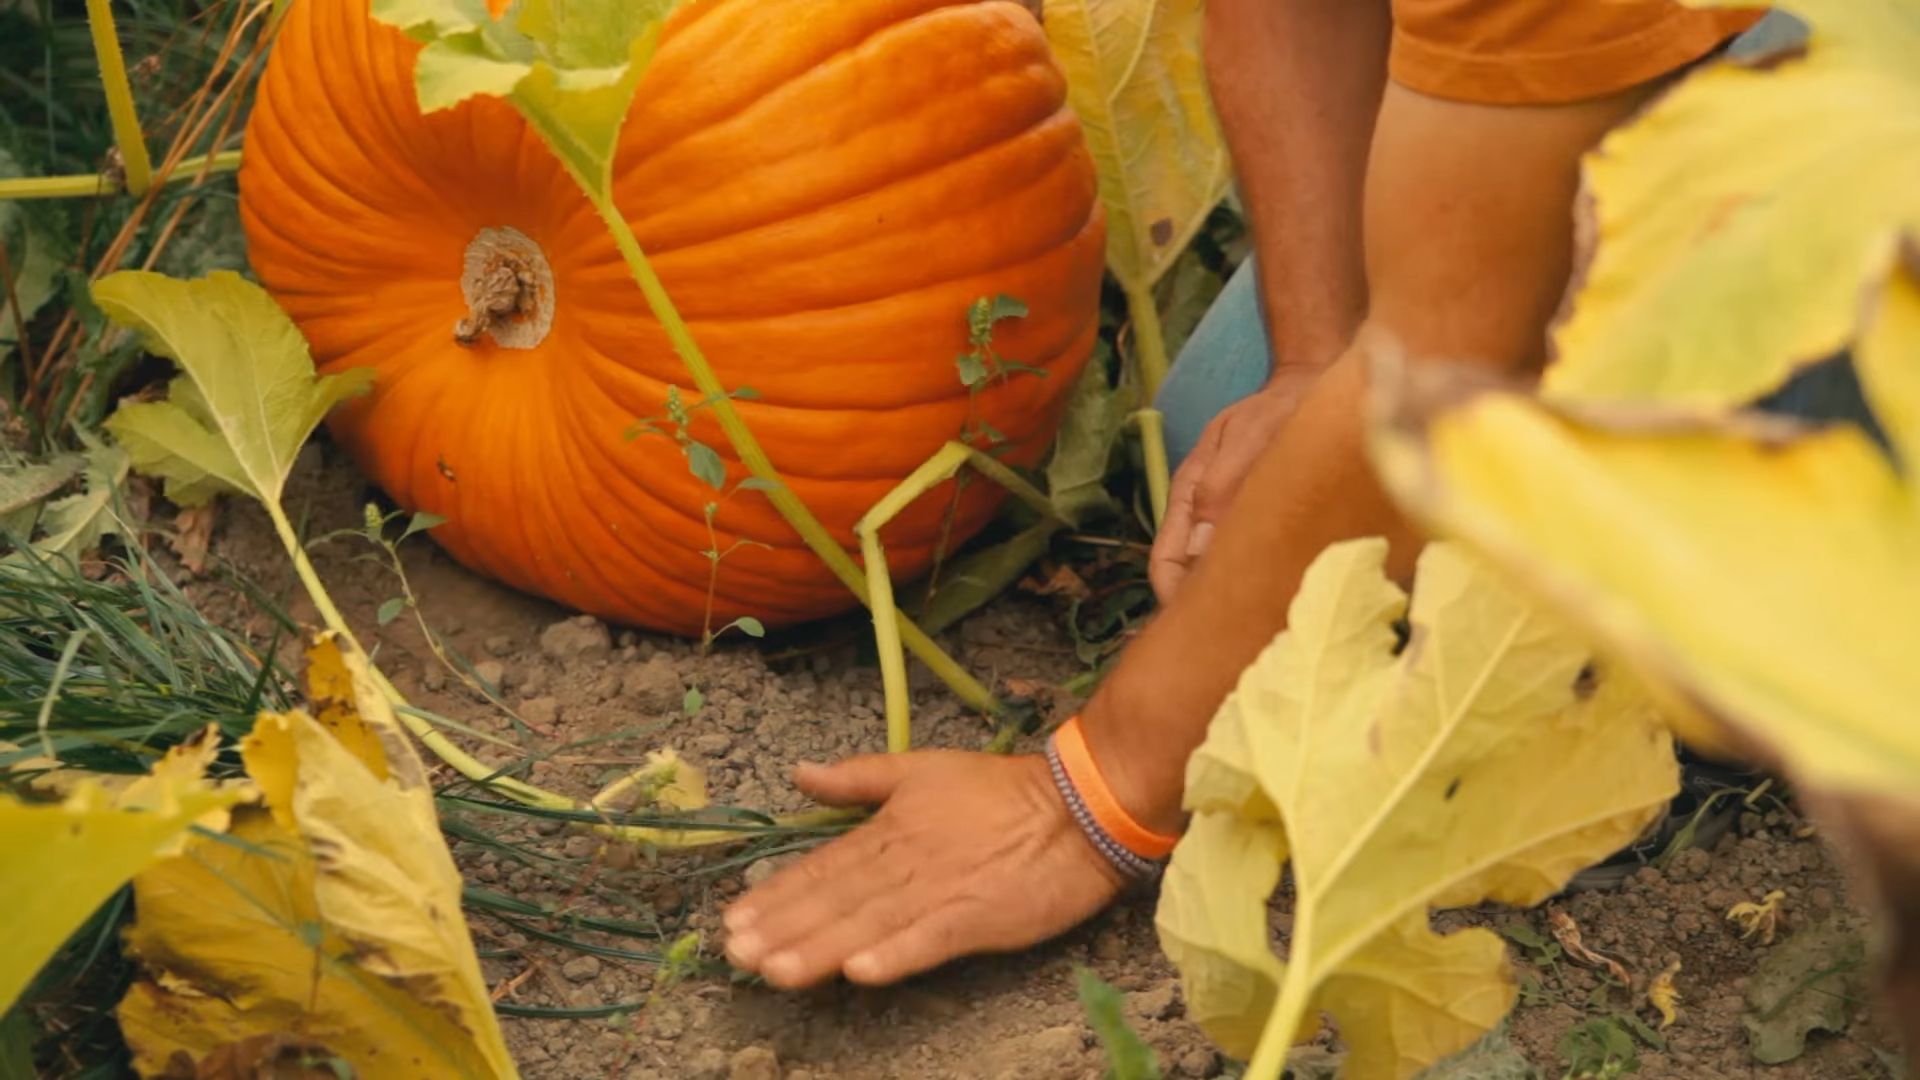
2. **Locate the Stem:** Find the stem (peduncle) of the pumpkin you want to harvest.
3. **Cut the Stem:** Using your sharp knife or pruning shears, carefully cut the stem, leaving about 3-4 inches of stem attached to the pumpkin. Do not pull or twist the pumpkin off the vine! This can damage the stem and create an entry point for rot. Make sure to cut at an angle, sloping away from the pumpkin. This helps prevent water from pooling on the cut surface.
4. **Handle with Care:** Gently lift the pumpkin, being careful not to drop it or bruise it. Pumpkins are surprisingly delicate, and even small bumps can shorten their storage life.
5. **Clean the Pumpkin:** Use your clean cloth or towel to wipe off any dirt or debris from the pumpkin’s surface.
6. **Inspect for Damage:** Carefully inspect the pumpkin for any cuts, bruises, or soft spots. Pumpkins with significant damage should be used immediately rather than stored.
7. **Transport to Storage:** Carefully transport the pumpkin to your designated storage area using a wheelbarrow, wagon, or by hand.
8. **Repeat:** Repeat steps 2-7 for all the pumpkins you want to harvest.
Curing Your Pumpkins for Longer Storage
Curing your pumpkins is an important step that helps them develop a thicker skin and heal any minor scratches or abrasions, which significantly extends their storage life. Here’s how to do it:
1. **Choose a Warm, Dry Location:** Find a warm, dry, and well-ventilated location for curing your pumpkins. A greenhouse, garage, or covered porch works well. The ideal temperature is between 80-85°F (27-29°C).
2. **Arrange the Pumpkins:** Place the pumpkins in a single layer, making sure they don’t touch each other. This allows for good air circulation.
3. **Cure for 10-14 Days:** Leave the pumpkins in the warm, dry location for 10-14 days. During this time, the skin will harden, and any minor scratches will heal.
4. **Monitor for Rot:** Check the pumpkins regularly for any signs of rot or mold. Remove any pumpkins that show signs of spoilage to prevent it from spreading to the others.
Storing Your Harvested Pumpkins
Once your pumpkins are cured, it’s time to store them properly. Here are some tips for successful pumpkin storage:
* **Choose a Cool, Dry, and Dark Location:** The ideal storage location is cool (50-60°F or 10-15°C), dry, and dark. A basement, cellar, or unheated garage works well.
* **Elevate the Pumpkins:** Place the pumpkins on a layer of cardboard, straw, or wood to elevate them off the floor. This helps prevent moisture buildup and rot.
* **Don’t Stack Pumpkins:** Avoid stacking pumpkins on top of each other, as this can cause bruising and shorten their storage life.
* **Maintain Air Circulation:** Ensure good air circulation around the pumpkins to prevent moisture buildup.
* **Check Regularly:** Check the pumpkins regularly for any signs of rot or mold. Remove any pumpkins that show signs of spoilage immediately.
* **Storage Life:** Properly cured and stored pumpkins can last for several months. The exact storage life will depend on the variety of pumpkin and the storage conditions.
Troubleshooting Common Pumpkin Harvesting Problems
Even with the best planning, sometimes things don’t go exactly as expected. Here are some common problems you might encounter during pumpkin harvesting and how to deal with them:
* **Accidental Cuts or Bruises:** If you accidentally cut or bruise a pumpkin during harvesting, use it as soon as possible. Damaged pumpkins are more susceptible to rot and won’t store well.
* **Stem Breaks Off:** If the stem breaks off completely, the pumpkin is more likely to rot. Use it immediately or try to seal the cut end with wax or petroleum jelly to prevent moisture loss and infection.
* **Pumpkins Rotting in the Field:** If you notice pumpkins rotting in the field before they’re fully ripe, it could be due to fungal diseases or pests. Remove the affected pumpkins immediately to prevent the spread of disease. Improve air circulation around the plants by pruning the vines.
* **Premature Harvesting:** If you accidentally harvest a pumpkin before it’s fully ripe, you can try to ripen it indoors. Place the pumpkin in a warm, sunny location and check it regularly. It may not ripen fully, but it might improve in color and flavor.
Enjoying Your Pumpkin Harvest
Congratulations! You’ve successfully harvested and stored your backyard pumpkins. Now it’s time to enjoy the fruits (or rather, vegetables) of your labor! Here are some ideas for using your pumpkin harvest:
* **Pumpkin Pie:** The classic! Use your pumpkins to make delicious homemade pumpkin pies.
* **Pumpkin Soup:** A warm and comforting soup perfect for chilly autumn evenings.
* **Roasted Pumpkin Seeds:** A healthy and delicious snack.
* **Pumpkin Bread:** A sweet and moist bread perfect for breakfast or dessert.
* **Pumpkin Carving:** Of course! Carve your pumpkins into spooky or festive jack-o’-lanterns for Halloween.
* **Pumpkin Decorations:** Use your pumpkins to create beautiful fall decorations for your home.
* **Pumpkin Puree:** Make your own pumpkin puree and freeze it for later use.
I hope this guide has been helpful! Happy harvesting, and enjoy your delicious and beautiful backyard pumpkins!
Conclusion
So, there you have it! Harvesting backyard pumpkins doesn’t have to be a guessing game or a race against the first frost. By following these simple steps, you can ensure a bountiful harvest of vibrant, healthy pumpkins ready for carving, baking, or simply adding a touch of autumnal charm to your home.
This DIY approach to pumpkin harvesting is a must-try for several reasons. First and foremost, it empowers you to take control of the process, ensuring that your pumpkins are picked at their peak ripeness. This translates to better flavor, longer storage life, and ultimately, a more satisfying experience. Secondly, it’s incredibly rewarding to nurture a plant from seed to harvest, witnessing the fruits (or rather, vegetables!) of your labor. There’s a certain magic in bringing a pumpkin you’ve grown yourself from the garden to the table.
But the beauty of pumpkin harvesting lies in its adaptability. Feel free to experiment with different curing methods. Some gardeners prefer to cure their pumpkins indoors in a cool, dry place, while others opt for a sunny spot outdoors, protecting them from rain and frost. You can also adjust the timing of your harvest based on your local climate and the specific variety of pumpkin you’re growing. For instance, smaller, ornamental pumpkins might be ready to harvest a bit earlier than larger carving pumpkins.
Consider these variations to enhance your pumpkin harvesting experience:
* Seed Saving: Don’t forget to save some seeds from your best pumpkins for next year’s crop! Clean and dry them thoroughly before storing them in an airtight container in a cool, dark place.
* Pumpkin Puree Prep: While you’re at it, why not roast some of your pumpkins and make your own pumpkin puree? It’s far superior to the canned stuff and can be used in a variety of delicious recipes, from pumpkin pie to pumpkin soup.
* Composting: After you’ve enjoyed your pumpkins, don’t let the leftover rinds go to waste! Compost them to enrich your garden soil for next year’s planting season.
* Decorating with Unripe Pumpkins: Even if some of your pumpkins haven’t fully ripened before the first frost, you can still use them for decorative purposes. Green or partially orange pumpkins can add a unique touch to your fall displays.
Ultimately, the best way to learn is by doing. So, grab your pruning shears, head out to your backyard pumpkin patch, and give this DIY trick a try. We’re confident that you’ll be amazed by the results. And most importantly, don’t forget to share your experiences with us! We’d love to hear about your pumpkin harvesting adventures, any tips or tricks you’ve discovered, and the delicious recipes you’ve created with your homegrown pumpkins. Share your photos and stories on social media using #BackyardPumpkinHarvest and let’s celebrate the bounty of the season together!
Frequently Asked Questions (FAQ)
Q: How do I know when my pumpkins are truly ripe and ready to harvest?
A: Determining pumpkin ripeness involves a combination of visual and tactile cues. The most reliable indicator is the color of the pumpkin. It should be a deep, uniform color typical of the variety you’re growing. For example, a ‘Jack O’ Lantern’ pumpkin should be a vibrant orange. The rind should also be hard and resistant to scratching. You can test this by gently pressing your fingernail into the skin. If it doesn’t easily puncture, the pumpkin is likely ripe. Another telltale sign is the stem. It should be dry, hard, and brown. If the stem is still green and pliable, the pumpkin probably needs more time to ripen. Finally, give the pumpkin a gentle thump. A ripe pumpkin will sound hollow.
Q: What happens if I harvest my pumpkins too early?
A: Harvesting pumpkins too early can result in several issues. The most significant is that the pumpkin won’t have reached its full flavor potential. It may also be less sweet and have a less desirable texture. Early-harvested pumpkins are also more susceptible to rot and spoilage because their rinds haven’t fully hardened, making them more vulnerable to fungal infections. If you accidentally harvest a pumpkin too early, you can try to ripen it indoors by placing it in a warm, sunny location. However, it’s unlikely to reach the same level of ripeness as a pumpkin that matured fully on the vine.
Q: Can I harvest pumpkins after the first frost?
A: Ideally, you should harvest your pumpkins before the first frost. Frost can damage the pumpkin’s skin, making it more susceptible to rot and shortening its storage life. However, if you experience an unexpected frost, don’t panic. If the frost was light and brief, your pumpkins may be fine. Inspect them carefully for any signs of damage, such as soft spots or discoloration. If the pumpkins appear undamaged, harvest them immediately and cure them as soon as possible. If the frost was severe and prolonged, it’s best to harvest the pumpkins regardless of their ripeness. Even if they’re not fully ripe, you can still use them for decorative purposes or compost them.
Q: How long will my harvested pumpkins last?
A: The storage life of your harvested pumpkins depends on several factors, including the variety of pumpkin, the ripeness at harvest, and the curing and storage conditions. Properly cured pumpkins can last for several months. Generally, smaller pumpkins tend to have a shorter storage life than larger ones. To maximize storage life, store your pumpkins in a cool, dry, and well-ventilated place. The ideal temperature is between 50 and 60 degrees Fahrenheit. Avoid storing pumpkins in direct sunlight or in damp conditions, as this can promote rot. Check your pumpkins regularly for any signs of spoilage, such as soft spots or mold. Remove any damaged pumpkins immediately to prevent the spread of rot to other pumpkins.
Q: What’s the best way to cure my pumpkins after harvesting?
A: Curing pumpkins is essential for extending their storage life. The curing process allows the skin to harden and helps to heal any minor wounds or abrasions. To cure your pumpkins, first, gently wipe them clean with a dry cloth to remove any dirt or debris. Then, place them in a warm, dry, and well-ventilated location. A sunny porch or patio is ideal, but make sure to protect them from rain and frost. The ideal temperature for curing is between 80 and 85 degrees Fahrenheit. Cure your pumpkins for about 10 to 14 days, turning them occasionally to ensure even curing. After curing, store your pumpkins in a cool, dry, and well-ventilated place as described above.
Q: My pumpkin stem broke off during harvesting. Can I still store it?
A: A broken stem can significantly reduce a pumpkin’s storage life, as it provides an entry point for bacteria and fungi. If the stem breaks off cleanly and the pumpkin is otherwise undamaged, you can try to seal the wound with wax or petroleum jelly to prevent rot. However, it’s best to use pumpkins with broken stems as soon as possible. Don’t attempt to store them for extended periods. If the stem is partially broken or damaged, it’s even more important to use the pumpkin quickly.
Q: Can I eat the seeds from my harvested pumpkins?
A: Absolutely! Pumpkin seeds are a delicious and nutritious snack. To prepare them, scoop them out of the pumpkin and rinse them thoroughly to remove any pulp. Then, spread them out on a baking sheet and dry them completely. You can dry them in the oven at a low temperature (around 170 degrees Fahrenheit) for a few hours, or you can air-dry them for several days. Once the seeds are dry, you can roast them with your favorite seasonings. Toss them with olive oil, salt, and pepper, or experiment with other spices like chili powder, garlic powder, or cinnamon. Roast them in the oven at 350 degrees Fahrenheit for about 10 to 15 minutes, or until they’re golden brown and crispy.
Q: What are some creative ways to use my harvested pumpkins besides carving and baking?
A: Beyond carving jack-o’-lanterns and baking pumpkin pies, there are countless creative ways to use your harvested pumpkins. You can use them to make pumpkin soup, pumpkin bread, pumpkin muffins, pumpkin risotto, and even pumpkin chili. You can also roast pumpkin wedges as a side dish or add pumpkin puree to smoothies and oatmeal. For decorative purposes, you can paint or decorate pumpkins with markers, glitter, or other craft supplies. You can also use pumpkins to create fall-themed centerpieces or displays. Smaller pumpkins can be used as planters for succulents or other small plants. Get creative and let your imagination run wild!
Leave a Comment