

Growing Okra for Bountiful Harvest doesn’t have to be a daunting task! Have you ever dreamed of stepping into your backyard and picking fresh, vibrant okra pods, ready to be transformed into delicious gumbos, crispy fried delights, or even pickled treasures? I know I have! For generations, okra has been a staple in Southern cuisine and beyond, with roots tracing back to Africa and a rich history of nourishing communities. But sometimes, achieving that bountiful harvest feels like a distant dream, doesn’t it?
That’s where these DIY tricks and hacks come in. Let’s face it, store-bought okra just doesn’t compare to the flavor and satisfaction of growing your own. But many gardeners struggle with common issues like stunted growth, pest infestations, or simply not knowing the secrets to maximizing their yield. I’m here to tell you that with a few simple strategies, you can unlock the potential of your okra plants and enjoy a truly impressive harvest. This article will equip you with the knowledge and practical tips you need to succeed, transforming you from a novice gardener into an okra-growing pro. Get ready to discover the joy of growing okra for bountiful harvest, right in your own backyard!
Growing Okra for a Bountiful Harvest: My DIY Guide
Hey there, fellow gardening enthusiasts! I’m so excited to share my tried-and-true method for growing okra. Trust me, with a little love and attention, you can have a fantastic harvest of this Southern staple. I’ve learned a lot over the years, and I’m going to break it all down for you, step-by-step.
Choosing the Right Okra Variety
Before we even get our hands dirty, let’s talk about choosing the right okra variety. This is crucial for success! Different varieties have different characteristics, like size, color, and disease resistance. Here are a few of my favorites:
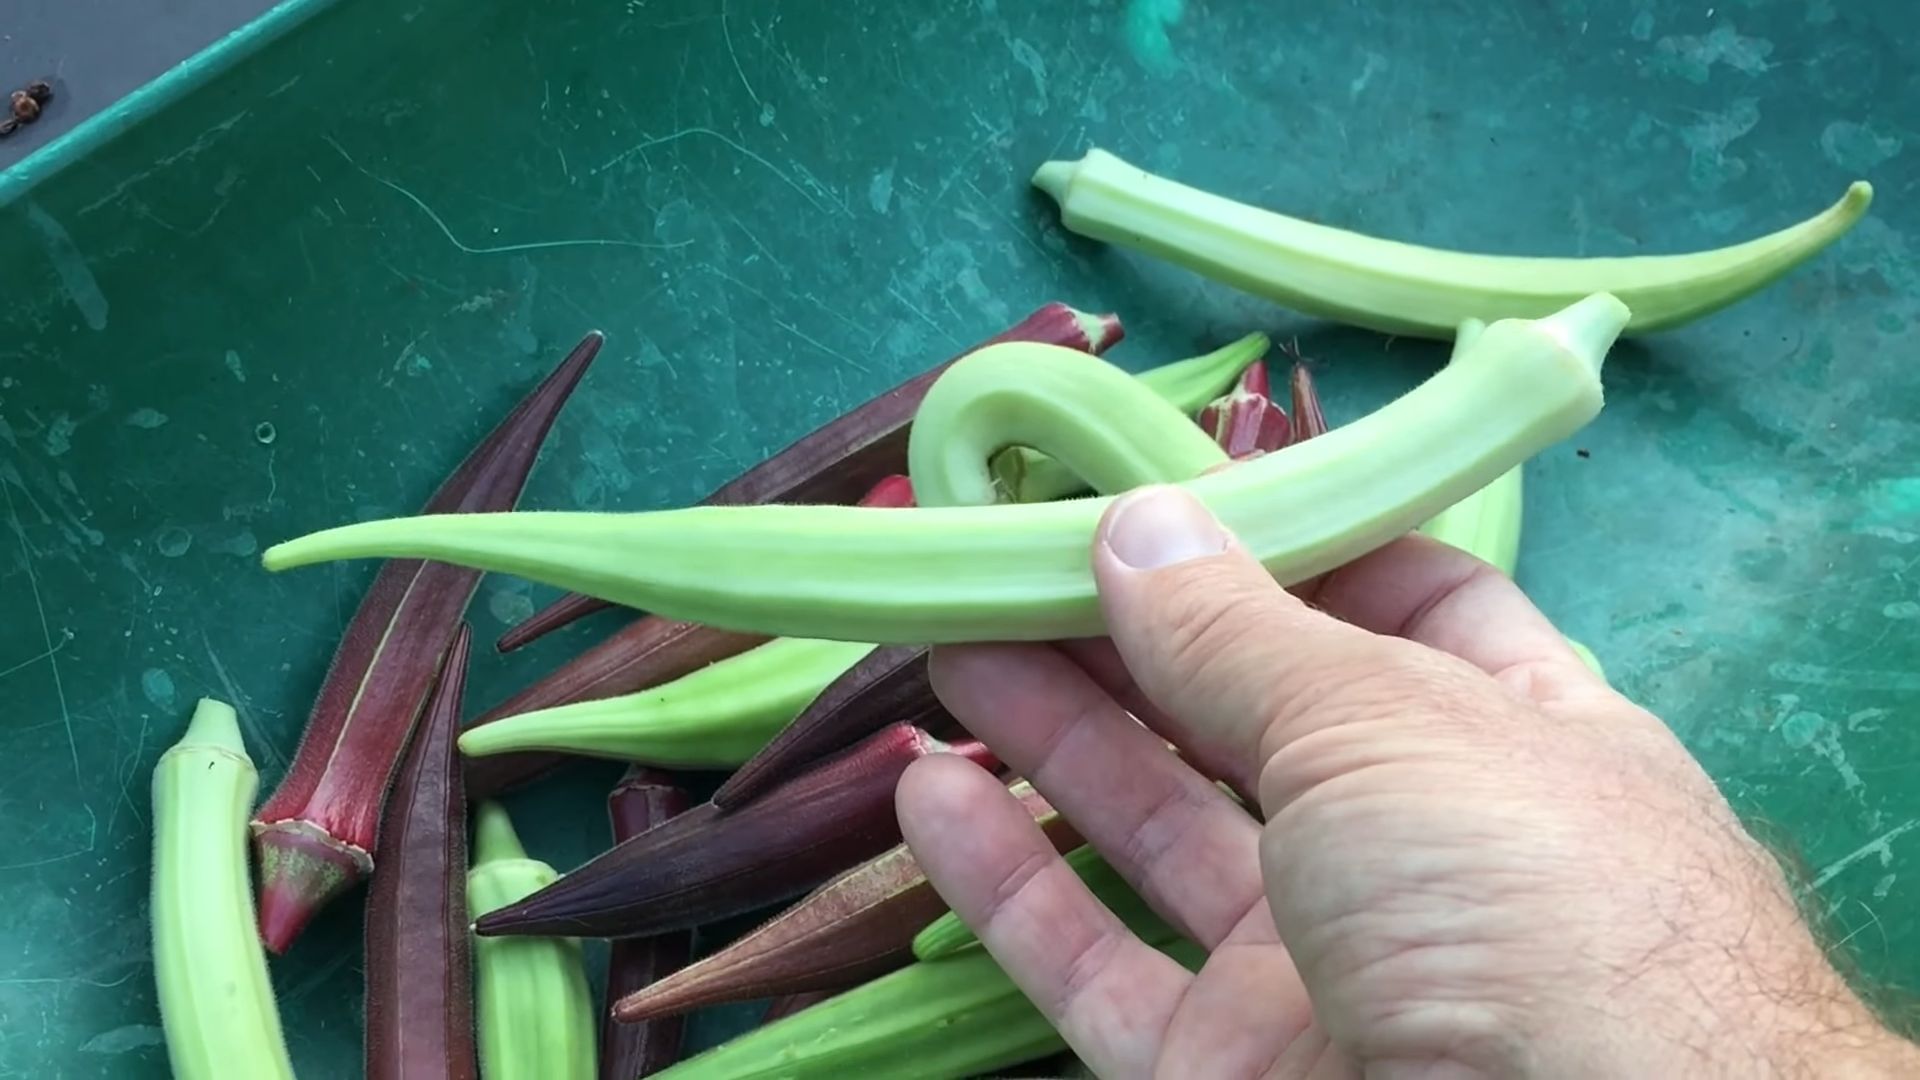
* Clemson Spineless: This is a classic for a reason! It’s reliable, produces well, and the pods are tender. Plus, the “spineless” part means less irritation when harvesting.
* Emerald: Another great spineless option with dark green, smooth pods. It’s known for its high yields.
* Burgundy: If you want something a little different, try Burgundy okra. It has beautiful red pods that add a pop of color to your garden. The color fades when cooked, but it’s still a fun variety to grow.
* Annie Oakley II: This is a hybrid variety that’s known for its compact size, making it a good choice for smaller gardens.
Consider your climate and growing space when making your decision. Read seed descriptions carefully to find the perfect fit for your needs.
Preparing Your Okra Planting Site
Okra loves sunshine and well-drained soil. Here’s how I prepare my planting site for optimal growth:
* Sunlight: Okra needs at least 6-8 hours of direct sunlight per day. Choose a spot in your garden that gets plenty of sunshine.
* Soil: Okra prefers well-drained, sandy loam soil. If your soil is heavy clay, amend it with compost and other organic matter to improve drainage.
* Soil pH: Okra grows best in soil with a pH between 6.0 and 7.0. You can test your soil pH with a soil testing kit and amend it accordingly.
* Fertilizing: Before planting, I like to work in some compost or well-rotted manure into the soil. This provides a slow-release source of nutrients for the okra plants. You can also add a balanced fertilizer, such as 10-10-10, according to the package directions.
Step-by-Step Planting Guide
Now for the fun part – planting! Here’s my step-by-step guide to planting okra seeds:
1. Timing is Key: Okra is a warm-season crop, so it’s important to wait until the soil has warmed up to at least 65°F (18°C) before planting. In my area, that’s usually in late spring or early summer. You can start seeds indoors 4-6 weeks before the last expected frost, but okra doesn’t always transplant well, so direct sowing is often preferred.
2. Soaking the Seeds: To improve germination, I like to soak the okra seeds in warm water for 12-24 hours before planting. This helps to soften the seed coat and speed up the germination process.
3. Planting Depth and Spacing: Plant the seeds about 1/2 to 1 inch deep and space them 12-18 inches apart in rows that are 3-4 feet apart. If you’re planting in hills, plant 2-3 seeds per hill and thin to the strongest plant after they emerge.
4. Watering: After planting, water the soil thoroughly. Keep the soil moist but not waterlogged until the seeds germinate.
5. Germination: Okra seeds typically germinate in 5-14 days, depending on the soil temperature and moisture levels.
Caring for Your Okra Plants
Once your okra plants have emerged, it’s important to provide them with proper care to ensure a bountiful harvest. Here’s what I do:
* Watering: Okra plants need consistent moisture, especially during hot, dry weather. Water deeply once or twice a week, or more often if the soil dries out quickly. Avoid overhead watering, as this can promote fungal diseases.
* Fertilizing: Okra is a heavy feeder, so it benefits from regular fertilization. I like to side-dress my okra plants with a balanced fertilizer every 4-6 weeks. You can also use a liquid fertilizer, such as fish emulsion or seaweed extract.
* Weeding: Keep the area around your okra plants free of weeds. Weeds compete with the okra plants for nutrients and water. You can hand-pull weeds or use a hoe. Mulching can also help to suppress weeds.
* Pruning: Okra plants don’t typically require pruning, but you can remove any yellowing or damaged leaves. You can also top the plants when they reach about 4-5 feet tall to encourage branching and more pod production.
* Pest and Disease Control: Okra can be susceptible to a few pests and diseases. Common pests include aphids, flea beetles, and stink bugs. Common diseases include powdery mildew and root-knot nematodes. I prefer to use organic pest and disease control methods whenever possible. For aphids, you can spray the plants with a strong stream of water or use insecticidal soap. For flea beetles, you can use row covers or diatomaceous earth. For stink bugs, you can hand-pick them off the plants or use a trap crop. For powdery mildew, you can improve air circulation and spray the plants with a fungicide. For root-knot nematodes, you can plant nematode-resistant varieties or use soil solarization.
Harvesting Your Okra
Harvesting okra at the right time is crucial for getting tender, flavorful pods. Here’s my harvesting guide:
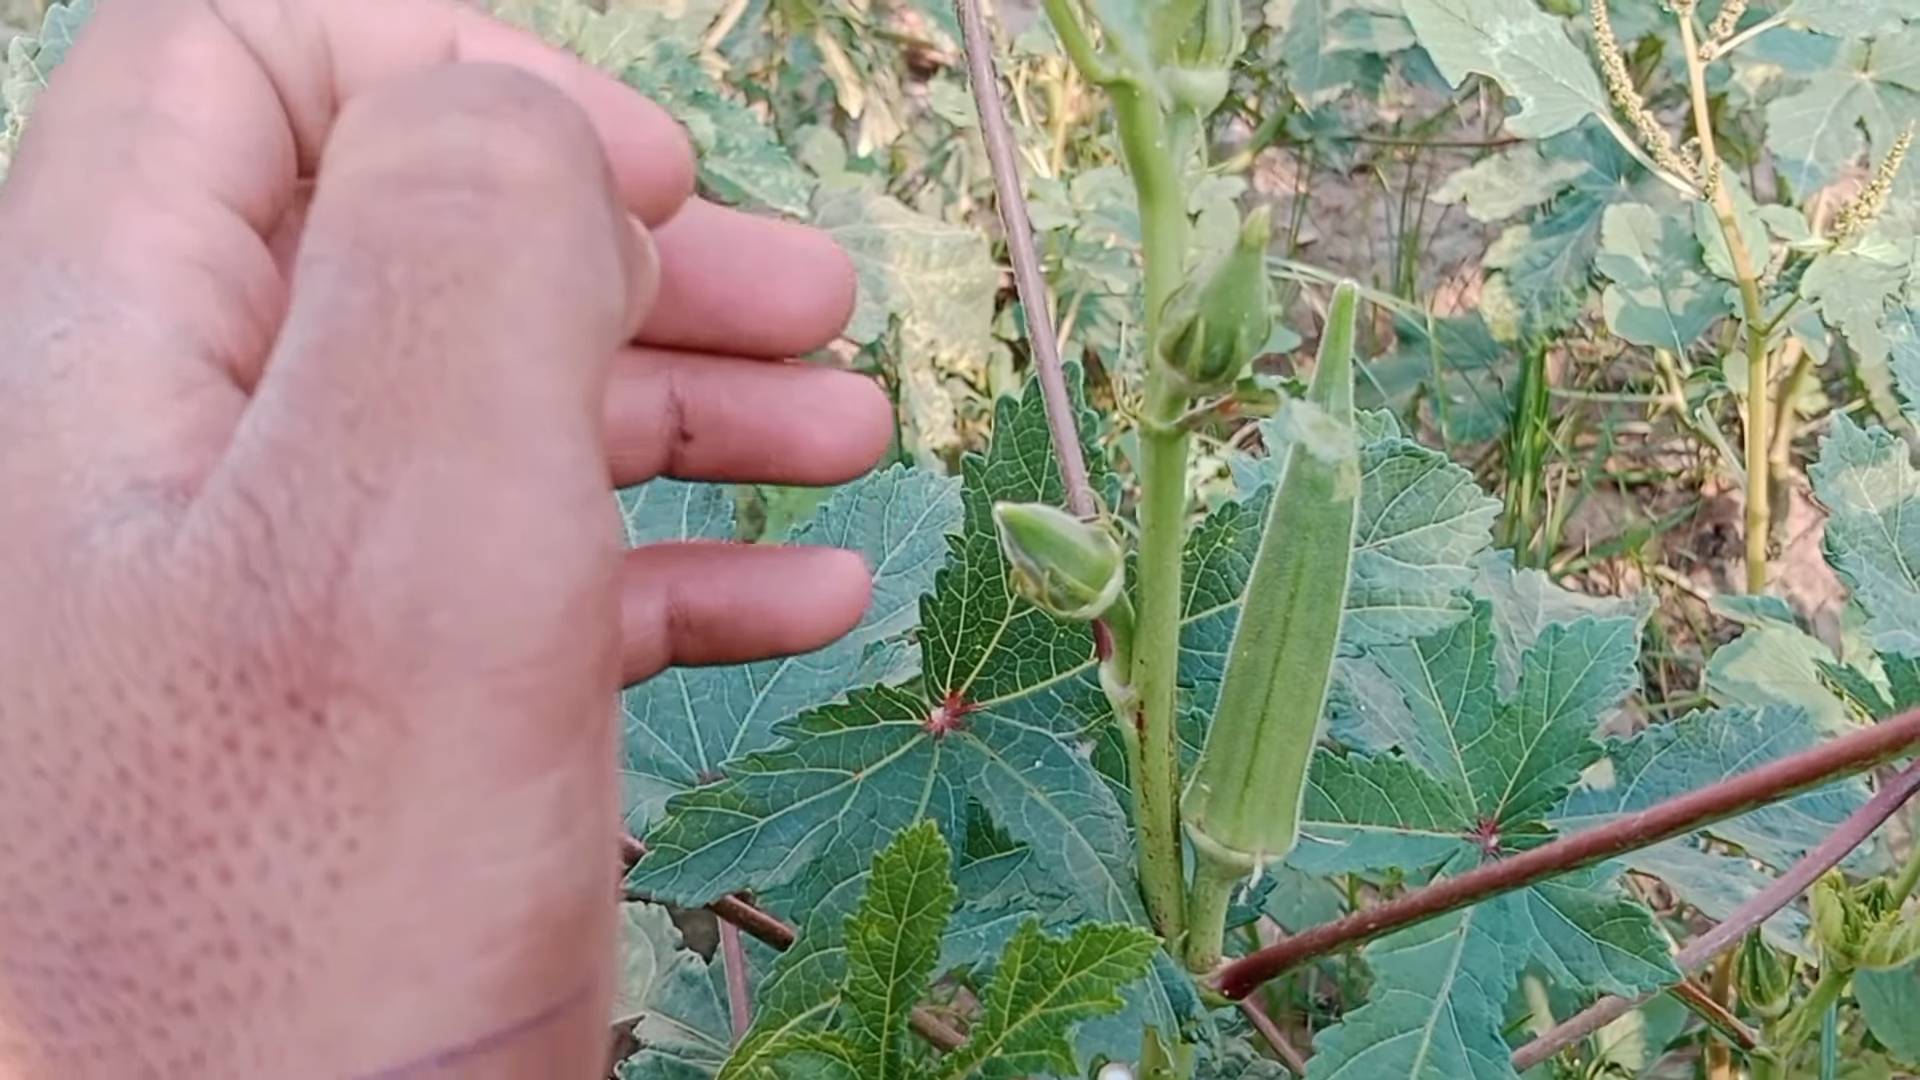
* Timing: Okra pods are typically ready to harvest 50-65 days after planting. The pods should be about 2-4 inches long and tender. If the pods are too large, they will be tough and fibrous.
* Harvesting Technique: Use a sharp knife or pruners to cut the pods from the plant. Be careful not to damage the plant. Wear gloves and long sleeves to protect your skin from the prickly hairs on the pods and stems.
* Frequency: Harvest okra pods every 1-2 days. The more you harvest, the more the plant will produce.
* Post-Harvest Handling: Okra pods are best used fresh, but they can be stored in the refrigerator for up to a week. Wrap the pods in a paper towel and place them in a plastic bag. You can also freeze okra pods for longer storage. To freeze okra, blanch the pods in boiling water for 2-3 minutes, then cool them in ice water. Drain the pods and freeze them in a single layer on a baking sheet. Once they’re frozen, transfer them to a freezer bag.
Troubleshooting Common Okra Problems
Even with the best care, you might encounter some problems when growing okra. Here are a few common issues and how to address them:
* Poor Germination: If your okra seeds aren’t germinating, it could be due to cold soil, poor seed quality, or overwatering. Make sure the soil is warm enough before planting, use fresh seeds, and avoid overwatering.
* Yellowing Leaves: Yellowing leaves can be a sign of nutrient deficiency, overwatering, or disease. Check the soil pH and nutrient levels, adjust your watering schedule, and treat any diseases.
* Stunted Growth: Stunted growth can be caused by poor soil, lack of sunlight, or pest infestation. Improve the soil, ensure the plants are getting enough sunlight, and control any pests.
* Lack of Pod Production: If your okra plants aren’t producing pods, it could be due to lack of pollination, high temperatures, or nutrient deficiency. Attract pollinators to your garden, provide shade during the hottest part of the day, and fertilize the plants regularly.
Enjoying Your Okra Harvest
Now that you’ve harvested your okra, it’s time to enjoy the fruits (or rather, pods!) of your labor. Okra is a versatile vegetable that can be used in a variety of dishes. Here are a few of my favorite ways to prepare okra:
* Fried Okra: This is a classic Southern dish. Slice the okra pods, dredge them in cornmeal, and fry them until golden brown.
* Okra Gumbo: Okra is a key ingredient in gumbo. Add it to your favorite gumbo recipe for a delicious and hearty meal.
* Roasted Okra: Toss the okra pods with olive oil, salt, and pepper, and roast them in the oven until tender.
* Pickled Okra: Pickle the okra pods for a tangy and flavorful snack.
* Grilled Okra: Skewer the okra pods and grill them until tender.
I hope this guide has been helpful
Conclusion
So, there you have it! Mastering the art of growing okra for a bountiful harvest isn’t some mystical secret reserved for seasoned gardeners. It’s a process accessible to anyone with a little patience, the right knowledge, and a willingness to get their hands dirty. We’ve walked through the essential steps, from selecting the perfect okra variety for your climate to nurturing your plants with the right soil and sunlight. We’ve tackled common challenges like pest control and watering schedules, and armed you with the knowledge to overcome them.
But why is this DIY approach to growing okra a must-try? Because it’s about more than just fresh vegetables. It’s about connecting with your food source, understanding the natural world, and enjoying the satisfaction of nurturing something from seed to table. Store-bought okra simply can’t compare to the vibrant flavor and crisp texture of homegrown okra, picked at its peak ripeness. Plus, you have complete control over the growing process, ensuring that your okra is free from harmful pesticides and chemicals.
Consider these variations to personalize your okra-growing journey. Experiment with different okra varieties, such as ‘Clemson Spineless’ for its smooth pods or ‘Burgundy’ for its striking color. Try companion planting with basil or marigolds to deter pests naturally. Explore different soil amendments to find what works best for your garden. You can even try growing okra in containers if you have limited space. The possibilities are endless!
Growing okra is a rewarding experience that offers a delicious and nutritious return on your investment. It’s a chance to embrace sustainable living, reduce your carbon footprint, and enjoy the freshest possible produce.
We wholeheartedly encourage you to give this DIY trick a try. Don’t be intimidated by the learning curve; every gardener starts somewhere. Embrace the challenges, celebrate the successes, and learn from your mistakes. And most importantly, share your experience with us! We’d love to hear about your okra-growing adventures, your favorite varieties, and any tips or tricks you’ve discovered along the way. Post photos of your bountiful harvests, share your recipes, and connect with fellow okra enthusiasts. Together, we can cultivate a community of passionate gardeners who appreciate the simple joys of growing their own food. So, grab your seeds, prepare your soil, and get ready to experience the magic of growing okra for a bountiful harvest! Happy gardening!
Frequently Asked Questions (FAQ)
What is the best time of year to plant okra?
Okra thrives in warm weather, so the best time to plant it is in late spring or early summer, after the last frost. The soil temperature should be at least 65 degrees Fahrenheit for optimal germination. In warmer climates, you can even plant a second crop in mid-summer for a fall harvest. Check your local frost dates to determine the ideal planting window for your region.
How much sunlight does okra need?
Okra needs at least 6-8 hours of direct sunlight per day to thrive. Choose a planting location that receives plenty of sunshine throughout the day. If you’re growing okra in containers, make sure to place them in a sunny spot. Insufficient sunlight can lead to leggy plants and reduced yields.
What type of soil is best for growing okra?
Okra prefers well-drained, fertile soil with a slightly acidic to neutral pH (6.0-7.0). Amend your soil with compost or other organic matter to improve drainage and fertility. Avoid heavy clay soils, as they can become waterlogged and hinder root growth. A soil test can help you determine the pH and nutrient levels of your soil and guide you in making necessary amendments.
How often should I water okra plants?
Okra plants need consistent moisture, especially during hot weather. Water deeply and regularly, aiming for about 1 inch of water per week. Avoid overwatering, as this can lead to root rot. Mulching around the plants can help retain moisture and suppress weeds. Check the soil moisture regularly and adjust your watering schedule accordingly.
How do I fertilize okra plants?
Okra benefits from regular fertilization. Apply a balanced fertilizer (e.g., 10-10-10) at planting time and then side-dress with a nitrogen-rich fertilizer every 4-6 weeks during the growing season. Avoid over-fertilizing, as this can lead to excessive foliage growth at the expense of pod production. Organic fertilizers, such as compost tea or fish emulsion, are also excellent options.
What are some common pests and diseases that affect okra?
Common pests that affect okra include aphids, flea beetles, corn earworms, and stink bugs. Diseases include powdery mildew, Fusarium wilt, and Verticillium wilt. Regularly inspect your plants for signs of pests or diseases and take action promptly. Organic pest control methods, such as insecticidal soap or neem oil, can be effective for controlling many pests. Choose disease-resistant varieties and practice good garden hygiene to prevent diseases.
When and how should I harvest okra?
Okra pods should be harvested when they are young and tender, typically 2-4 inches long. Use a sharp knife or pruners to cut the pods from the plant. Harvest okra every 1-2 days to encourage continued production. Overripe pods become tough and fibrous. Wear gloves when harvesting okra, as the pods can be prickly and irritating to the skin.
How can I store okra after harvesting?
Freshly harvested okra can be stored in the refrigerator for up to a week. Place the pods in a plastic bag or container to prevent them from drying out. Okra can also be frozen for longer storage. Blanch the pods in boiling water for 2-3 minutes, then cool them in ice water before freezing. Pickled okra is another delicious way to preserve your harvest.
Can I grow okra in containers?
Yes, okra can be successfully grown in containers. Choose a large container (at least 10 gallons) with good drainage. Use a high-quality potting mix and provide regular watering and fertilization. Container-grown okra may require more frequent watering than okra grown in the ground. Place the container in a sunny location.
What are some good companion plants for okra?
Good companion plants for okra include basil, marigolds, peppers, tomatoes, and cucumbers. Basil and marigolds can help deter pests, while peppers and tomatoes can benefit from the shade provided by okra plants. Avoid planting okra near beans, as they can compete for nutrients. Companion planting can improve the health and productivity of your garden.

Leave a Comment