

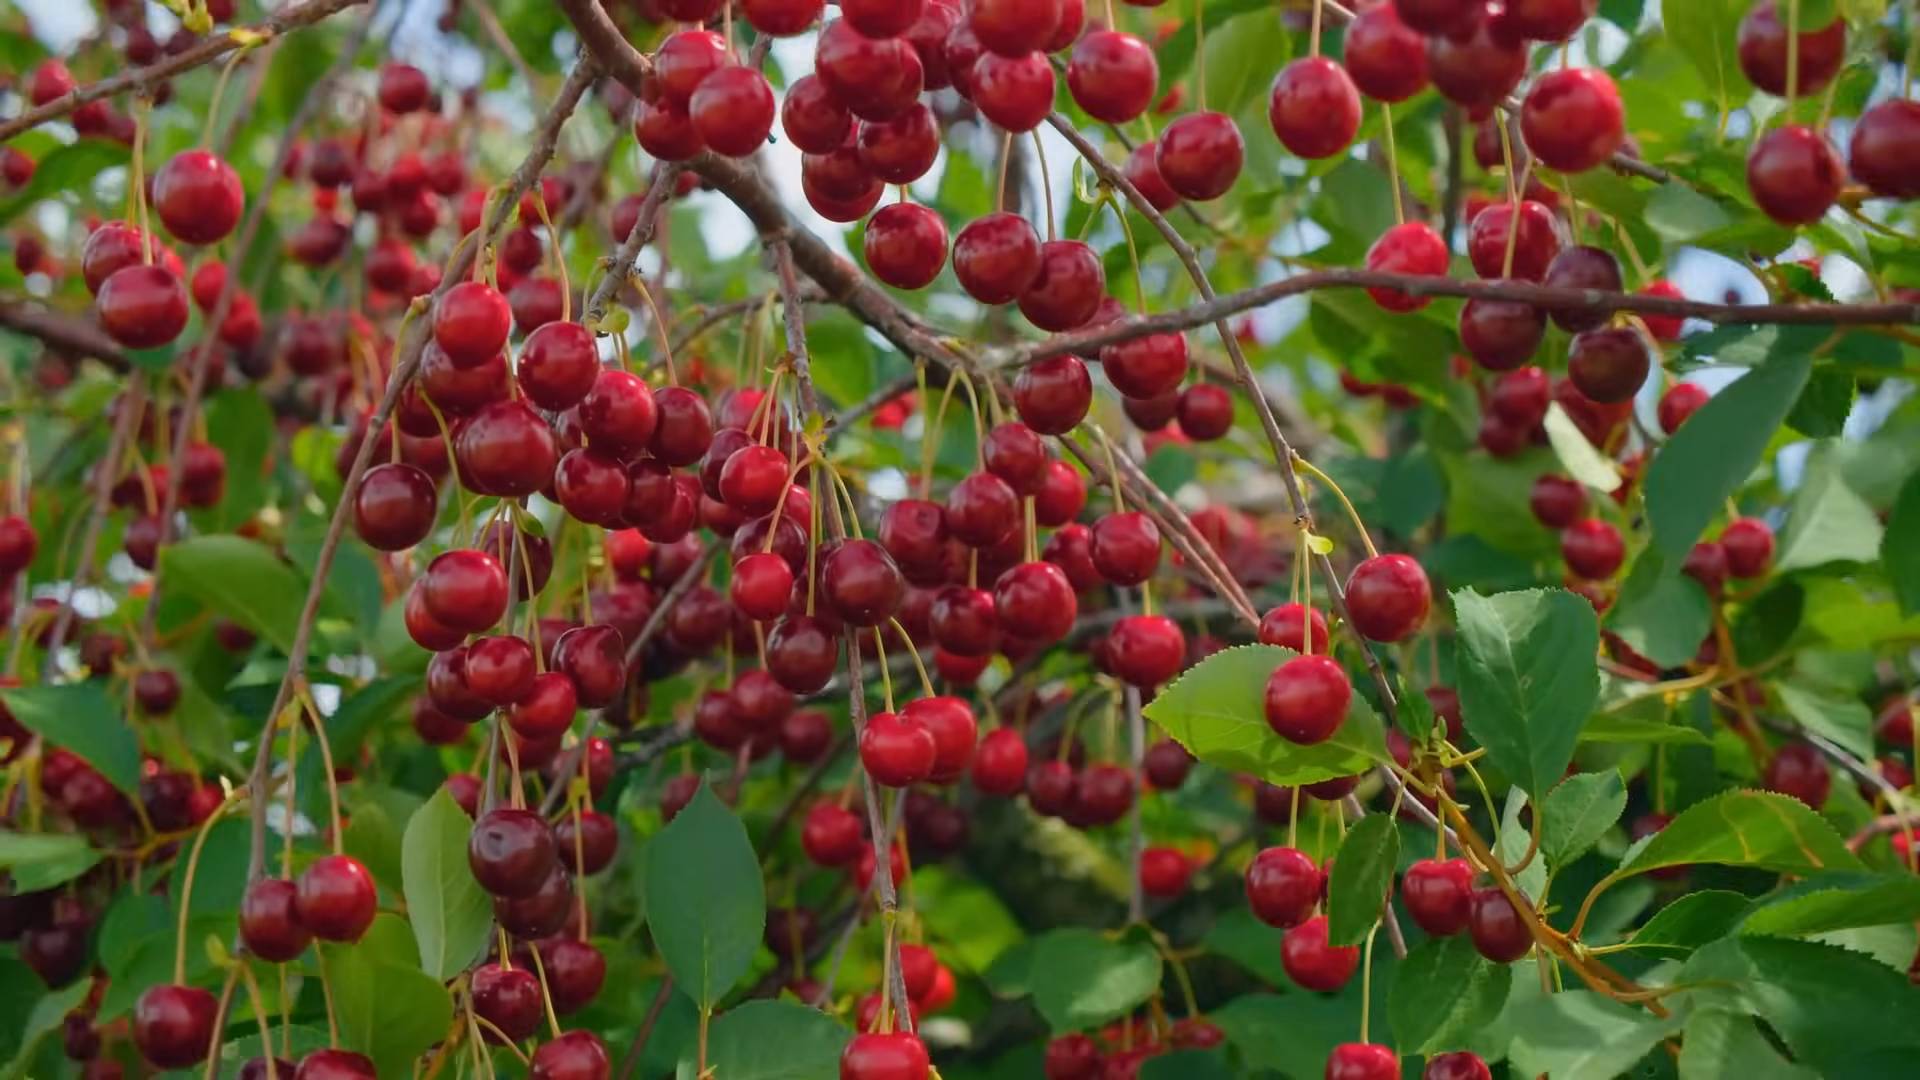
Growing Cherry Trees at Home might seem like a daunting task reserved for sprawling orchards, but I’m here to tell you it’s absolutely achievable, even in a small backyard! Imagine biting into a sun-ripened, juicy cherry, bursting with flavor, that you nurtured from a sapling right in your own garden. That’s the magic we’re unlocking today with these simple DIY tricks and hacks.
For centuries, cherry trees have held a special place in cultures around the world. In Japan, the fleeting beauty of cherry blossoms (sakura) symbolizes the ephemeral nature of life, celebrated with elaborate festivals. In other cultures, cherries represent abundance and good fortune. Now, you can bring a piece of that history and symbolism into your own life.
Why should you bother with the effort of growing cherry trees at home? Well, beyond the sheer joy of harvesting your own fruit, you’ll be saving money on store-bought cherries (which can be surprisingly expensive!), reducing your carbon footprint, and enjoying the satisfaction of nurturing a living thing. Plus, cherry trees are beautiful additions to any landscape, providing shade and attracting pollinators. Many people are intimidated by the perceived difficulty, but with the right knowledge and a few clever DIY solutions, you can overcome common challenges like pests, diseases, and pollination issues. I’m going to share my favorite tips and tricks to make growing cherry trees at home a rewarding and delicious experience. Let’s get started!
Growing Your Own Delicious Cherries: A DIY Guide
Okay, so you want to grow cherry trees at home? Awesome! It’s totally doable, and the reward of fresh, juicy cherries straight from your backyard is absolutely worth the effort. It might seem daunting, but I promise, with a little planning and some elbow grease, you’ll be enjoying your own cherry harvest in no time. Let’s dive in!
Choosing the Right Cherry Tree
Before you even think about digging a hole, you need to decide what kind of cherry tree you want. This is a crucial step, so don’t rush it!
* Sweet vs. Sour: This is the big one. Sweet cherries are what you typically eat fresh (Bing, Rainier, Lapins), while sour cherries (Montmorency) are best for pies, jams, and preserves. Consider what you plan to do with your cherries.
* Climate: Cherry trees need a certain number of “chill hours” (hours below 45°F) to properly set fruit. Make sure the variety you choose is suitable for your climate. Your local nursery can be a huge help here!
* Space: Cherry trees can get pretty big! Consider the mature size of the tree and make sure you have enough room. Dwarf varieties are available if you’re short on space.
* Pollination: Many sweet cherry varieties are not self-pollinating, meaning you’ll need to plant another compatible variety nearby for them to produce fruit. Sour cherries are generally self-pollinating. Again, your local nursery can advise you on compatible pollinators.
* Rootstock: The rootstock affects the tree’s size, vigor, and disease resistance. Research different rootstocks to find one that’s suitable for your soil and climate.
Preparing the Planting Site
Alright, you’ve picked your cherry tree! Now it’s time to get the planting site ready. This is where the real work begins, but trust me, a well-prepared site will make all the difference.
* Sunlight: Cherry trees need at least 6-8 hours of direct sunlight per day. Choose a location that gets plenty of sun.
* Soil: Cherry trees prefer well-drained soil. If your soil is heavy clay, you’ll need to amend it with organic matter to improve drainage.
* Drainage Test: Dig a hole about a foot deep and fill it with water. If the water drains away within a few hours, your drainage is good. If it takes longer, you’ll need to improve the drainage.
* Soil pH: Cherry trees prefer a slightly acidic to neutral soil pH (6.0-7.0). You can test your soil pH with a soil testing kit. If your soil is too alkaline, you can amend it with sulfur.
* Clearing the Area: Remove any grass, weeds, or rocks from the planting area. Dig a hole that’s twice as wide as the root ball and just as deep.
Planting Your Cherry Tree
Okay, the site is prepped, the tree is ready, let’s get planting!
1. Carefully Remove the Tree from the Container: Gently loosen the root ball and remove the tree from its container. If the roots are circling the pot, gently tease them apart.
2. Position the Tree in the Hole: Place the tree in the hole, making sure the top of the root ball is level with the surrounding soil.
3. Backfill the Hole: Backfill the hole with the soil you removed, gently tamping it down as you go. Be careful not to compact the soil too much.
4. Water Thoroughly: Water the tree thoroughly after planting. This will help settle the soil and get the roots off to a good start.
5. Mulch Around the Tree: Apply a layer of mulch around the tree, keeping it a few inches away from the trunk. Mulch will help retain moisture, suppress weeds, and regulate soil temperature. I like to use wood chips or shredded bark.
6. Stake the Tree (Optional): If you live in a windy area, you may want to stake the tree to provide support. Use soft ties to attach the tree to the stake, making sure they’re not too tight.
Caring for Your Cherry Tree
Planting is just the beginning! Now you need to take care of your cherry tree to ensure it thrives and produces a bountiful harvest.
* Watering: Water your cherry tree regularly, especially during dry periods. Young trees need more frequent watering than established trees. Check the soil moisture by sticking your finger into the soil. If it feels dry, it’s time to water.
* Fertilizing: Fertilize your cherry tree in the spring with a balanced fertilizer. Follow the instructions on the fertilizer label. Avoid over-fertilizing, as this can damage the tree.
* Pruning: Prune your cherry tree annually to maintain its shape, remove dead or diseased branches, and improve air circulation. The best time to prune is in late winter or early spring, before the tree starts to grow.
* Pest and Disease Control: Cherry trees are susceptible to a variety of pests and diseases. Monitor your tree regularly for signs of problems. Common pests include aphids, cherry fruit flies, and borers. Common diseases include brown rot, leaf spot, and powdery mildew. Treat any problems promptly with appropriate pesticides or fungicides. I always try to use organic options whenever possible.
* Protecting from Birds: Birds love cherries just as much as we do! To protect your crop, you may need to cover your tree with netting. This can be a bit of a hassle, but it’s worth it to save your cherries.
* Weed Control: Keep the area around your cherry tree free of weeds. Weeds compete with the tree for water and nutrients. You can control weeds by hand-pulling, hoeing, or applying a herbicide.
Pruning Your Cherry Tree: A Detailed Guide
Pruning can seem intimidating, but it’s essential for a healthy and productive cherry tree. Here’s a more detailed breakdown:
Pruning Young Trees (First 3-4 Years)
The goal in the early years is to establish a strong framework of branches.
1. Establish a Central Leader: Choose a strong, upright branch to be the central leader. This will be the main trunk of the tree.
2. Select Scaffold Branches: Select 3-5 well-spaced branches to be the scaffold branches. These will be the main branches that support the fruit. Choose branches that are growing at a wide angle from the trunk.
3. Remove Competing Branches: Remove any branches that are competing with the central leader or scaffold branches. Also, remove any branches that are growing inward or crossing other branches.
4. Head Back Scaffold Branches: Head back the scaffold branches by about one-third. This will encourage them to branch out and create a fuller canopy.
Pruning Mature Trees (After 4 Years)
The goal in mature trees is to maintain the tree’s shape, remove dead or diseased branches, and improve air circulation.
1. Remove Dead, Diseased, or Damaged Branches: This is the most important part of pruning. Remove any branches that are dead, diseased, or damaged. Cut back to healthy wood.
2. Thin Out the Canopy: Thin out the canopy by removing some of the smaller branches. This will improve air circulation and allow more sunlight to reach the fruit.
3. Remove Water Sprouts and Suckers: Water sprouts are vigorous, upright shoots that grow from the trunk or branches. Suckers are shoots that grow from the roots. Remove these as they appear.
4. Rejuvenate Old Trees: If your cherry tree is old and unproductive, you can rejuvenate it by pruning it back hard. This will encourage new growth and improve fruit production. However, be careful not to remove too much wood at once, as this can stress the tree.
Important Pruning Tips:
* Use Sharp Pruning Tools: Use sharp pruning shears or a pruning saw to make clean cuts. Dull tools can damage the tree.
* Make Cuts at a 45-Degree Angle: Make cuts at a 45-degree angle, just above a bud or branch.
* Disinfect Your Pruning Tools: Disinfect your pruning tools between cuts to prevent the spread of disease. You can use rubbing alcohol or a bleach solution.
* Don’t Over-Prune: It’s better to under-prune than to over-prune. Over-pruning can stress the tree and reduce fruit production.
Harvesting Your Cherries
Finally, the moment you’ve been waiting for! Harvesting your own cherries is incredibly satisfying.
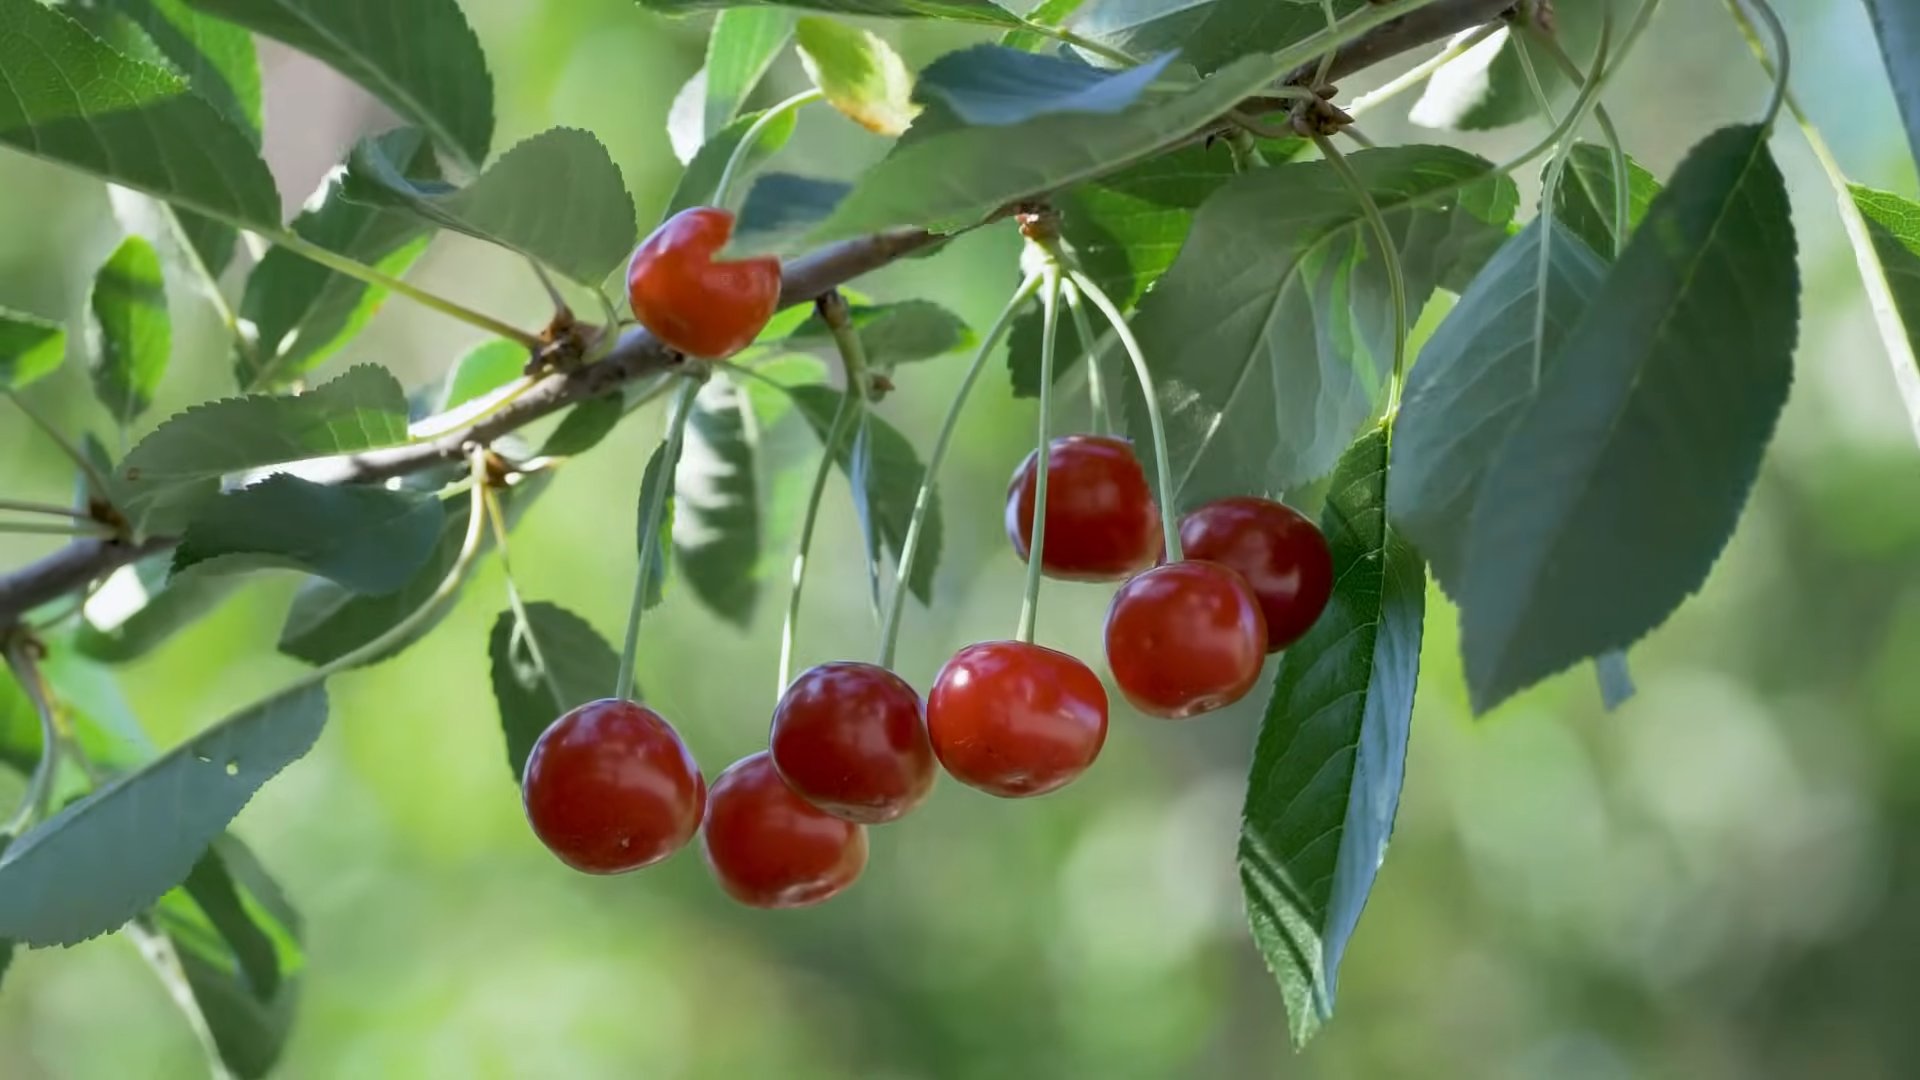
* Timing: Cherries are typically ready to harvest in late spring or early summer. The exact timing will depend on the variety and your climate.
* Ripeness: Cherries are ripe when they are fully colored and slightly soft to the touch. They should also come off the stem easily
Conclusion
So, there you have it – a comprehensive guide to successfully growing cherry trees at home! We’ve covered everything from selecting the right variety and preparing the soil to planting, pruning, and protecting your precious trees from pests and diseases. While it might seem daunting at first, the reward of harvesting your own sweet, juicy cherries is well worth the effort.
This isn’t just about having fresh fruit; it’s about connecting with nature, understanding the growing process, and enjoying the satisfaction of nurturing something from a sapling to a fruit-bearing tree. Imagine stepping into your backyard and picking sun-ripened cherries straight from the branch – a taste far superior to anything you can find in a store.
The DIY aspect of growing cherry trees is particularly appealing. You have complete control over the process, ensuring that your trees are grown organically and sustainably. Plus, it’s a fantastic learning experience for the whole family. Get the kids involved in planting, watering, and even harvesting – it’s a great way to teach them about where their food comes from and the importance of environmental stewardship.
Don’t be afraid to experiment with different varieties of cherry trees to find the ones that thrive best in your specific climate and soil conditions. Consider planting both sweet and tart cherry varieties to enjoy a wider range of flavors and culinary uses. You could even try grafting different varieties onto a single tree for a truly unique and productive specimen. Another variation to consider is espaliering your cherry tree. This technique involves training the tree to grow flat against a wall or fence, which can be a great option for smaller gardens or urban environments. It also helps to maximize sunlight exposure and improve air circulation.
Remember, patience is key. Cherry trees typically take a few years to start producing fruit, but the wait is well worth it. In the meantime, enjoy the beauty of your growing trees and the anticipation of the delicious harvest to come.
We strongly encourage you to give growing cherry trees at home a try. It’s a rewarding and enjoyable experience that will provide you with fresh, delicious fruit for years to come. And once you’ve harvested your first crop, be sure to share your experience with us! We’d love to hear about your successes, challenges, and any tips or tricks you’ve learned along the way. Share your photos and stories on our social media channels or in the comments section below. Let’s create a community of home cherry growers and inspire others to embark on this fruitful adventure! Embrace the journey of growing cherry trees at home, and you’ll be rewarded with a bounty of deliciousness and a deeper connection to the natural world.
Frequently Asked Questions (FAQs)
Q: What is the best time of year to plant a cherry tree?
A: The best time to plant a cherry tree is typically in the early spring or late fall, when the tree is dormant. This allows the tree to establish its roots before the stresses of summer heat or winter cold. If you live in an area with mild winters, fall planting is often preferred, as it gives the tree more time to develop its root system before the growing season begins. However, if you experience harsh winters, spring planting may be a better option to avoid potential frost damage to the young roots. Regardless of when you plant, be sure to choose a day when the soil is not frozen or waterlogged.
Q: How much space does a cherry tree need?
A: The amount of space a cherry tree needs depends on the variety and rootstock. Standard-sized sweet cherry trees can grow to be 35-40 feet tall and wide, requiring at least 30-40 feet of spacing between trees. Dwarf varieties, on the other hand, may only reach 8-10 feet tall and wide, requiring only 8-10 feet of spacing. Tart cherry trees are generally smaller than sweet cherry trees, typically reaching 15-20 feet tall and wide. When planning your orchard, be sure to consider the mature size of the tree and provide adequate spacing to allow for proper growth and air circulation. Insufficient spacing can lead to overcrowding, reduced sunlight exposure, and increased risk of disease.
Q: What kind of soil is best for cherry trees?
A: Cherry trees thrive in well-drained, fertile soil with a slightly acidic to neutral pH (6.0-7.0). The soil should be rich in organic matter and have good drainage to prevent root rot. Before planting, it’s a good idea to conduct a soil test to determine the pH and nutrient levels. Amend the soil as needed with compost, manure, or other organic materials to improve its fertility and drainage. Avoid planting cherry trees in heavy clay soil or areas with poor drainage, as this can lead to root problems. If your soil is heavy clay, consider planting the tree on a raised mound to improve drainage.
Q: How often should I water my cherry tree?
A: Newly planted cherry trees need regular watering to establish their root systems. Water deeply and regularly, especially during dry periods. As the tree matures, you can reduce the frequency of watering, but still provide supplemental water during prolonged droughts. The amount of water needed will depend on the climate, soil type, and age of the tree. A good rule of thumb is to water deeply and less frequently, rather than shallowly and more often. Avoid overwatering, as this can lead to root rot. Use a soaker hose or drip irrigation system to deliver water directly to the roots.
Q: Do cherry trees need to be pollinated?
A: Most sweet cherry varieties require cross-pollination from another compatible cherry variety to produce fruit. This means you’ll need to plant at least two different sweet cherry varieties that bloom at the same time. Tart cherry trees, on the other hand, are typically self-pollinating, meaning they can produce fruit without the need for another variety. However, even self-pollinating cherry trees may benefit from cross-pollination, as it can increase fruit set and yield. When selecting cherry varieties, be sure to check their pollination requirements and choose compatible varieties that will bloom at the same time.
Q: How do I protect my cherry tree from pests and diseases?
A: Cherry trees are susceptible to a variety of pests and diseases, including aphids, cherry fruit flies, brown rot, and leaf spot. To protect your trees, it’s important to monitor them regularly for signs of infestation or disease. Use preventative measures such as pruning to improve air circulation, removing fallen leaves and fruit to reduce disease spread, and applying dormant oil in the late winter to control overwintering pests. If you do encounter pests or diseases, use appropriate control methods, such as insecticidal soap, horticultural oil, or fungicides. Choose products that are specifically labeled for use on cherry trees and follow the instructions carefully. Consider using organic or natural control methods whenever possible to minimize the impact on the environment.
Q: When do cherry trees produce fruit?
A: Cherry trees typically start producing fruit 3-5 years after planting, depending on the variety and rootstock. Dwarf varieties may start producing fruit sooner than standard-sized trees. The fruit ripens in the late spring or early summer, depending on the variety and climate. The exact timing of the harvest will vary from year to year, depending on the weather conditions. To determine when the fruit is ripe, look for a deep, rich color and a slightly soft texture. The fruit should also detach easily from the stem.
Q: How do I prune my cherry tree?
A: Pruning is essential for maintaining the health and productivity of your cherry tree. Prune in the late winter or early spring, before the tree begins to grow. Remove any dead, damaged, or diseased branches. Thin out crowded branches to improve air circulation and sunlight penetration. Shape the tree to encourage a strong, open structure. Sweet cherry trees are typically pruned to a central leader system, while tart cherry trees are often pruned to an open vase shape. Avoid pruning too heavily, as this can reduce fruit production.
Q: Can I grow a cherry tree in a container?
A: Yes, you can grow a cherry tree in a container, but you’ll need to choose a dwarf variety and use a large container with good drainage. Use a high-quality potting mix and water regularly. Container-grown cherry trees will need to be fertilized more frequently than trees grown in the ground. Protect the tree from extreme temperatures in the winter by moving it to a sheltered location or wrapping the container with insulation. Container growing is a great option for those with limited space or poor soil conditions.
Leave a Comment