

Growing bean sprouts at home is easier than you might think, and I’m here to show you how! Forget those pricey trips to the grocery store for a handful of sprouts that might be past their prime. Imagine having a constant supply of fresh, crunchy bean sprouts right on your kitchen counter, ready to add a nutritious boost to your salads, stir-fries, and sandwiches.
The practice of sprouting beans has ancient roots, dating back thousands of years in Asian cultures. It was a clever way to ensure a source of fresh greens, even during harsh winters or in regions where fresh produce was scarce. Think of it as the original survival food hack! Today, we can appreciate this time-honored tradition not just for its practicality, but also for its incredible health benefits and delicious flavor.
Why should you learn this simple DIY trick? Well, for starters, commercially grown sprouts can sometimes be a breeding ground for bacteria if not handled properly. By growing bean sprouts at home, you have complete control over the process, ensuring a safe and healthy product. Plus, it’s incredibly rewarding to watch those tiny seeds transform into vibrant, edible sprouts in just a few days. I’m excited to share my favorite methods and tips for successful home sprouting, so let’s get started!
Growing Bean Sprouts at Home: A Beginner’s Guide
Hey there, fellow sprout enthusiasts! Ever wanted to grow your own fresh, crunchy bean sprouts right in your kitchen? It’s surprisingly easy, super rewarding, and way cheaper than buying them at the store. Plus, you know exactly what’s going into them – just pure, clean goodness! I’m going to walk you through everything you need to know to become a sprout-growing pro.
What You’ll Need
Before we dive in, let’s gather our supplies. The beauty of this project is that you probably already have most of these things lying around!
* **Bean Seeds:** Mung beans are the most common and easiest to sprout, but you can also use adzuki beans, lentils, chickpeas, or even alfalfa seeds. Make sure they’re specifically labeled for sprouting or food use, not for planting in the garden, as those might be treated with chemicals.
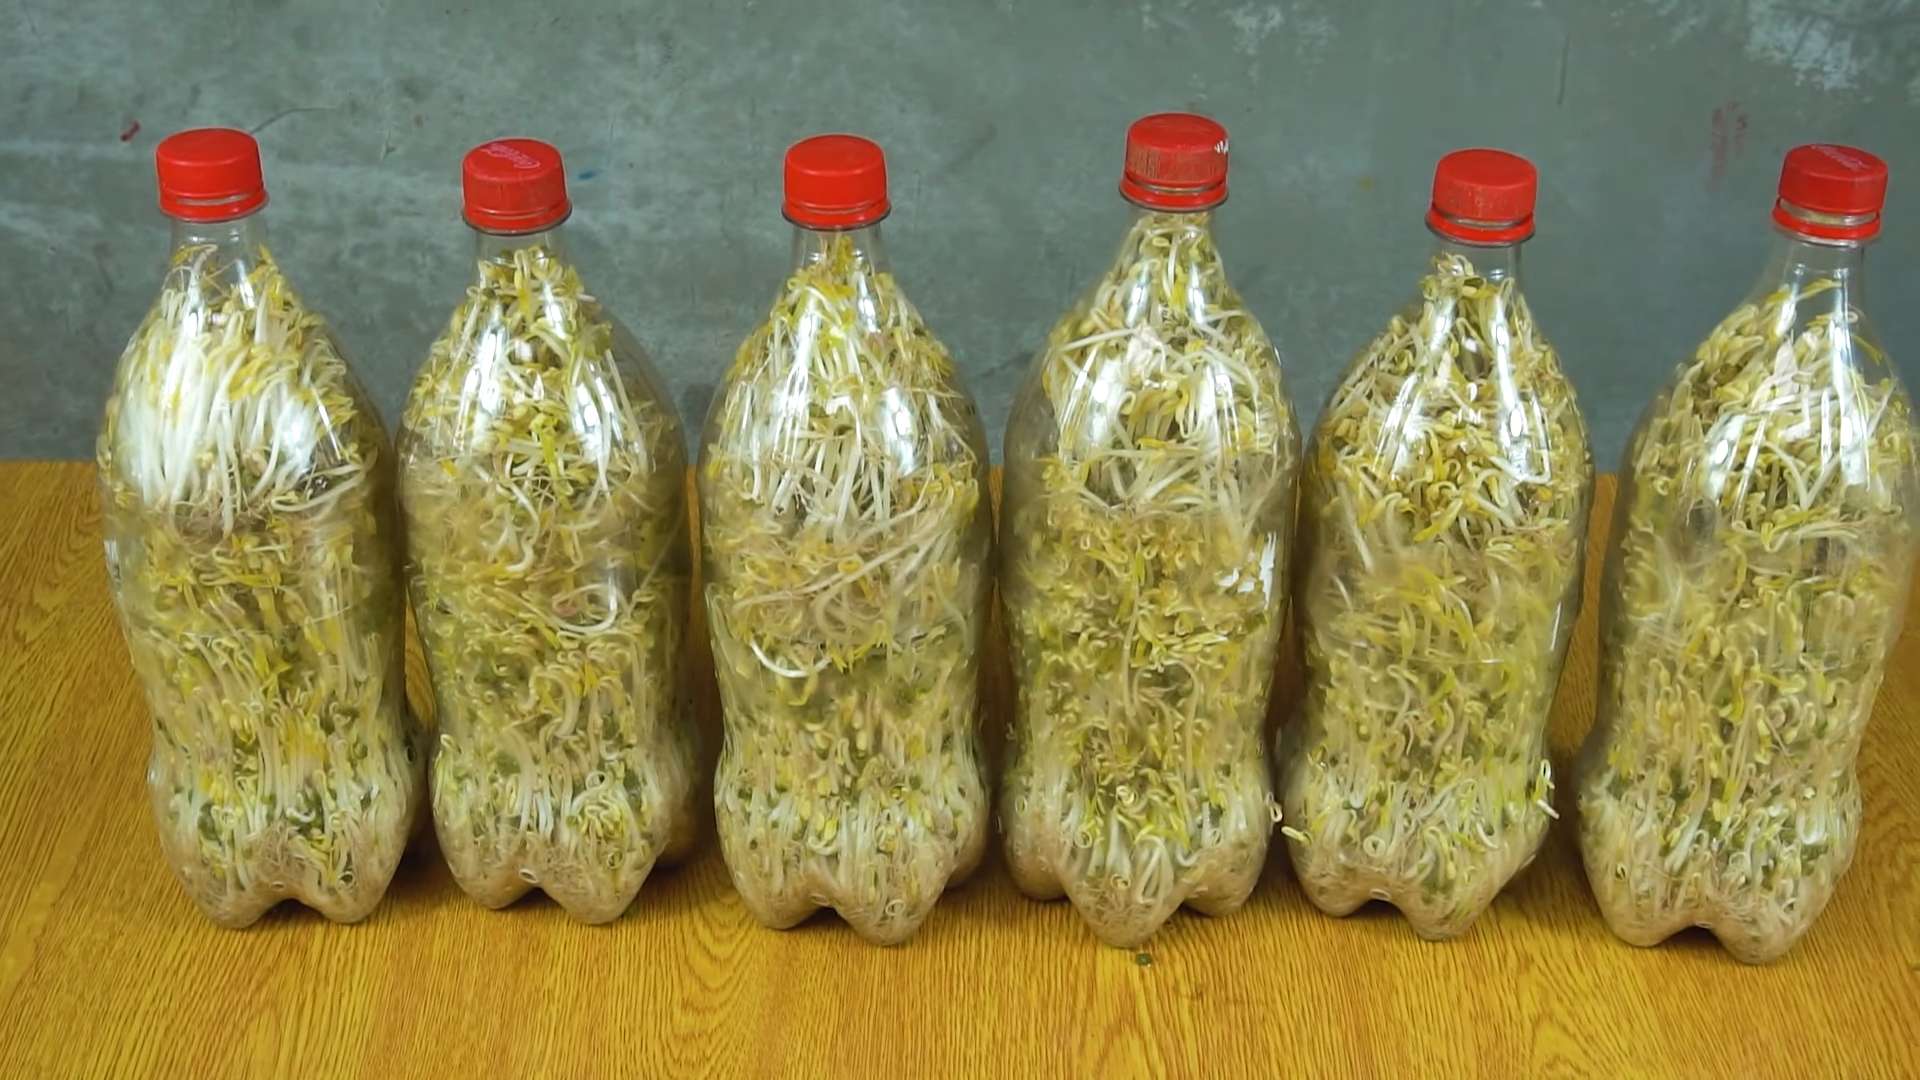
* **Sprouting Jar or Container:** A wide-mouth mason jar works perfectly. You can also use a plastic container with drainage holes. I personally prefer glass because it’s easy to clean and doesn’t leach any chemicals.
* **Sprouting Lid or Cheesecloth:** You’ll need something to cover the jar that allows for drainage and airflow. A sprouting lid with a mesh screen is ideal, but a piece of cheesecloth secured with a rubber band works just as well.
* **Water:** Clean, filtered water is best.
* **Dark Place:** A cupboard, pantry, or even a covered box will do the trick. Darkness is crucial for proper sprout development.
* **Bowl or Tray:** To catch any excess water during rinsing.
Step-by-Step Sprouting Guide
Alright, let’s get sprouting! Here’s a detailed breakdown of the process:
1. **Soaking the Beans:**
* Rinse your bean seeds thoroughly under cool water to remove any debris or dust.
* Place about 2-3 tablespoons of bean seeds into your sprouting jar or container. Remember, they’ll expand significantly, so don’t overcrowd them!
* Add plenty of cool, filtered water – about three times the volume of the beans. This allows them to fully hydrate.
* Cover the jar with your sprouting lid or cheesecloth and secure it with a rubber band.
* Let the beans soak for 8-12 hours, or even overnight. This is a crucial step to kickstart the germination process. I usually soak mine before I go to bed, so they’re ready to go in the morning.
2. **Draining and Rinsing:**
* After the soaking period, drain the water completely through the sprouting lid or cheesecloth.
* Rinse the beans thoroughly with fresh, cool water. This helps to prevent mold and bacteria growth.
* Drain the water again, ensuring that no excess water remains in the jar.
3. **Sprouting in Darkness:**
* Place the jar upside down in a bowl or tray at an angle. This allows any remaining water to drain out and provides good airflow.
* Put the jar in a dark, well-ventilated place. Remember, darkness is key for healthy sprout development.
* Important: Avoid direct sunlight, as it can inhibit sprouting and even turn the sprouts bitter.
4. **Rinsing and Draining (Repeat!):**
* This is the most important part of the process! You need to rinse and drain your sprouts 2-3 times a day. This keeps them hydrated, prevents mold, and ensures they grow properly.
* Each time, rinse thoroughly with cool water, drain completely, and return the jar to its dark location.
* I usually do this in the morning, afternoon, and before bed. It only takes a few minutes, and it’s well worth the effort.
5. **Harvesting Your Sprouts:**
* Your sprouts will be ready to harvest in 3-5 days, depending on the type of bean and the temperature.
* They should be about 1-2 inches long and have small leaves starting to form.
* Before harvesting, give them one final rinse and drain.
* You can now move them to a bright location (but still out of direct sunlight) for a day or two to allow them to “green up.” This will enhance their flavor and nutritional value.
6. **Storing Your Sprouts:**
* Once harvested, store your sprouts in an airtight container in the refrigerator.
* They should last for up to a week if stored properly.
* Rinse them again before using.
Troubleshooting Tips
Even with the best instructions, sometimes things can go a little sideways. Here are some common issues and how to fix them:
* **Mold:** If you see fuzzy white or gray mold, it’s likely due to poor drainage or insufficient rinsing. Discard the entire batch and start over, making sure to rinse and drain more frequently.
* **Rotting Smell:** A foul odor indicates that the sprouts are rotting. This is usually caused by bacteria growth due to inadequate rinsing. Discard the batch and start again, paying close attention to rinsing and drainage.
* **Slow Growth:** If your sprouts aren’t growing as quickly as expected, it could be due to low temperatures or poor seed quality. Try moving them to a slightly warmer location and make sure you’re using fresh, high-quality sprouting seeds.
* **Bitter Taste:** A bitter taste can be caused by exposure to direct sunlight. Keep your sprouts in a dark place throughout the sprouting process.
Choosing the Right Beans
While mung beans are the easiest to start with, don’t be afraid to experiment with other types of beans and seeds! Here’s a quick rundown of some popular options:
* **Mung Beans:** These are the classic bean sprouts you find in most grocery stores. They have a mild, slightly sweet flavor and a satisfying crunch.
* **Adzuki Beans:** These sprouts have a slightly nutty flavor and a reddish-brown color.
* **Lentils:** Lentil sprouts are a great source of protein and fiber. They have a slightly earthy flavor.
* **Chickpeas:** Chickpea sprouts have a nutty, slightly bitter flavor. They’re best used in cooked dishes.
* **Alfalfa Seeds:** Alfalfa sprouts are very small and delicate. They have a mild, slightly grassy flavor.
Beyond the Basics: Flavoring Your Sprouts
Once you’ve mastered the basic sprouting technique, you can start experimenting with different ways to flavor your sprouts. Here are a few ideas:
* **Sea Salt:** Add a pinch of sea salt to the rinsing water for a subtle salty flavor.
* **Lemon Juice:** A few drops of lemon juice in the rinsing water can add a bright, citrusy flavor.
* **Vinegar:** A splash of apple cider vinegar or rice vinegar can add a tangy flavor and help to prevent mold growth.
* **Spices:** Add a pinch of your favorite spices, such as cumin, coriander, or chili powder, to the rinsing water for a more complex flavor.
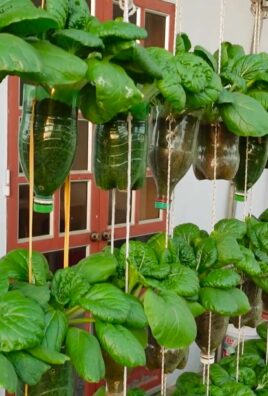
Why Grow Your Own Sprouts?
Besides being incredibly easy and cost-effective, growing your own sprouts offers a ton of benefits:
* **Freshness:** You can’t beat the taste of freshly grown sprouts! They’re so much more flavorful than store-bought ones.
* **Nutrition:** Sprouts are packed with vitamins, minerals, and enzymes. They’re a nutritional powerhouse!
* **Control:** You know exactly what’s going into your sprouts – no pesticides, herbicides, or other harmful chemicals.
* **Sustainability:** Growing your own sprouts is a sustainable way to add fresh, healthy food to your diet.
* **Fun!** It’s a fun and rewarding project that the whole family can enjoy.
Using Your Homegrown Sprouts
Now that you have a bounty of fresh sprouts, what do you do with them? The possibilities are endless! Here are some ideas:
* **Salads:** Add sprouts to your favorite salads for a boost of flavor and nutrition.
* **Sandwiches and Wraps:** Sprouts add a delicious crunch to sandwiches and wraps.
* **Stir-fries:** Toss sprouts into stir-fries for a healthy and flavorful addition.
* **Soups:** Garnish soups with sprouts for a fresh and vibrant touch.
* **Smoothies:** Add sprouts to smoothies for a nutritional boost.
* **As a Garnish:** Use them as a garnish for almost any dish!
So there you have it! Everything you need to know to start growing your own delicious and nutritious bean sprouts at home. Happy sprouting!

Conclusion
So, there you have it! Growing bean sprouts at home is not just a fun project; it’s a gateway to fresher, healthier, and more flavorful meals. Forget those limp, often questionable sprouts from the grocery store. With this simple DIY trick, you can cultivate a vibrant batch of crisp, delicious bean sprouts right in your own kitchen, whenever you need them.
Why is this a must-try? Because it puts you in complete control. You know exactly what you’re eating, where it came from, and how it was grown. No pesticides, no preservatives, just pure, unadulterated bean sprout goodness. Plus, the satisfaction of nurturing something from seed to sprout is incredibly rewarding. It’s a miniature garden on your countertop!
But the benefits don’t stop there. Homegrown bean sprouts are significantly more cost-effective than store-bought. A small bag of beans can yield a surprisingly large quantity of sprouts, making it a budget-friendly way to add a nutritious boost to your diet.
Feeling adventurous? Experiment with different types of beans! Mung beans are the classic choice, but you can also try adzuki beans, lentils, or even chickpeas for a unique flavor profile. Each variety will offer a slightly different texture and taste, allowing you to tailor your sprouts to your specific culinary preferences.
Consider adding a touch of spice to your sprouting process. A pinch of chili flakes or a few slices of ginger in the soaking water can infuse your sprouts with a subtle kick. Or, for a more savory flavor, try using a diluted vegetable broth instead of plain water.
Another variation is to control the amount of light your sprouts receive. Growing them in complete darkness will result in paler, more delicate sprouts, while exposing them to indirect light will encourage them to develop a slightly greener hue and a more robust flavor.
The possibilities are endless! The key is to start with the basic method and then experiment to find what works best for you and your taste buds.
We wholeheartedly encourage you to give this DIY bean sprout growing trick a try. It’s easy, affordable, and incredibly rewarding. Once you’ve tasted the difference between homegrown and store-bought, you’ll never go back.
Don’t be shy! Share your experiences with us. Let us know what types of beans you tried, what variations you experimented with, and what delicious dishes you created with your homegrown sprouts. Post pictures of your sprouting setups and your culinary creations on social media using #HomegrownBeanSprouts. We can’t wait to see what you come up with! Embrace the joy of fresh, healthy eating and discover the magic of growing your own bean sprouts at home. This simple **DIY bean sprouts** method will revolutionize your approach to fresh produce.
Frequently Asked Questions (FAQ)
What types of beans work best for sprouting?
Mung beans are the most commonly used and generally considered the easiest to sprout. They have a mild flavor and sprout reliably. However, you can also successfully sprout adzuki beans, lentils, chickpeas, and even some types of peas. Just be sure to use beans specifically intended for sprouting or cooking, not ornamental beans, as these may be treated with chemicals or be toxic. Avoid using split beans, as they won’t sprout properly. Experiment to find your favorite!
How long does it take to grow bean sprouts?
Typically, it takes between 3 to 5 days to grow bean sprouts to a usable length. The exact time will depend on the type of bean, the temperature, and the humidity levels in your environment. Warmer temperatures generally speed up the sprouting process. Check your sprouts daily and harvest them when they reach your desired length and crispness.
What if my bean sprouts start to smell bad?
A foul odor is a sign that your bean sprouts are contaminated with bacteria or mold. This is usually caused by insufficient rinsing or poor drainage. If you notice a bad smell, discard the entire batch immediately. To prevent this, ensure you rinse your sprouts thoroughly at least twice a day with fresh, cool water. Make sure your sprouting container has adequate drainage to prevent water from pooling at the bottom.
How do I store bean sprouts once they are grown?
Once your bean sprouts are ready, rinse them thoroughly and gently pat them dry with a clean paper towel. Store them in an airtight container lined with a paper towel in the refrigerator. The paper towel will help absorb excess moisture and keep the sprouts crisp. Properly stored bean sprouts should last for up to a week in the refrigerator.
Can I eat the bean sprout roots?
Yes, the roots of bean sprouts are perfectly edible. They are tender and have a slightly nutty flavor. Some people prefer to trim the roots for aesthetic reasons, but it’s not necessary.
Why are my bean sprouts not sprouting?
There could be several reasons why your bean sprouts aren’t sprouting. First, make sure your beans are viable and not too old. Old beans may have a lower germination rate. Second, ensure the beans are getting enough moisture. They should be kept consistently damp but not waterlogged. Third, the temperature may be too cold. Bean sprouts prefer a warm environment (around 70-75°F or 21-24°C). Finally, make sure the beans are not exposed to direct sunlight, which can inhibit sprouting.
Is it safe to eat raw bean sprouts?
While homegrown bean sprouts are generally safer than store-bought, there is still a small risk of bacterial contamination. To minimize this risk, rinse your sprouts thoroughly before eating them. If you are pregnant, elderly, or have a weakened immune system, it is recommended to cook bean sprouts before consuming them. Lightly steaming or stir-frying them will kill any harmful bacteria.
Can I use tap water for sprouting?
Yes, you can use tap water for sprouting, as long as it is safe to drink. If you are concerned about the quality of your tap water, you can use filtered or bottled water instead. Avoid using water that is heavily chlorinated, as this can inhibit sprouting.
How much light do bean sprouts need?
Bean sprouts don’t need a lot of light. In fact, growing them in a dark or dimly lit environment is preferable. Exposure to direct sunlight can cause them to become bitter and tough. If you want to encourage a slightly greener hue, you can expose them to indirect light for a few hours during the last day or two of sprouting.
Can I reuse the same beans for sprouting multiple times?
No, you should not reuse the same beans for sprouting multiple times. Once beans have been soaked and started to sprout, they are more susceptible to bacterial contamination. It’s best to use a fresh batch of beans each time you want to grow bean sprouts.
Leave a Comment