

Grow Sweet Potato Tops – and transform your kitchen scraps into a vibrant, leafy green addition to your home! Have you ever looked at a sweet potato sprouting in your pantry and thought, “There has to be more to this than just throwing it away?” Well, you’re absolutely right! For generations, resourceful gardeners have known the secret to coaxing beautiful, edible greens from this humble root vegetable.
The practice of sprouting sweet potatoes isn’t just a modern trend; it’s rooted in a history of resourcefulness and sustainability. In many cultures, utilizing every part of a plant was a necessity, and the sweet potato was no exception. These vibrant greens, often overlooked, are packed with nutrients and offer a delicious alternative to spinach or kale.
Why should you learn this simple DIY trick? Because it’s a fantastic way to reduce food waste, save money on groceries, and add a touch of homegrown goodness to your meals. Plus, it’s incredibly rewarding to watch something beautiful and useful grow from something you might have otherwise discarded. I’m excited to share with you how easy it is to grow sweet potato tops right in your own home, no matter how small your space may be. Let’s get started!
Grow Sweet Potato Vines Indoors: A Simple & Stunning DIY Project
Hey there, fellow plant enthusiasts! Ever wanted to add a touch of vibrant greenery to your home without breaking the bank? Well, I’ve got just the project for you: growing sweet potato vines indoors! It’s surprisingly easy, incredibly rewarding, and adds a unique, bohemian vibe to any space. Plus, it’s a fantastic way to repurpose those sweet potatoes that might be lingering in your pantry. Let’s dive in!
What You’ll Need
Before we get started, let’s gather our supplies. This is a pretty low-key project, so you probably already have most of these items lying around:
* A sweet potato (organic is best, but any will do!)
* A glass jar, vase, or container (wide-mouthed is ideal)
* Toothpicks (at least 3-4)
* Water (tap water is fine)
* A sunny spot (near a window is perfect)
* Optional: Liquid fertilizer (for later, once the vine is established)
Step-by-Step Instructions: Sprouting Your Sweet Potato
This is where the magic happens! Follow these steps carefully, and you’ll be well on your way to a beautiful indoor vine.
1. Prepare Your Sweet Potato: First, give your sweet potato a good wash to remove any dirt or debris. This will help prevent mold growth later on. I like to use a soft brush to gently scrub the skin.
2. Decide on Orientation: This is important! Sweet potatoes tend to sprout more readily from the “eye” end (the end with more little bumps and potential sprout points). The other end is usually more tapered. You want the eye end to be facing *up* when you place it in the water.
3. Insert the Toothpicks: Now, carefully insert the toothpicks around the middle of the sweet potato. Space them evenly apart, about an inch or two from each other. The toothpicks will act as a support system, allowing the bottom half of the sweet potato to sit in the water while keeping the top half dry. Think of them as little stilts!
4. Position in Water: Fill your jar or container with water, leaving about an inch of space at the top. Gently lower the sweet potato into the jar, resting it on the toothpicks. The bottom half of the sweet potato should be submerged in the water, while the top half remains dry.
5. Find a Sunny Spot: Place your sweet potato setup in a bright, sunny location. A windowsill is ideal, but any spot that receives several hours of indirect sunlight will work. Direct sunlight can sometimes scorch the sweet potato, so keep an eye on it.
6. Patience is Key: Now comes the hardest part: waiting! It can take anywhere from a few days to a few weeks for sprouts to appear. Be patient and don’t give up!
7. Change the Water Regularly: To prevent mold and keep the water fresh, change the water every 2-3 days. This also helps to provide the sweet potato with fresh nutrients.
8. Observe and Admire: Keep an eye on your sweet potato. You should start to see small roots emerging from the bottom and sprouts appearing on the top. As the sprouts grow, they’ll develop into vines.
Caring for Your Sweet Potato Vine
Once your sweet potato vine is established, it’s time to provide it with some extra TLC.
1. Watering: Continue to change the water every 2-3 days. Make sure the bottom half of the sweet potato remains submerged.
2. Fertilizing (Optional): After a few weeks, you can start adding a diluted liquid fertilizer to the water every 2-4 weeks. This will provide your vine with extra nutrients and encourage healthy growth. I usually use a balanced fertilizer diluted to half strength.
3. Pruning: As your vine grows, you may want to prune it to keep it from getting too unruly. Simply trim the ends of the vines with clean scissors. This will also encourage bushier growth.
4. Support: As the vines get longer, they may need some support. You can use a small trellis, bamboo stakes, or even just let them trail down from a shelf.
5. Repotting (Optional): While you can keep your sweet potato vine growing in water indefinitely, you can also choose to repot it in soil. This will allow it to grow even larger and potentially produce sweet potatoes (although this is less likely indoors). If you choose to repot, use a well-draining potting mix and a pot that’s at least 12 inches in diameter.
Troubleshooting
Sometimes, things don’t go exactly as planned. Here are a few common issues you might encounter and how to address them:
* Mold: If you see mold growing on the sweet potato or in the water, don’t panic! Simply remove the sweet potato, rinse it thoroughly, and clean the jar. Change the water more frequently and make sure the sweet potato is getting enough air circulation.
* No Sprouts: If you’ve been waiting for weeks and still haven’t seen any sprouts, try a different sweet potato. Some sweet potatoes are simply less viable than others. Also, make sure the eye end is facing up and that the sweet potato is getting enough sunlight.
* Yellowing Leaves: Yellowing leaves can be a sign of overwatering or nutrient deficiency. Make sure you’re changing the water regularly and consider adding a diluted liquid fertilizer.
* Leggy Growth: If your vine is growing long and spindly with few leaves, it’s likely not getting enough sunlight. Move it to a brighter location.
Creative Ideas for Displaying Your Sweet Potato Vine
Now for the fun part: showing off your beautiful creation! Here are a few ideas for displaying your sweet potato vine:
* Hanging Baskets: Let the vines cascade down from a hanging basket for a dramatic effect.
* Shelves: Train the vines to trail along a shelf or bookcase.
* Windowsills: Place the jar on a windowsill and let the vines climb up the window frame.
* Macrame Hangers: Add a touch of bohemian flair with a macrame plant hanger.
* Unique Containers: Get creative with your container! Use an old mason jar, a vintage vase, or even a repurposed glass bottle.
Why I Love This Project
I absolutely adore this DIY project because it’s so simple, affordable, and rewarding. It’s a fantastic way to add a touch of nature to your home, and it’s also a great conversation starter. Plus, it’s a fun and educational project for kids. Watching the sweet potato sprout and grow into a beautiful vine is truly magical.
It’s also a great way to learn about plant propagation and the life cycle of plants. You get to witness the entire process from start to finish, which is incredibly fascinating.
And let’s not forget the aesthetic appeal! Sweet potato vines come in a variety of colors, from vibrant green to deep purple, adding a pop of color and texture to any room.
So, what are you waiting for? Grab a sweet potato and get started on your own indoor vine adventure! I promise you won’t regret it. Happy growing!
Conclusion
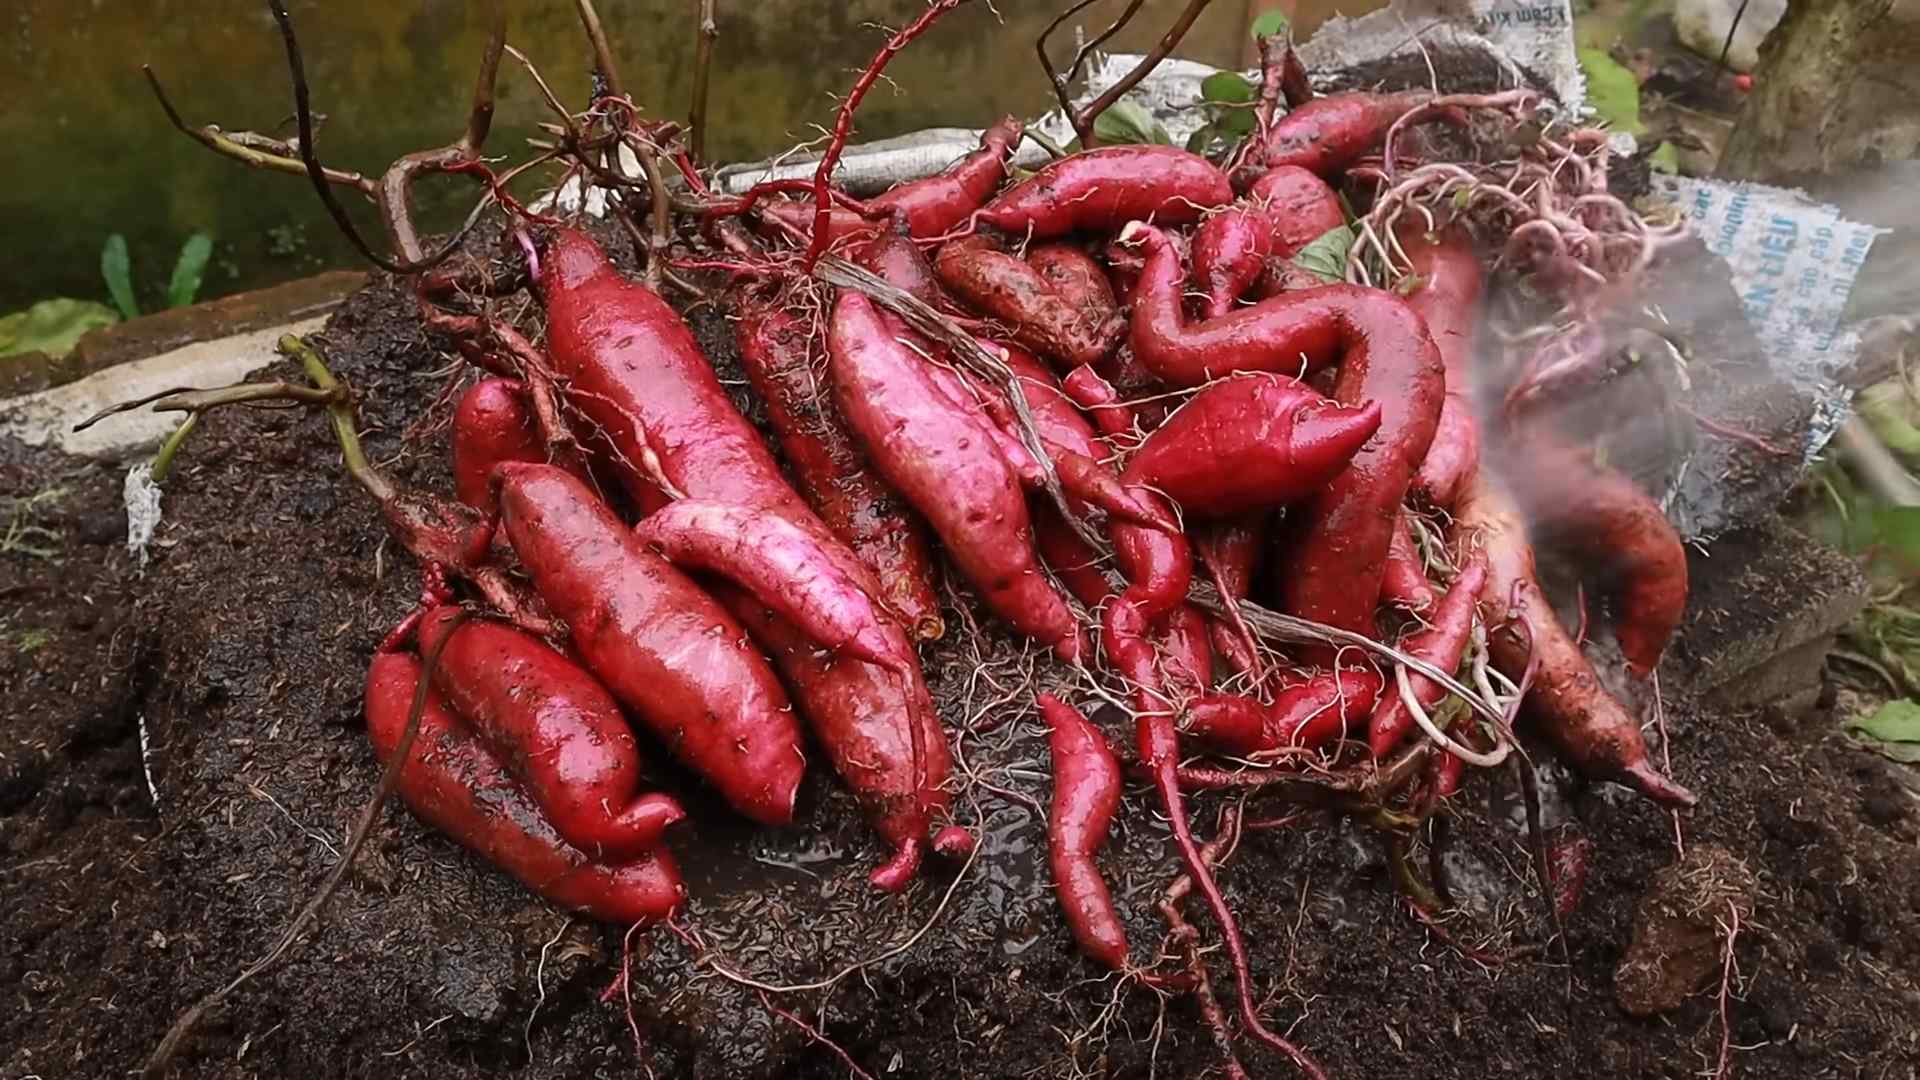
So, there you have it! Growing sweet potato tops is not just a fun gardening experiment; it’s a gateway to a sustainable and delicious addition to your kitchen. We’ve walked you through the simple steps, from selecting your sweet potato to nurturing its leafy growth, and hopefully, you’re feeling inspired to give it a try.
Why is this DIY trick a must-try? Because it’s incredibly rewarding! Imagine transforming a humble sweet potato, often overlooked in the pantry, into a vibrant source of fresh, edible greens. It’s a fantastic way to reduce food waste, connect with nature, and enjoy the unique flavor of sweet potato leaves, all while saving money. Plus, it’s a conversation starter! Your friends and family will be amazed by your resourcefulness and gardening prowess.
But the benefits don’t stop there. Sweet potato leaves are packed with nutrients, offering a healthy boost to your meals. They’re a versatile ingredient that can be used in salads, stir-fries, soups, and so much more. Think of them as a more nutritious and interesting alternative to spinach or kale.
Looking for variations? Absolutely! Experiment with different varieties of sweet potatoes to see which ones produce the most flavorful and abundant leaves. You can also try growing your sweet potato tops in different mediums, such as soil or hydroponically, to compare the results. Consider adding a diluted liquid fertilizer to the water every few weeks to encourage even more vigorous growth. For a decorative touch, use a beautiful glass jar or vase to display your growing sweet potato. You can even train the vines to climb a trellis or create a living wall.
Don’t be afraid to get creative and personalize your sweet potato top growing experience. The possibilities are endless!
We wholeheartedly encourage you to embark on this simple yet satisfying gardening adventure. It’s a fantastic way to learn about plant propagation, enjoy fresh, homegrown produce, and add a touch of green to your home. Remember, even if you don’t have a green thumb, this is a forgiving and easy project that anyone can succeed at.
And now, the most important part: we want to hear about your experience! Did you try growing sweet potato tops? What challenges did you face? What successes did you celebrate? What delicious dishes did you create with your homegrown leaves? Share your stories, tips, and photos with us in the comments below. Let’s create a community of sweet potato top enthusiasts and inspire others to embrace this wonderful DIY trick. Let us know if you found this guide on how to grow sweet potato tops helpful!
Frequently Asked Questions (FAQs)
What kind of sweet potato should I use?
You can use any variety of sweet potato to grow sweet potato tops. However, organic sweet potatoes are generally recommended, as they are less likely to have been treated with growth inhibitors. Look for sweet potatoes that are firm, smooth, and free from blemishes or soft spots. If you’re unsure, a regular sweet potato from the grocery store will usually work just fine. Experiment with different varieties to see which ones produce the most flavorful and abundant leaves.
How long does it take to grow sweet potato tops?
The time it takes to grow sweet potato tops can vary depending on several factors, including the variety of sweet potato, the growing conditions (temperature, light, humidity), and the method used (water or soil). Generally, you can expect to see sprouts emerging from the sweet potato within 1-3 weeks. Once the sprouts have developed into leafy vines, you can start harvesting the leaves in about 4-6 weeks. Be patient and provide your sweet potato with the right conditions, and you’ll be rewarded with a bountiful harvest of fresh greens.
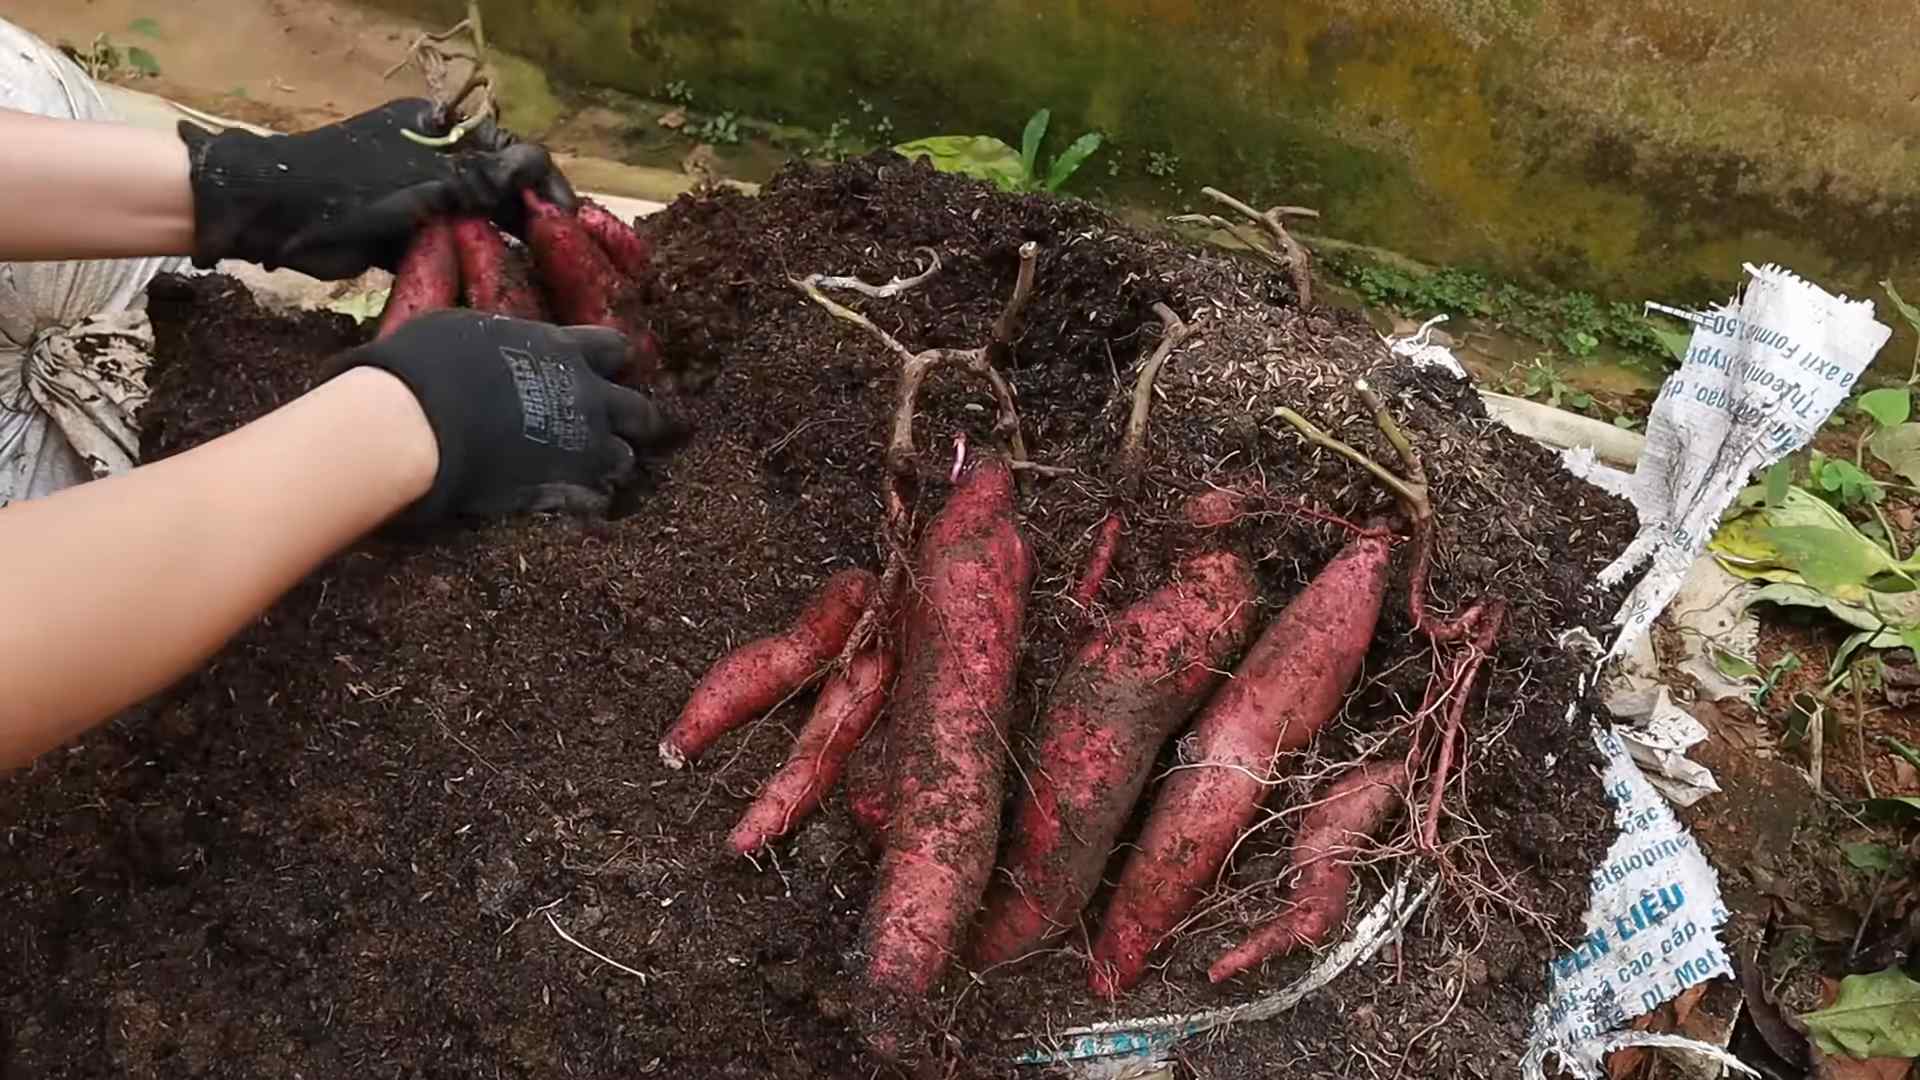
How do I harvest sweet potato leaves?
Harvesting sweet potato leaves is easy! Simply snip off the leaves and tender stems with a pair of scissors or pruning shears. Avoid cutting off more than one-third of the plant at a time, as this can stress the sweet potato and slow down its growth. Focus on harvesting the larger, more mature leaves, as these will have the best flavor and texture. You can harvest leaves regularly throughout the growing season, as long as the sweet potato continues to produce new growth.
Are sweet potato leaves edible?
Yes, sweet potato leaves are absolutely edible and are a nutritious addition to your diet. They have a mild, slightly sweet flavor that is similar to spinach or kale. They can be eaten raw in salads, or cooked in stir-fries, soups, stews, and other dishes. Sweet potato leaves are a good source of vitamins A and C, as well as fiber and antioxidants. However, it’s important to note that sweet potato leaves contain oxalates, which can be harmful if consumed in large quantities. Therefore, it’s best to cook the leaves before eating them, as this will reduce the oxalate content.
How do I store sweet potato leaves?
Freshly harvested sweet potato leaves are best used immediately, but they can be stored in the refrigerator for a few days. To store them, wrap the leaves in a damp paper towel and place them in a plastic bag or container. This will help to keep them fresh and prevent them from wilting. You can also freeze sweet potato leaves for longer storage. To freeze them, blanch the leaves in boiling water for 2-3 minutes, then transfer them to an ice bath to stop the cooking process. Drain the leaves thoroughly and pack them into freezer bags or containers. Frozen sweet potato leaves can be stored for up to 6 months.
Can I grow sweet potato tops indoors?
Yes, you can definitely grow sweet potato tops indoors! In fact, growing them indoors is a great way to enjoy fresh greens year-round, especially if you live in a climate with cold winters. To grow sweet potato tops indoors, simply follow the same steps as you would for growing them outdoors. Make sure to provide your sweet potato with plenty of bright, indirect light. A south-facing window is ideal. You may also need to supplement with artificial light, especially during the winter months. Keep the soil or water consistently moist, but not soggy. And don’t forget to fertilize your sweet potato regularly to encourage healthy growth.
My sweet potato is rotting, what am I doing wrong?
Rotting is usually caused by overwatering or poor drainage. Make sure the bottom half of the sweet potato is submerged in water, but not the entire potato. Change the water every few days to prevent bacterial growth. If growing in soil, ensure the pot has drainage holes and the soil is well-draining. Also, avoid placing the sweet potato in direct sunlight, as this can overheat the water and promote rot. Using filtered water can also help.
Are sweet potato tops poisonous to pets?
While sweet potato itself is generally safe for pets in moderation, the leaves can be mildly toxic due to the presence of oxalates. If your pet consumes a large quantity of sweet potato leaves, it may experience symptoms such as vomiting, diarrhea, or drooling. It’s best to keep sweet potato tops out of reach of pets to prevent any potential health problems. If you suspect that your pet has ingested sweet potato leaves, contact your veterinarian for advice.
Can I replant the sweet potato after harvesting the leaves?
Yes, you can replant the sweet potato after harvesting the leaves! In fact, replanting the sweet potato is a great way to continue growing more leaves and eventually harvest sweet potatoes themselves. Once you’ve harvested the leaves, carefully remove the sweet potato from the water or soil. If it has developed roots, you can plant it directly into a pot or garden bed filled with well-draining soil. If it hasn’t developed roots, you can place it back in water until roots form, then plant it. Provide the sweet potato with plenty of sunlight and water, and it will continue to grow and produce more leaves and eventually, sweet potatoes.
How often should I fertilize my sweet potato tops?
If you’re growing your sweet potato tops in water, you can add a diluted liquid fertilizer every 2-3 weeks to provide the plant with essential nutrients. Use a balanced fertilizer that is specifically formulated for leafy greens. If you’re growing your sweet potato tops in soil, you can fertilize them every 4-6 weeks with a slow-release fertilizer or a diluted liquid fertilizer. Be careful not to over-fertilize, as this can burn the roots and damage the plant. Always follow the instructions on the fertilizer label.
Leave a Comment