

Grow Napa Cabbage Indoors? Absolutely! Imagine harvesting fresh, crisp Napa cabbage right from your own home, even when the weather outside is frightful. Forget those sad, wilted heads at the grocery store – with a few simple tricks, you can enjoy the vibrant flavor and satisfying crunch of homegrown Napa cabbage year-round.
For centuries, Napa cabbage, also known as Chinese cabbage, has been a staple in Asian cuisine, prized for its versatility and nutritional value. From kimchi to stir-fries, its mild, slightly sweet flavor adds a delightful touch to countless dishes. But who says you need a sprawling garden to enjoy this culinary gem?
I know what you’re thinking: “Indoor gardening is hard!” And while it can seem daunting, I’m here to tell you that growing Napa cabbage indoors is surprisingly achievable with the right knowledge and a little bit of effort. This DIY guide will walk you through every step, from selecting the perfect seeds to troubleshooting common problems. Why spend money on store-bought produce when you can cultivate your own fresh, healthy, and delicious Napa cabbage right in your living room? Let’s get started and unlock the secrets to successfully grow Napa Cabbage Indoors!
Growing Napa Cabbage Indoors: A Step-by-Step Guide
Hey there, fellow gardening enthusiasts! Ever dreamt of having fresh, crisp Napa cabbage right at your fingertips, even when the weather outside is frightful? Well, dream no more! I’m going to walk you through the process of growing Napa cabbage indoors, ensuring you have a delicious supply of this versatile veggie year-round. It’s easier than you might think, and I’m here to guide you every step of the way.
Choosing the Right Variety and Starting Seeds
First things first, let’s talk about choosing the right Napa cabbage variety for indoor growing. Smaller varieties tend to do better in containers, so look for options like ‘Minuet’ or ‘Blues’. These are compact and well-suited for indoor environments.
Here’s how to get those seeds started:
1. Gather Your Supplies: You’ll need Napa cabbage seeds, seed starting trays or small pots (2-3 inches in diameter), seed starting mix (a light, well-draining mix is crucial), a spray bottle, and a warm, bright location.
2. Prepare the Seed Starting Mix: Moisten the seed starting mix with water. It should be damp but not soggy. I usually mix it in a bucket until it’s evenly moist.
3. Sow the Seeds: Fill your seed starting trays or pots with the moistened mix. Make a small indentation (about ¼ inch deep) in the center of each cell or pot. Place 2-3 seeds in each indentation. This increases your chances of at least one seed germinating.
4. Cover the Seeds: Gently cover the seeds with a thin layer of seed starting mix.
5. Water Gently: Use a spray bottle to mist the surface of the soil. Avoid pouring water directly, as this can dislodge the seeds.
6. Provide Warmth and Light: Napa cabbage seeds germinate best in warm conditions (around 65-75°F or 18-24°C). Place the trays or pots in a warm location, such as on top of a refrigerator or near a heat vent. You can also use a heat mat designed for seed starting. If you don’t have a naturally bright spot, use a grow light. I’ve found that grow lights make a huge difference in germination rates and seedling vigor.
7. Maintain Moisture: Keep the soil consistently moist but not waterlogged. Check the soil daily and mist with water as needed.
8. Wait for Germination: Napa cabbage seeds typically germinate within 5-10 days. Be patient!
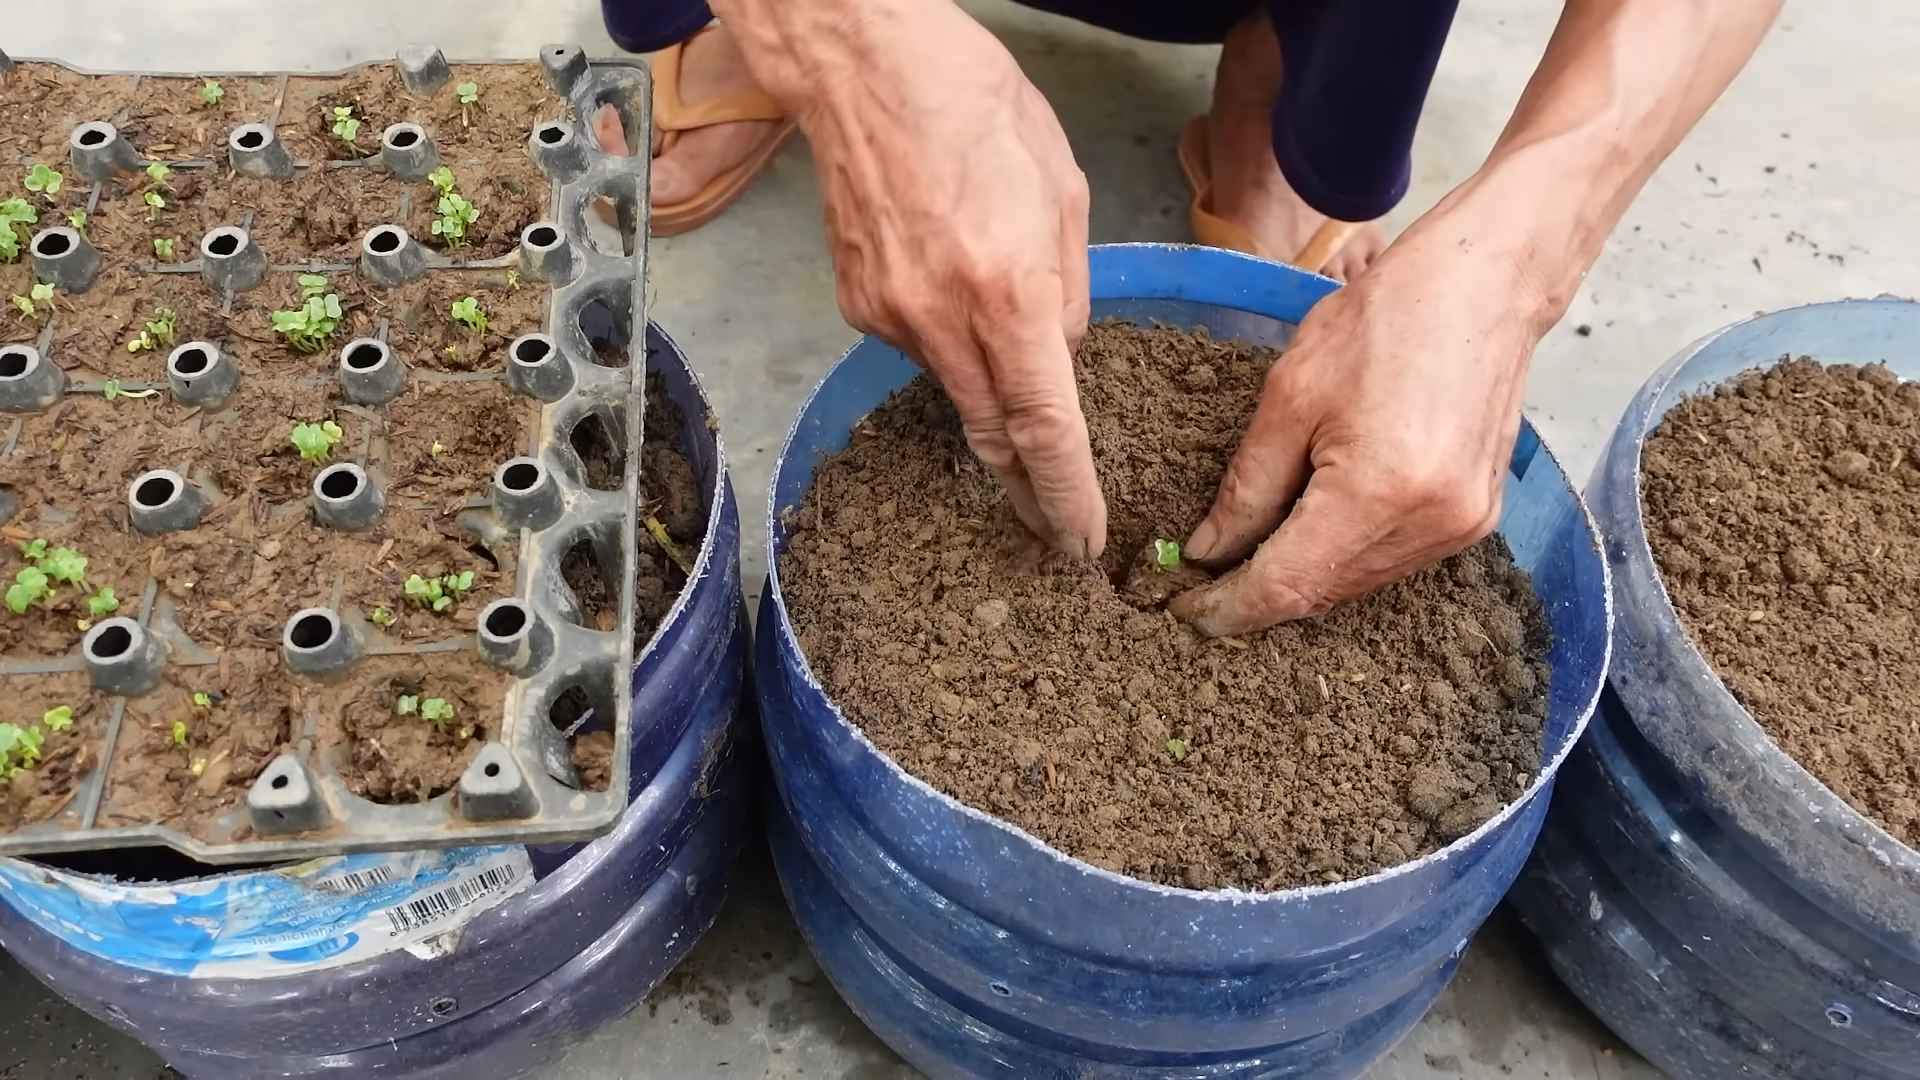
Transplanting Seedlings
Once your seedlings have developed their first set of true leaves (the leaves that look like miniature cabbage leaves, not just the initial seed leaves), it’s time to transplant them into larger containers.
1. Prepare Larger Containers: Choose pots that are at least 6-8 inches in diameter. Napa cabbage needs room for its roots to grow. Make sure the pots have drainage holes.
2. Choose a Good Potting Mix: Use a high-quality potting mix that is well-draining and rich in organic matter. I like to add some compost to my potting mix for extra nutrients.
3. Carefully Remove Seedlings: Gently loosen the soil around the seedlings in the seed starting tray or pots. Carefully lift each seedling by its leaves (not the stem) to avoid damaging the delicate roots.
4. Plant the Seedlings: Make a hole in the center of each pot large enough to accommodate the seedling’s root ball. Place the seedling in the hole and gently backfill with potting mix. Make sure the top of the root ball is level with the surface of the soil.
5. Water Thoroughly: Water the transplanted seedlings thoroughly until water drains out of the drainage holes.
6. Provide Support (Optional): If your seedlings are a bit leggy (tall and spindly), you can provide support by gently staking them with small bamboo skewers or plant markers.
Providing the Right Growing Conditions
Napa cabbage needs specific conditions to thrive indoors. Here’s what you need to keep in mind:
1. Light: Napa cabbage needs at least 6 hours of direct sunlight per day. If you don’t have a sunny window, use a grow light. I recommend using a full-spectrum LED grow light for best results. Position the light a few inches above the plants and adjust as they grow.
2. Temperature: Napa cabbage prefers cooler temperatures, ideally between 60-70°F (15-21°C). Avoid placing your plants near heat sources, such as radiators or vents.
3. Watering: Water your Napa cabbage plants regularly, keeping the soil consistently moist but not waterlogged. Check the soil moisture by sticking your finger about an inch into the soil. If it feels dry, it’s time to water.
4. Humidity: Napa cabbage prefers moderate humidity. If your indoor environment is dry, you can increase humidity by using a humidifier, placing a tray of water near the plants, or misting the leaves regularly.
5. Fertilizing: Feed your Napa cabbage plants every 2-3 weeks with a balanced liquid fertilizer. Follow the instructions on the fertilizer label. I like to use an organic fertilizer for healthier plants and produce.
6. Air Circulation: Good air circulation is important to prevent fungal diseases. Make sure your plants have plenty of space around them and consider using a small fan to circulate the air.
Dealing with Pests and Diseases
Even indoors, your Napa cabbage plants can be susceptible to pests and diseases. Here’s how to deal with them:
1. Common Pests: Aphids, cabbage worms, and spider mites are common pests that can affect Napa cabbage. Inspect your plants regularly for signs of infestation, such as small insects, webbing, or chewed leaves.
2. Pest Control: If you find pests, you can try to remove them by hand, using a strong stream of water, or applying insecticidal soap or neem oil. I prefer to use organic pest control methods whenever possible.
3. Common Diseases: Fungal diseases, such as powdery mildew and downy mildew, can also affect Napa cabbage. These diseases are often caused by high humidity and poor air circulation.
4. Disease Prevention: To prevent fungal diseases, make sure your plants have good air circulation, avoid overwatering, and remove any infected leaves promptly. You can also use a fungicide if necessary.
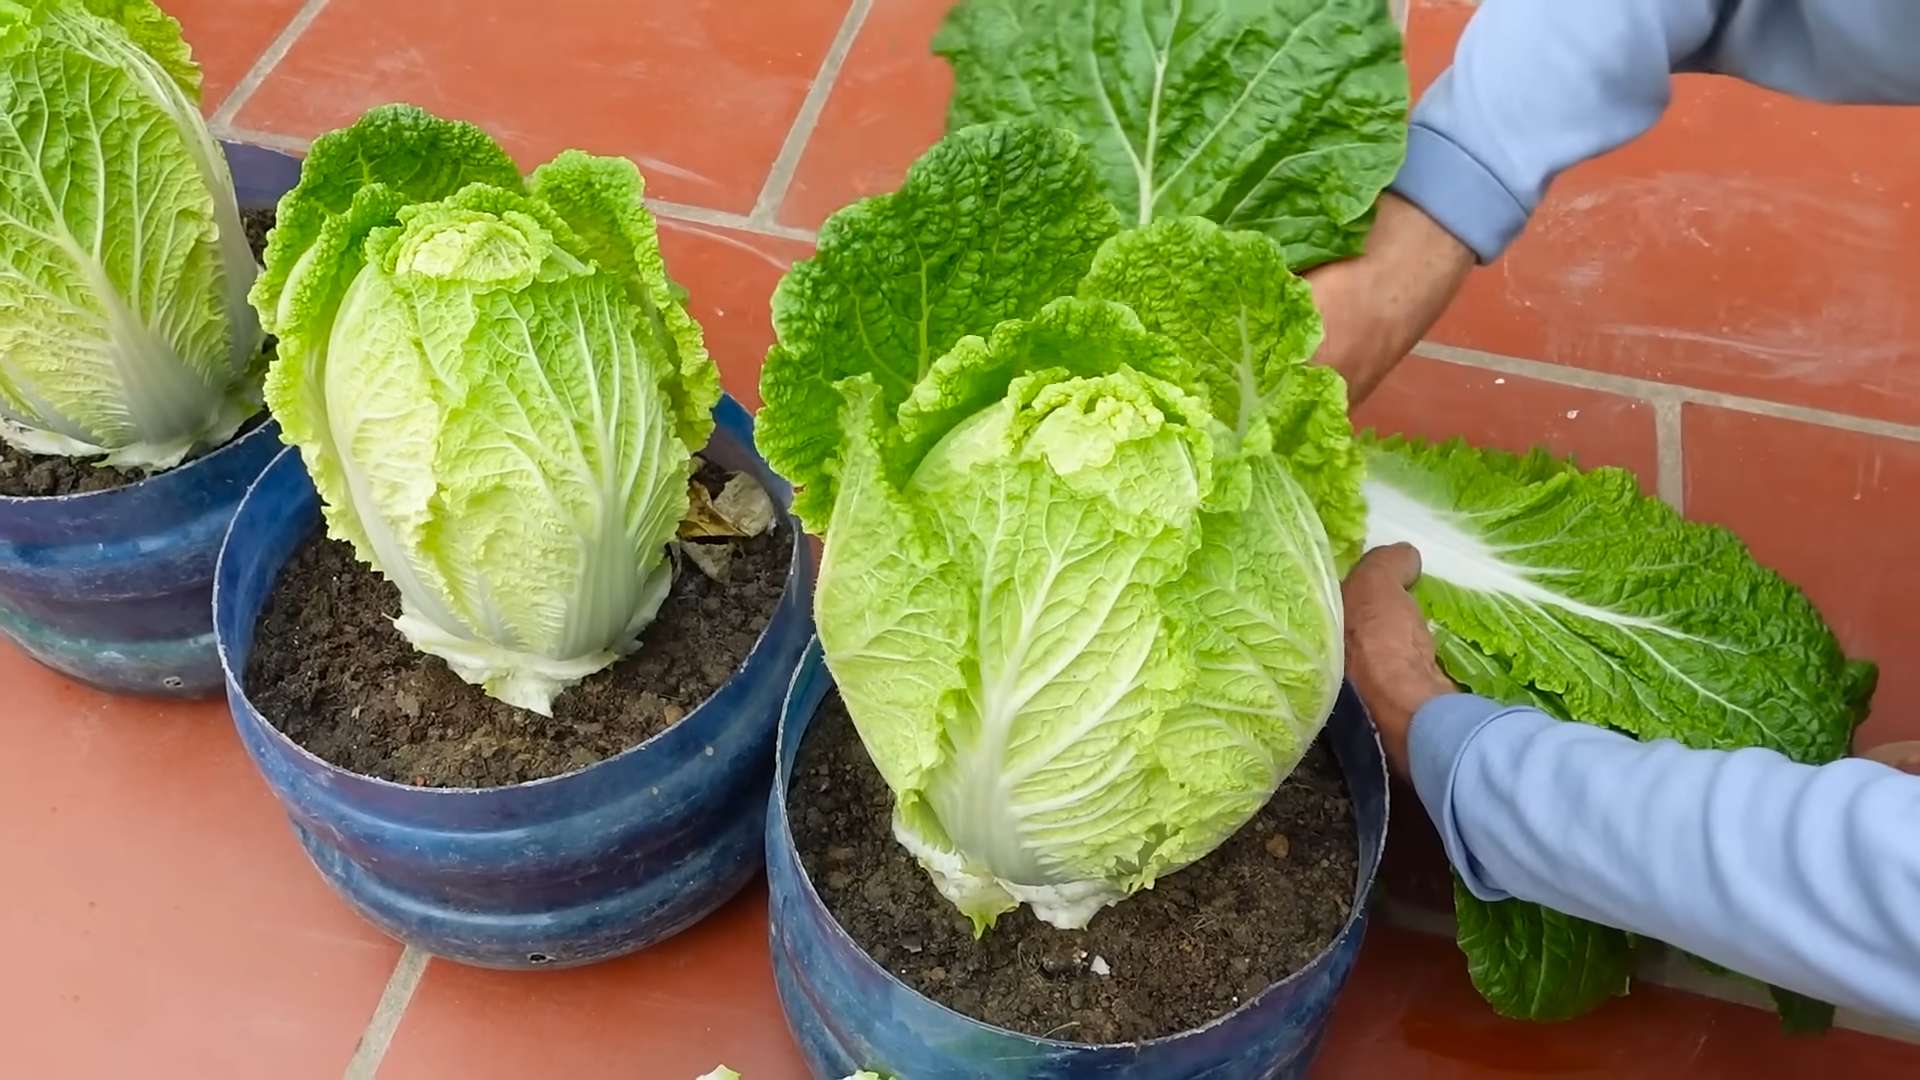
Harvesting Your Napa Cabbage
The moment you’ve been waiting for! Harvesting your homegrown Napa cabbage is incredibly rewarding.
1. Harvest Time: Napa cabbage is typically ready to harvest in 60-80 days from seed. The heads should be firm and compact.
2. Harvesting Technique: To harvest, use a sharp knife to cut the head of cabbage at the base of the plant.
3. Storage: Store your harvested Napa cabbage in the refrigerator for up to 2 weeks.
Troubleshooting Common Problems
Even with the best care, you might encounter some problems while growing Napa cabbage indoors. Here are some common issues and how to fix them:
1. Leggy Seedlings: If your seedlings are tall and spindly, they’re not getting enough light. Move them to a brighter location or use a grow light.
2. Yellowing Leaves: Yellowing leaves can be a sign of overwatering, underwatering, or nutrient deficiency. Check the soil moisture and adjust your watering accordingly. Fertilize your plants regularly with a balanced fertilizer.
3. Slow Growth: Slow growth can be caused by a variety of factors, including insufficient light, poor soil, or cool temperatures. Make sure your plants are getting enough light, use a high-quality potting mix, and keep the temperature within the ideal range.
4. Bolting: Bolting (premature flowering) can occur if the temperature is too warm or if the plants are stressed. Try to keep the temperature within the ideal range and provide consistent watering and fertilization.
Enjoying Your Homegrown Napa Cabbage
Now that you’ve successfully grown your own Napa cabbage indoors, it’s time to enjoy the fruits (or rather, vegetables) of your labor! Napa cabbage is incredibly versatile and can be used in a variety of dishes, from salads and slaws to stir-fries and soups. I personally love using it in kimchi!
Growing Napa cabbage indoors can be a fun and rewarding experience. With a little bit of care and attention, you can enjoy fresh, delicious Napa cabbage year-round. Happy gardening!
Conclusion
Growing Napa cabbage indoors might seem like a challenge, but the rewards are well worth the effort. From the crisp, tender leaves perfect for slaws and stir-fries to the satisfaction of nurturing your own food source, this DIY project offers a unique and fulfilling gardening experience. We’ve walked you through the entire process, from seed selection and germination to transplanting and ongoing care, providing you with the knowledge and confidence to successfully cultivate your own Napa cabbage crop within the comfort of your home.
This isn’t just about saving money on groceries; it’s about connecting with nature, learning new skills, and enjoying the freshest possible ingredients. Imagine the pride you’ll feel when you serve a salad featuring Napa cabbage you grew yourself! The flavor difference between store-bought and homegrown is undeniable, and you’ll appreciate the absence of pesticides and other chemicals.
But the benefits extend beyond the culinary. Indoor gardening is a fantastic stress reliever, a rewarding hobby, and a way to bring a touch of green into your living space, especially during the colder months when outdoor gardening is limited. Plus, growing your own food contributes to a more sustainable lifestyle by reducing your carbon footprint and supporting local food systems.
Don’t be afraid to experiment with different varieties of Napa cabbage. Some are more compact and better suited for indoor containers than others. Consider trying ‘Blues,’ known for its disease resistance, or ‘Optiko,’ a fast-maturing variety. You can also adjust the growing conditions to influence the flavor and texture of your cabbage. For a sweeter taste, provide slightly less nitrogen fertilizer. For a crisper texture, ensure adequate watering and good air circulation.
Ready to embark on your indoor Napa cabbage growing adventure? We encourage you to give this DIY trick a try. It’s easier than you might think, and the results are incredibly rewarding. Don’t hesitate to adapt the techniques we’ve shared to suit your specific environment and resources. Remember to monitor your plants regularly, adjust your care routine as needed, and most importantly, have fun!
We’re eager to hear about your experiences! Share your successes, challenges, and tips in the comments below. Let’s create a community of indoor Napa cabbage growers and learn from each other. Post pictures of your thriving plants, share your favorite Napa cabbage recipes, and let us know what you’ve discovered along the way. Your insights could inspire others to take the plunge and discover the joys of growing their own food indoors. So, grab your seeds, prepare your soil, and get ready to enjoy the delicious and rewarding experience of growing Napa cabbage indoors!
Frequently Asked Questions (FAQ)
What are the best Napa cabbage varieties to grow indoors?
While most Napa cabbage varieties can be grown indoors with proper care, some are better suited for container gardening due to their size and growth habits. Compact varieties like ‘Blues’ and ‘Optiko’ are excellent choices. ‘Blues’ is known for its disease resistance, making it a good option for beginners. ‘Optiko’ is a fast-maturing variety, allowing you to harvest your cabbage sooner. Other varieties to consider include ‘Minuet’ and ‘Spring A-One,’ both of which are relatively small and well-suited for indoor containers. When selecting a variety, consider factors such as disease resistance, maturity time, and size to ensure it aligns with your indoor growing conditions and preferences. Remember to check the seed packet for specific information on the variety’s growth habits and requirements.
How much light does Napa cabbage need when grown indoors?
Napa cabbage requires a significant amount of light to thrive indoors. Ideally, it needs at least 6-8 hours of direct sunlight per day. If you don’t have a sunny window that provides this much light, you’ll need to supplement with artificial grow lights. Fluorescent or LED grow lights are excellent options. Position the lights about 6-12 inches above the plants and keep them on for 12-16 hours per day. Monitor your plants closely for signs of insufficient light, such as leggy growth (long, thin stems) or pale leaves. If you notice these signs, increase the amount of light your plants are receiving. Remember that consistent and adequate light is crucial for healthy growth and the development of firm, flavorful heads of Napa cabbage.
What type of soil is best for growing Napa cabbage in containers?
Napa cabbage thrives in well-draining, nutrient-rich soil. A good potting mix for container gardening is essential. Avoid using garden soil, as it can be too heavy and may not drain properly. A mix of equal parts peat moss, perlite, and vermiculite is a good starting point. You can also add compost or well-rotted manure to the mix to provide additional nutrients. The soil should be slightly acidic to neutral, with a pH between 6.0 and 7.0. Before planting, ensure the soil is thoroughly moistened but not waterlogged. Proper soil drainage is crucial to prevent root rot, a common problem in container gardening. Consider adding a layer of gravel or pebbles to the bottom of the container to improve drainage.
How often should I water my indoor Napa cabbage plants?
Watering frequency depends on several factors, including the size of the container, the type of soil, the temperature, and the humidity. Generally, you should water your Napa cabbage plants when the top inch of soil feels dry to the touch. Water thoroughly until excess water drains out of the bottom of the container. Avoid overwatering, as this can lead to root rot. During hot, dry periods, you may need to water more frequently. During cooler, more humid periods, you may need to water less frequently. Monitor your plants closely and adjust your watering schedule accordingly. Wilting leaves can indicate either underwatering or overwatering, so check the soil moisture before watering.
What are some common pests and diseases that affect indoor Napa cabbage, and how can I control them?
While indoor gardening reduces the risk of pest and disease problems, Napa cabbage can still be susceptible to certain issues. Common pests include aphids, spider mites, and cabbage worms. Aphids can be controlled with insecticidal soap or neem oil. Spider mites thrive in dry conditions, so increasing humidity can help prevent infestations. Cabbage worms can be handpicked or controlled with Bacillus thuringiensis (Bt), a natural insecticide. Common diseases include root rot, caused by overwatering, and fungal diseases, caused by poor air circulation. To prevent root rot, ensure proper soil drainage and avoid overwatering. To prevent fungal diseases, provide good air circulation and avoid wetting the leaves when watering. If you notice signs of pests or diseases, take action promptly to prevent them from spreading.
How do I fertilize my indoor Napa cabbage plants?
Napa cabbage is a heavy feeder and requires regular fertilization to thrive. Start fertilizing your plants about two weeks after transplanting them into their final containers. Use a balanced fertilizer with an NPK ratio of 10-10-10 or 14-14-14. Follow the instructions on the fertilizer label for application rates. You can also use a liquid fertilizer diluted to half strength. Fertilize your plants every two to three weeks throughout the growing season. Avoid over-fertilizing, as this can lead to excessive foliage growth and reduced head formation. Monitor your plants closely for signs of nutrient deficiencies, such as yellowing leaves or stunted growth. Adjust your fertilization schedule accordingly.
How long does it take to grow Napa cabbage indoors?
The time it takes to grow Napa cabbage indoors depends on several factors, including the variety, the growing conditions, and your care practices. Generally, it takes about 70-85 days from seed to harvest. Some faster-maturing varieties, like ‘Optiko,’ may be ready to harvest in as little as 60 days. Start seeds indoors about 4-6 weeks before the last expected frost. Transplant seedlings into their final containers when they have developed several sets of true leaves. Provide adequate light, water, and nutrients throughout the growing season. Monitor your plants closely and adjust your care routine as needed. You’ll know your Napa cabbage is ready to harvest when the head is firm and compact.
Can I grow Napa cabbage indoors year-round?
Yes, you can grow Napa cabbage indoors year-round, provided you can provide the necessary growing conditions. This includes adequate light, temperature, and humidity. During the winter months, you may need to supplement with artificial grow lights to ensure your plants receive enough light. Maintain a consistent temperature between 60-70°F (15-21°C). Ensure good air circulation to prevent fungal diseases. With proper care, you can enjoy fresh, homegrown Napa cabbage throughout the year.
How do I harvest Napa cabbage grown indoors?
Harvest your Napa cabbage when the head is firm and compact. Use a sharp knife to cut the head from the base of the plant. Leave a few outer leaves intact to protect the cut surface. After harvesting, store your Napa cabbage in the refrigerator for up to two weeks. To extend its shelf life, wrap the head in a damp paper towel and place it in a plastic bag. You can also ferment Napa cabbage to make kimchi, a traditional Korean dish.


Leave a Comment