

Grow Mushrooms in Plastic Cans? Absolutely! I know it sounds a little unconventional, but trust me, this DIY project is a game-changer for any home gardening enthusiast looking to cultivate delicious, fresh mushrooms without breaking the bank. Forget expensive mushroom kits and complicated setups. We’re diving into a simple, sustainable, and surprisingly effective method that utilizes something you probably already have lying around: plastic cans!
Mushrooms have been revered for centuries, not just for their culinary delights but also for their medicinal properties. From ancient civilizations using them in rituals to modern-day chefs crafting gourmet dishes, mushrooms hold a special place in human history. But growing them at home? That used to seem like a daunting task. Not anymore!
In today’s world, where sustainability and self-sufficiency are becoming increasingly important, learning to grow mushrooms in plastic cans is more relevant than ever. Imagine the satisfaction of harvesting your own organic mushrooms, knowing exactly where they came from and what went into growing them. Plus, it’s a fantastic way to recycle those plastic containers and reduce waste. This DIY trick is perfect for urban dwellers with limited space, budget-conscious gardeners, or anyone simply looking for a fun and rewarding project. So, let’s get started and unlock the secrets to cultivating your own mushroom bounty!
Grow Your Own Gourmet Mushrooms in Recycled Plastic Cans!
Hey there, fellow fungi fanatics! Ever dreamed of harvesting your own delicious mushrooms right from your kitchen counter? Well, I’m here to tell you it’s totally doable, even if you don’t have a fancy lab or a green thumb the size of Texas. We’re going to use something you probably already have lying around: plastic cans! Think coffee cans, large vegetable cans, even those big powdered drink mix containers. This method is budget-friendly, space-saving, and surprisingly effective. Let’s dive in!
Choosing Your Mushroom Variety
Before we get our hands dirty, let’s talk mushrooms. Not all varieties are created equal when it comes to indoor cultivation, especially in a simple setup like this. Here are a few good options for beginners:
* Oyster Mushrooms (Pleurotus spp.): These are arguably the easiest to grow. They’re fast-growing, tolerate a wide range of conditions, and come in a rainbow of colors – blue, pink, yellow, you name it! Plus, they’re delicious sautéed, grilled, or added to soups and stir-fries.
* Shiitake Mushrooms (Lentinula edodes): A bit more challenging than oysters, but still manageable. Shiitakes have a rich, earthy flavor and are a staple in Asian cuisine. They require a bit more patience, as they take longer to fruit.
* Lion’s Mane (Hericium erinaceus): This unique-looking mushroom is gaining popularity for its cognitive benefits and seafood-like texture. It’s a bit more demanding in terms of humidity, but the reward is well worth it.
Important Note: Avoid growing wild mushrooms indoors. It’s extremely difficult to identify them accurately, and you could end up with a poisonous variety. Always purchase mushroom spawn or cultures from a reputable supplier.
Gathering Your Supplies
Okay, time to assemble our mushroom-growing arsenal! Here’s what you’ll need:
* Plastic Cans: Clean and sanitize them thoroughly. Remove any labels and sharp edges. The size will depend on how many mushrooms you want to grow. Larger cans will yield more.
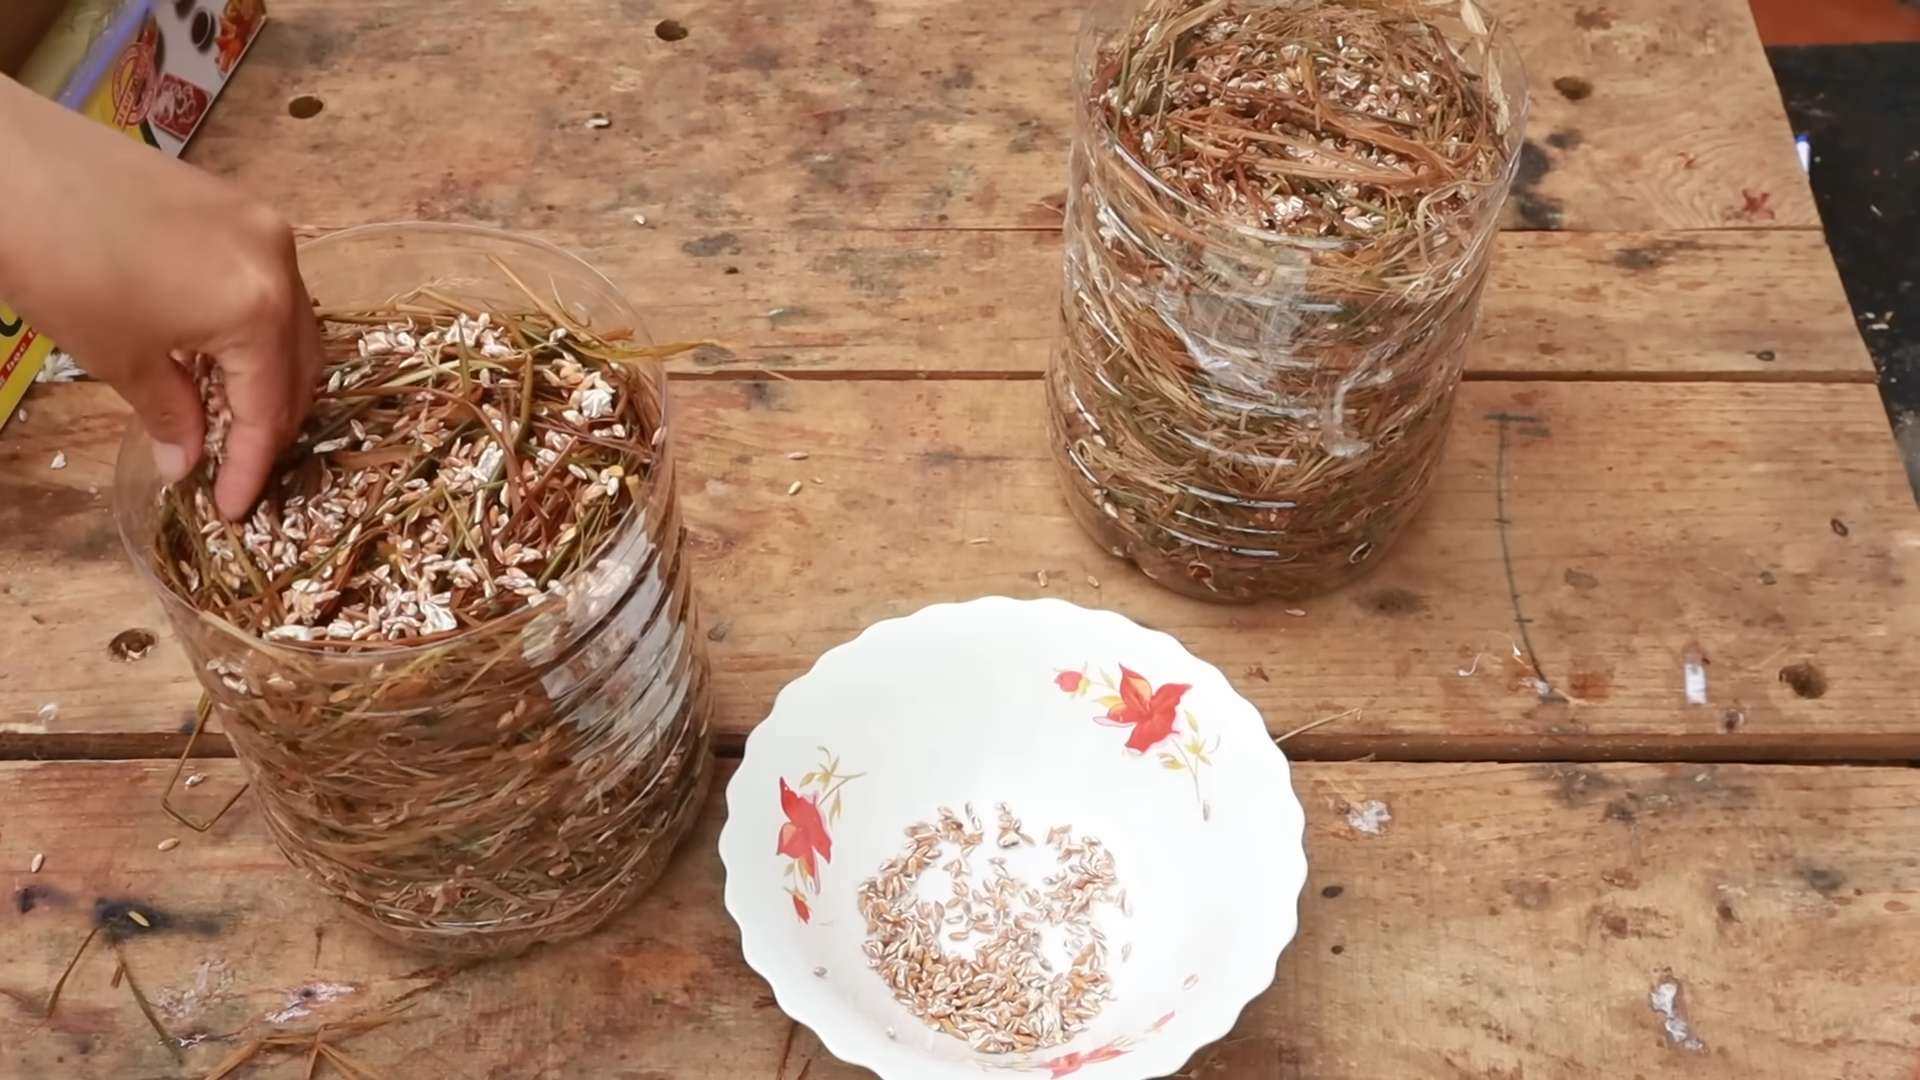
* Mushroom Spawn: This is essentially the “seed” of the mushroom. You can buy it online or from a local mushroom farm. Make sure to choose the right spawn for the mushroom variety you’ve selected. Grain spawn (rye, wheat, or millet colonized with mushroom mycelium) is a good choice for beginners.
* Substrate: This is the food source for your mushrooms. For oyster mushrooms, pasteurized straw is a great option. For shiitakes, you can use hardwood sawdust. Lion’s Mane prefers a mix of hardwood sawdust and bran.
* Pasteurization Container: A large pot or tub for pasteurizing your substrate.
* Heat Source: A stove or burner to heat the water for pasteurization.
* Thermometer: To monitor the temperature of the substrate during pasteurization.
* Spray Bottle: For misting the mushrooms to maintain humidity.
* Gloves: To keep things sanitary.
* Drill or Punch: To create ventilation holes in the cans.
* Micropore Tape: To cover the ventilation holes and prevent contamination.
* Optional: A humidity tent or plastic bag to create a humid environment.
Preparing the Substrate
This is a crucial step, as it eliminates competing organisms that could hinder mushroom growth. We’re going to pasteurize the substrate, which means heating it to a temperature that kills harmful bacteria and fungi without destroying the beneficial ones.
Pasteurizing Straw (for Oyster Mushrooms)
1. Chop the Straw: Cut the straw into small pieces, about 2-3 inches long. This will make it easier to pack into the cans and allow the mycelium to colonize it more efficiently.
2. Soak the Straw: Place the chopped straw in a large container and cover it with water. Let it soak for at least 24 hours. This will hydrate the straw and make it easier to pasteurize.
3. Heat the Water: Drain the soaked straw and transfer it to your pasteurization container. Add enough water to cover the straw completely.
4. Pasteurize: Heat the water to 160-180°F (71-82°C) and maintain that temperature for 60-90 minutes. Use a thermometer to monitor the temperature closely. Stir the straw occasionally to ensure even heating.
5. Drain and Cool: Carefully drain the hot water from the straw. Let the straw cool down to room temperature before using it. It should be moist but not dripping wet.
Pasteurizing Hardwood Sawdust (for Shiitake or Lion’s Mane)
1. Mix the Sawdust: If you’re using a mix of sawdust and bran, combine them thoroughly. A ratio of 80% sawdust to 20% bran is a good starting point.
2. Hydrate the Sawdust: Add water to the sawdust mixture until it’s moist but not dripping wet. You should be able to squeeze a handful of sawdust and have a few drops of water come out.
3. Pack into Jars or Bags: Pack the moistened sawdust into heat-resistant jars or bags. Leave some headspace at the top.
4. Sterilize (Preferred) or Pasteurize: For best results, sterilize the sawdust in a pressure cooker at 15 PSI for 90 minutes. This will eliminate all competing organisms. If you don’t have a pressure cooker, you can pasteurize the sawdust by steaming it for 2-3 hours.
5. Cool Down: Let the sterilized or pasteurized sawdust cool down completely before using it.
Inoculating the Cans
Now for the fun part – introducing the mushroom spawn to the substrate! This is where the magic happens.
1. Clean and Sanitize: Before you start, make sure your hands are clean and wear gloves. Sanitize your work surface and the inside of the plastic cans with rubbing alcohol.
2. Layer the Substrate and Spawn: Start by placing a layer of pasteurized substrate at the bottom of the can. Then, sprinkle a layer of mushroom spawn on top. Repeat this process, layering substrate and spawn, until the can is almost full. Leave about an inch of space at the top.
3. Top Layer: Finish with a final layer of substrate on top.
4. Ventilation Holes: Drill or punch several small ventilation holes (about ¼ inch in diameter) around the sides of the can, near the top. These holes will allow for air exchange, which is essential for mushroom growth.
5. Cover the Holes: Cover the ventilation holes with micropore tape. This will prevent contamination while still allowing air to flow.
Incubation
This is the period where the mushroom mycelium colonizes the substrate. It’s like planting seeds and waiting for them to sprout.
1. Find a Suitable Location: Place the inoculated cans in a dark, humid, and well-ventilated area. A basement, closet, or spare room works well. The ideal temperature for incubation depends on the mushroom variety, but generally, 65-75°F (18-24°C) is a good range.
2. Maintain Humidity: Keep the humidity high by misting the cans regularly with a spray bottle. You can also place the cans inside a humidity tent or a large plastic bag to trap moisture. Make sure to leave the bag slightly open for ventilation.
3. Monitor Colonization: Check the cans regularly for signs of colonization. You should see white, fuzzy mycelium spreading throughout the substrate. This process can take anywhere from a few days to a few weeks, depending on the mushroom variety and the environmental conditions.
4. Be Patient: Don’t disturb the cans too much during incubation. Let the mycelium do its thing.
Fruiting
Once the substrate is fully colonized, it’s time to trigger fruiting – the formation of mushrooms!
1. Increase Light: Move the cans to a location with more light. Indirect sunlight or artificial light is fine. Light is a trigger for fruiting in many mushroom species.
2. Lower Temperature (Optional): For some mushroom varieties, like shiitakes, lowering the temperature can help induce fruiting. Try moving the cans to a slightly cooler location.
3. Increase Humidity: Maintain high humidity by misting the cans frequently. You may need to mist several times a day, especially in dry environments.
4. Ventilation: Ensure good ventilation to prevent the buildup of carbon dioxide.
5. Watch for Pins: After a few days or weeks, you should start to see small mushroom “pins” forming on the surface of the substrate. These are the baby mushrooms!
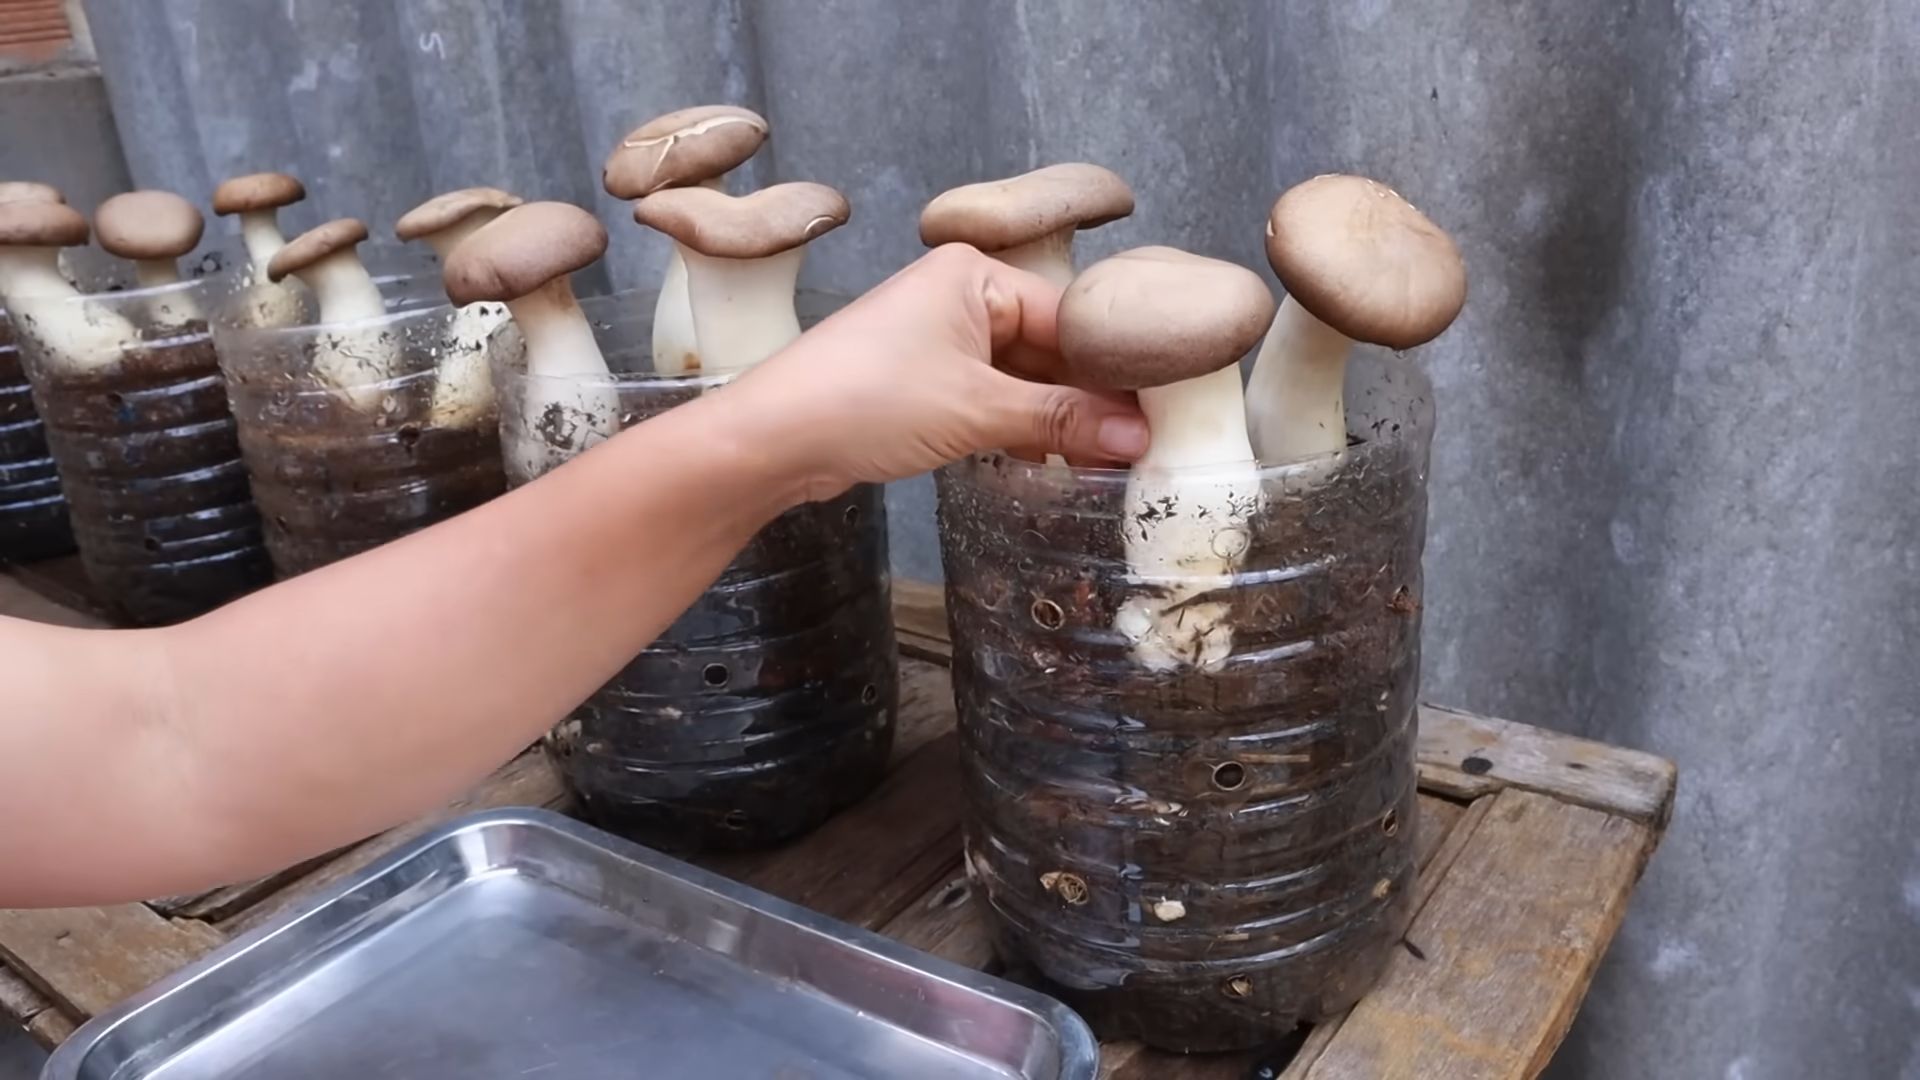
6. Harvest: Harvest the mushrooms when they reach their mature size. The exact timing depends on the mushroom variety. For oyster mushrooms
Conclusion
So, there you have it! Growing mushrooms in plastic cans might sound unconventional, but as we’ve explored, it’s a surprisingly effective, space-saving, and budget-friendly way to cultivate your own delicious fungi at home. This DIY mushroom growing method offers a fantastic opportunity to connect with nature, learn about the fascinating life cycle of mushrooms, and enjoy the unparalleled satisfaction of harvesting your own food.
Why is this a must-try? Because it democratizes mushroom cultivation. You don’t need a fancy greenhouse, specialized equipment, or a ton of space. Plastic cans, readily available and often recycled, become the perfect miniature ecosystems for your chosen mushroom species. It’s a project that’s accessible to beginners, yet offers enough complexity to keep seasoned gardeners engaged. Plus, the visual appeal of mushrooms sprouting from repurposed containers adds a unique charm to any garden or indoor growing setup.
But the real magic lies in the flavor. Freshly harvested, homegrown mushrooms boast a depth of flavor that you simply can’t find in store-bought varieties. Imagine sautéing your own oyster mushrooms for a creamy pasta sauce, adding shiitakes to a hearty stir-fry, or grilling portobellos for a delicious vegetarian burger. The possibilities are endless!
Ready to take your mushroom growing to the next level? Consider experimenting with different substrates. While we’ve focused on straw and sawdust, you can also try coffee grounds, cardboard, or even a combination of materials. Each substrate will impart a slightly different flavor and texture to your mushrooms, allowing you to fine-tune your growing process to achieve your desired results.
Another exciting variation is to explore different mushroom species. Oyster mushrooms are a great starting point due to their ease of cultivation and rapid growth, but don’t be afraid to branch out and try shiitakes, lion’s mane, or even wine cap mushrooms. Just be sure to research the specific growing requirements of each species to ensure success.
And finally, don’t forget the importance of environmental control. Maintaining the right temperature and humidity levels is crucial for optimal mushroom growth. Consider using a humidity tent or a small humidifier to create a more favorable environment, especially in drier climates.
We wholeheartedly encourage you to embark on this rewarding journey of growing mushrooms in plastic cans. It’s a fun, educational, and ultimately delicious experience that will transform the way you think about food. Once you’ve harvested your first flush of homegrown goodness, we’d love to hear about your experience! Share your photos, tips, and tricks in the comments below. Let’s build a community of DIY mushroom growers and inspire others to embrace the magic of fungi! This method of growing mushrooms in plastic cans is a game changer.
Frequently Asked Questions (FAQ)
What type of plastic cans are best for growing mushrooms?
Ideally, you want to use food-grade plastic cans that are clean and free of any harmful chemicals. Look for cans labeled with the recycling symbol and a number indicating the type of plastic. Numbers 1, 2, 4, and 5 are generally considered safe for food contact. Avoid using cans that have contained harsh chemicals or pesticides. Thoroughly wash and sanitize the cans before use to prevent contamination. The size of the can will depend on the type of mushroom you’re growing and the amount of substrate you plan to use. Larger cans will generally allow for larger yields.
How do I sterilize the substrate to prevent contamination?
Sterilization is crucial to eliminate competing organisms that can hinder mushroom growth. There are several methods you can use, depending on the type of substrate. For straw, you can pasteurize it by soaking it in hot water (around 160-180°F) for 1-2 hours. For sawdust, you can sterilize it in a pressure cooker at 15 PSI for 90 minutes. Alternatively, you can use a steam sterilizer or even a microwave (although this is less effective for larger quantities). Ensure the substrate is properly cooled before inoculating it with mushroom spawn.
Where should I place the plastic cans while the mushrooms are growing?
The ideal location will depend on the mushroom species you’re growing, but generally, you want a cool, dark, and humid environment. A basement, garage, or even a closet can work well. Avoid direct sunlight, as it can dry out the substrate and inhibit mushroom growth. Maintain a temperature range that is suitable for your chosen mushroom species (usually between 60-75°F). Use a humidity tent or humidifier to maintain a humidity level of around 80-90%. Good air circulation is also important to prevent the buildup of carbon dioxide.
How long does it take for mushrooms to grow in plastic cans?
The time it takes for mushrooms to grow will vary depending on the species, the substrate, and the environmental conditions. Oyster mushrooms are typically the fastest growing, often fruiting within 1-2 weeks after inoculation. Shiitakes can take several weeks or even months to fruit. Be patient and monitor the cans regularly for signs of growth. Once you see pins (tiny mushroom formations), it usually takes a few days for them to mature into full-sized mushrooms.
How do I harvest the mushrooms?
Harvest the mushrooms when the caps are fully developed but before they start to release spores. Gently twist or cut the mushrooms off at the base of the stem. Avoid pulling them out, as this can damage the substrate and prevent future flushes. After harvesting, you can often get multiple flushes of mushrooms from the same can. Simply rehydrate the substrate by misting it with water and maintain the appropriate environmental conditions.
What if my mushrooms don’t grow?
There are several reasons why your mushrooms might not be growing. The most common causes are contamination, improper environmental conditions, and poor-quality spawn. Ensure you sterilize the substrate properly and maintain the correct temperature and humidity levels. Use high-quality spawn from a reputable source. If you suspect contamination, you may need to discard the affected can and start over.
Can I reuse the plastic cans after harvesting the mushrooms?
Yes, you can reuse the plastic cans, but it’s important to clean and sanitize them thoroughly before using them again. Wash them with soap and water, and then disinfect them with a bleach solution (1 part bleach to 10 parts water). Rinse them well and allow them to air dry completely before using them for another batch of mushrooms.
What can I do with the spent substrate after harvesting all the mushrooms?
The spent substrate is a valuable resource that can be used as compost in your garden. It’s rich in nutrients and organic matter, which can improve soil fertility and water retention. You can also use it as a mulch around plants. Alternatively, you can add it to your compost pile.
Leave a Comment