

Grow Daikon Radish at Home – sounds intimidating, right? Trust me, it’s not! Forget those supermarket prices and bland, imported veggies. I’m here to show you how incredibly rewarding (and easy!) it is to cultivate your own crisp, flavorful daikon radishes right in your backyard, or even in containers on your balcony.
Daikon radishes have a rich history, deeply rooted in Asian cuisine and traditional medicine for centuries. From Japan to China, these versatile vegetables have been prized for their unique flavor, digestive benefits, and impressive size. Imagine, you can bring a piece of that history to your own table!
Why should you bother learning to grow daikon radish at home? Well, for starters, the taste is unparalleled. Freshly harvested daikon has a delightful crispness and a subtle sweetness that you simply can’t find in store-bought varieties. Plus, you’ll know exactly what went into growing them – no harmful pesticides or questionable farming practices. But more importantly, growing your own food is incredibly empowering and therapeutic. It’s a chance to connect with nature, get your hands dirty, and enjoy the satisfaction of nurturing something from seed to harvest. So, let’s dive in and unlock the secrets to successfully growing these amazing radishes!
Growing Daikon Radish at Home: A DIY Guide
Hey there, fellow gardening enthusiasts! Ever wanted to try growing your own daikon radish? It’s surprisingly easy and rewarding, and nothing beats the fresh, crisp taste of homegrown veggies. Daikon radishes are those long, white radishes you often see in Asian cuisine. They’re incredibly versatile – you can eat them raw in salads, pickled, stir-fried, or even grated into soups. Plus, they’re packed with nutrients!
This guide will walk you through every step of the process, from choosing the right seeds to harvesting your bounty. Let’s get our hands dirty!
Choosing the Right Daikon Variety
First things first, let’s talk about daikon varieties. While they all share that characteristic long, white shape, there are subtle differences in size, taste, and growing time. Here are a few popular options:
* ‘Minowase’: This is a classic, reliable variety that produces long, slender radishes. It’s known for its mild flavor and good storage capabilities.
* ‘April Cross’: A fast-maturing variety, perfect if you’re eager to harvest quickly. It’s slightly shorter and thicker than ‘Minowase’.
* ‘Miyashige’: Another popular choice, known for its excellent flavor and resistance to bolting (going to seed prematurely).
* ‘Watermelon Radish’: Okay, this isn’t technically a daikon, but it’s often grouped with them due to its similar growing requirements. It has a beautiful pink interior and a slightly peppery flavor.
I personally love ‘Minowase’ for its consistent performance and mild taste, but feel free to experiment and find your favorite!
Preparing the Soil: The Foundation for Success
Daikon radishes need loose, well-drained soil to thrive. Their long roots need room to grow without encountering resistance. Compacted soil will result in stunted, misshapen radishes.
Here’s how to prepare your soil:
1. Choose a Sunny Location: Daikon radishes need at least 6 hours of sunlight per day.
2. Test Your Soil: A soil test will tell you the pH level and nutrient content of your soil. Daikon radishes prefer a slightly acidic to neutral pH (6.0-7.0). You can purchase a soil testing kit at most garden centers or send a sample to your local agricultural extension office.
3. Amend the Soil: Based on your soil test results, amend the soil accordingly.
* For heavy clay soil: Add plenty of organic matter, such as compost, well-rotted manure, or peat moss. This will improve drainage and aeration. I usually add a generous layer of compost, about 2-3 inches thick, and till it into the soil.
* For sandy soil: Add organic matter to help retain moisture and nutrients.
* If your soil is too acidic: Add lime to raise the pH.
* If your soil is too alkaline: Add sulfur to lower the pH.
4. Till the Soil: Till the soil to a depth of at least 12 inches. This will loosen the soil and make it easier for the daikon roots to penetrate. Remove any rocks, roots, or other debris.
5. Create Raised Beds (Optional): Raised beds can improve drainage and soil warming, especially in areas with heavy clay soil or cool climates.
Planting Daikon Radish Seeds: Timing is Key
Timing is crucial for growing daikon radishes. They’re cool-season crops, meaning they prefer cooler temperatures and shorter days. Planting them at the wrong time can lead to bolting or poor root development.
Here’s the planting schedule:
* For a fall harvest: Sow seeds in late summer (July-August) in most regions. This allows the radishes to mature during the cooler fall months.
* For a spring harvest: Sow seeds in early spring (March-April) as soon as the soil can be worked. Be aware that spring-planted daikon radishes are more likely to bolt if the weather gets too hot.
Here’s how to plant the seeds:
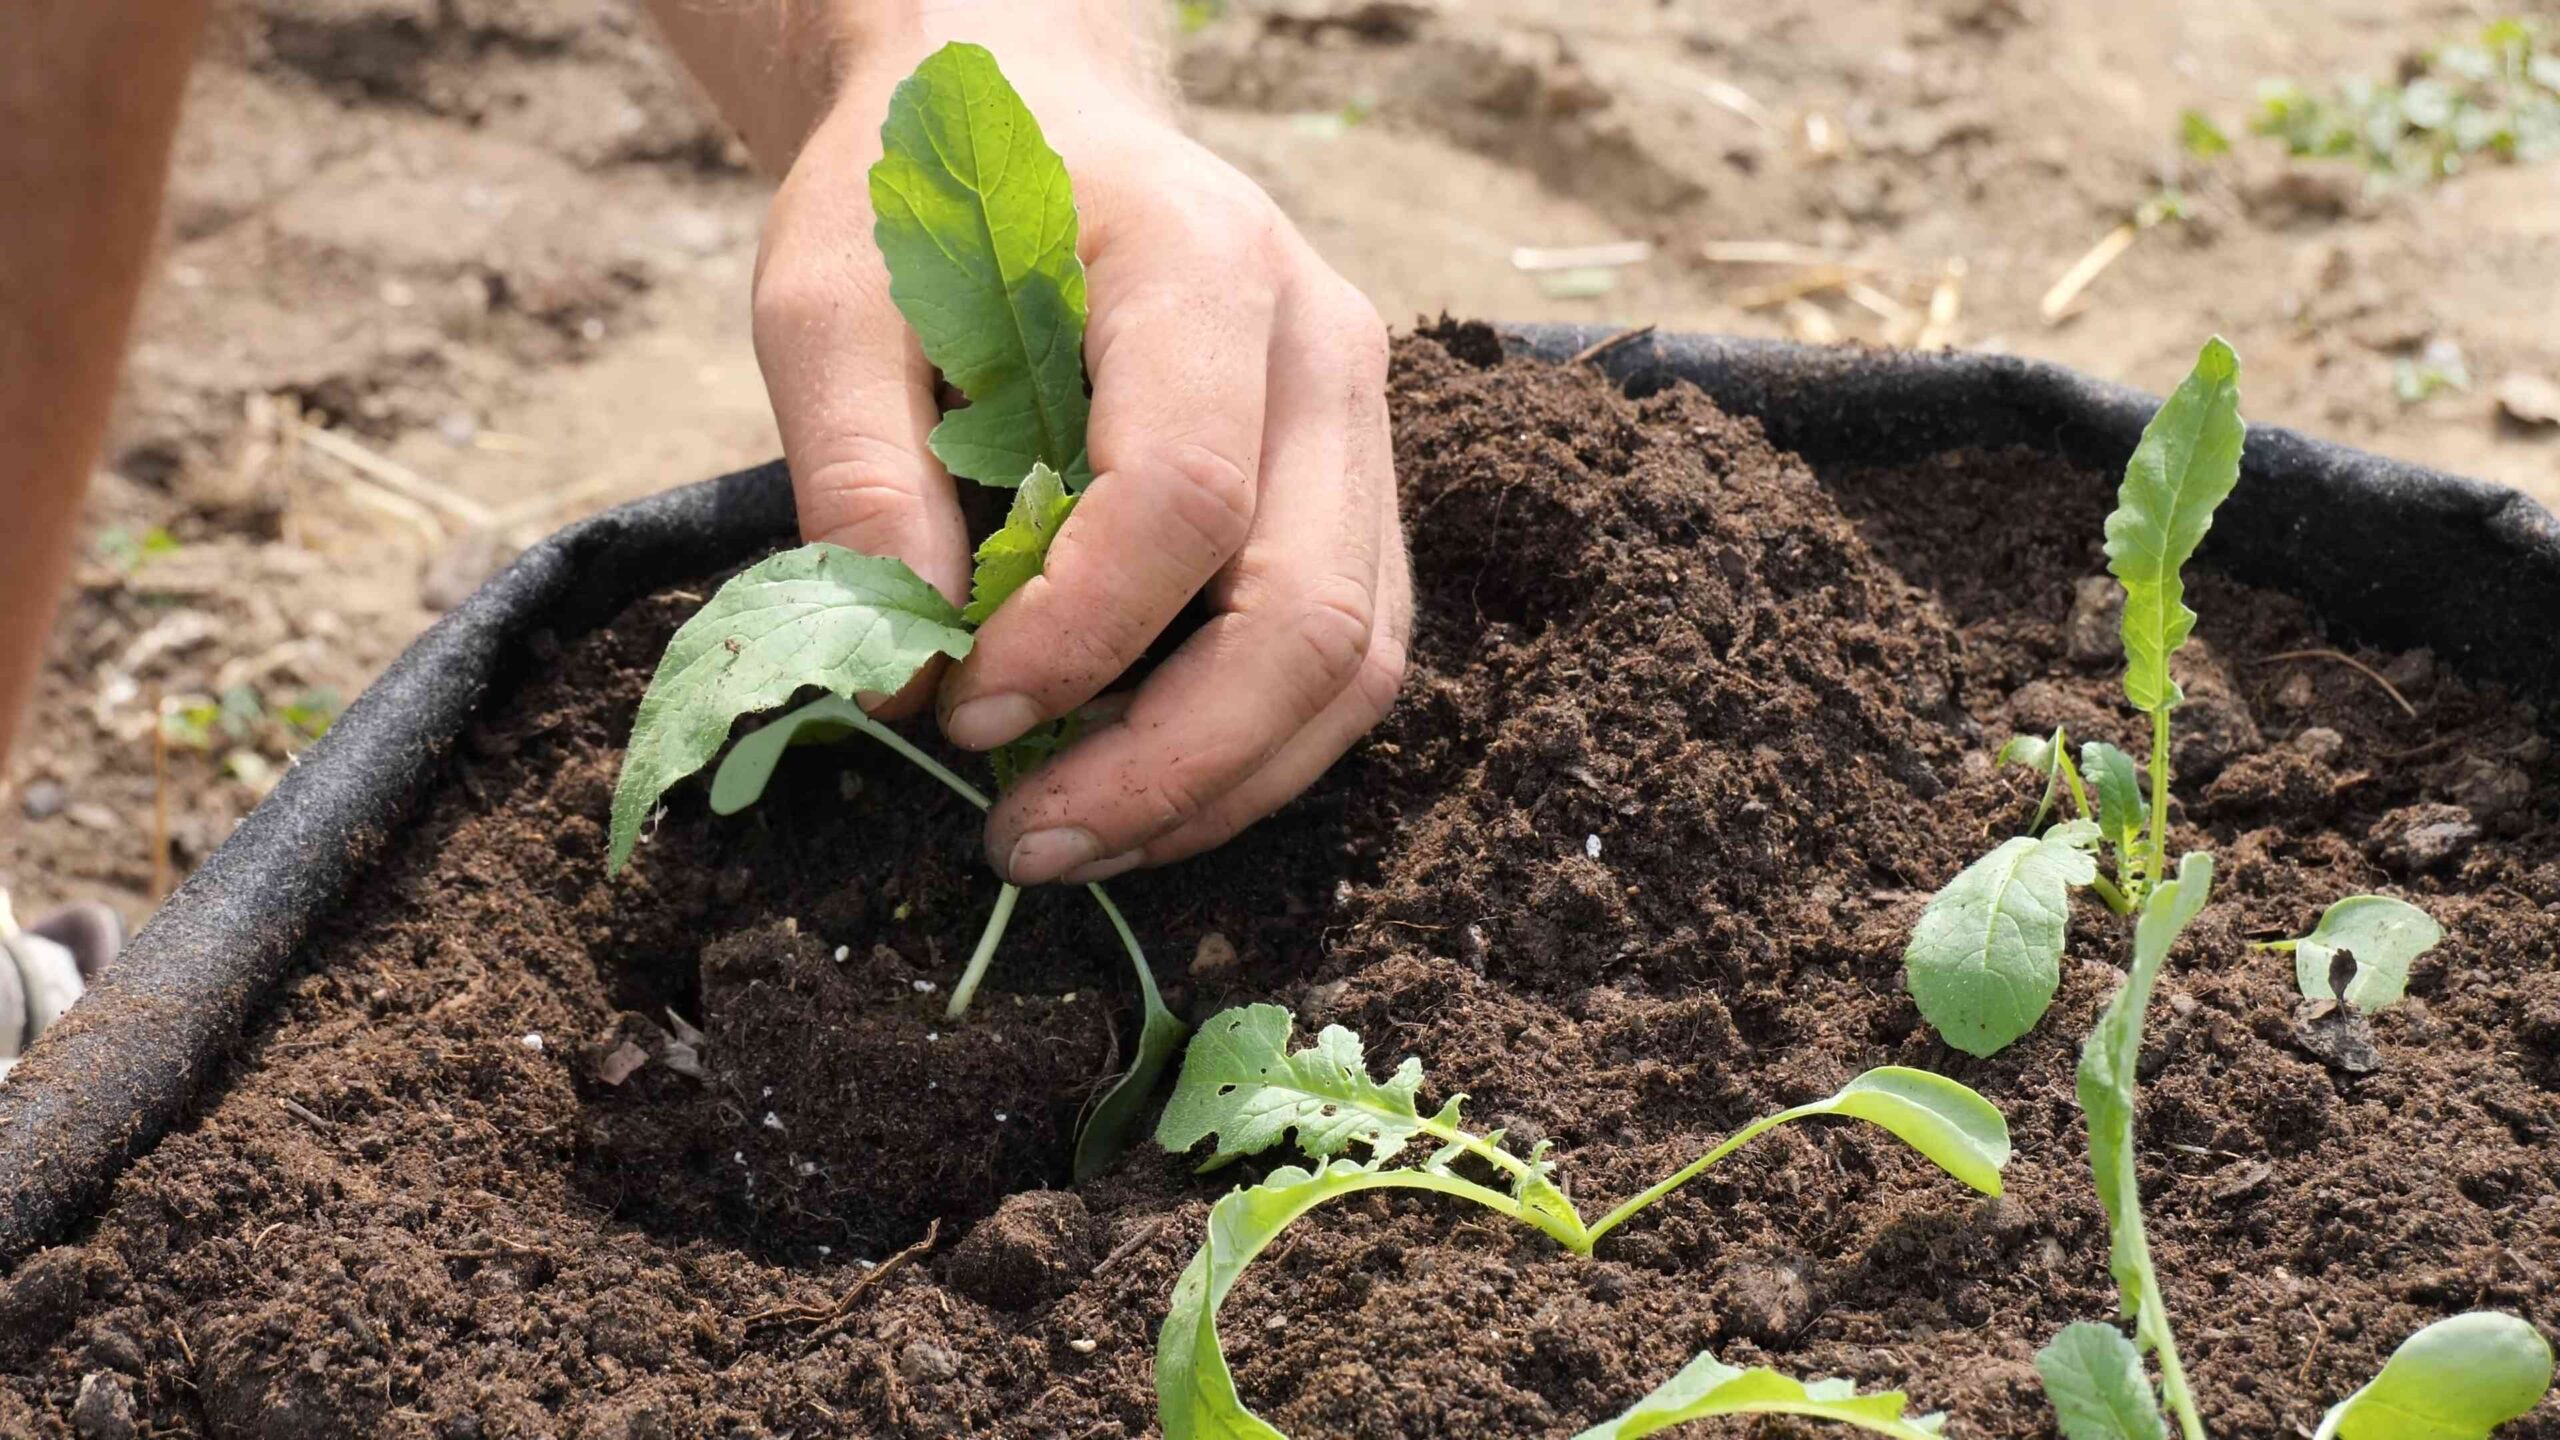
1. Sow Seeds Directly: Daikon radishes don’t transplant well, so it’s best to sow the seeds directly into the garden.
2. Create Furrows: Make shallow furrows in the soil, about ½ inch deep and 2-3 inches apart.
3. Sow Seeds Sparsely: Sow the seeds sparsely in the furrows, about 1 inch apart. This will prevent overcrowding and allow the radishes to develop properly.
4. Cover the Seeds: Gently cover the seeds with soil and water thoroughly.
5. Label Your Rows: Don’t forget to label your rows with the variety of daikon radish you’re growing and the date you planted them. This will help you keep track of your progress.
Caring for Your Daikon Radishes: Watering, Thinning, and Weeding
Once your daikon radish seeds have sprouted, it’s important to provide them with proper care to ensure a healthy harvest.
1. Watering: Daikon radishes need consistent moisture to thrive. Water deeply and regularly, especially during dry periods. Aim for about 1 inch of water per week. Avoid overwatering, as this can lead to root rot. I usually check the soil moisture by sticking my finger about an inch deep. If it feels dry, it’s time to water.
2. Thinning: Once the seedlings are a few inches tall, thin them to about 4-6 inches apart. This will give the remaining radishes enough space to grow to their full size. Don’t just pull the extra seedlings out; gently snip them off at the soil line to avoid disturbing the roots of the remaining plants. You can even eat the thinned seedlings in salads!
3. Weeding: Keep the garden bed free of weeds. Weeds compete with the daikon radishes for water, nutrients, and sunlight. Hand-pull weeds regularly or use a hoe to cultivate the soil. Be careful not to damage the daikon radish roots when weeding.
4. Fertilizing (Optional): If your soil is poor, you can fertilize your daikon radishes with a balanced fertilizer. Follow the instructions on the fertilizer package. I prefer to use organic fertilizers, such as compost tea or fish emulsion.
5. Pest Control: Daikon radishes are generally pest-resistant, but they can be susceptible to flea beetles and aphids.
* Flea Beetles: These tiny beetles can chew small holes in the leaves. Cover your plants with row covers to prevent flea beetles from reaching them. You can also spray the plants with insecticidal soap.
* Aphids: These small, sap-sucking insects can weaken the plants. Spray the plants with a strong stream of water to dislodge the aphids. You can also use insecticidal soap or neem oil.
Harvesting Daikon Radishes: The Moment of Truth
The time to harvest your daikon radishes depends on the variety you’re growing and the growing conditions. Generally, daikon radishes are ready to harvest in 50-70 days after planting.
Here’s how to tell when your daikon radishes are ready to harvest:
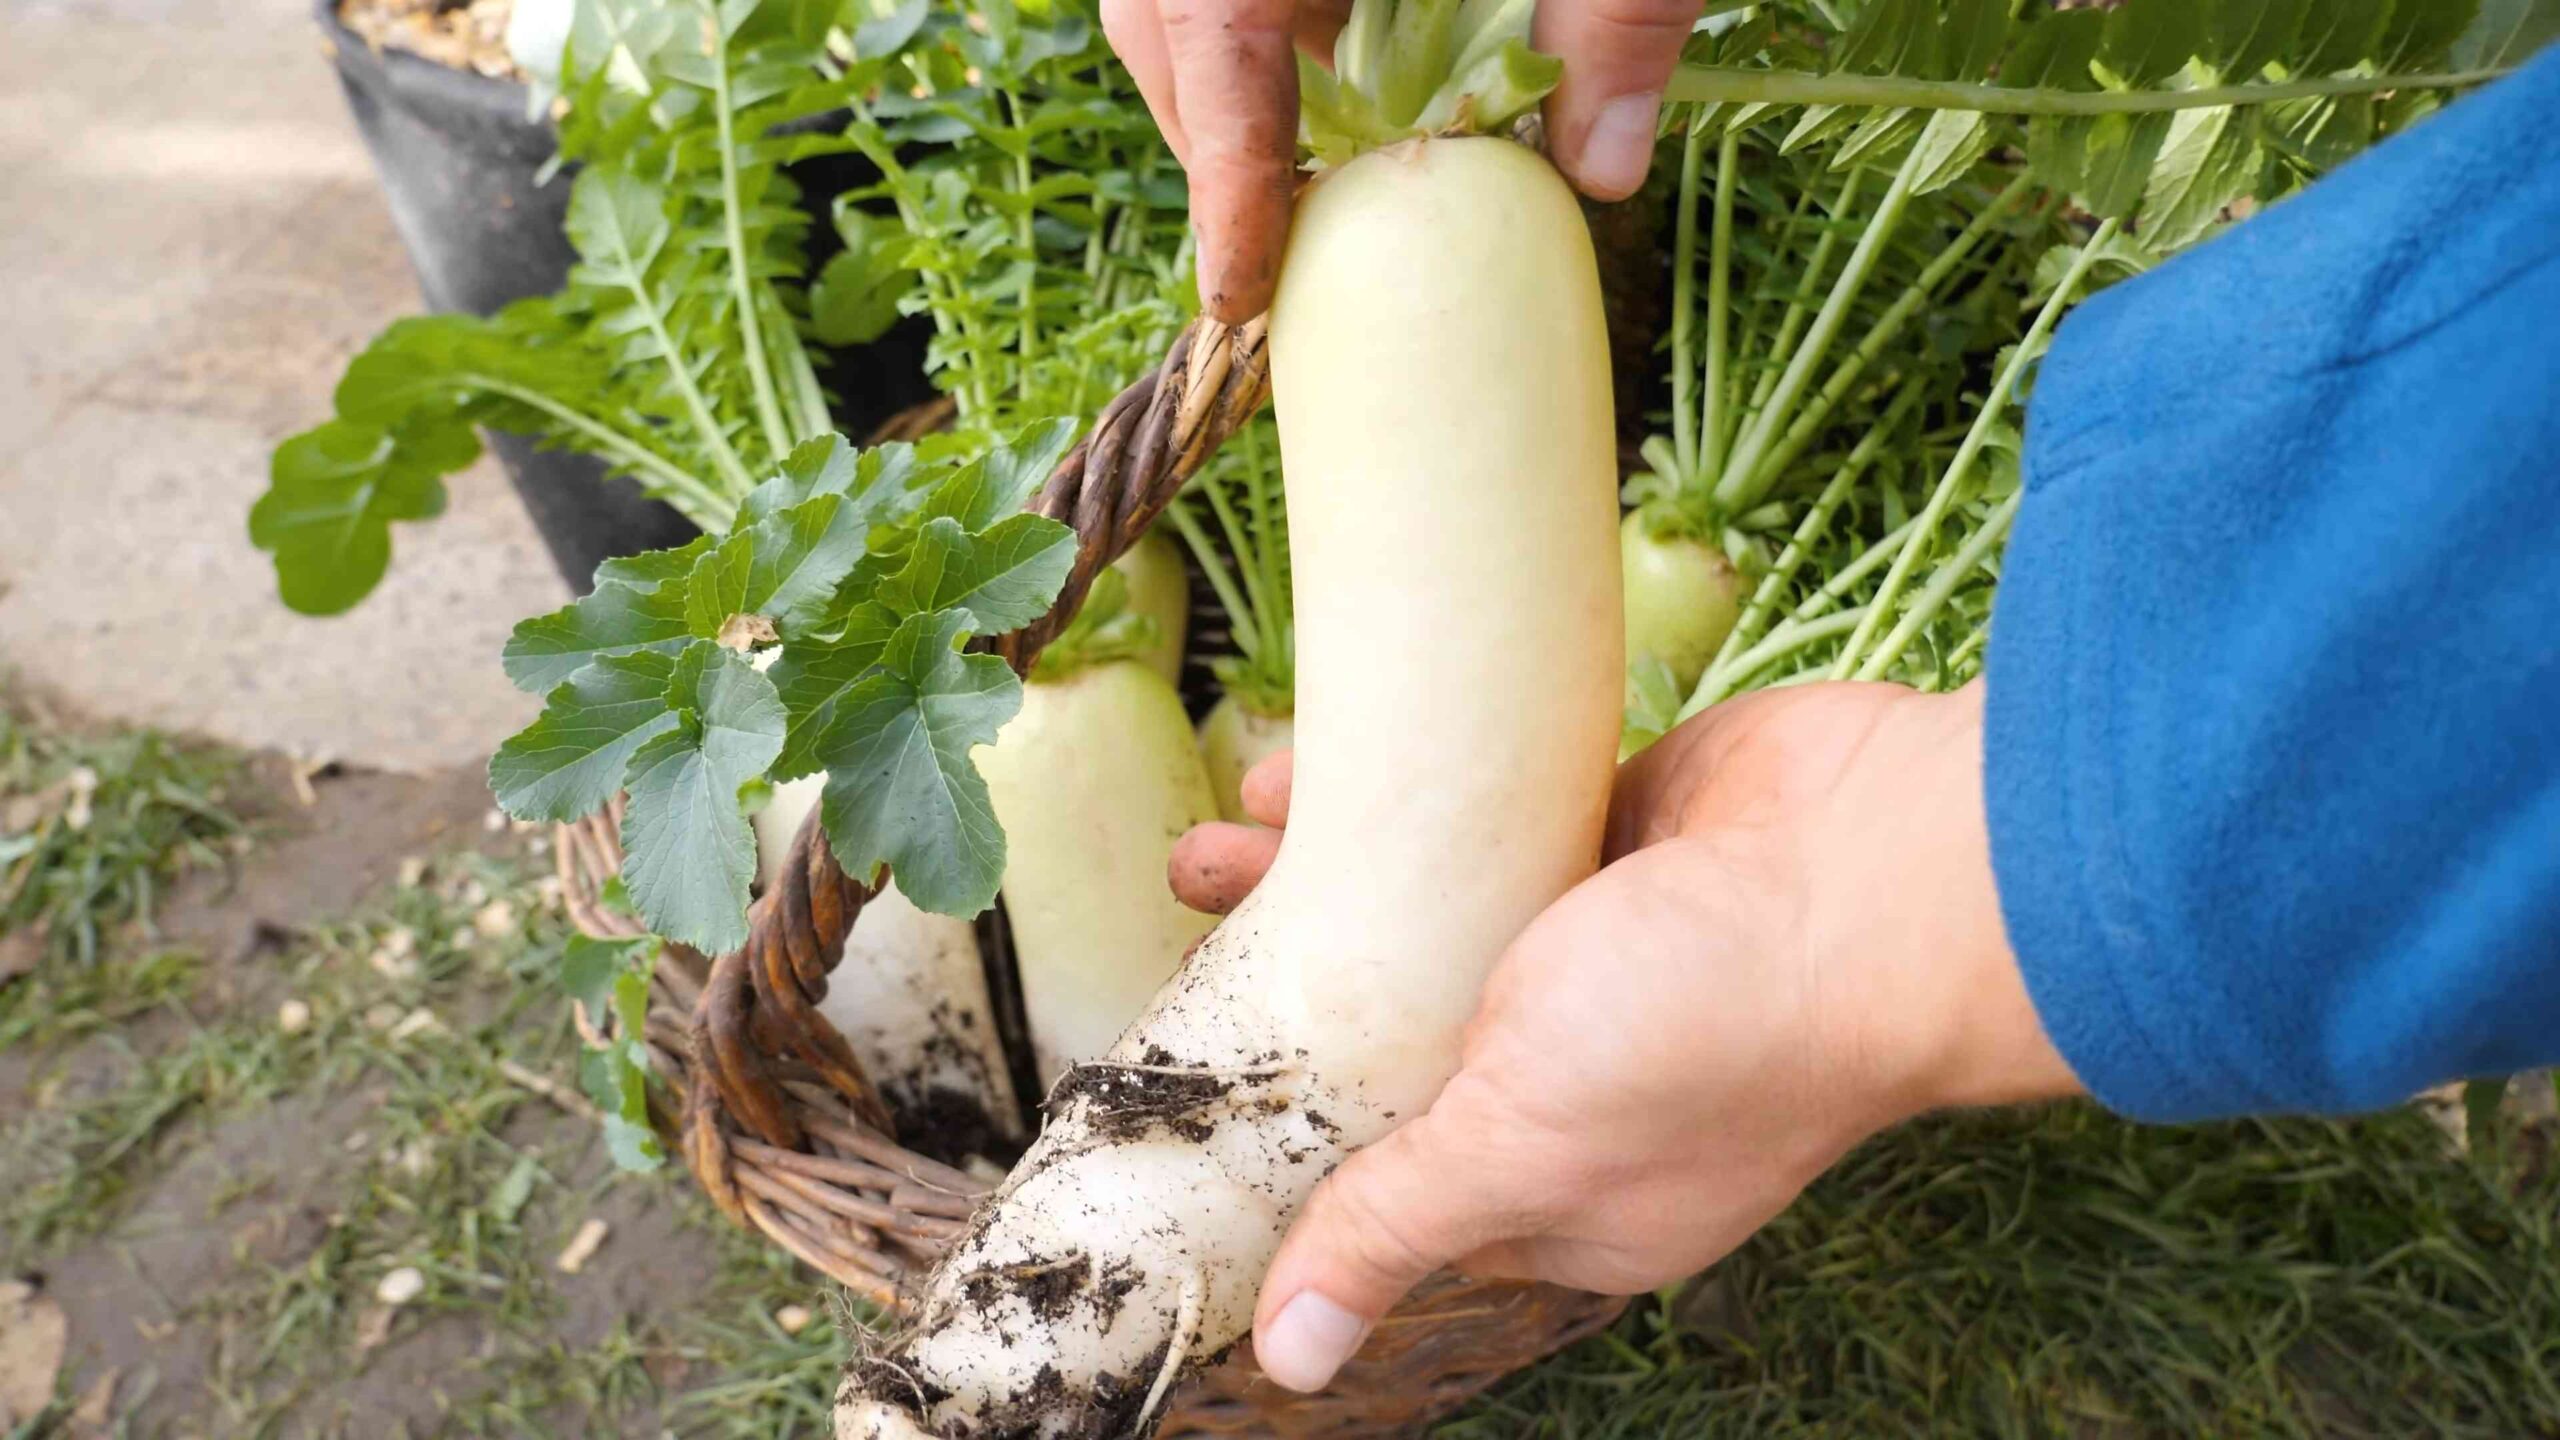
* Check the Size: The radishes should be the size specified for the variety you’re growing. For example, ‘Minowase’ radishes are typically 12-18 inches long.
* Check the Top: The top of the radish should be visible above the soil line.
* Test One: Gently pull up one radish to check its size and shape. If it’s ready, the rest of the radishes should be ready too.
Here’s how to harvest your daikon radishes:
1. Loosen the Soil: Use a garden fork or shovel to loosen the soil around the radish.
2. Pull Gently: Grasp the radish near the top and gently pull it out of the ground.
3. Clean the Radish: Brush off any excess soil.
4. Cut Off the Greens: Cut off the greens, leaving about 1-2 inches of stem. You can eat the greens in salads or stir-fries.
5. Store the Radishes: Store the radishes in the refrigerator in a plastic bag or container. They should keep for several weeks.
Enjoying Your Homegrown Daikon Radishes: Culinary Delights
Now for the best part – enjoying the fruits (or rather, roots!) of your labor. Daikon radishes are incredibly versatile in the kitchen.
Here are a few ideas:
* Raw: Slice or grate daikon radishes into salads for a crisp, refreshing flavor.
* Pickled: Pickle daikon radishes for a tangy, crunchy condiment.
* Stir-Fried: Add daikon radishes to stir-fries for a mild, slightly sweet
Conclusion
So, there you have it! Growing Daikon Radish at home is not only achievable, but it’s also incredibly rewarding. From the crisp, peppery bite in your salads to the satisfying crunch in your stir-fries, the flavor of homegrown Daikon is simply unmatched. Forget the bland, often woody radishes you find at the grocery store; with a little effort, you can cultivate vibrant, flavorful Daikon right in your own backyard or even in containers on your balcony.
This isn’t just about saving a few dollars; it’s about connecting with your food, understanding its journey from seed to table, and enjoying the unparalleled freshness that only homegrown produce can offer. Plus, the process itself is surprisingly therapeutic. There’s something deeply satisfying about nurturing a plant from a tiny seed to a mature, edible vegetable.
But the benefits don’t stop there. Growing your own Daikon Radish allows you to control every aspect of its cultivation, ensuring that it’s free from harmful pesticides and herbicides. You can choose organic methods, enriching your soil with compost and natural fertilizers, resulting in a healthier and more flavorful radish.
Why is this DIY trick a must-try? Because it empowers you to take control of your food source, enjoy superior flavor, and experience the joy of gardening, all while contributing to a more sustainable lifestyle. It’s a win-win-win!
Ready to take your Daikon game to the next level? Consider these variations:
* Experiment with different varieties: Beyond the classic long, white Daikon, explore other types like the Watermelon Radish with its striking pink interior or the Black Spanish Radish with its pungent flavor. Each variety offers a unique taste and texture profile.
* Succession planting: Plant seeds every few weeks to ensure a continuous harvest throughout the growing season. This way, you’ll always have fresh Daikon on hand.
* Companion planting: Plant Daikon alongside carrots to help deter carrot root flies, or with lettuce to provide shade and keep the soil cool.
* Pickling and Fermenting: Don’t limit yourself to eating Daikon fresh. Try pickling it for a tangy condiment or fermenting it for a probiotic-rich side dish. The possibilities are endless!
We’re confident that once you experience the satisfaction of harvesting your own homegrown Daikon Radish, you’ll never go back to store-bought again. So, grab some seeds, prepare your soil, and get ready to embark on a rewarding gardening adventure.
Don’t forget to share your experiences with us! We’d love to see your photos, hear your tips, and learn about your favorite ways to enjoy your homegrown Daikon. Use the hashtag #HomegrownDaikon on social media so we can all celebrate your success! Happy gardening!
Frequently Asked Questions (FAQ)
What is the best time of year to plant Daikon Radish?
Daikon Radishes are cool-season crops, meaning they thrive in cooler temperatures. The ideal time to plant them is in the late summer or early fall for a fall/winter harvest. In regions with mild winters, you can even plant them in early spring for a spring harvest. Avoid planting during the hottest months of summer, as the heat can cause the radishes to bolt (go to seed) and become bitter. Check your local climate and planting guides for the most accurate timing for your area.
How much sunlight do Daikon Radishes need?
Daikon Radishes need at least 6 hours of direct sunlight per day to grow properly. While they can tolerate some partial shade, especially in hotter climates, insufficient sunlight can result in smaller radishes and reduced yields. Choose a planting location that receives ample sunlight throughout the day. If you’re growing them in containers, make sure to place them in a sunny spot.
What kind of soil is best for growing Daikon Radishes?
Daikon Radishes prefer loose, well-drained soil that is rich in organic matter. Heavy clay soil can hinder their growth and cause them to become misshapen. Amend your soil with compost, aged manure, or other organic materials to improve its drainage and fertility. A slightly acidic to neutral soil pH (around 6.0 to 7.0) is ideal. Before planting, loosen the soil to a depth of at least 12 inches to allow the radishes to grow freely.
How often should I water my Daikon Radishes?
Daikon Radishes need consistent moisture to thrive. Water them deeply and regularly, especially during dry periods. Aim to keep the soil consistently moist but not waterlogged. Overwatering can lead to root rot, while underwatering can cause the radishes to become tough and bitter. A good rule of thumb is to water when the top inch of soil feels dry to the touch. Mulching around the plants can help retain moisture and suppress weeds.
How long does it take for Daikon Radishes to mature?
Daikon Radishes typically mature in 50 to 70 days, depending on the variety and growing conditions. Check the seed packet for specific maturity times. You can harvest them when they reach the desired size, usually when the tops of the radishes are visible above the soil. Don’t let them get too large, as they can become woody and less flavorful.
What are some common pests and diseases that affect Daikon Radishes?
Daikon Radishes can be susceptible to several pests and diseases, including flea beetles, aphids, root maggots, and fungal diseases like powdery mildew. To prevent pest and disease problems, practice good garden hygiene, such as removing plant debris and weeds. Use row covers to protect young plants from flea beetles. If you encounter aphids, spray them with insecticidal soap or neem oil. Ensure good air circulation to prevent fungal diseases.
Can I grow Daikon Radishes in containers?
Yes, you can grow Daikon Radishes in containers, but you’ll need to choose a large container that is at least 12 inches deep and wide to accommodate their long roots. Use a well-draining potting mix and provide adequate sunlight and water. Container-grown Daikon Radishes may require more frequent watering and fertilization than those grown in the ground.
Are Daikon Radish leaves edible?
Yes, Daikon Radish leaves are edible and nutritious! They have a slightly peppery flavor similar to the radish itself. You can use them in salads, stir-fries, soups, or as a cooked green. Harvest the leaves when they are young and tender for the best flavor.
How do I store Daikon Radishes after harvesting?
After harvesting, remove the leaves and wash the radishes thoroughly. Store them in the refrigerator in a plastic bag or container. They can last for several weeks if stored properly. You can also pickle or ferment Daikon Radishes to preserve them for longer periods.
What are some ways to use Daikon Radishes in cooking?
Daikon Radishes are incredibly versatile in the kitchen. You can eat them raw in salads, slaws, or as a crudité with dips. They can also be cooked in stir-fries, soups, stews, or roasted. Daikon Radishes are a popular ingredient in Asian cuisine, particularly in Japanese and Korean dishes. They can be pickled, fermented, or grated and used as a garnish. Their mild, slightly peppery flavor pairs well with a variety of ingredients.

Leave a Comment