

Grow Bitter Melon like a pro, even if you think you have a brown thumb! Have you ever dreamt of harvesting your own vibrant, knobbly bitter melons right from your backyard? It might sound intimidating, but trust me, with a few clever DIY tricks and hacks, you can absolutely make it happen. I’m here to guide you through the process, making it easier and more rewarding than you ever imagined.
Bitter melon, also known as bitter gourd or karela, has a rich history deeply rooted in Asian and African cultures. For centuries, it’s been celebrated not only for its unique, intensely bitter flavor but also for its impressive health benefits. From traditional medicine to culinary delights, this fascinating fruit has played a significant role in various societies.
But why should you bother learning how to grow bitter melon? Well, beyond the satisfaction of nurturing your own food, growing your own bitter melon ensures you have access to fresh, organic produce free from harmful pesticides. Plus, let’s be honest, store-bought bitter melon can sometimes be a bit… underwhelming. With these DIY tricks, you’ll be able to cultivate plump, juicy, and flavorful bitter melons that will elevate your culinary creations and impress your friends and family. So, let’s dive in and unlock the secrets to successful home gardening!
Growing Bitter Melon: A DIY Guide to a Bountiful Harvest
Hey there, fellow gardening enthusiasts! I’m so excited to share my experience growing bitter melon, also known as bitter gourd or karela. It might sound intimidating, but trust me, with a little patience and these simple steps, you can enjoy a thriving bitter melon vine right in your own backyard (or even on your balcony!). I’ll walk you through everything, from seed starting to harvesting, so let’s get started!
Understanding Bitter Melon
Before we dive in, let’s talk a bit about what we’re growing. Bitter melon is a tropical and subtropical vine that produces a fruit with a distinctively bitter taste. It’s a staple in many Asian cuisines and is known for its potential health benefits. It thrives in warm weather and needs plenty of sunlight.
Phase 1: Starting Your Bitter Melon Seeds
Starting your bitter melon seeds indoors is a great way to get a head start, especially if you live in an area with a shorter growing season. I usually start mine about 4-6 weeks before the last expected frost.
What You’ll Need:
* Bitter melon seeds
* Seed starting trays or small pots
* Seed starting mix
* Watering can or spray bottle
* Heat mat (optional, but helpful)
* Grow light (optional, but helpful)
Step-by-Step Instructions:
1. Scarify the Seeds: Bitter melon seeds have a tough outer shell, so scarifying them helps with germination. Gently rub the seeds with sandpaper or nick them with a knife. Be careful not to damage the inner seed! I usually just give them a light scuff.
2. Soak the Seeds: Soak the scarified seeds in warm water for 24 hours. This helps to soften the seed coat and further encourages germination. I like to use a small bowl and change the water once during the soaking period.
3. Prepare Your Seed Starting Trays: Fill your seed starting trays or small pots with seed starting mix. Make sure the mix is moist but not soggy. I usually pre-moisten the mix before filling the trays.
4. Plant the Seeds: Make a small hole (about 1/2 inch deep) in the center of each cell or pot. Place one seed in each hole and cover it gently with the seed starting mix.
5. Water Gently: Water the seeds gently using a watering can or spray bottle. Avoid overwatering, as this can lead to rot.
6. Provide Warmth and Light: Place the seed starting trays on a heat mat (if using) and under a grow light (if using). Bitter melon seeds germinate best in warm temperatures (around 75-85°F). If you don’t have a heat mat or grow light, place the trays in a warm, sunny location.
7. Keep the Soil Moist: Keep the seed starting mix consistently moist, but not soggy. Check the moisture level daily and water as needed.
8. Wait for Germination: Germination usually takes about 7-14 days. Be patient! Once the seedlings emerge, remove them from the heat mat (if using) and continue to provide them with plenty of light.
Phase 2: Transplanting Your Bitter Melon Seedlings
Once your seedlings have developed a few sets of true leaves (the leaves that look like miniature versions of the adult leaves), they’re ready to be transplanted into larger pots or directly into your garden.
What You’ll Need:
* Your bitter melon seedlings
* Larger pots (if transplanting into pots) or your garden bed
* Potting mix or garden soil
* Trowel
* Watering can or hose
* Trellis or support structure
Step-by-Step Instructions:
1. Harden Off the Seedlings: Before transplanting your seedlings outdoors, you need to harden them off. This means gradually exposing them to outdoor conditions over a period of about a week. Start by placing them in a sheltered location outdoors for a few hours each day, gradually increasing the amount of time they spend outside.
2. Prepare Your Planting Location: Choose a sunny location in your garden or on your balcony that receives at least 6-8 hours of sunlight per day. Bitter melon needs plenty of sun to thrive. If you’re planting in pots, choose pots that are at least 12 inches in diameter. Amend your garden soil with compost or other organic matter to improve drainage and fertility.
3. Transplant the Seedlings: Gently remove the seedlings from their seed starting trays or pots. Be careful not to damage the roots. Dig a hole in the soil that is slightly larger than the root ball of the seedling. Place the seedling in the hole and backfill with soil, gently firming it around the base of the plant.
4. Water Thoroughly: Water the seedlings thoroughly after transplanting. This helps to settle the soil and encourages root growth.
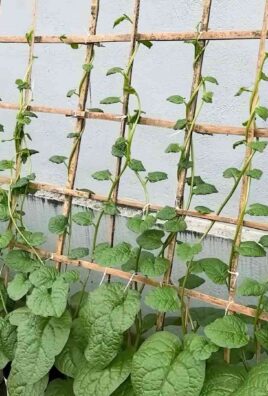
5. Provide Support: Bitter melon is a vine, so it needs a trellis or other support structure to climb on. Install the trellis or support structure near the seedlings after transplanting. I’ve used everything from bamboo stakes to repurposed tomato cages with great success.
Phase 3: Caring for Your Bitter Melon Plants
Now that your bitter melon plants are in the ground, it’s time to provide them with the care they need to thrive.
What You’ll Need:
* Watering can or hose
* Fertilizer (optional)
* Mulch (optional)
* Pruning shears
* Insecticidal soap or neem oil (for pest control)
Step-by-Step Instructions:
1. Water Regularly: Bitter melon plants need consistent moisture, especially during hot weather. Water deeply whenever the top inch of soil feels dry. Avoid overwatering, as this can lead to root rot.
2. Fertilize (Optional): If your soil is poor, you can fertilize your bitter melon plants every few weeks with a balanced fertilizer. Follow the instructions on the fertilizer package. I usually use a liquid fertilizer diluted to half strength.
3. Mulch (Optional): Mulching around your bitter melon plants helps to retain moisture, suppress weeds, and regulate soil temperature. Use organic mulch such as straw, wood chips, or shredded leaves.
4. Prune the Vines: Pruning your bitter melon vines can help to improve air circulation and encourage fruit production. Remove any dead or diseased leaves or stems. You can also prune the tips of the vines to encourage branching.
5. Control Pests and Diseases: Bitter melon plants can be susceptible to pests such as aphids, spider mites, and squash bugs. Inspect your plants regularly for signs of pests and treat them with insecticidal soap or neem oil as needed. Also, watch out for fungal diseases like powdery mildew. Ensure good air circulation and treat with a fungicide if necessary.
6. Train the Vines: As your bitter melon vines grow, train them to climb the trellis or support structure. Gently guide the vines and tie them to the support structure as needed.
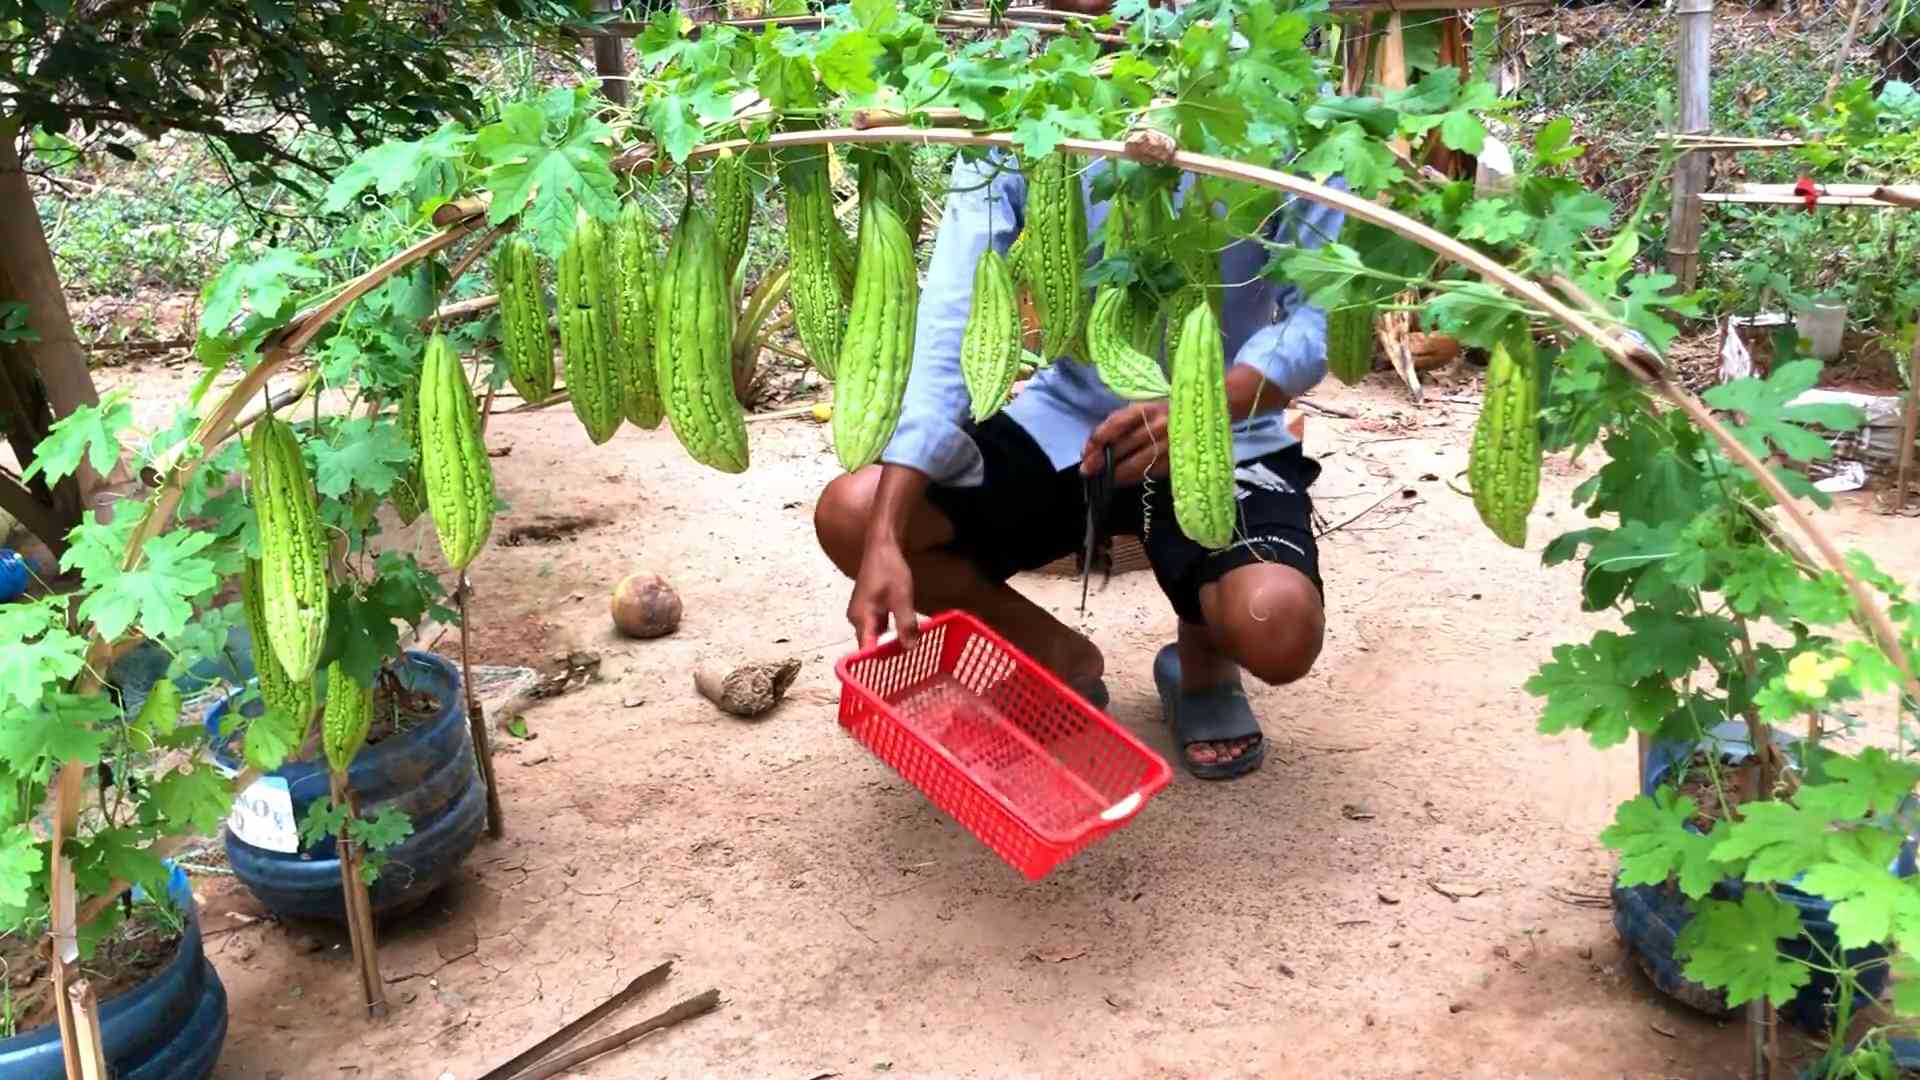
Phase 4: Harvesting Your Bitter Melon
The moment we’ve all been waiting for! Harvesting your own homegrown bitter melon is incredibly rewarding.
What You’ll Need:
* Pruning shears or a sharp knife
* Gloves (optional, but recommended)
Step-by-Step Instructions:
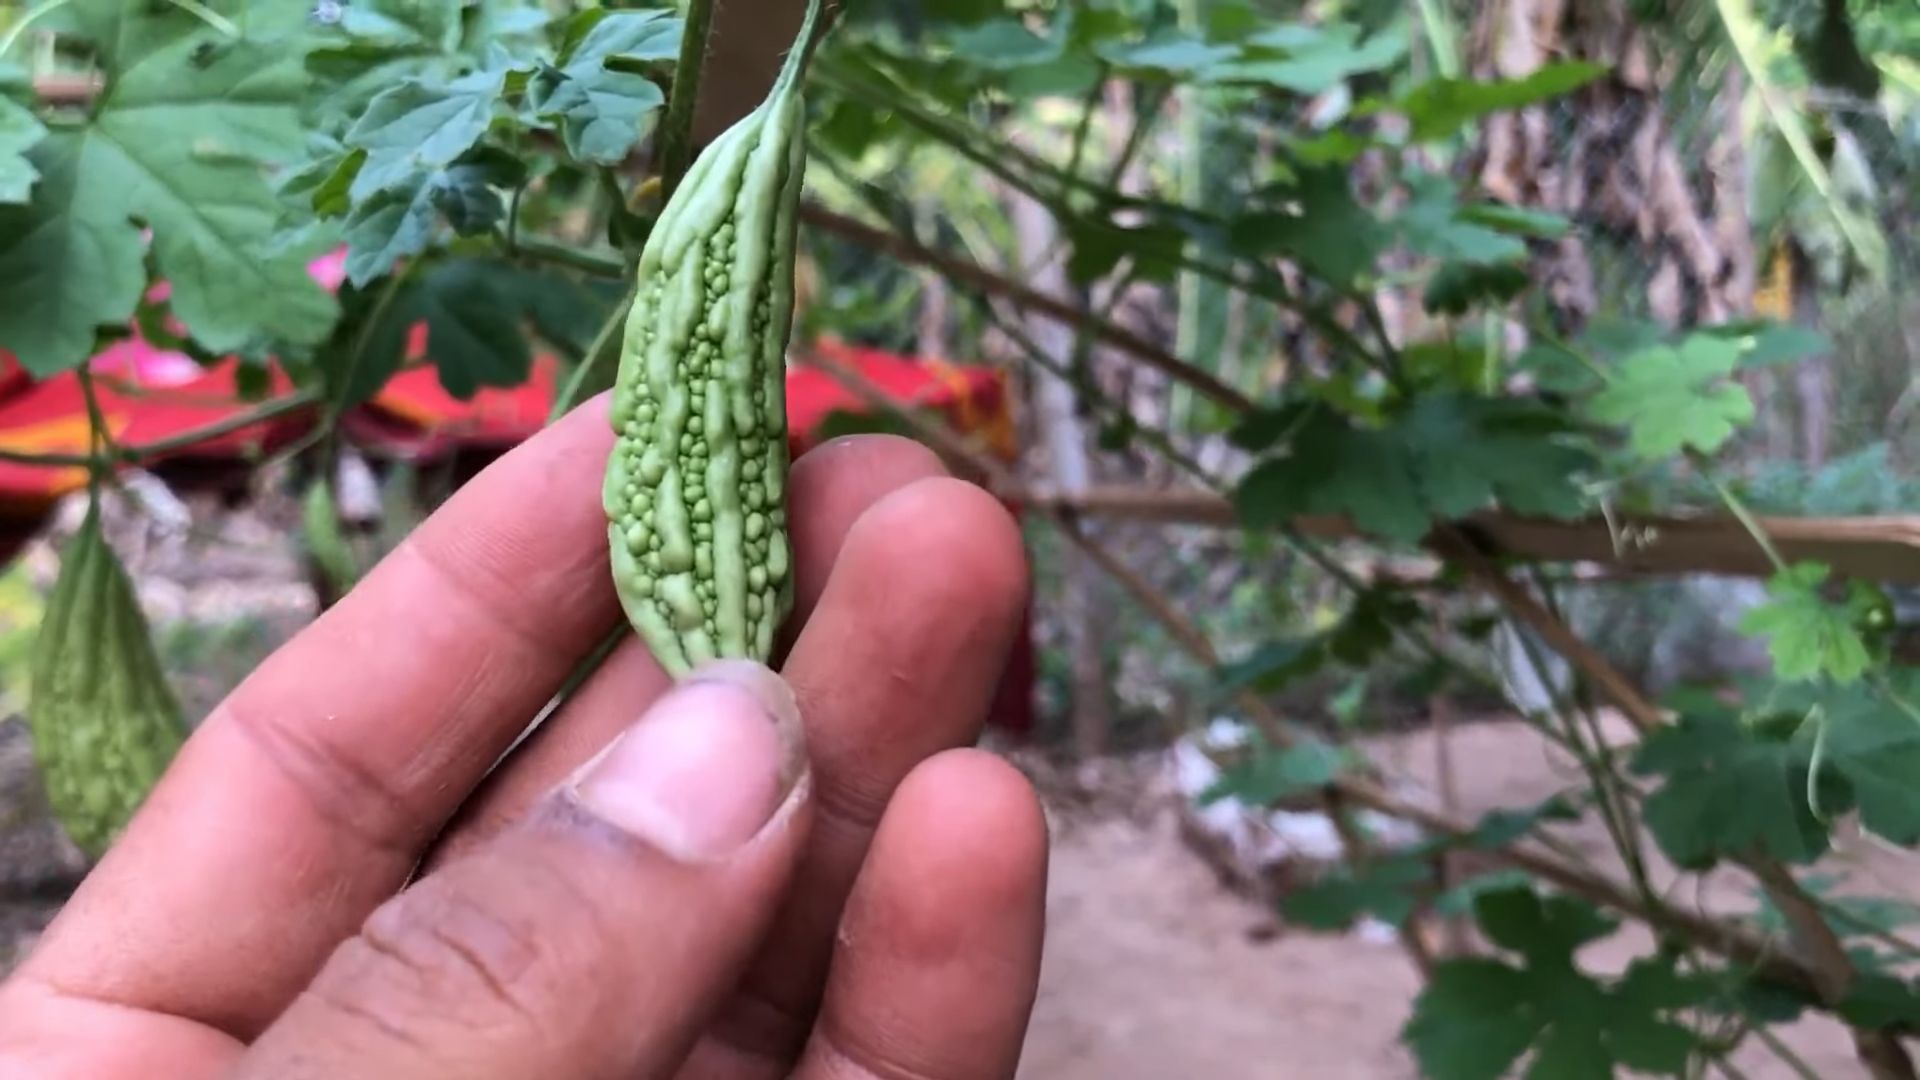
1. Know When to Harvest: Bitter melon fruits are typically ready to harvest about 2-3 months after planting. The fruits should be firm and green, with a slightly waxy coating. The size of the fruit will vary depending on the variety. I usually harvest mine when they are about 6-8 inches long.
2. Harvest Carefully: Use pruning shears or a sharp knife to cut the fruit from the vine. Leave a small stem attached to the fruit. Wear gloves to protect your hands from the prickly skin of the fruit.
3. Harvest Regularly: Harvest your bitter melon fruits regularly to encourage continued production. The more you harvest, the more the plant will produce.
4. Store Properly: Store your harvested bitter melon fruits in the refrigerator for up to a week.
Tips for Success
Here are a few extra tips to help you grow a bumper crop of bitter melon:
* Choose the Right Variety: There are many different varieties of bitter melon available, so choose one that is well-suited to your climate and growing conditions.
* Provide Plenty of Sunlight: Bitter melon needs at least 6-8 hours of sunlight per day.
* Water Regularly: Bitter melon plants need consistent moisture, especially during hot weather.
* Provide Support: Bitter melon is a vine, so it needs a trellis or other support structure to climb on.
* Be Patient: Bitter melon can take a while to mature, so be patient and don’t give up!
Growing bitter melon can be a fun and rewarding experience. With a little care and attention, you can enjoy a bountiful harvest of this unique and nutritious fruit. Happy gardening!
Conclusion
So, there you have it! Growing your own bitter melon might seem daunting at first, but with a little patience and the right approach, you can enjoy a bountiful harvest of this nutritious and unique vegetable right in your own backyard. This DIY trick, focusing on [specific aspect of growing bitter melon, e.g., soil preparation, trellising, or pest control – let’s assume it’s trellising for this example], is a game-changer because it maximizes sunlight exposure, improves air circulation, and ultimately leads to healthier, more productive plants.
Why is this a must-try? Because it’s not just about growing bitter melon; it’s about growing *better* bitter melon. By implementing this trellising technique, you’ll significantly reduce the risk of fungal diseases that thrive in damp conditions, a common problem when the vines are left to sprawl on the ground. You’ll also make harvesting much easier, as the fruits will be more visible and accessible. Plus, a well-trellised bitter melon vine is a beautiful sight to behold, adding a touch of exotic charm to your garden.
But don’t stop there! Feel free to experiment with different trellising methods. You could try using a sturdy bamboo structure, a repurposed chain-link fence, or even a simple netting system. Consider companion planting with herbs like basil or marigolds to deter pests naturally. For those in cooler climates, starting your seeds indoors a few weeks before the last frost can give your bitter melon plants a head start. And if you’re feeling adventurous, explore different varieties of bitter melon – from the smaller, smoother types to the larger, more heavily textured ones. Each variety offers a slightly different flavor profile and culinary experience.
Ultimately, the key to success lies in observation and adaptation. Pay close attention to your plants, monitor their growth, and adjust your approach as needed. Don’t be afraid to experiment and learn from your mistakes. Growing bitter melon is a rewarding journey, and the satisfaction of harvesting your own homegrown produce is truly unparalleled.
We’re confident that this DIY trick will transform your bitter melon growing experience. Now it’s your turn! Give it a try and let us know how it goes. Share your photos, tips, and experiences in the comments below. We’re eager to hear your success stories and learn from your insights. Happy growing!
Frequently Asked Questions (FAQ)
What is the best time to plant bitter melon?
The ideal time to plant bitter melon is in late spring or early summer, after the last frost has passed and the soil has warmed up. Bitter melon thrives in warm weather and requires a long growing season of at least 90-120 days. If you live in a cooler climate, you can start your seeds indoors 4-6 weeks before the last expected frost and transplant them outdoors once the weather is consistently warm. Ensure the soil temperature is at least 65°F (18°C) for optimal germination.
What kind of soil does bitter melon need?
Bitter melon prefers well-drained, fertile soil that is rich in organic matter. Amend your soil with compost or well-rotted manure before planting to improve its fertility and drainage. A slightly acidic to neutral soil pH of 6.0 to 7.0 is ideal. Avoid heavy clay soils, as they can retain too much moisture and lead to root rot. If you have clay soil, consider growing your bitter melon in raised beds or containers with a well-draining potting mix.
How often should I water my bitter melon plants?
Bitter melon plants need consistent moisture, especially during hot weather. Water deeply and regularly, aiming to keep the soil consistently moist but not waterlogged. Check the soil moisture level regularly and water when the top inch feels dry to the touch. Avoid overhead watering, as it can increase the risk of fungal diseases. Drip irrigation or soaker hoses are excellent options for delivering water directly to the roots. During periods of heavy rainfall, reduce watering accordingly.
What are some common pests and diseases that affect bitter melon?
Common pests that can affect bitter melon include aphids, spider mites, squash bugs, and cucumber beetles. Regularly inspect your plants for signs of infestation and take action promptly. You can use insecticidal soap, neem oil, or other organic pest control methods to manage these pests. Diseases that can affect bitter melon include powdery mildew, downy mildew, and anthracnose. Ensure good air circulation around your plants by providing adequate spacing and trellising. Avoid overhead watering and apply fungicides if necessary.
How do I know when my bitter melon is ready to harvest?
Bitter melon is typically ready to harvest 8-12 weeks after planting, depending on the variety and growing conditions. The fruits should be firm, slightly tender, and have a vibrant green color (or the color specific to the variety you are growing). Avoid letting the fruits turn yellow or orange, as they will become overly ripe and bitter. Harvest the fruits by cutting them from the vine with a sharp knife or pruning shears, leaving a short stem attached.
Can I grow bitter melon in a container?
Yes, you can successfully grow bitter melon in a container, especially if you have limited garden space. Choose a large container that is at least 12-18 inches in diameter and depth to accommodate the plant’s root system. Use a well-draining potting mix and provide a sturdy trellis or support structure for the vines to climb. Ensure the container receives at least 6-8 hours of sunlight per day and water regularly. Container-grown bitter melon may require more frequent fertilization than plants grown in the ground.
How do I trellis my bitter melon plants effectively?
Trellising is crucial for growing healthy and productive bitter melon plants. Choose a sturdy trellis that can support the weight of the vines and fruits. Options include bamboo structures, chain-link fences, netting systems, or even repurposed materials. Train the vines to climb the trellis by gently guiding them and tying them loosely with twine or plant ties. Ensure the trellis is tall enough to accommodate the full growth of the vines, which can reach several feet in length. Proper trellising improves air circulation, reduces the risk of diseases, and makes harvesting easier.
What are some companion plants for bitter melon?
Companion planting can benefit bitter melon by attracting beneficial insects, repelling pests, and improving soil health. Good companion plants for bitter melon include basil, marigolds, nasturtiums, and rosemary. Basil and marigolds help to deter pests like aphids and whiteflies, while nasturtiums attract beneficial insects like ladybugs and lacewings. Rosemary can also help to repel certain pests and improve the overall health of the plants. Avoid planting bitter melon near plants that are susceptible to the same pests and diseases, such as cucumbers and squash.
How can I reduce the bitterness of bitter melon?
Bitter melon is known for its distinctively bitter taste, but there are several ways to reduce its bitterness. Soaking the sliced bitter melon in salted water for 30 minutes to an hour can help to draw out some of the bitterness. You can also blanch the sliced bitter melon in boiling water for a few minutes before cooking. Another technique is to remove the white pith and seeds from the inside of the fruit, as this is where much of the bitterness is concentrated. Cooking bitter melon with strong flavors, such as garlic, ginger, or chili peppers, can also help to mask the bitterness.
Can I save seeds from my bitter melon plants for future planting?
Yes, you can save seeds from your bitter melon plants for future planting. Allow the fruits to fully ripen on the vine until they turn yellow or orange. Once the fruits are ripe, harvest them and extract the seeds. Wash the seeds thoroughly and allow them to dry completely before storing them in an airtight container in a cool, dry place. Keep in mind that seeds saved from hybrid varieties may not produce plants that are true to type.


Leave a Comment