

Dusting Hacks: Are you tired of battling dust bunnies that seem to multiply overnight? Do you feel like you’re constantly waging war against a never-ending layer of grime on your furniture? I know I used to! Dusting, a chore as old as time itself, has plagued households for centuries. From ancient civilizations using rudimentary cloths to the modern-day microfiber marvels, the struggle to keep our homes clean has been a constant.
But fear not, fellow cleaning enthusiasts! This isn’t just another article telling you to grab a duster. We’re diving deep into the world of dusting hacks, uncovering clever DIY solutions and time-saving tricks that will revolutionize your cleaning routine. Think beyond the feather duster – we’re talking about innovative techniques and homemade concoctions that will not only eliminate dust but also prevent it from returning so quickly.
Why do you need these hacks? Because let’s face it, nobody enjoys spending their precious free time dusting! Plus, excessive dust can trigger allergies and respiratory issues, making a clean home essential for your health and well-being. I’m going to share my favorite, tried-and-true methods for tackling dust in every nook and cranny, from the highest shelves to the most delicate surfaces. Get ready to say goodbye to dust-induced frustration and hello to a sparkling, healthy home!
DIY Dusting Hacks: Conquer Dust Like a Pro!
Okay, let’s face it, nobody *loves* dusting. It’s one of those chores that feels like you’re just moving the dust around, not actually getting rid of it. But fear not, fellow dust-haters! I’ve compiled a collection of my favorite DIY dusting hacks that will make your life easier and your home cleaner. Get ready to say goodbye to those pesky dust bunnies!
Hack 1: The Microfiber Magic Wand
Microfiber cloths are your best friend when it comes to dusting. They grab and trap dust instead of just pushing it around. But let’s take it a step further and create a super-effective dusting wand!
* **Why this works:** Microfiber’s split fibers create a large surface area that attracts and holds dust particles. The wand shape allows you to reach tight spaces and high areas with ease.
* **Best for:** General dusting, furniture, shelves, baseboards, ceiling fans.
**Step-by-Step Instructions:**
1. **Gather your supplies:** You’ll need a few microfiber cloths (I prefer the thicker ones), a wooden dowel rod (about 3-4 feet long), a rubber band, and some scissors.
2. **Prepare the microfiber cloths:** Lay one microfiber cloth flat. Fold it in half lengthwise, and then in half again. This will create a thick, multi-layered pad.
3. **Attach the cloth to the dowel:** Place the folded microfiber cloth at the end of the dowel rod. Secure it tightly with a rubber band. Make sure the rubber band is snug so the cloth doesn’t slip.
4. **Fluff it up:** Gently fluff out the edges of the microfiber cloth to create a wider dusting surface. You can even use scissors to fringe the edges for extra dust-grabbing power.
5. **Dust away!** Now you’re ready to tackle those dusty surfaces. The dowel rod gives you extra reach, and the microfiber cloth will trap the dust effectively.
Hack 2: The Sock Puppet Duster (for Blinds!)
Cleaning blinds can be a real pain. Those individual slats are dust magnets! But I’ve got a simple solution that uses something you probably already have: socks!
* **Why this works:** The sock acts like a glove, allowing you to easily slide between the slats of the blinds and wipe away dust. The fabric traps the dust, preventing it from just falling to the floor.
* **Best for:** Venetian blinds, mini blinds.
**Step-by-Step Instructions:**
1. **Gather your supplies:** You’ll need an old sock (cotton or microfiber works best), a spray bottle filled with water or a mild cleaning solution (optional).
2. **Prepare the sock:** If you’re using a cleaning solution, lightly dampen the sock. Don’t soak it! You just want it slightly moist.
3. **Slip on the sock:** Put the sock on your hand like a puppet.
4. **Dust the blinds:** Pinch each slat of the blind between your thumb and fingers (with the sock on, of course!). Slide your hand along the slat to wipe away the dust. Work from top to bottom.
5. **Repeat:** Repeat the process for each slat of the blind. You may need to re-dampen the sock or switch to a clean sock if it gets too dusty.
6. **Wash the socks:** Once you’re done, toss the socks in the washing machine.
Hack 3: The Dryer Sheet Dust Magnet
Dryer sheets aren’t just for laundry! They’re also surprisingly effective at repelling dust.
* **Why this works:** Dryer sheets contain antistatic properties that help to reduce the buildup of static electricity, which attracts dust. They also leave behind a light coating that makes it harder for dust to stick.
* **Best for:** Furniture, electronics, baseboards.
**Step-by-Step Instructions:**
1. **Gather your supplies:** You’ll need a box of dryer sheets (new or used).
2. **Wipe down surfaces:** Simply wipe down your furniture, electronics, and baseboards with a dryer sheet.
3. **Replace as needed:** Replace the dryer sheet when it becomes too dusty.
4. **Enjoy dust-free surfaces:** Enjoy your dust-free surfaces for longer!
Hack 4: The Paintbrush Power-Up
Sometimes, you need a little extra precision when dusting. That’s where a paintbrush comes in handy!
* **Why this works:** The soft bristles of a paintbrush can reach into tight corners and crevices, dislodging dust that a cloth might miss.
* **Best for:** Intricate carvings, picture frames, keyboards, lampshades.
**Step-by-Step Instructions:**
1. **Gather your supplies:** You’ll need a soft-bristled paintbrush (a small to medium size works best).
2. **Brush away the dust:** Gently brush away the dust from the surface you’re cleaning.
3. **Vacuum or wipe:** Use a vacuum cleaner with a brush attachment or a damp cloth to collect the dislodged dust.
4. **Repeat as needed:** Repeat the process until the surface is clean.
Hack 5: The Compressed Air Blast
For those hard-to-reach areas and delicate electronics, compressed air is your secret weapon.
* **Why this works:** Compressed air blasts away dust without requiring any physical contact, making it ideal for sensitive surfaces.
* **Best for:** Keyboards, electronics, vents, intricate decorations.
**Step-by-Step Instructions:**
1. **Gather your supplies:** You’ll need a can of compressed air.
2. **Hold the can upright:** Hold the can of compressed air upright and point the nozzle at the area you want to clean.
3. **Short bursts:** Use short bursts of air to blow away the dust. Avoid holding the nozzle down for too long, as this can cause condensation.
4. **Work in a well-ventilated area:** Work in a well-ventilated area to avoid inhaling the dust.
5. **Repeat as needed:** Repeat the process until the area is clean.
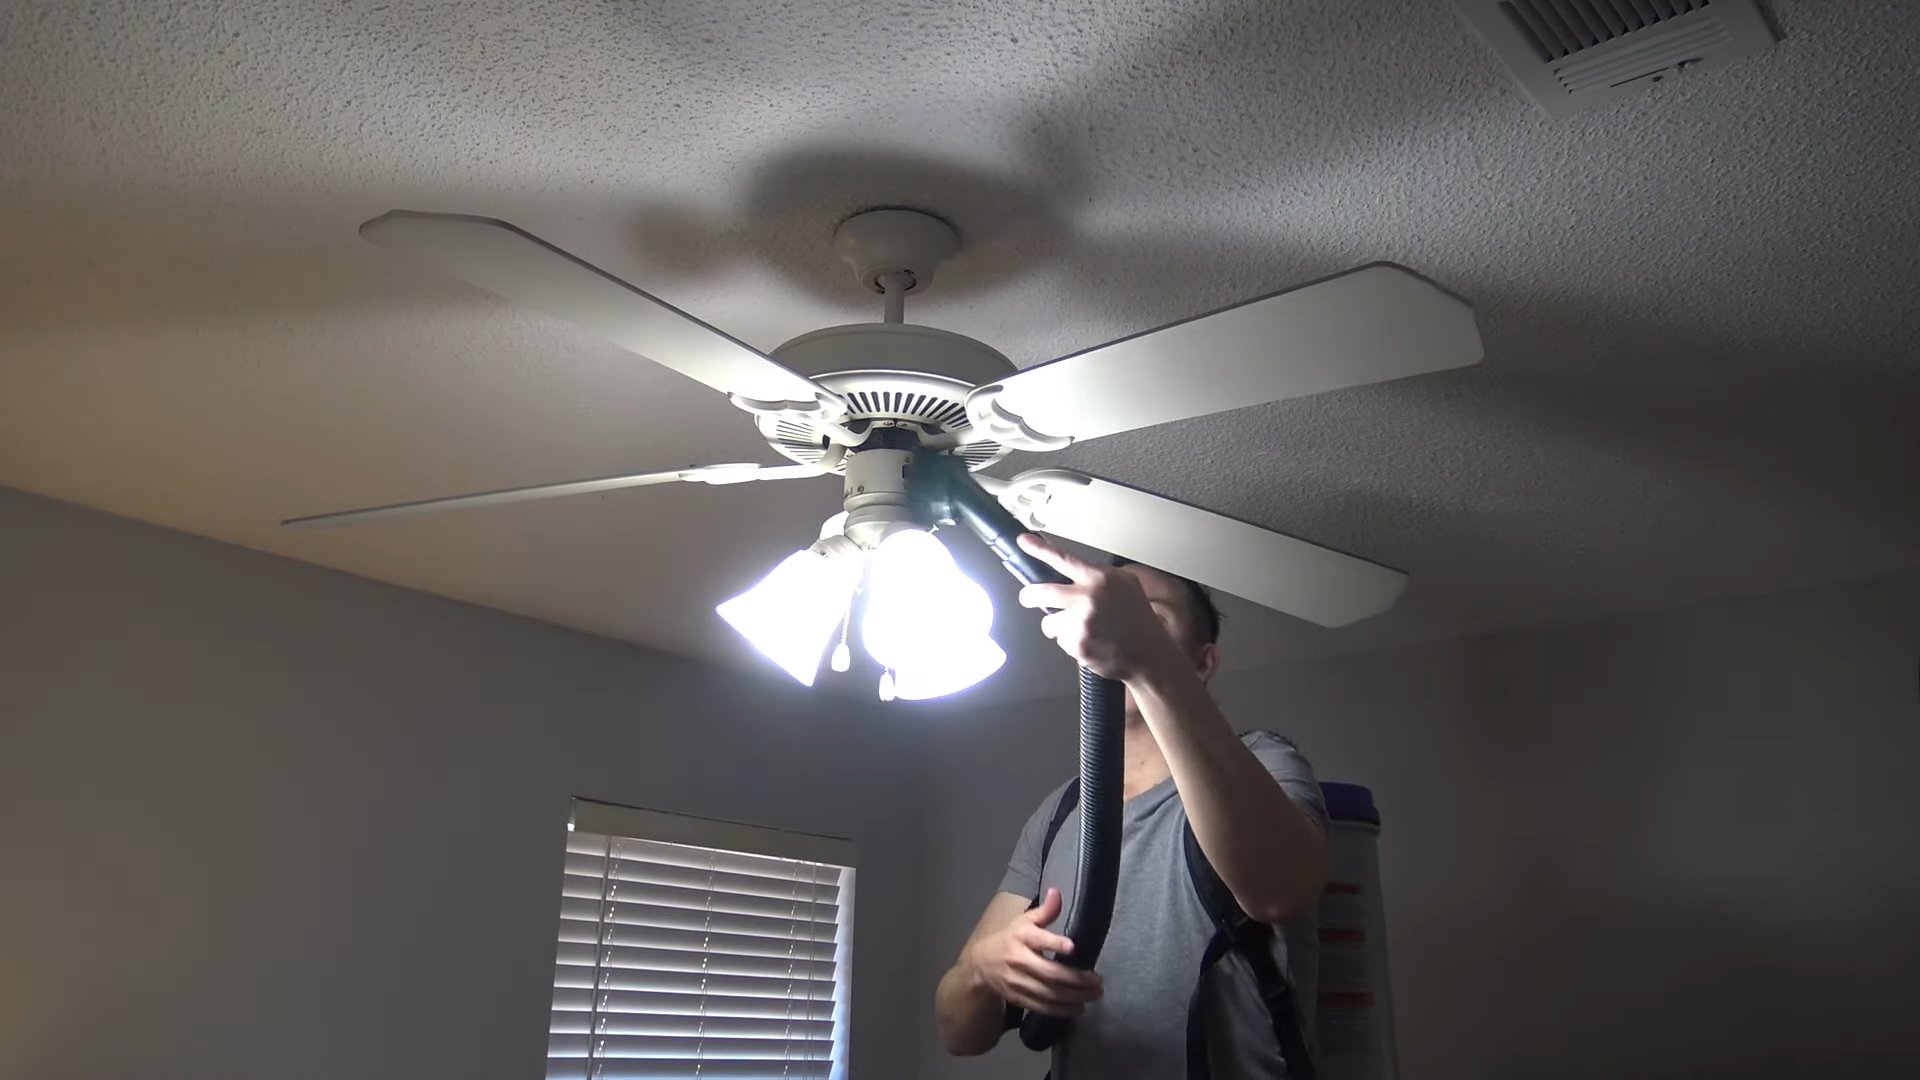
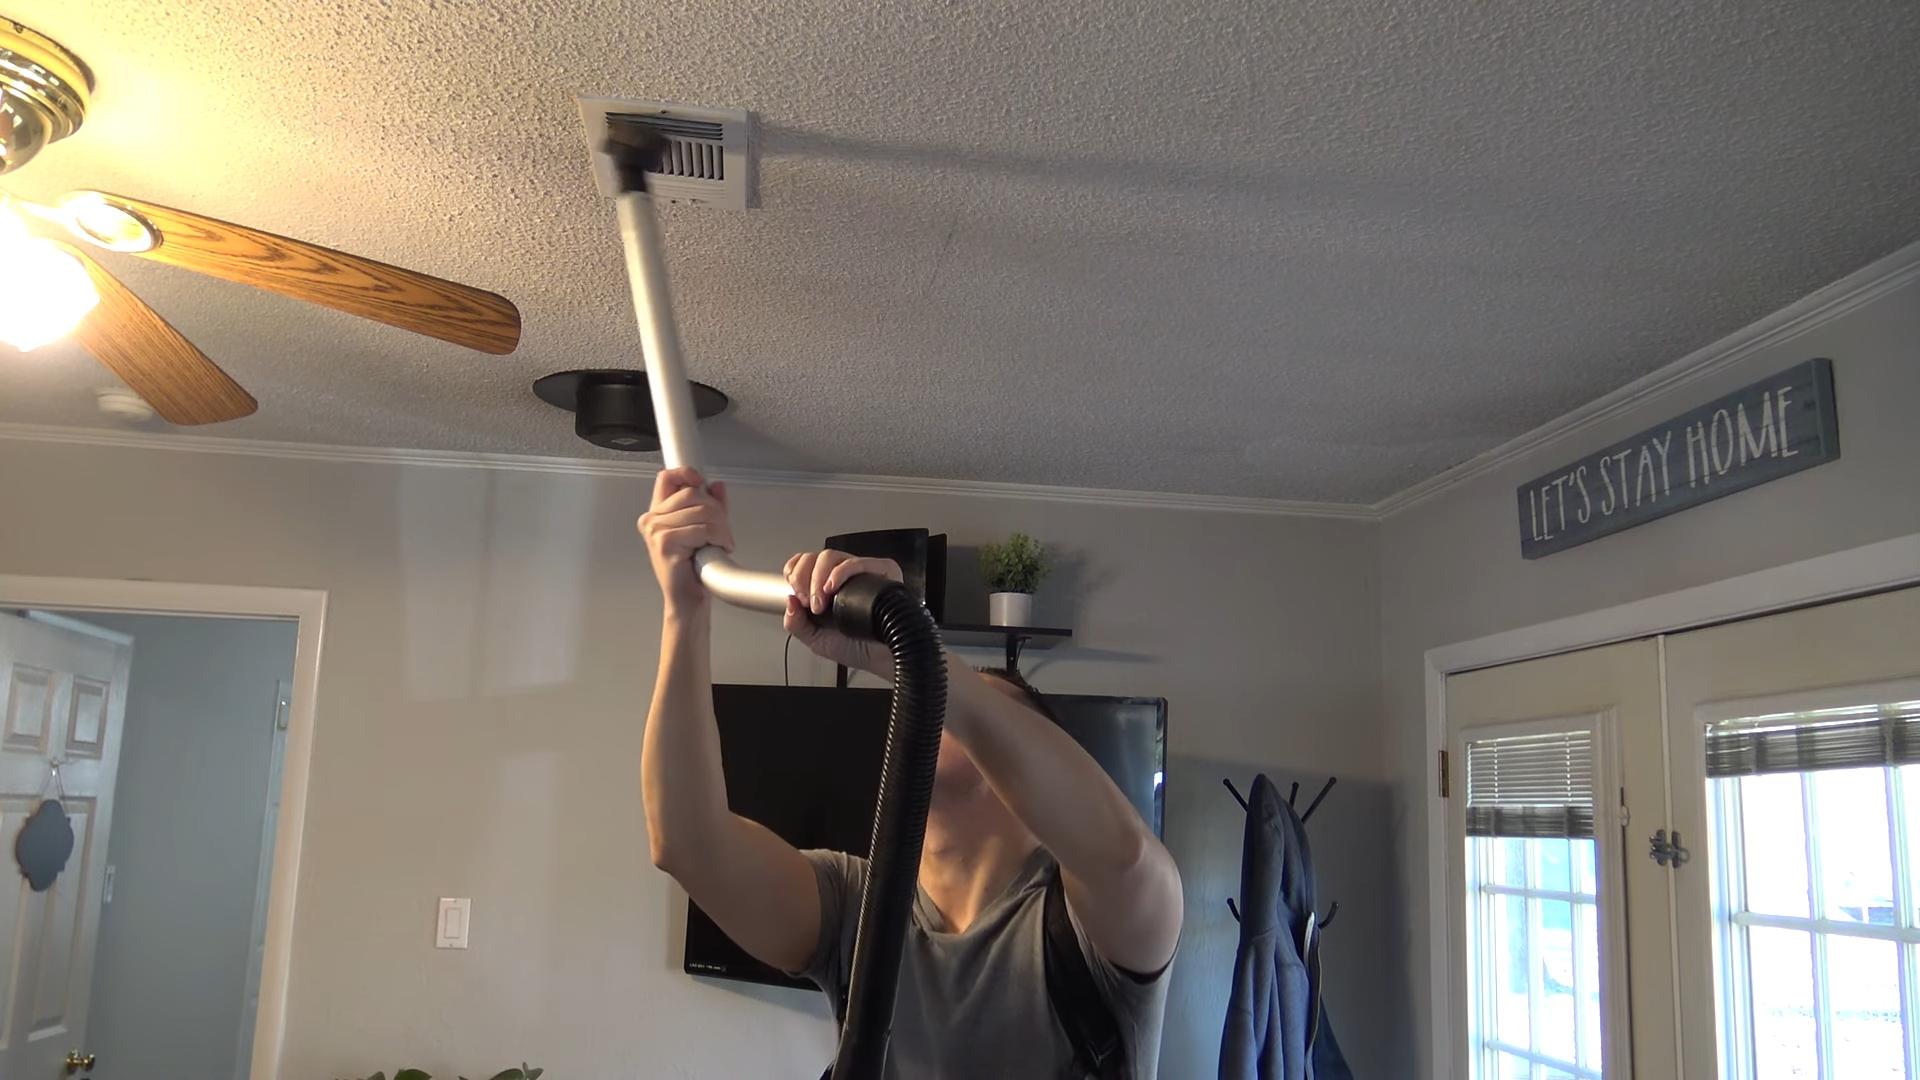
Hack 6: The Vacuum Attachment Arsenal
Your vacuum cleaner is more than just a floor cleaner! With the right attachments, it can be a powerful dusting tool.
* **Why this works:** Vacuum attachments allow you to reach different surfaces and crevices, effectively sucking up dust and debris.
* **Best for:** Upholstery, curtains, baseboards, hard-to-reach corners.
**Step-by-Step Instructions:**
1. **Gather your supplies:** You’ll need your vacuum cleaner and the appropriate attachments (dusting brush, crevice tool, upholstery tool).
2. **Choose the right attachment:** Select the attachment that’s best suited for the surface you’re cleaning.
3. **Vacuum the surface:** Vacuum the surface using the chosen attachment. Use slow, overlapping strokes to ensure you’re picking up all the dust.
4. **Empty the vacuum:** Empty the vacuum cleaner bag or canister regularly to maintain suction power.
Hack 7: The DIY Dusting Spray
Commercial dusting sprays can be expensive and often contain harsh chemicals. Why not make your own?
* **Why this works:** This DIY dusting spray uses natural ingredients to clean and protect surfaces while repelling dust.
* **Best for:** Furniture, wood surfaces.
**Step-by-Step Instructions:**
1. **Gather your supplies:** You’ll need a spray bottle, 1 cup of water, 1/4 cup of white vinegar, 2 tablespoons of olive oil, and a few drops of essential oil (lemon or lavender are great choices).
2. **Combine the ingredients:** Combine all the ingredients in the spray bottle.
3. **Shake well:** Shake the bottle well to mix the ingredients.
4. **Spray and wipe:** Lightly spray the surface you want to clean and wipe it down with a clean microfiber cloth.
5. **Enjoy the shine:** Enjoy the clean, dust-free surface and the pleasant scent!
Hack 8: The Humidifier Helper
Dry air can exacerbate dust problems. A humidifier can help to reduce dust buildup by increasing the humidity in your home.
* **Why this works:** Humidifiers add moisture to the air, which helps to weigh down dust particles and prevent them from floating around.
* **Best for:** Reducing overall dust levels in your home.
**Step-by-Step Instructions:**
1. **Choose a humidifier:** Select a humidifier that’s appropriate for the size of your room.
2. **Fill the humidifier:** Fill the humidifier with clean water according to the manufacturer’s instructions.
3. **Place the humidifier:** Place the humidifier in a central location in the room.
4. **Monitor the humidity:** Monitor the humidity level in the room and adjust the humidifier settings as needed. Aim for a humidity level between 40% and 60%.
5. **Clean the humidifier regularly:** Clean the humidifier regularly to prevent the growth of mold and bacteria.
Conclusion
So, there you have it! These simple yet incredibly effective dusting hacks are a game-changer for anyone looking to streamline their cleaning routine and achieve a truly dust-free home. We’ve explored how to create your own electrostatic dusting spray, repurpose old socks into efficient dusting mitts, and even harness the power of microfiber cloths for optimal dust removal. These aren’t just quick fixes; they’re sustainable solutions that can significantly reduce the amount of time and effort you spend battling dust.
Why is this a must-try? Because it’s about more than just aesthetics. Dust can trigger allergies, exacerbate respiratory problems, and generally contribute to a less healthy living environment. By implementing these DIY dusting tricks, you’re not just making your home look cleaner; you’re making it a healthier place to live. Plus, you’re saving money by using readily available materials and reducing your reliance on expensive commercial cleaning products.
But the best part? You can customize these hacks to suit your specific needs and preferences. For the electrostatic dusting spray, experiment with different essential oil combinations to create a scent that you love. Lavender and lemon are popular choices for their calming and refreshing properties, respectively. You can also add a teaspoon of glycerin to the spray for extra shine on wooden surfaces.
For the sock dusting mitts, consider using different types of socks for different tasks. Thicker, fuzzier socks are great for dusting furniture and baseboards, while thinner socks are ideal for reaching into tight spaces and cleaning delicate items. You can even sew a small loop onto the sock mitt for easy hanging and storage.
And don’t underestimate the power of a good microfiber cloth. These cloths are incredibly effective at trapping dust and dirt, and they can be used on a variety of surfaces. Just be sure to wash them regularly to maintain their effectiveness. You can even dedicate specific colors of microfiber cloths to different areas of your home to prevent cross-contamination.
We’re confident that these dusting hacks will transform your cleaning routine and leave your home sparkling. But we want to hear from you! Try these methods out for yourself and let us know what you think. Share your experiences, your variations, and your own dusting tips in the comments below. We’re always looking for new and innovative ways to keep our homes clean and healthy, and we believe that the best ideas come from our community.
So, ditch the expensive cleaning products and embrace the power of DIY. Your home – and your wallet – will thank you for it. Get ready to say goodbye to dust and hello to a cleaner, healthier, and happier home with these amazing dusting hacks!
Frequently Asked Questions (FAQ)
Q: What exactly is electrostatic dusting spray, and how does it work?
A: Electrostatic dusting spray is a homemade cleaning solution designed to attract and trap dust particles using static electricity. The basic recipe typically involves water, vinegar (or lemon juice), and a small amount of dish soap or liquid fabric softener. The vinegar or lemon juice helps to loosen dirt and grime, while the dish soap or fabric softener creates a slight static charge that attracts dust to the cloth. When you spray the solution onto a surface and wipe it with a microfiber cloth, the dust clings to the cloth instead of simply being pushed around. This results in a more thorough and effective dusting experience. The key is to use a very small amount of soap or fabric softener, as too much can leave a residue.
Q: Is vinegar safe to use on all surfaces?
A: While vinegar is a versatile and effective cleaning agent, it’s not suitable for all surfaces. Avoid using vinegar on natural stone surfaces like marble, granite, and limestone, as the acidity can etch and damage them. It’s also best to avoid using vinegar on waxed wood furniture, as it can strip the wax finish. For these surfaces, a mild soap and water solution is a safer option. Always test any cleaning solution in an inconspicuous area before applying it to the entire surface.
Q: Can I use any type of sock for the dusting mitts?
A: While you can technically use any type of sock for the dusting mitts, certain types of socks are more effective than others. Microfiber socks are ideal, as they have a naturally high static charge and are excellent at trapping dust. Cotton socks are also a good option, especially thicker, fuzzier ones. Avoid using socks that are too thin or have holes, as they won’t be as effective at picking up dust. Also, ensure the socks are clean before using them for dusting.
Q: How often should I wash my microfiber cloths and sock dusting mitts?
A: The frequency of washing depends on how often you use them and how much dust they collect. As a general rule, you should wash your microfiber cloths and sock dusting mitts after each use, especially if you’re dusting heavily soiled areas. This prevents you from simply spreading the dust around the next time you use them. You can wash them in the washing machine with your regular laundry, but avoid using fabric softener, as it can reduce their absorbency and effectiveness. Tumble dry on low heat or air dry.
Q: What are some tips for dusting hard-to-reach areas?
A: Dusting hard-to-reach areas can be challenging, but there are several tools and techniques that can help. A long-handled duster with a flexible head is ideal for reaching high ceilings, ceiling fans, and the tops of bookshelves. You can also use a vacuum cleaner with a hose attachment and a dusting brush to remove dust from crevices and corners. For tight spaces, try wrapping a microfiber cloth around a butter knife or a paint stirrer to create a makeshift dusting tool. Compressed air can also be helpful for blasting dust out of electronics and other delicate items.
Q: I have allergies. Are these dusting hacks safe for me?
A: Yes, these dusting hacks are generally safe for people with allergies, and in fact, they can help to reduce allergy symptoms by removing dust and allergens from your home. However, it’s important to choose your cleaning products carefully. Avoid using harsh chemicals or fragrances that can irritate your respiratory system. Opt for natural cleaning solutions like vinegar and essential oils, and always wear a mask and gloves while dusting to minimize your exposure to dust and allergens. If you have severe allergies, consider using an air purifier to further improve the air quality in your home.
Q: Can I use these dusting hacks on electronics?
A: Yes, you can use these dusting hacks on electronics, but it’s important to be careful. Always turn off and unplug the electronic device before dusting it. Use a dry microfiber cloth to gently wipe the screen and other surfaces. Avoid using any liquid cleaning solutions on electronics, as they can damage the internal components. For hard-to-reach areas, use compressed air to blow out dust from vents and ports.
Q: What essential oils are best for dusting?
A: The best essential oils for dusting are those with antibacterial, antiviral, and antifungal properties, as well as those with pleasant scents. Some popular choices include:
* **Lavender:** Known for its calming and relaxing properties.
* **Lemon:** Has a refreshing and uplifting scent and is a natural degreaser.
* **Tea Tree:** A powerful antibacterial and antifungal agent.
* **Eucalyptus:** Has a refreshing scent and can help to clear congestion.
* **Peppermint:** Has a refreshing and invigorating scent and can help to repel insects.
When using essential oils, always dilute them with water or a carrier oil before applying them to surfaces. A few drops of essential oil per cup of water is usually sufficient.
Q: My homemade dusting spray is leaving a residue. What am I doing wrong?
A: If your homemade dusting spray is leaving a residue, it’s likely that you’re using too much soap or fabric softener. These ingredients are essential for creating the electrostatic charge that attracts dust, but using too much can leave a sticky or greasy film on surfaces. Try reducing the amount of soap or fabric softener in your recipe. You can also try adding a tablespoon of rubbing alcohol to the spray, as it will help to evaporate the excess moisture and prevent residue buildup. Finally, make sure you’re using a clean microfiber cloth to wipe the surfaces, as a dirty cloth can also contribute to residue.

Leave a Comment