

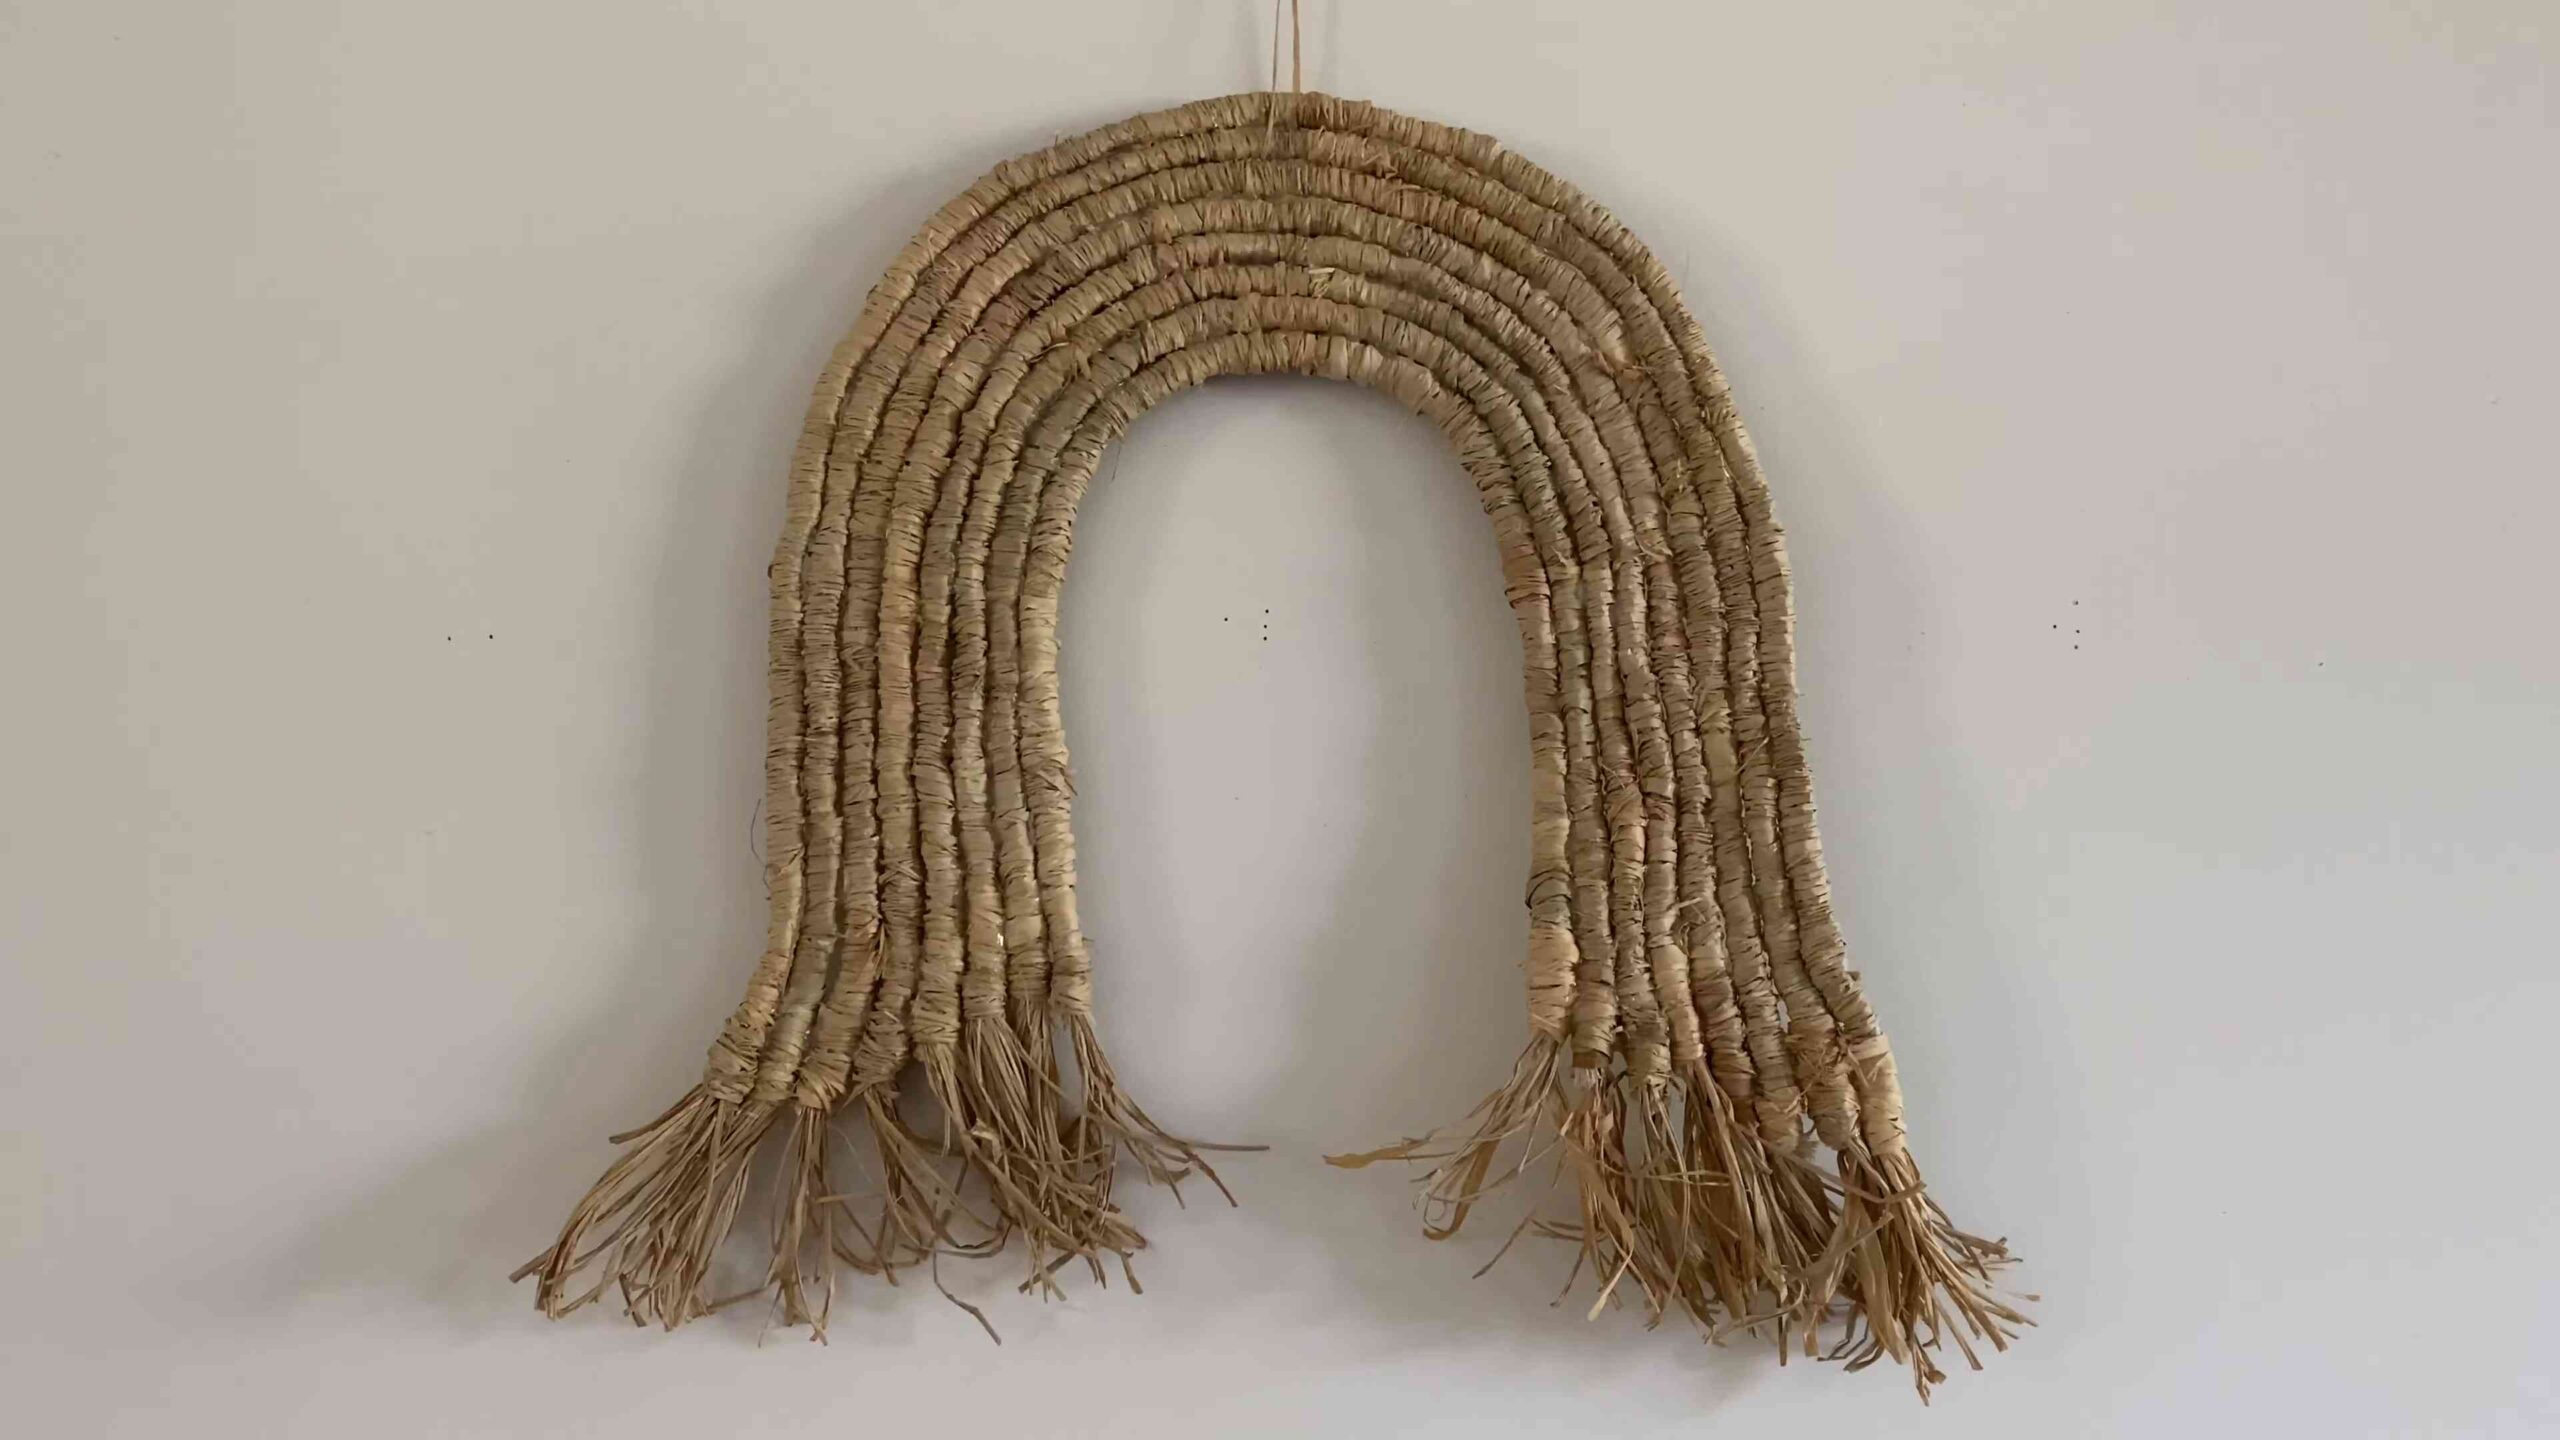
DIY Raffia Wall Hanging: Ready to add a touch of bohemian charm and natural texture to your home? I’m so excited to share this simple yet stunning DIY project with you! Forget those expensive store-bought decorations – we’re diving into the world of crafting a beautiful raffia wall hanging that will instantly elevate any room.
The art of weaving and fiber art has been around for centuries, with raffia, a natural fiber derived from palm leaves, playing a significant role in various cultures. From traditional crafts in Madagascar to contemporary home decor, raffia brings an earthy, organic feel that’s both timeless and on-trend.
Why should you learn this DIY raffia wall hanging trick? Well, besides being incredibly satisfying to create something with your own hands, it’s a fantastic way to personalize your space and express your unique style. Plus, it’s budget-friendly! Instead of spending a fortune on wall art, you can create a statement piece that’s completely your own. I’ll guide you through each step, making it easy even if you’re a complete beginner. Let’s get crafting and transform your walls with this beautiful, textured masterpiece!
DIY Raffia Wall Hanging: A Boho Chic Project You Can Totally Nail!
Okay, friends, let’s dive into creating a gorgeous raffia wall hanging! I’ve always been obsessed with the natural, textured look of raffia, and this project is a fantastic way to bring that boho vibe into your home without breaking the bank. Trust me, it’s easier than it looks!
What You’ll Need: Your Raffia Wall Hanging Supply List
Before we get started, let’s gather our supplies. Having everything ready will make the process so much smoother.
* Raffia: This is the star of the show! You can find raffia in natural tones or dyed in various colors. I recommend getting a generous amount, especially if you’re planning a larger wall hanging. A good starting point is at least 200 grams. You can always buy more if needed.
* Dowel Rod or Branch: This will be the base of your wall hanging. A wooden dowel rod from a craft store works perfectly, or you can forage for a cool-looking branch in your backyard (just make sure it’s clean and dry!). The length will depend on how wide you want your finished piece to be. I’m using a 18-inch dowel rod for this project.
* Scissors: A sharp pair of scissors is essential for cutting the raffia.
* Measuring Tape or Ruler: To ensure your raffia strands are even.
* Comb or Brush: This will help to separate and fluff the raffia for a more textured look. A wide-tooth comb works best.
* Yarn or Twine (Optional): For adding decorative elements or wrapping the dowel rod. I’m going to use some chunky cream-colored yarn to wrap the dowel for a more finished look.
* Hot Glue Gun and Glue Sticks (Optional): For securing yarn or adding extra embellishments.
* Beads, Feathers, or Other Embellishments (Optional): Get creative! These can add a personal touch to your wall hanging. I’m thinking of adding some small wooden beads.
* Work Surface: A large table or floor space will give you plenty of room to work.
Preparing Your Base: Wrapping the Dowel Rod (Optional)
This step is totally optional, but I think it adds a nice touch. Wrapping the dowel rod with yarn or twine gives it a more polished and cohesive look.
1. Apply a Dot of Hot Glue: Place a small dot of hot glue on one end of the dowel rod.
2. Attach the Yarn: Press the end of your yarn or twine onto the glue. Hold it in place until the glue sets.
3. Wrap Tightly: Begin wrapping the yarn tightly around the dowel rod, overlapping each wrap slightly.
4. Continue Wrapping: Continue wrapping until you’ve covered the entire dowel rod.
5. Secure the End: Apply another dot of hot glue to the end of the dowel rod and secure the end of the yarn. Trim any excess yarn.
Creating the Raffia Strands: The Knotting Process
This is where the magic happens! We’ll be using a simple knotting technique to attach the raffia to the dowel rod.
1. Cut the Raffia: Decide on the length you want your raffia strands to be. Remember that the length you cut will be doubled when you attach it to the dowel rod. For example, if you want the strands to hang 12 inches, cut the raffia into 24-inch lengths. I’m starting with 30-inch lengths for a longer, more dramatic look. Cut a bunch of strands at once to save time. I usually cut about 20-30 strands to start.
2. Fold the Raffia: Fold a bundle of raffia strands in half, creating a loop at the top.
3. Attach to the Dowel Rod: Place the loop over the dowel rod.
4. Pull the Ends Through: Reach through the loop and pull the loose ends of the raffia through the loop.
5. Tighten the Knot: Gently pull the ends down to tighten the knot. Make sure the knot is snug but not too tight, as you don’t want to damage the raffia.
6. Repeat: Repeat steps 2-5, attaching more bundles of raffia to the dowel rod. Continue adding raffia until you achieve your desired fullness. I like to alternate between thicker and thinner bundles for a more organic look. Leave a little space on each end of the dowel rod if you plan to hang it with twine or yarn.
Adding Layers and Texture: Varying Lengths and Techniques
To create a more interesting and dynamic wall hanging, let’s add some layers and texture by varying the lengths of the raffia strands and incorporating different knotting techniques.
1. Varying Lengths: Cut some raffia strands shorter than the initial length. This will create a layered effect. I’m cutting some strands to 20 inches and some to 15 inches.
2. Attach Shorter Strands: Attach the shorter strands to the dowel rod using the same knotting technique as before. Distribute them evenly throughout the wall hanging or concentrate them in certain areas for a more asymmetrical look.
3. Adding a Different Knot (Optional): For a different texture, you can try a lark’s head knot. To do this, fold a bundle of raffia in half and place the loop behind the dowel rod. Bring the ends of the raffia forward and through the loop. This creates a slightly different look than the standard knot.
4. Creating a V-Shape (Optional): To create a V-shape at the bottom of your wall hanging, gradually shorten the raffia strands towards the center. This adds a modern and stylish touch.
Trimming and Shaping: Achieving the Perfect Silhouette
Once you’ve attached all the raffia, it’s time to trim and shape it to create the perfect silhouette.
1. Hang the Wall Hanging: Hang the wall hanging on a wall or from a hook. This will give you a better perspective of the overall shape and help you identify any areas that need trimming.
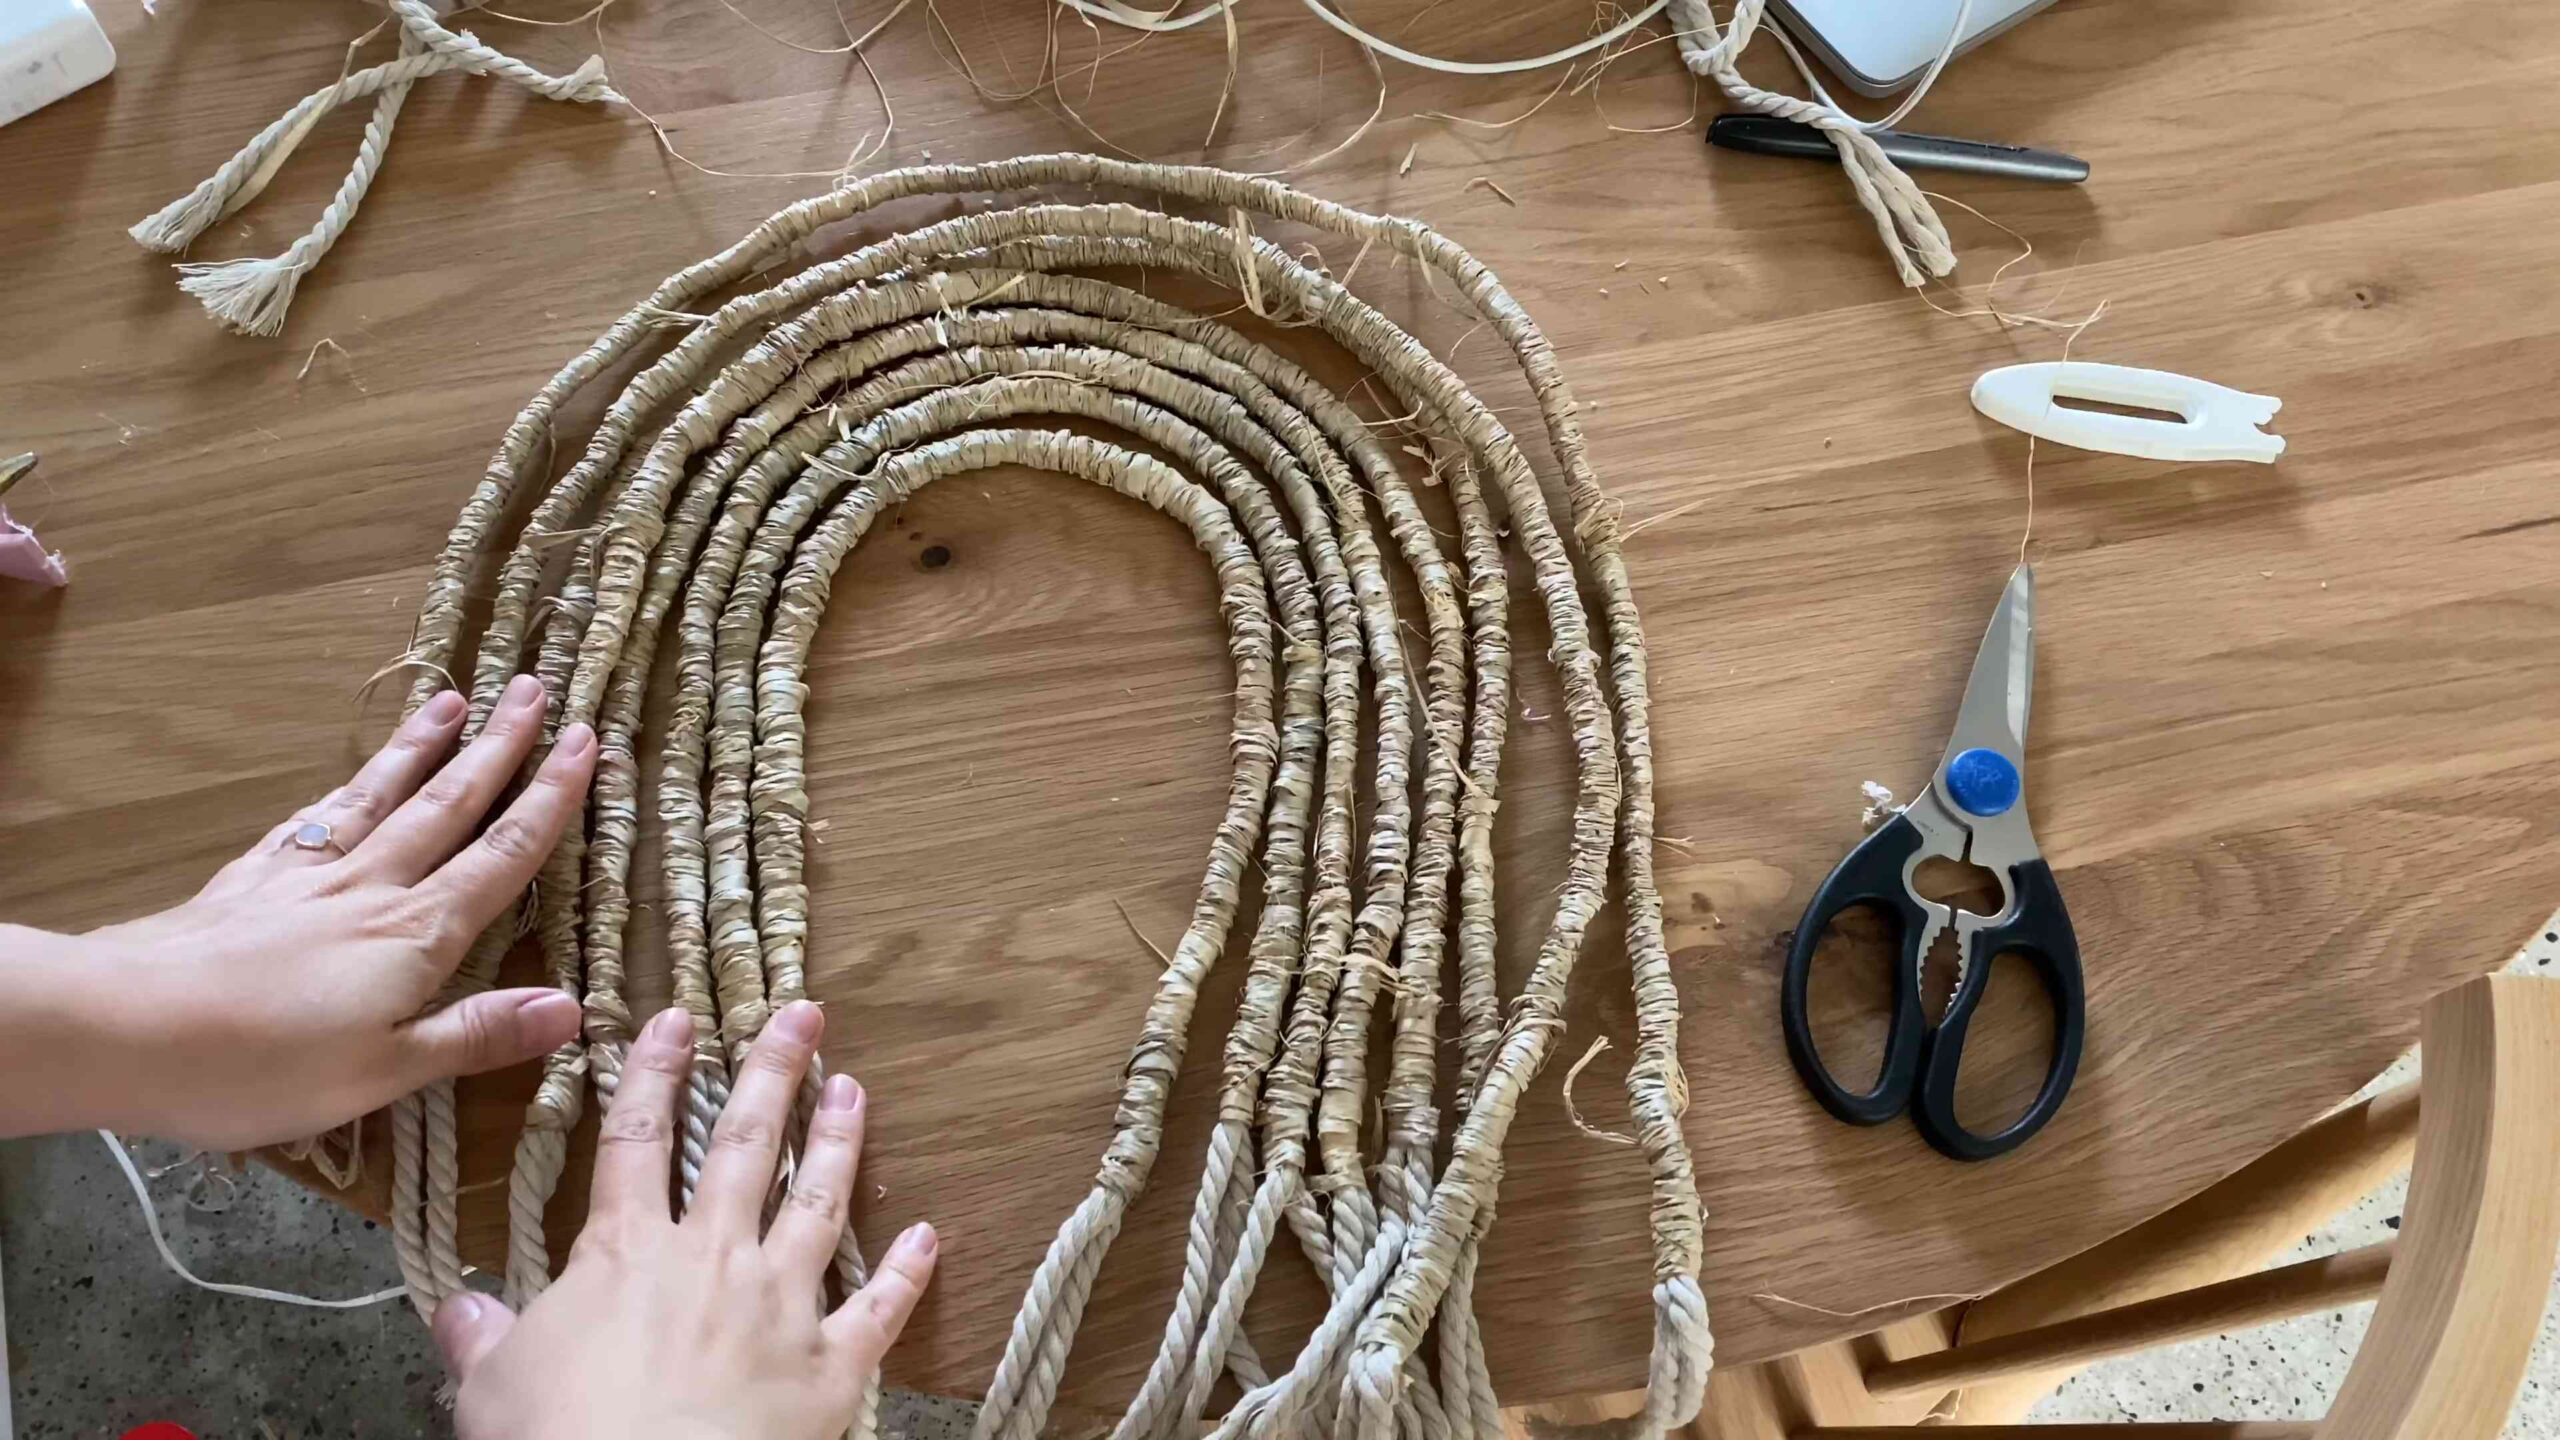
2. Comb or Brush the Raffia: Use a comb or brush to separate and fluff the raffia strands. This will make it easier to see the individual strands and trim them evenly.
3. Trim the Bottom: Use sharp scissors to trim the bottom of the raffia to your desired shape. You can create a straight line, a V-shape, an asymmetrical shape, or any other shape that you like. I’m going for a slightly uneven, organic look.
4. Refine the Shape: Step back and take a look at the wall hanging from a distance. Identify any areas that need further trimming or shaping.
5. Trim Any Stray Strands: Trim any stray strands that are sticking out or look out of place.
Adding Embellishments: Personalizing Your Creation
This is where you can really let your creativity shine! Add beads, feathers, or other embellishments to personalize your wall hanging and make it truly unique.
1. Beads: String beads onto individual raffia strands or create beaded tassels to hang from the bottom of the wall hanging. I’m using a needle to thread the beads onto the raffia.
2. Feathers: Attach feathers to the raffia strands using hot glue or by tying them on with yarn or twine.
3. Other Embellishments: Get creative with other embellishments, such as shells, small pieces of driftwood, or even fabric scraps.
4. Placement: Experiment with different placements of the embellishments until you find a look that you love.
Finishing Touches: Hanging Your Masterpiece
Now that your raffia wall hanging is complete, it’s time to hang it up and enjoy your creation!
1. Attach Hanging Cord: Cut a length of yarn or twine and tie it to each end of the dowel rod. Make sure the cord is long enough to hang the wall hanging at your desired height.
2. Secure the Knots: Double-knot the yarn or twine to ensure it’s secure. You can also add a dab of hot glue to the knots for extra security.
3. Hang and Enjoy: Hang your raffia wall hanging on a wall or from a hook. Step back and admire your handiwork!
Tips and Tricks for Raffia Wall Hanging Success:
* Don’t be afraid to experiment! There are no hard and fast rules when it comes to DIY projects. Try different knotting techniques, lengths, and embellishments to create a wall hanging that is truly your own.
* Work in batches. Cutting and attaching the raffia can be time-consuming. Break the process down into smaller batches to avoid feeling overwhelmed.
* Use a lint roller. Raffia can sometimes shed a bit. Use a
Conclusion
So, there you have it! Creating your own DIY raffia wall hanging is not only incredibly simple and budget-friendly, but it’s also a fantastic way to inject personality and texture into your living space. Forget those mass-produced, generic wall decorations – this project allows you to craft a truly unique piece that reflects your individual style and creativity.
Why is this a must-try? Because it’s more than just a craft project; it’s an opportunity to transform your home into a haven that feels authentically *you*. The natural, earthy tones of raffia bring a sense of calm and tranquility, while the handmade element adds a touch of warmth and character that you simply can’t replicate with store-bought items. Plus, the satisfaction of creating something beautiful with your own two hands is a reward in itself!
But the beauty of this DIY project lies in its versatility. Feel free to experiment with different colors of raffia to match your existing décor. Consider incorporating other natural elements like feathers, beads, or small pieces of driftwood for added texture and visual interest. You could even try weaving in different patterns or creating a more intricate design if you’re feeling ambitious. The possibilities are truly endless!
Don’t be afraid to get creative and personalize your raffia wall hanging to make it your own.
Think about the space where you plan to hang your masterpiece. A larger, more elaborate design might be perfect for a living room or bedroom, while a smaller, simpler piece could add a touch of charm to a hallway or bathroom. Consider the color palette of the room and choose raffia colors that complement the existing décor.
We encourage you to give this DIY raffia wall hanging project a try. It’s a fun, relaxing, and rewarding way to add a touch of bohemian chic to your home. And most importantly, don’t forget to share your creations with us! We’d love to see your unique designs and hear about your experience. Tag us on social media and let us know how your DIY raffia wall hanging turned out. Happy crafting!
Frequently Asked Questions (FAQ)
What exactly is raffia, and where can I find it?
Raffia is a natural fiber made from the leaves of the raffia palm tree. It’s known for its strength, flexibility, and natural texture, making it an ideal material for crafting. You can typically find raffia at craft stores, online retailers specializing in craft supplies, and even some garden centers. Look for it in hanks or spools, and it’s often available in a variety of natural colors and dyed shades.
Is this DIY project suitable for beginners?
Absolutely! This DIY raffia wall hanging project is designed to be beginner-friendly. The basic techniques involved, such as wrapping and knotting, are relatively simple to learn. With a little patience and practice, anyone can create a beautiful and unique wall hanging. Don’t be intimidated if your first attempt isn’t perfect – the beauty of handmade items lies in their imperfections.
What tools and materials do I need to get started?
The essential tools and materials you’ll need include:
* Raffia (in your desired colors and quantity)
* A wooden dowel, branch, or metal ring (for the base of your wall hanging)
* Scissors
* Hot glue gun (optional, for securing loose ends)
* Measuring tape or ruler (optional, for precise measurements)
* Comb or brush (optional, for smoothing out the raffia)
You may also want to gather additional embellishments like beads, feathers, or driftwood, depending on your desired design.
How long does it typically take to complete a raffia wall hanging?
The time it takes to complete a raffia wall hanging will vary depending on the size and complexity of your design. A simple, small wall hanging could be completed in a few hours, while a larger, more intricate piece might take a few days. Don’t rush the process – enjoy the creative journey and take breaks as needed.
How do I care for and clean my raffia wall hanging?
Raffia is a natural fiber, so it’s important to handle your wall hanging with care. To clean it, gently dust it with a soft brush or cloth. Avoid getting it wet, as this can damage the raffia. If necessary, you can spot clean it with a damp cloth and mild soap, but be sure to dry it thoroughly afterward. To prevent fading, avoid hanging your wall hanging in direct sunlight.
Can I use different types of yarn or fibers instead of raffia?
While raffia is the star of this project, you can certainly experiment with other types of yarn or fibers to create a similar effect. Consider using cotton yarn, wool yarn, jute twine, or even recycled fabric strips. Each material will give your wall hanging a different texture and appearance, so have fun exploring the possibilities.
How do I prevent the raffia from unraveling?
To prevent the raffia from unraveling, you can secure the ends with a small dab of hot glue or tie them in a knot. You can also use a needle and thread to stitch the ends together for a more secure hold. Trimming the ends neatly will also help to prevent fraying.
What are some design ideas for my raffia wall hanging?
The design possibilities are endless! Here are a few ideas to get you started:
* Create a geometric pattern using different colors of raffia.
* Incorporate macrame knots for added texture and visual interest.
* Add beads, feathers, or shells for a bohemian vibe.
* Create a layered effect by using different lengths of raffia.
* Experiment with different weaving techniques.
* Make a mini wall hanging for a small space.
* Try a tassel design for a playful touch.
Where is the best place to hang my raffia wall hanging?
Raffia wall hangings can be hung in a variety of spaces, depending on your personal style and the overall aesthetic of your home. They look great in living rooms, bedrooms, hallways, bathrooms, and even nurseries. Consider the size and style of your wall hanging when choosing a location. A larger piece might be best suited for a focal point wall, while a smaller piece could be used to add a touch of texture to a gallery wall.
How can I share my DIY raffia wall hanging with others?
We’d love to see your creations! You can share your DIY raffia wall hanging on social media using relevant hashtags like #DIYraffiawallhanging, #raffiacraft, #homedecor, and #handmade. Tag us in your posts so we can admire your work and share it with our community. You can also share your project on craft forums or websites to inspire others.
Leave a Comment