

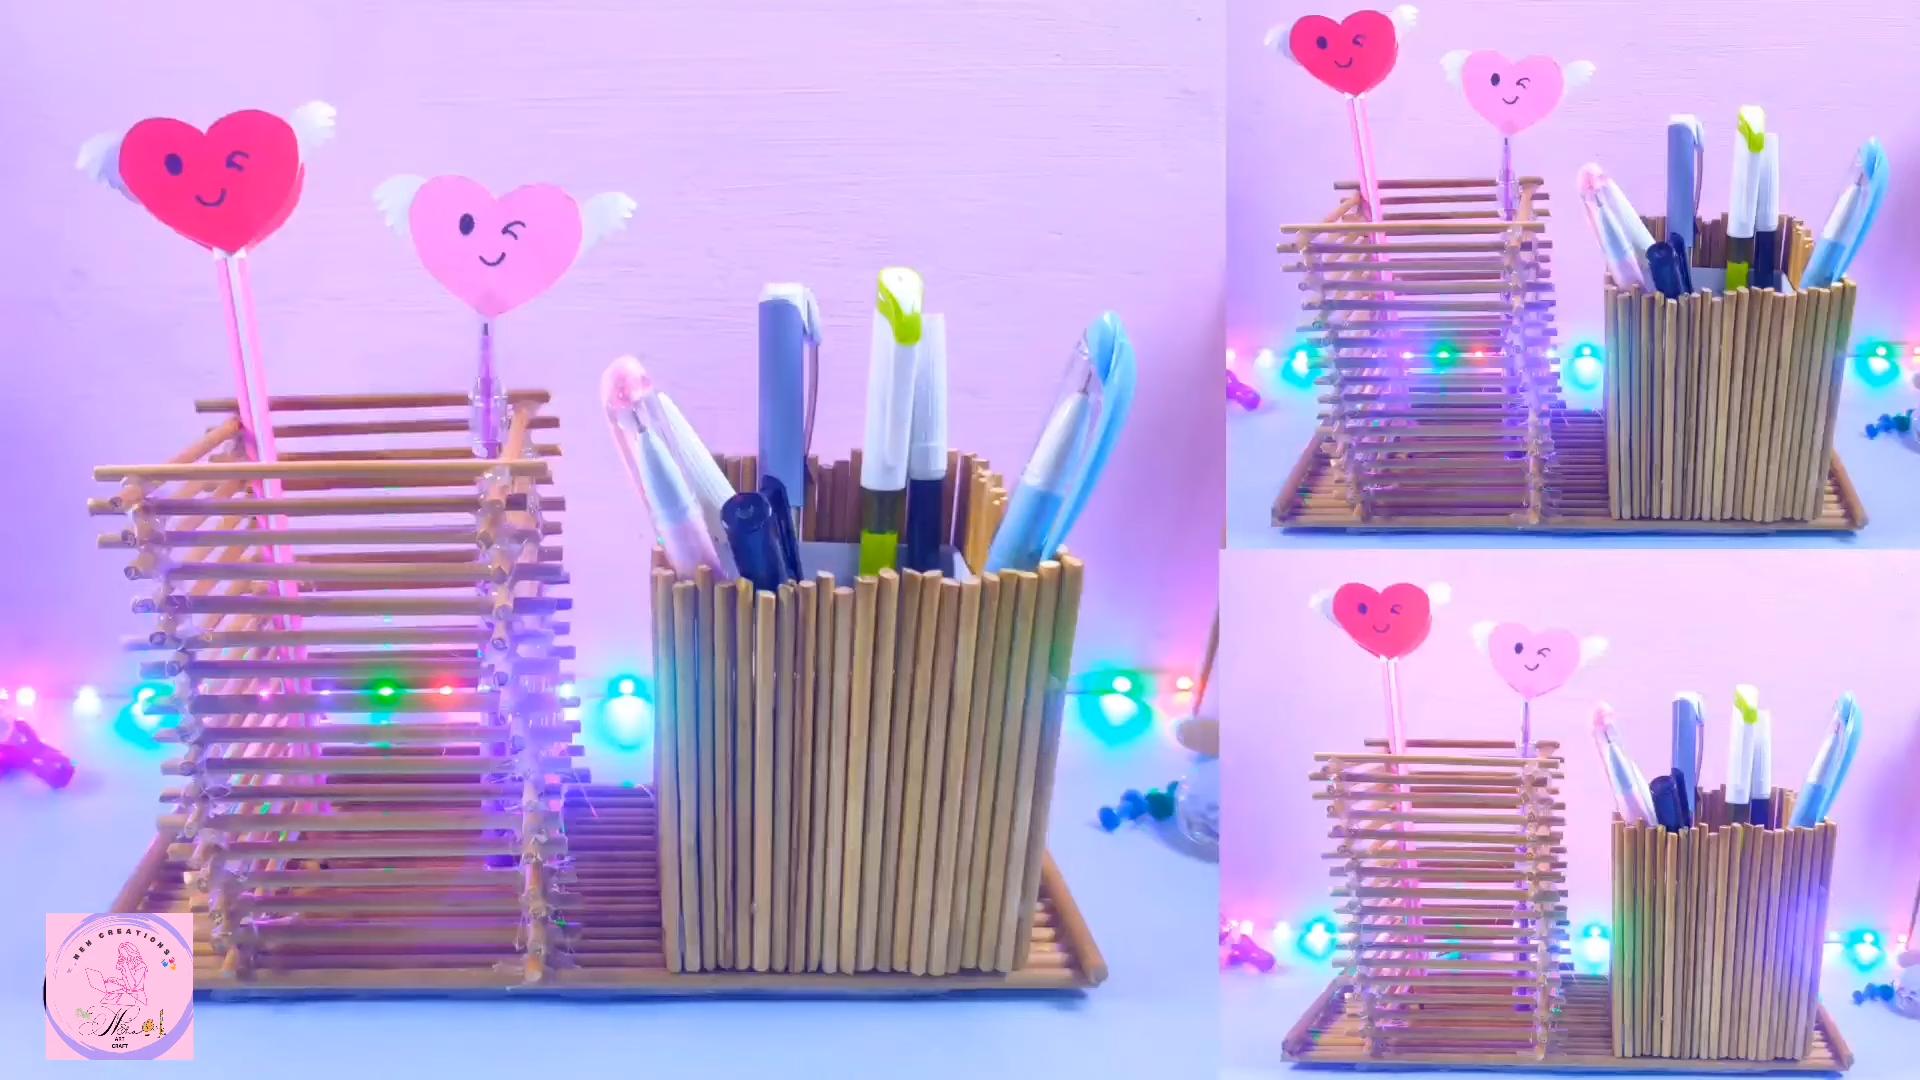
DIY Pen Holder Craft: Unleash Your Creativity and Organize Your Space!
Ever find yourself drowning in a sea of pens, pencils, and markers, desperately searching for that one elusive writing tool? I know I have! That’s why I’m so excited to share some fantastic DIY pen holder craft ideas that will not only declutter your desk but also add a touch of personality to your workspace.
While the humble pen holder might seem like a modern invention, its roots can be traced back to ancient civilizations. Scribes in ancient Egypt, for example, used specialized containers to hold their reeds and writing implements. Over time, these functional objects evolved into decorative pieces, reflecting the artistry and craftsmanship of different cultures. Today, we can continue this tradition by creating our own unique pen holders!
In today’s fast-paced world, where organization is key to productivity, a well-crafted pen holder is more than just a desk accessory; it’s a statement. It’s a reflection of your personal style and a testament to your resourcefulness. Plus, let’s be honest, who doesn’t love a good upcycling project? These DIY pen holder craft ideas are not only budget-friendly but also environmentally conscious, allowing you to transform everyday materials into something beautiful and functional. So, grab your glue gun, gather your supplies, and let’s get crafting! I’m confident you’ll find a project here that sparks your imagination and helps you conquer desk disorganization once and for all.
DIY Pen Holder: Upcycle Your Way to an Organized Desk!
Hey everyone! Are you tired of pens rolling all over your desk, disappearing into the abyss of clutter? I know I was! That’s why I decided to tackle this super easy and fun DIY pen holder project. It’s a great way to upcycle materials you probably already have lying around and add a personal touch to your workspace. Plus, it’s incredibly satisfying to create something useful with your own hands. Let’s get started!
Materials You’ll Need:
Before we dive in, let’s gather our supplies. The beauty of this project is its flexibility – feel free to substitute materials based on what you have available!
* Cardboard Tubes: Think toilet paper rolls, paper towel rolls, or even mailing tubes cut to size. The more variety in height, the more interesting your pen holder will be. I used a mix of all three!
* Base Material: This could be a piece of cardboard, a small wooden plank, a sturdy plastic lid, or even a recycled tile. It needs to be large enough to accommodate all your tubes with a little extra space. I opted for a piece of thick cardboard.
* Glue: Hot glue is my go-to for this project because it dries quickly and creates a strong bond. However, you can also use craft glue or even strong double-sided tape, but keep in mind the drying time will be longer.
* Scissors or Craft Knife: For cutting the cardboard tubes if needed. Always be careful when using sharp tools!
* Ruler or Measuring Tape: To ensure your tubes are the desired height and your base is the right size.
* Pencil or Pen: For marking measurements.
* Decorating Supplies: This is where you can really let your creativity shine! Here are some ideas:
* Paint (acrylic, spray paint, etc.)
* Wrapping paper
* Fabric scraps
* Washi tape
* Glitter
* Buttons
* Ribbon
* Markers
* Stickers
* Optional:
* Sandpaper (if using a wooden base)
* Primer (if painting)
* Sealer (to protect your finished pen holder)
Preparing the Cardboard Tubes:
This step involves getting your tubes ready for assembly. It’s all about achieving the right heights and ensuring a clean, even surface for decorating.
1. Measure and Cut (if necessary): Decide on the heights you want for your pen holder. I like to have a variety – some taller for pens and pencils, and some shorter for smaller items like paper clips or erasers. Use your ruler and pencil to mark the desired lengths on the cardboard tubes. If you’re using a craft knife, place the tube on a cutting mat and carefully cut along the marked line. If you’re using scissors, you might need to score the line first to get a clean cut.
2. Sand the Edges (optional): If the cut edges are a bit rough, you can lightly sand them down with sandpaper. This will give you a smoother surface for decorating and prevent any snags.
3. Clean the Tubes: Wipe down the cardboard tubes with a damp cloth to remove any dust or debris. This will help the glue and decorating materials adhere better.
Preparing the Base:
The base is the foundation of your pen holder, so it’s important to make sure it’s sturdy and the right size.
1. Cut to Size: If your base material is too large, use your ruler and pencil to mark the desired size and shape. Then, carefully cut it to size using scissors or a craft knife. I went with a simple rectangular shape for my cardboard base.
2. Sand (if using wood): If you’re using a wooden base, sand it down to create a smooth surface. This will also help the paint or other decorating materials adhere better.
3. Prime (optional): If you’re planning to paint your base, you might want to apply a primer first. This will help the paint adhere better and create a more even finish. I skipped this step since I was covering my cardboard base with wrapping paper.
4. Decorate the Base (optional): You can decorate the base before attaching the tubes, or you can wait until the end. I chose to decorate mine first. I covered my cardboard base with a piece of pretty wrapping paper, securing it with glue. You could also paint it, cover it with fabric, or use any other decorating technique you like.
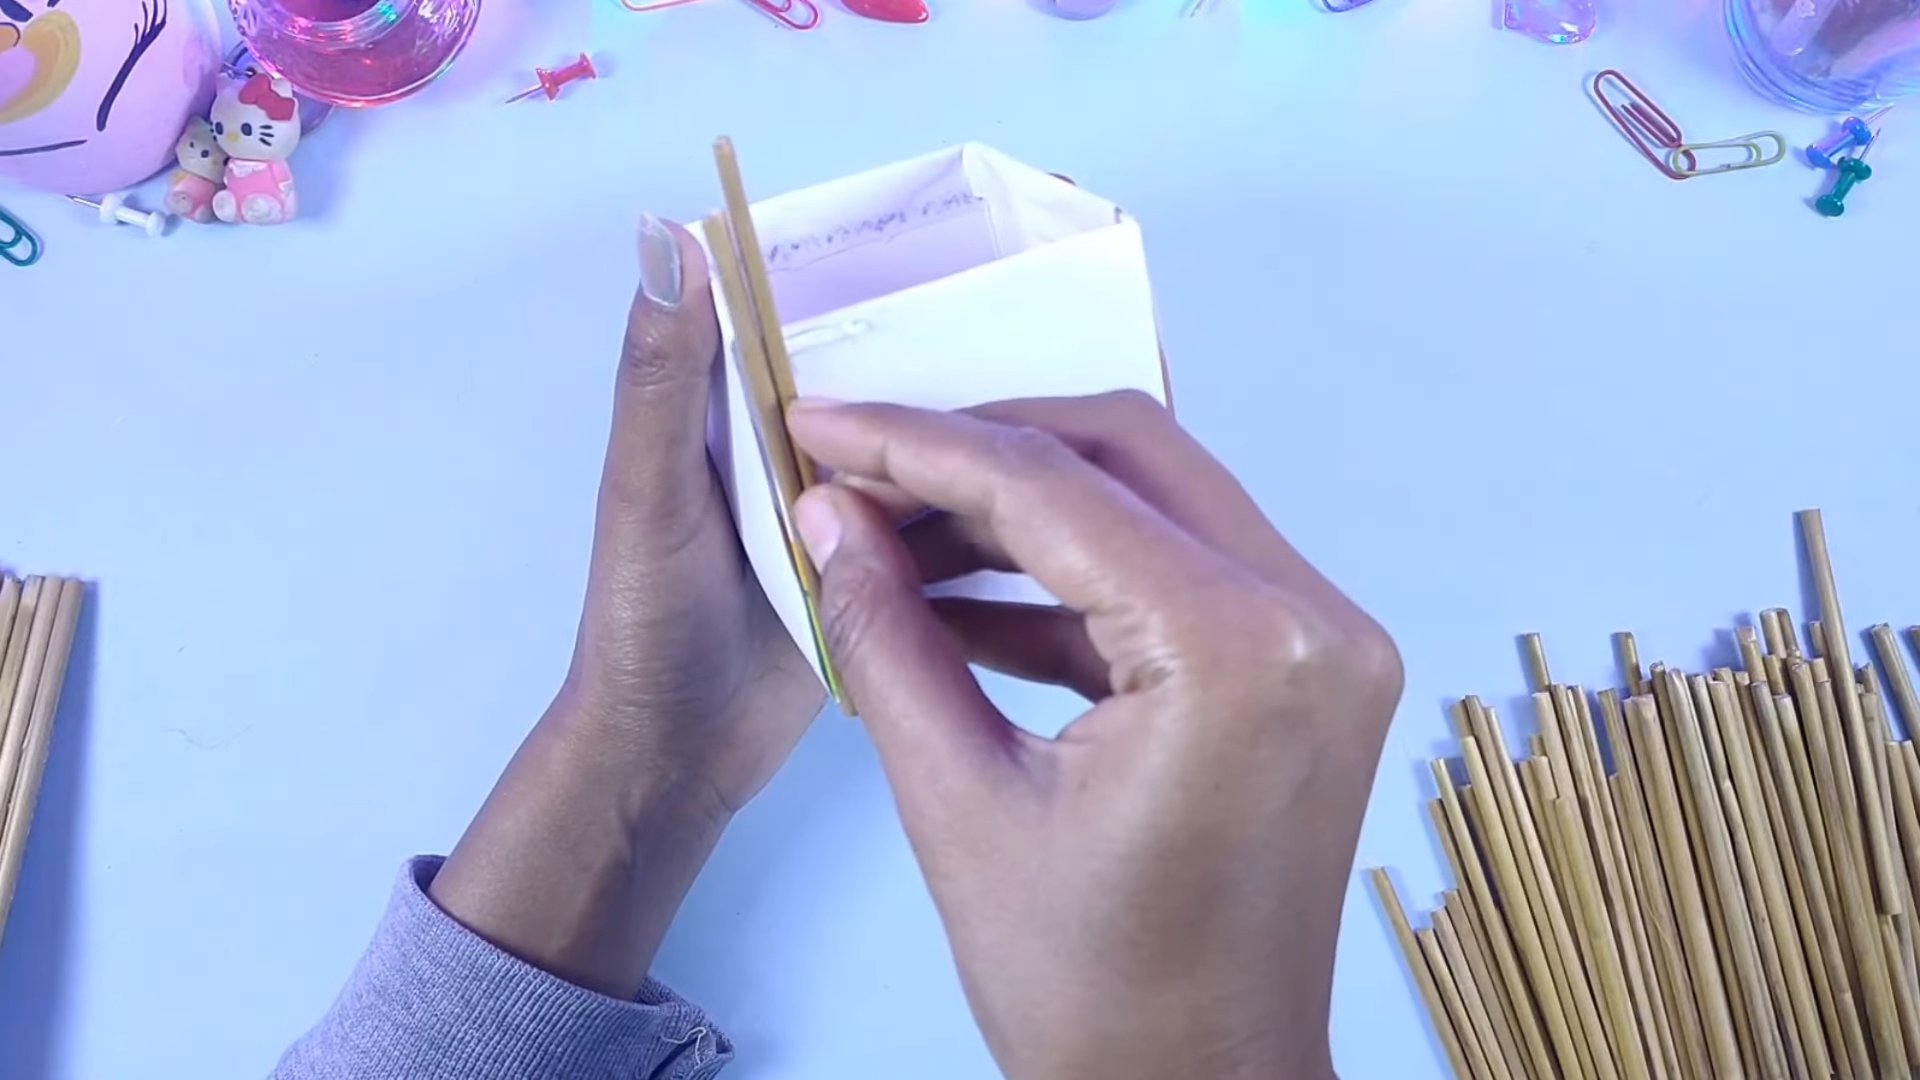
Assembling the Pen Holder:
Now for the fun part – putting everything together!
1. Arrange the Tubes: Before you start gluing, arrange the cardboard tubes on the base to get an idea of how you want them to look. Experiment with different arrangements until you find one you like. Consider the heights of the tubes and how they will accommodate your pens and other desk supplies. I played around with a few different layouts before settling on one that I thought looked balanced and functional.
2. Glue the Tubes to the Base: Once you’re happy with the arrangement, start gluing the tubes to the base one at a time. Apply a generous amount of glue to the bottom of each tube and press it firmly onto the base. Hold it in place for a few seconds until the glue starts to set. If you’re using hot glue, this will only take a few seconds. If you’re using craft glue, you might need to hold it in place for a minute or two.
3. Let the Glue Dry: Allow the glue to dry completely before moving on to the next step. This will ensure that the tubes are securely attached to the base. The drying time will depend on the type of glue you’re using. Hot glue dries very quickly, while craft glue can take several hours to dry completely. I usually wait at least an hour just to be safe.
Decorating the Tubes:
This is where you can really personalize your pen holder and make it your own! There are endless possibilities for decorating the tubes.
1. Choose Your Decorating Method: Decide how you want to decorate the tubes. Here are some ideas:
* Paint: Paint the tubes with acrylic paint, spray paint, or any other type of paint you like. You can use different colors for each tube, or you can create a pattern.
* Wrapping Paper: Cover the tubes with wrapping paper. Cut the wrapping paper to size and glue it to the tubes.
* Fabric Scraps: Wrap the tubes with fabric scraps. Secure the fabric with glue or double-sided tape.
* Washi Tape: Decorate the tubes with washi tape. Washi tape is a great way to add color and pattern to your pen holder.
* Glitter: Add glitter to the tubes for a sparkly effect. Apply glue to the tubes and then sprinkle with glitter.
* Buttons: Glue buttons to the tubes for a fun and whimsical look.
* Ribbon: Wrap ribbon around the tubes and secure it with glue.
* Markers: Draw designs on the tubes with markers.
* Stickers: Add stickers to the tubes.
2. Decorate the Tubes: Once you’ve chosen your decorating method, start decorating the tubes. Take your time and be creative! I decided to use a combination of paint and washi tape for my pen holder. I painted some of the tubes with acrylic paint in different colors, and I covered others with colorful washi tape.
3. Let the Decorations Dry: Allow the decorations to dry completely before moving on to the next step. This will prevent any smudging or smearing.
Finishing Touches (Optional):
These final steps will add a professional touch to your pen holder and help protect it from wear and tear.
1. Apply a Sealer: If you’ve used paint or other materials that might be prone to chipping or fading, you can apply a sealer to protect your pen holder. This will also give it a nice, glossy finish. I used a clear acrylic sealer spray.
2. Add Embellishments: If you want to add even more personality to your pen holder, you can add embellishments like buttons, beads, or charms. Glue them to the tubes or the base.
3. Organize Your Desk: Now that your pen holder is finished, it’s time to organize your desk! Fill the tubes with your pens, pencils, and other desk supplies. Enjoy your newly organized workspace!
And there you have it! A super cute and functional pen holder made from upcycled materials. I hope you enjoyed this DIY project as much as I did. It’s a great way to add a personal touch to your desk and keep your supplies organized. Happy crafting!
Conclusion
So, there you have it! Transforming ordinary materials into a stylish and functional DIY pen holder is not only incredibly easy but also remarkably rewarding. We’ve walked you through a simple yet effective method to create a personalized desk organizer that reflects your unique style and keeps your workspace clutter-free.
Why is this DIY trick a must-try? Because it’s more than just crafting; it’s about resourcefulness, creativity, and adding a personal touch to your everyday life. In a world of mass-produced items, creating something with your own hands offers a sense of accomplishment and satisfaction that’s hard to replicate. Plus, it’s a fantastic way to upcycle materials you might otherwise discard, contributing to a more sustainable lifestyle.
But the fun doesn’t stop here! Feel free to experiment with different variations to truly make this pen holder your own. Consider using fabric scraps, colorful yarn, or even mosaic tiles to decorate the exterior. You could also add compartments for other desk essentials like paper clips, sticky notes, or even your phone. If you’re feeling particularly ambitious, try creating a multi-tiered pen holder using different sized containers stacked on top of each other.
For a rustic touch, consider using burlap or twine to wrap around the container. If you prefer a more modern aesthetic, opt for sleek metallic paint or geometric patterns. The possibilities are truly endless! Don’t be afraid to let your imagination run wild and create a pen holder that perfectly complements your personal style and workspace décor.
Remember, the beauty of DIY projects lies in their flexibility and adaptability. There are no strict rules to follow, only guidelines to inspire you. So, gather your materials, unleash your creativity, and embark on this exciting crafting adventure.
We are confident that you’ll be thrilled with the results. Not only will you have a functional and stylish pen holder, but you’ll also have the satisfaction of knowing that you created it yourself. It’s a win-win situation!
We wholeheartedly encourage you to try this DIY pen holder craft and share your experience with us. We’d love to see your creations and hear about any variations or modifications you made along the way. Share your photos and stories on social media using [Your Hashtag Here] or leave a comment below. Let’s inspire each other and celebrate the joy of DIY crafting!
Ready to declutter your desk and add a touch of personal style? Start crafting your DIY pen holder today!
FAQ
What kind of container works best for a DIY pen holder?
Almost any sturdy container can be transformed into a pen holder! Recycled tin cans, glass jars, plastic bottles (cut to size), cardboard tubes (like those from paper towels or wrapping paper), and even small wooden boxes are all excellent options. Consider the size and shape of the container based on the number and type of pens and pencils you want to store. For example, a wider jar might be better for holding thicker markers, while a taller can is ideal for longer pencils. Also, ensure the container is clean and free of any sharp edges before you begin decorating.
What are some easy ways to decorate my DIY pen holder?
The decoration options are virtually limitless! Here are a few ideas to get you started:
* Paint: Acrylic paint is a versatile and affordable option. You can use solid colors, create patterns, or even paint a miniature landscape.
* Wrapping Paper or Fabric: Cut and glue wrapping paper or fabric scraps around the container for a quick and easy makeover. Mod Podge works well as an adhesive.
* Yarn or Twine: Wrap yarn or twine around the container for a textured, rustic look. Secure the ends with glue.
* Washi Tape: Washi tape comes in a wide variety of colors and patterns, making it perfect for adding decorative stripes or geometric designs.
* Beads, Buttons, and Sequins: Glue on beads, buttons, and sequins for a sparkly and eye-catching pen holder.
* Decoupage: Cut out images from magazines, newspapers, or printed paper and glue them onto the container using Mod Podge.
* Stickers: Stickers are a simple and fun way to personalize your pen holder, especially for kids.
How can I make my DIY pen holder more stable?
If you’re using a lightweight container, you can add weight to the bottom to make it more stable. Here are a few suggestions:
* Rocks or Pebbles: Place a layer of small rocks or pebbles at the bottom of the container before adding your pens and pencils.
* Sand or Gravel: Fill the bottom of the container with sand or gravel.
* Coins: Glue a layer of coins to the bottom of the container.
* Plaster of Paris: Pour a small amount of Plaster of Paris into the bottom of the container and let it harden.
Can I make a pen holder with multiple compartments?
Absolutely! Creating a pen holder with multiple compartments is a great way to organize your desk supplies even further. Here are a few ideas:
* Use Multiple Containers: Glue several smaller containers together to create a multi-compartment pen holder.
* Cardboard Dividers: Cut pieces of cardboard to fit inside your container and create dividers. Secure them with glue or tape.
* Upcycled Boxes: Use small upcycled boxes (like those from tea bags or jewelry) as individual compartments within a larger container.
What if I don’t have glue? What can I use instead?
While glue is generally the best option for securing decorations to your pen holder, there are a few alternatives you can try:
* Tape: Double-sided tape or strong packing tape can be used to adhere lightweight decorations.
* Hot Glue Gun: A hot glue gun provides a strong and instant bond, but be careful when using it, as the glue can be very hot.
* Staples: For fabric or paper decorations, you can use staples to secure them to the container.
* Natural Adhesives: In a pinch, you can try making a simple paste from flour and water. However, this may not be as strong as commercial glue.
How do I clean my DIY pen holder?
The cleaning method will depend on the materials you used to decorate your pen holder. For most surfaces, a damp cloth will suffice. Avoid using harsh chemicals or abrasive cleaners, as they could damage the decorations. If you used paper or fabric decorations, be careful not to get them too wet. For stubborn stains, try using a mild soap and water solution.
Is this DIY project suitable for kids?
Yes, this DIY project can be a fun and engaging activity for kids, but adult supervision is recommended, especially when using sharp tools like scissors or hot glue guns. Choose age-appropriate materials and decorations, and encourage kids to express their creativity and personalize their pen holders.
How can I make this DIY pen holder more eco-friendly?
Making your DIY pen holder eco-friendly is a great way to reduce waste and promote sustainability. Here are a few tips:
* Use Recycled Materials: Opt for recycled containers, paper, fabric, and other materials whenever possible.
* Choose Eco-Friendly Adhesives: Look for non-toxic and biodegradable glues.
* Avoid Plastic Decorations: Consider using natural materials like wood, leaves, or dried flowers for decoration.
* Upcycle Old Pens and Pencils: If you have old pens and pencils that no longer work, you can break them down and use the parts for decoration.

Leave a Comment