

DIY Oven Cleaning Guide: Let’s face it, cleaning the oven is probably on everyone’s list of least favorite chores. It’s messy, it’s time-consuming, and those store-bought oven cleaners? Whew, the fumes alone are enough to send you running! But what if I told you there’s a better way? A way to tackle that baked-on grime without harsh chemicals and endless scrubbing?
For generations, resourceful homemakers have relied on simple, natural ingredients to keep their homes sparkling. Think about it – before the age of commercial cleaners, our grandmothers and great-grandmothers used things like vinegar, baking soda, and lemon to keep their ovens clean. These methods are not only effective, but they’re also gentler on the environment and safer for your family.
That’s why I’m so excited to share this DIY Oven Cleaning Guide with you! In this article, we’ll ditch the harsh chemicals and embrace a more natural approach. You’ll learn simple, step-by-step instructions for creating your own powerful oven cleaner using ingredients you probably already have in your pantry. Not only will you save money, but you’ll also breathe easier knowing you’re not exposing yourself or your loved ones to harmful toxins. Plus, I’ll share some insider tips and tricks to make the process even easier and more effective. So, let’s get started and transform that grimy oven into a sparkling clean masterpiece!
DIY Oven Cleaning: The Baking Soda and Vinegar Powerhouse!
Okay, let’s be honest, cleaning the oven is probably on everyone’s list of least favorite chores. But fear not! I’m going to walk you through a super effective, all-natural method using just baking soda and vinegar. It’s cheap, it’s safe, and it actually works wonders on even the most baked-on grime. Trust me, your oven will thank you!
What You’ll Need:
Before we dive in, let’s gather our supplies. This is a pretty simple list, which is part of what makes this method so great!
* Baking Soda: The star of the show! We’ll need a good amount, so grab a fresh box if yours is running low.
* White Vinegar: The bubbly activator! Plain white vinegar is perfect.
* Water: For mixing and rinsing.
* Spray Bottle: An empty spray bottle is essential for applying the vinegar.
* Spatula or Scraper: A plastic or rubber spatula will help loosen stubborn grime without scratching your oven.
* Sponge or Cloth: For wiping and scrubbing. I prefer a non-scratch sponge.
* Rubber Gloves: Protect your hands from the baking soda paste.
* Old Towels or Rags: For soaking up spills and wiping down surfaces.
* Trash Bag: For disposing of the baking soda paste.
* Small Bowl: For mixing the baking soda paste.
Step-by-Step Oven Cleaning Guide:
Alright, let’s get down to business! Follow these steps, and you’ll have a sparkling clean oven in no time.
1. Remove Oven Racks and Clean Separately:
* First things first, take out all the oven racks. This will give you better access to the inside of the oven.
* Fill your sink or bathtub with hot, soapy water. Dish soap works great!
* Submerge the racks in the hot water and let them soak for at least 30 minutes, or even overnight for really tough grime.
* After soaking, scrub the racks with a sponge or brush to remove any remaining residue. You might need a little elbow grease here!
* Rinse the racks thoroughly with clean water and let them air dry completely before putting them back in the oven.
2. Prepare the Baking Soda Paste:
* In your small bowl, mix together about ½ cup of baking soda with enough water to form a thick, spreadable paste. You want it to be similar to the consistency of frosting.
* Add the water gradually, mixing as you go, until you achieve the desired consistency.
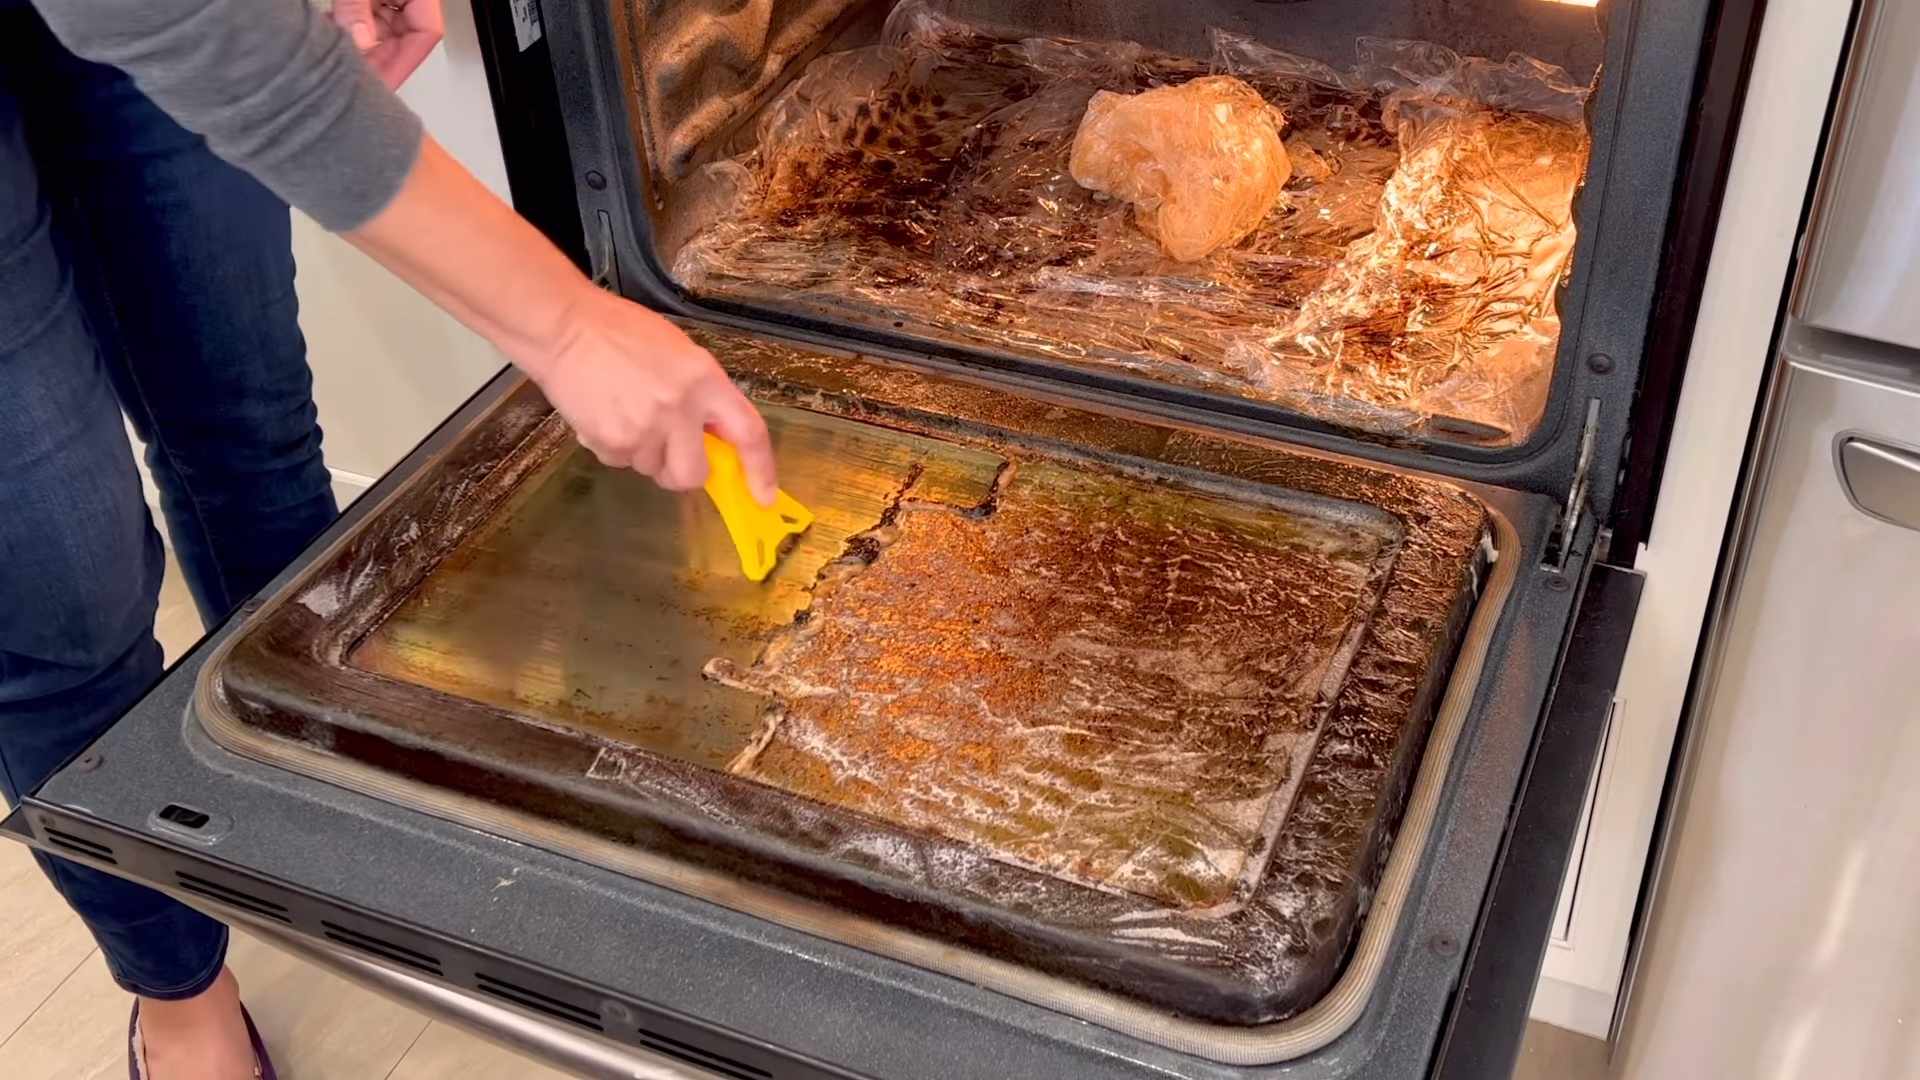
3. Coat the Oven Interior with Baking Soda Paste:
* Put on your rubber gloves to protect your hands.
* Using your hands or a spatula, spread the baking soda paste all over the interior surfaces of your oven, avoiding the heating elements.
* Make sure to coat the back, sides, top, bottom, and door of the oven.
* For particularly stubborn areas, apply a thicker layer of paste.
* Important: Avoid getting the paste on the heating elements, as it can be difficult to remove.
4. Let the Baking Soda Paste Sit Overnight:
* This is the key to the whole process! The baking soda needs time to work its magic and loosen the baked-on grime.
* Leave the baking soda paste on the oven interior for at least 12 hours, or even longer if your oven is particularly dirty. I usually do this overnight so it’s ready to go in the morning.
5. Wipe Down the Oven Interior:
* After the baking soda has had time to sit, use a damp sponge or cloth to wipe away as much of the dried paste as possible.
* You might need to use a little elbow grease to remove some of the more stubborn areas.
* Use your spatula or scraper to help loosen any remaining grime.
* Rinse your sponge or cloth frequently with clean water.
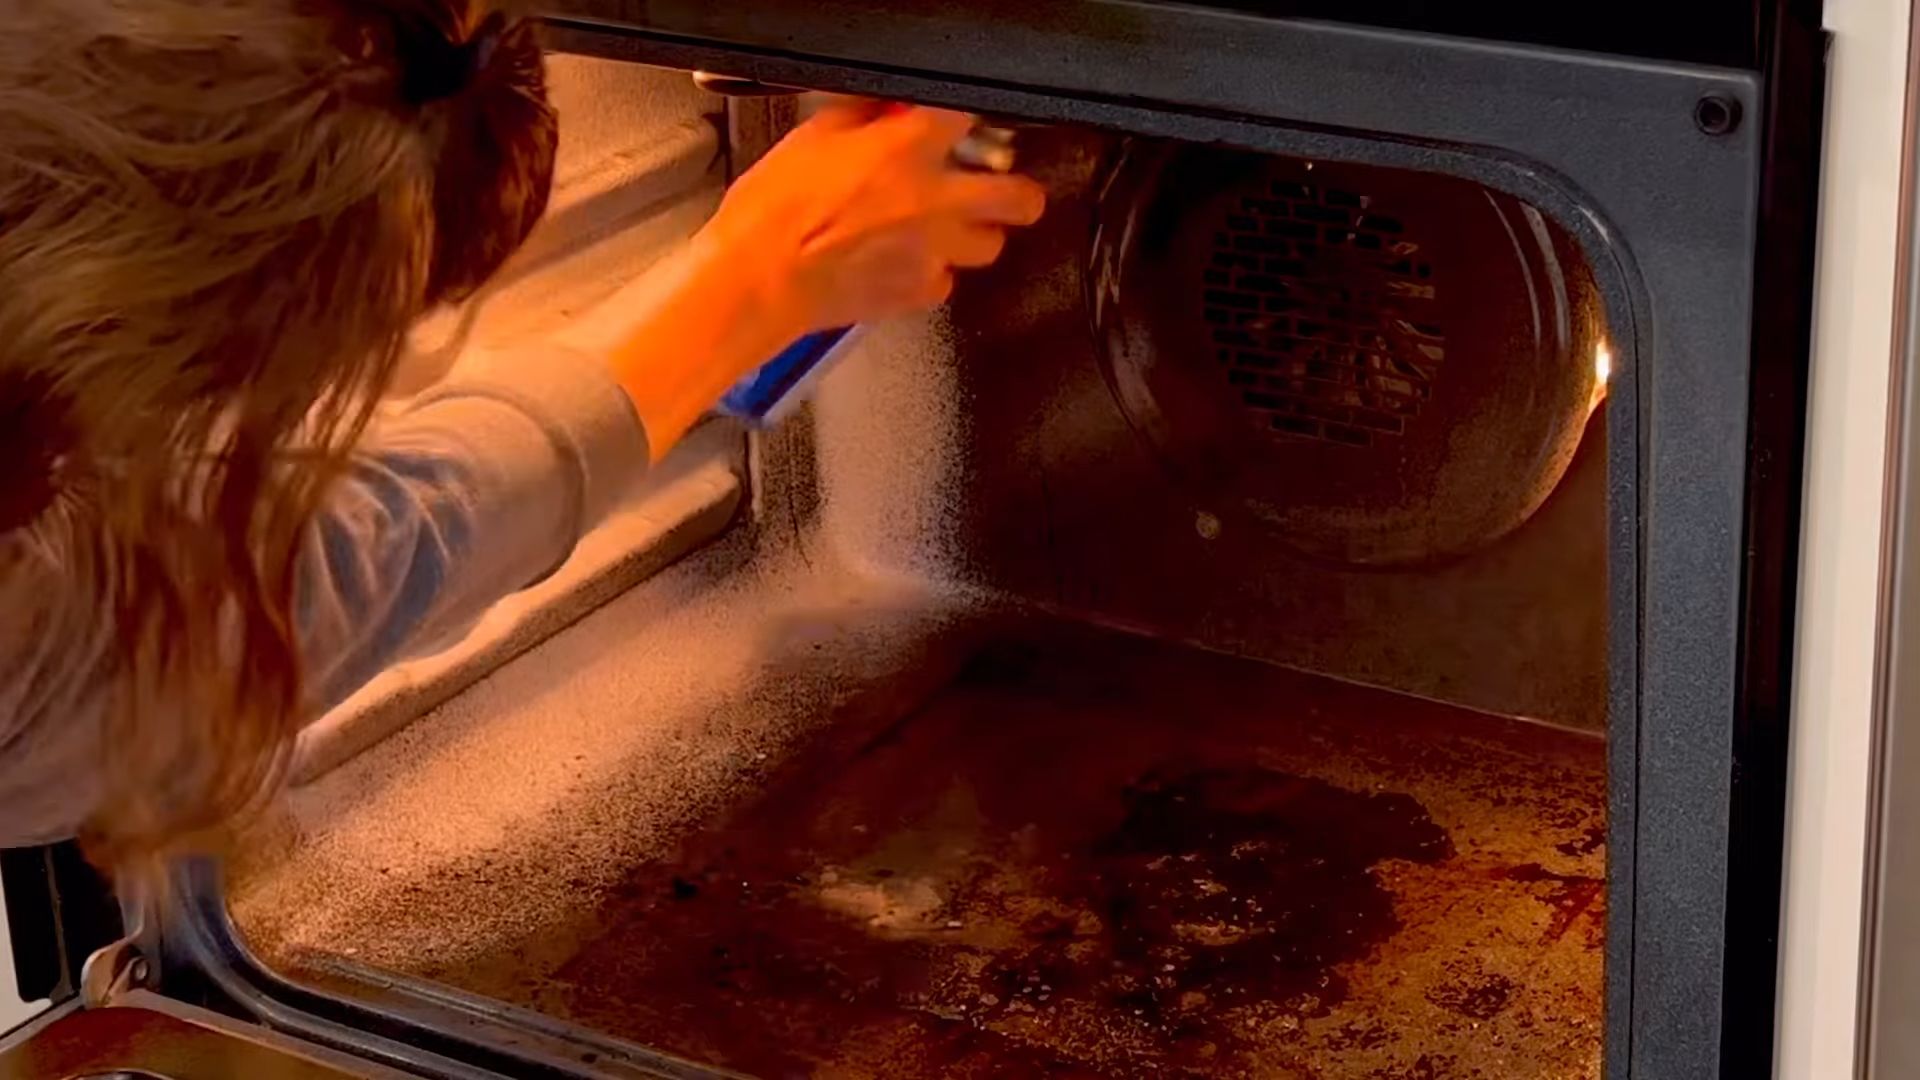
6. Spray with Vinegar:
* Pour some white vinegar into your spray bottle.
* Spray the entire interior of the oven with vinegar. The vinegar will react with any remaining baking soda, creating a bubbly foam.
* This is a good sign! It means the vinegar is helping to loosen any remaining grime.
7. Wipe Down Again:
* Use a clean, damp sponge or cloth to wipe away the vinegar and any remaining baking soda residue.
* Rinse your sponge or cloth frequently with clean water.
* You might need to repeat this step several times to ensure that all the baking soda and vinegar are completely removed.
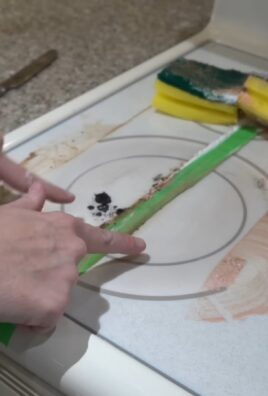
8. Scrub Stubborn Spots:
* If you still have some stubborn spots of grime, you can try scrubbing them with a paste of baking soda and water.
* Apply the paste to the affected area, let it sit for a few minutes, and then scrub with a sponge or brush.
* You can also try using a non-scratch scouring pad for really tough spots, but be careful not to scratch the oven’s surface.
9. Final Rinse and Dry:
* Give the entire oven interior a final rinse with a clean, damp sponge or cloth to remove any remaining residue.
* Dry the oven interior thoroughly with a clean towel.
10. Clean the Oven Door:
* Don’t forget the oven door! You can use the same baking soda and vinegar method to clean the door.
* Apply a paste of baking soda and water to the inside of the door, let it sit for a few minutes, and then wipe it away with a damp sponge or cloth.
* Spray the door with vinegar and wipe it down again.
* For the outside of the door, you can use a glass cleaner to remove any streaks or smudges.
11. Replace Oven Racks:
* Once the oven interior and racks are completely dry, carefully replace the racks in the oven.
Dealing with Extra-Tough Grime:
Sometimes, you’ll encounter grime that’s just extra stubborn. Here are a few tips for tackling those tough spots:
* More Baking Soda: Don’t be afraid to use a thicker layer of baking soda paste on particularly grimy areas.
* Longer Soaking Time: If the grime is really baked on, let the baking soda paste sit for even longer than 12 hours. You could even leave it on for 24 hours.
* Heat it Up (Slightly!): After applying the baking soda paste, you can turn the oven on to a very low temperature (like 200°F) for about 15-20 minutes. This will help to loosen the grime. **Important:** Make sure to turn the oven off and let it cool completely before proceeding with the wiping and scrubbing steps. And NEVER leave the oven unattended while it’s on.
* Lemon Power: For a fresh scent and extra cleaning power, add a few drops of lemon juice to your baking soda paste.
* Patience is Key: Sometimes, it just takes a little extra elbow grease and patience to get your oven sparkling clean. Don’t give up!
Maintaining a Clean Oven:
Now that you’ve put in all that effort to clean your oven, you’ll want to keep it clean! Here are a few tips for maintaining a clean oven:
* Wipe Up Spills Immediately: The best way to prevent baked-on grime is to wipe up spills as soon as they happen.
* Use Oven Liners: Oven liners can help to catch drips and spills, making cleanup much easier.
* Regular Cleaning: Try to clean your oven at least once a month, or more often if you use it frequently. A quick wipe-down after each use can also help to prevent grime from building up.
* Consider a Self-Cleaning Oven (If You Have One): While this DIY method is great, if your oven has a self-cleaning function, you can use it occasionally to give your oven a deep clean. However, be aware that the self-cleaning function can produce strong odors and high heat, so make sure to follow the manufacturer’s instructions carefully.
Safety First!
Before you start cleaning your oven, here are a few important safety precautions to keep in mind:
* Turn Off the Oven: Make sure the oven is completely turned off and cool before you start cleaning it.
* Unplug the Oven (If Possible): For added safety, unplug the oven from the electrical outlet.
* Wear Rubber Gloves: Protect your hands from the baking soda paste and vinegar.
* Ventilation: Open a window or turn on the exhaust fan to provide ventilation while you’re cleaning.
* Avoid Contact with Eyes:
Conclusion
So, there you have it! Ditching those harsh chemicals and embracing this DIY oven cleaning method is more than just a trend; it’s a game-changer for your kitchen, your health, and even your wallet. We’ve walked you through a simple, effective process that utilizes ingredients you likely already have in your pantry. Why spend a fortune on commercial cleaners packed with questionable substances when you can achieve sparkling results with baking soda, vinegar, and a little elbow grease?
This isn’t just about cleaning; it’s about creating a healthier home environment. Think about it: every time you bake, residual chemicals from conventional cleaners can release into your oven and potentially contaminate your food. By opting for this natural approach, you’re ensuring that your culinary creations are pure and untainted.
But the benefits don’t stop there. This DIY oven cleaning method is incredibly versatile. Feel free to experiment with variations to suit your specific needs and preferences. For instance, if you have a particularly stubborn stain, try adding a few drops of lemon essential oil to your baking soda paste for extra degreasing power and a refreshing scent. Alternatively, for ovens with self-cleaning functions that you’d still prefer to avoid using, this method offers a gentler, more controlled cleaning experience.
Consider using a pumice stone (carefully!) for baked-on messes on the oven door glass. Just be sure to wet the stone and test it in an inconspicuous area first to avoid scratching. You can also use a toothbrush to get into those hard-to-reach corners and crevices.
And don’t forget about your oven racks! Soaking them in a bathtub filled with hot water and dish soap overnight can loosen grime, making them easier to scrub clean. A paste of baking soda and dish soap works wonders on racks as well.
The key to success with this DIY oven cleaning method is patience. Allow the baking soda paste ample time to work its magic, and don’t be afraid to repeat the process if necessary. Remember, you’re not just cleaning your oven; you’re investing in its longevity and ensuring the quality of your future meals.
We’re confident that once you try this DIY oven cleaning trick, you’ll be amazed by the results. It’s effective, eco-friendly, and surprisingly satisfying. So, roll up your sleeves, gather your supplies, and get ready to transform your oven from grimy to gleaming.
We’re eager to hear about your experiences! Share your before-and-after photos, tips, and variations in the comments below. Let’s build a community of DIY cleaning enthusiasts and inspire others to embrace a healthier, more sustainable approach to home care. What worked best for you? Did you discover any unique cleaning hacks? Your insights could be invaluable to fellow readers. Don’t hesitate to share your thoughts and help us refine this DIY oven cleaning guide even further. Happy cleaning!
Frequently Asked Questions (FAQ)
1. How often should I clean my oven using this DIY method?
The frequency of cleaning depends on how often you use your oven and how much splattering occurs. As a general guideline, cleaning your oven every 3-6 months is a good practice. However, if you notice significant spills or buildup, it’s best to clean it sooner. Regular spot cleaning of spills as they happen can also help extend the time between deep cleans. If you bake frequently or tend to have messy dishes, consider cleaning it every other month.
2. Can I use this DIY oven cleaning method on a self-cleaning oven?
Yes, you can! In fact, many people prefer this method for self-cleaning ovens because it avoids the high heat and fumes associated with the self-cleaning cycle. While self-cleaning ovens are convenient, the high temperatures can damage the oven’s components and release harmful chemicals into your home. This DIY method offers a gentler, more controlled cleaning experience that is safe for both your oven and your health. It’s a great alternative for those who are sensitive to smells or concerned about the environmental impact of the self-cleaning cycle.
3. What if the baking soda paste dries out and becomes difficult to remove?
If the baking soda paste dries out and hardens, don’t worry! Simply spray it with a generous amount of vinegar. The vinegar will react with the baking soda, causing it to fizz and loosen. Let the mixture sit for a few minutes, then wipe it away with a damp cloth or sponge. You may need to repeat this process a few times for particularly stubborn areas. You can also use a plastic scraper to gently loosen the dried paste before wiping it away. Avoid using metal scrapers, as they can scratch the oven’s surface.
4. Is it safe to use vinegar on all oven surfaces?
Vinegar is generally safe to use on most oven surfaces, including stainless steel and enamel. However, it’s always a good idea to test it in an inconspicuous area first to ensure it doesn’t cause any discoloration or damage. Avoid using vinegar on heating elements or electrical components. If you’re unsure about a particular surface, consult your oven’s manufacturer’s instructions.
5. What if I don’t have vinegar? Can I use something else?
While vinegar is the ideal choice for reacting with the baking soda and loosening grime, you can try using lemon juice as a substitute. Lemon juice contains citric acid, which has similar cleaning properties to vinegar. Mix equal parts lemon juice and water in a spray bottle and use it to dampen the baking soda paste. You can also add a few drops of lemon essential oil to the baking soda paste for extra cleaning power and a refreshing scent.
6. How do I clean the oven door glass using this DIY method?
The oven door glass can be cleaned using the same baking soda paste as the rest of the oven. Apply a thin layer of paste to the glass, let it sit for 15-20 minutes, and then wipe it away with a damp cloth or sponge. For stubborn stains, you can use a pumice stone (carefully!) to gently scrub the glass. Be sure to wet the stone and test it in an inconspicuous area first to avoid scratching. You can also use a razor blade scraper to carefully remove baked-on messes, but be extremely cautious to avoid scratching the glass.
7. My oven has a strong odor even after cleaning. What can I do?
If your oven still has a strong odor after cleaning, try placing a bowl of vinegar or baking soda inside the oven overnight. These substances will help absorb any lingering odors. You can also boil a pot of water with lemon slices or orange peels inside the oven for 30 minutes to freshen it up. Make sure to remove any remaining food particles or spills that may be contributing to the odor.
8. Can I use this method to clean my microwave?
While this specific method is designed for ovens, a similar approach can be used to clean your microwave. Mix equal parts vinegar and water in a microwave-safe bowl and microwave on high for 5-10 minutes. The steam will loosen grime and make it easier to wipe away. Be sure to let the bowl cool slightly before removing it from the microwave. You can also add a few drops of lemon essential oil to the vinegar and water mixture for a refreshing scent.
9. What are the benefits of using a DIY oven cleaning method compared to commercial cleaners?
DIY oven cleaning methods offer several advantages over commercial cleaners. They are typically more affordable, eco-friendly, and safer for your health. Commercial cleaners often contain harsh chemicals that can irritate your skin, eyes, and respiratory system. They can also release harmful fumes into your home and contribute to environmental pollution. DIY methods, on the other hand, use natural ingredients that are readily available and biodegradable. They are also less likely to damage your oven or leave behind harmful residues.
10. What safety precautions should I take when cleaning my oven?
Before cleaning your oven, always disconnect it from the power source or turn off the circuit breaker. This will prevent accidental shocks. Wear gloves to protect your hands from the cleaning solution and any sharp edges inside the oven. Ensure that the area is well-ventilated to avoid inhaling any fumes. Avoid getting the cleaning solution on heating elements or electrical components. If you’re using a pumice stone or razor blade scraper, be extremely cautious to avoid scratching the oven’s surface or cutting yourself.

Leave a Comment