

DIY egg carton ottoman: Who knew that those humble egg cartons destined for the recycling bin could be transformed into a stylish and functional piece of furniture? I’m excited to share this surprisingly simple and eco-friendly project that will not only add a unique touch to your home but also help you reduce waste.
Upcycling, the art of transforming discarded materials into something new and useful, has roots stretching back centuries. From repurposing old clothes to crafting furniture from salvaged wood, resourceful individuals have always found creative ways to extend the life of everyday objects. This DIY egg carton ottoman is a modern take on this time-honored tradition, blending sustainability with a touch of DIY flair.
Let’s face it, buying new furniture can be expensive and often contributes to environmental concerns. This is where the magic of DIY egg carton ottoman comes in! This project is perfect for anyone looking to furnish their space on a budget, embrace sustainable living, or simply unleash their inner creativity. Plus, it’s a fantastic way to involve kids in a fun and educational activity. Imagine the satisfaction of creating a comfortable and eye-catching ottoman from something you would normally throw away. So, gather your egg cartons, and let’s get crafting! I’ll guide you through each step, ensuring you create a beautiful and functional piece that you’ll be proud to show off.
DIY Egg Carton Ottoman: Comfort and Sustainability Combined!
Hey there, fellow DIY enthusiasts! Ever looked at a pile of discarded egg cartons and thought, “There has to be a better use for these?” Well, I certainly have! Today, I’m going to walk you through a fantastic project: building a sturdy and surprisingly comfortable ottoman entirely from recycled egg cartons. It’s a great way to reduce waste, add a unique piece of furniture to your home, and impress your friends with your resourcefulness. Let’s get started!
Materials You’ll Need:
Before we dive in, let’s gather all the necessary materials. This will make the process smoother and prevent any frustrating mid-project supply runs.
* A LOT of egg cartons (at least 60-80, depending on the size you want your ottoman to be). Cardboard or paper pulp egg cartons work best. Styrofoam ones won’t work for this project.
* Strong packing tape (the wider, the better).
* Scissors or a utility knife.
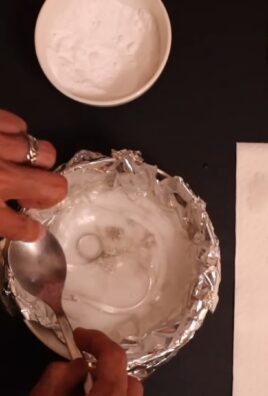
* Hot glue gun and glue sticks (lots of them!).
* Cardboard sheets (recycled boxes are perfect!). You’ll need enough to create a sturdy base and top for the ottoman.
* Batting or foam padding (for cushioning). You can use old blankets, towels, or purchase batting from a craft store.
* Fabric of your choice (for covering the ottoman). Choose something durable and that complements your decor. I recommend upholstery fabric, canvas, or even a thick denim.
* Staple gun and staples.
* Measuring tape or ruler.
* Pencil or marker.
* Optional: Decorative trim, buttons, or other embellishments.
Preparing the Egg Cartons: The Foundation of Your Ottoman
This is probably the most time-consuming part, but trust me, it’s worth it! We need to transform those flimsy egg cartons into strong building blocks.
1. Cut the Egg Cartons: Using your scissors or utility knife, carefully cut each egg carton into individual cups. You want to separate each section that held an egg. Be careful not to cut yourself! I found that using scissors was a bit safer and easier on my hands.
2. Stack and Tape: Now, we’re going to create stacks of egg carton cups. I recommend stacking them in groups of 4 or 5. The more cups you stack, the taller your ottoman will be. Secure each stack tightly with packing tape. Wrap the tape around the stack multiple times to ensure it’s solid. This is crucial for the ottoman’s stability.
3. Repeat, Repeat, Repeat: Keep cutting, stacking, and taping until you have a sufficient number of egg carton stacks. The exact number will depend on the size and shape you want your ottoman to be. I aimed for about 60 stacks for a small, round ottoman.
Building the Ottoman Core: Assembling the Stacks
Now that we have our building blocks, it’s time to assemble the core of the ottoman.
1. Arrange the Stacks: On a flat surface, arrange the egg carton stacks in the shape you desire for your ottoman. You can create a round, square, rectangular, or even an irregular shape. Play around with the arrangement until you’re happy with the overall look.
2. Hot Glue Time: This is where the hot glue gun comes in handy. Carefully apply hot glue to the sides of each egg carton stack, and then press them together to form a solid structure. Work in sections, allowing the glue to cool and harden before moving on to the next section. Be generous with the glue, but avoid using so much that it drips everywhere. Safety first!
3. Reinforce with Tape: Once the hot glue has dried, reinforce the entire structure with packing tape. Wrap the tape around the entire ottoman core, both horizontally and vertically, to provide extra stability. This will help to prevent the egg carton stacks from shifting or collapsing under pressure.
Creating the Base and Top: Adding Structure and Support
To make the ottoman sturdy and comfortable, we need to create a solid base and top.
1. Measure and Cut the Cardboard: Measure the dimensions of your ottoman core. Then, cut two pieces of cardboard to match those dimensions. These will serve as the base and top of the ottoman. Make sure the cardboard is thick and sturdy enough to support weight. If you’re using thinner cardboard, you might want to double or triple it up for extra strength.
2. Attach the Base: Apply a generous amount of hot glue to the bottom of the ottoman core. Then, carefully place the cardboard base on top of the glue, pressing down firmly to ensure a strong bond. Allow the glue to dry completely. You can also use packing tape to further secure the base to the core.
3. Attach the Top: Repeat the same process to attach the cardboard top to the ottoman core. Apply hot glue to the top of the core, place the cardboard top on top of the glue, and press down firmly. Allow the glue to dry completely, and then reinforce with packing tape.
Adding Padding: Comfort is Key!
Now that we have a solid structure, it’s time to add some padding to make the ottoman comfortable to sit on or rest your feet on.
1. Cut the Padding: Cut the batting or foam padding to the same size as the cardboard top. You can use multiple layers of padding to achieve the desired level of cushioning. I used a combination of old blankets and a layer of batting for extra comfort.
2. Attach the Padding: Use hot glue to attach the padding to the cardboard top. Apply the glue to the cardboard and then carefully place the padding on top, pressing down firmly. Make sure the padding is evenly distributed and covers the entire surface of the top.
Covering the Ottoman: Adding Style and Personality
This is where you can really get creative and personalize your ottoman to match your style.
1. Measure and Cut the Fabric: Measure the circumference and height of your ottoman. Then, cut a piece of fabric that is large enough to cover the entire ottoman, with a few extra inches on all sides for stapling.
2. Drape the Fabric: Drape the fabric over the ottoman, centering it so that the pattern (if any) is aligned correctly. Smooth out any wrinkles or creases.
3. Staple the Fabric: Using your staple gun, begin stapling the fabric to the bottom edge of the cardboard base. Start at one point and work your way around the ottoman, pulling the fabric taut as you go. Be careful not to pull the fabric too tight, as this can distort the shape of the ottoman.
4. Fold and Staple the Corners: When you reach the corners, fold the fabric neatly and staple it in place. There are many different ways to fold the corners, so experiment until you find a method that you like. I prefer to create a mitered corner for a clean and professional look.
5. Trim Excess Fabric: Once you’ve stapled the entire fabric cover in place, trim away any excess fabric with scissors. Be careful not to cut too close to the staples, as this could cause the fabric to unravel.
Adding Finishing Touches: Making it Your Own
Now that your ottoman is covered, you can add some finishing touches to make it truly unique.
1. Add Decorative Trim (Optional): You can add decorative trim around the base of the ottoman to hide the staples and give it a more polished look. Use hot glue to attach the trim to the fabric.
2. Add Buttons or Embellishments (Optional): You can also add buttons, beads, or other embellishments to the top of the ottoman for a more decorative look. Use hot glue or needle and thread to attach the embellishments.
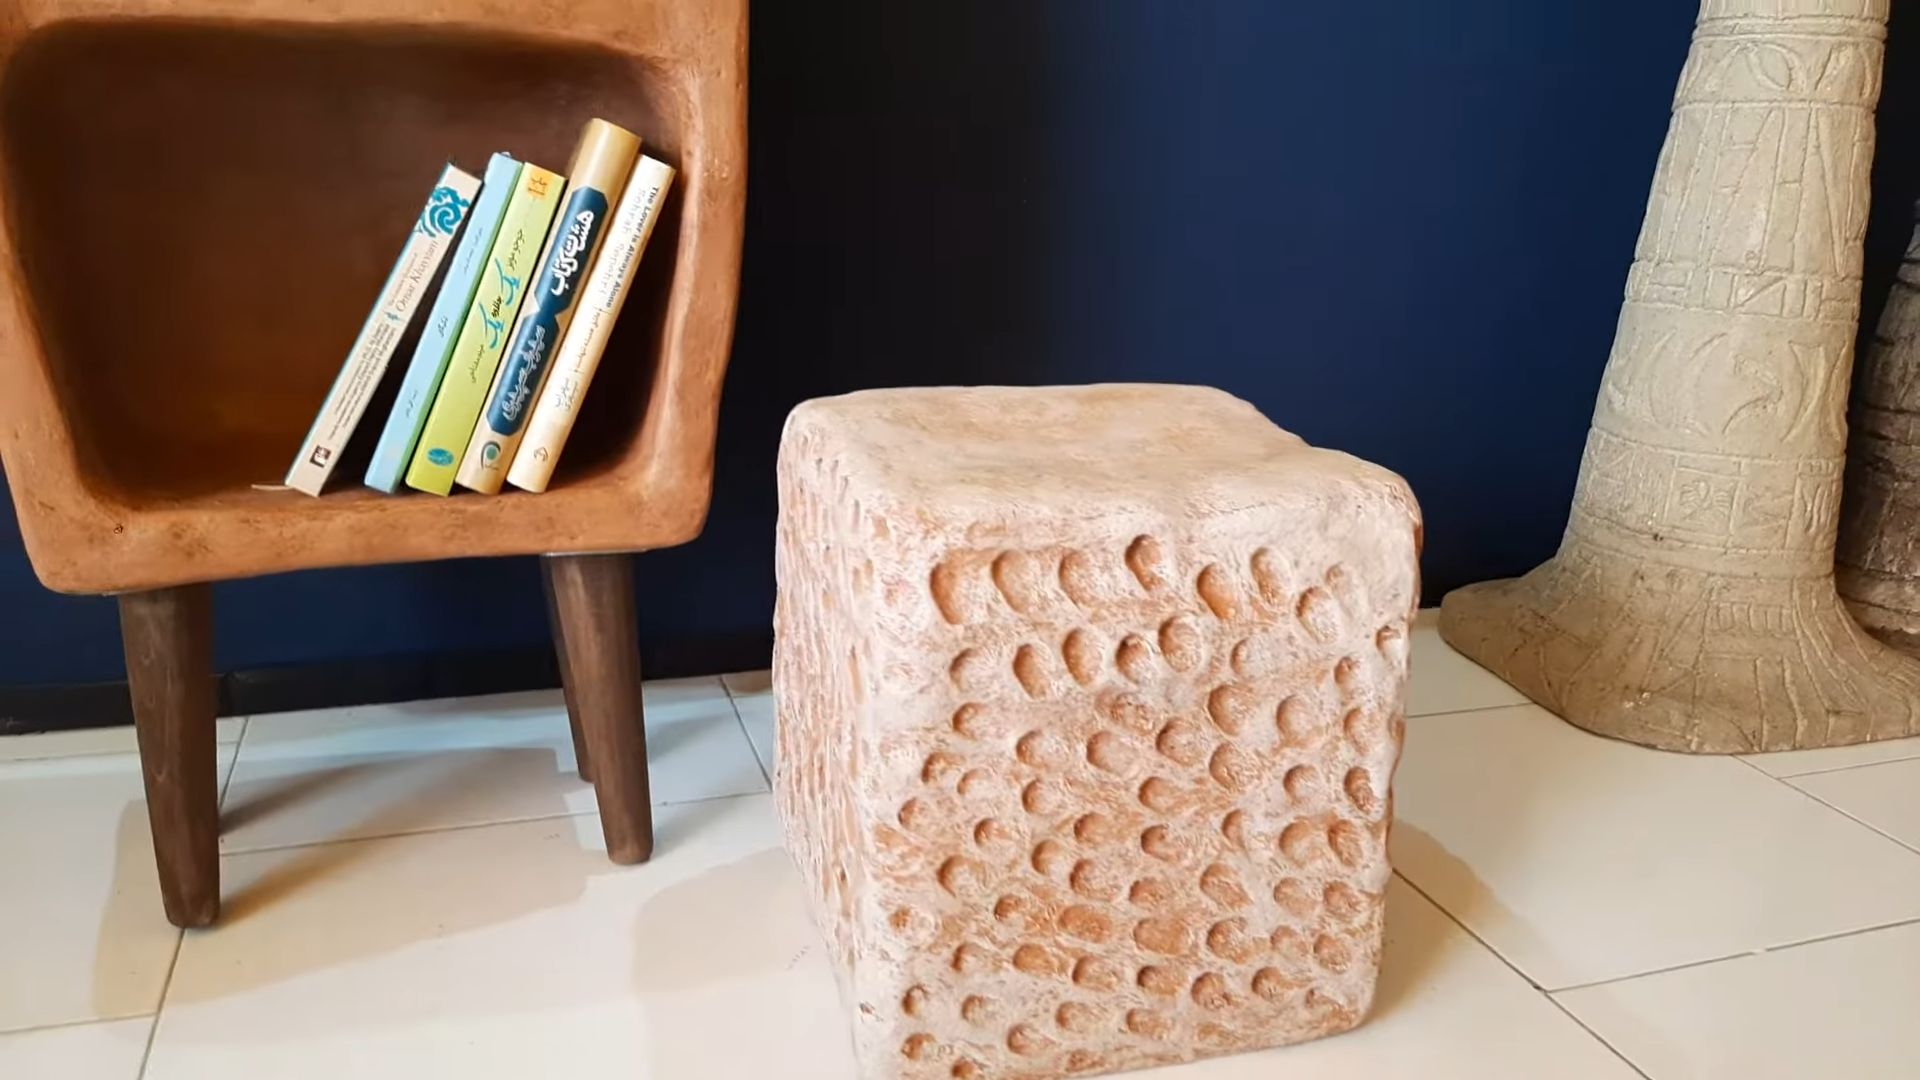
3. Enjoy Your Creation! Congratulations! You’ve successfully created a beautiful and functional ottoman from recycled egg cartons. Now, sit back, relax, and enjoy your new piece of furniture. You can use it as a footrest, a seat, or even a small table.
Tips and Tricks for Success:
* Collect Egg Cartons Gradually: Don’t try to collect all the egg cartons at once. Start saving them a few weeks or months in advance. Ask your friends and family to save their egg cartons for you as well.
* Use a Strong Staple Gun: A good quality staple gun will make the stapling process much easier and more efficient.
* Choose Durable Fabric: Select a fabric that is durable and easy to clean. Upholstery fabric, canvas, or denim are all good choices.
* Don’t Be Afraid to Experiment: This is a DIY project, so don’t be afraid to experiment with different shapes, sizes, and designs.
* Have Fun! The most important thing is to have fun and enjoy the process of creating something unique and sustainable.
I hope you enjoyed this tutorial! I’m so happy with how my egg carton ottoman turned out, and I know you’ll love yours too. Happy crafting!
Conclusion
So, there you have it! Transforming humble egg cartons into a stylish and surprisingly sturdy ottoman is not just a fun craft project; it’s a testament to the power of resourcefulness and a fantastic way to add a unique, eco-friendly touch to your home decor. This DIY egg carton ottoman project is more than just a seating solution; it’s a conversation starter, a statement piece, and a tangible representation of your commitment to sustainable living.
Why is this a must-try? Because it’s incredibly satisfying to create something beautiful and functional from materials that would otherwise end up in the trash. It’s a budget-friendly alternative to expensive furniture, allowing you to express your creativity without breaking the bank. Plus, the process itself is therapeutic and engaging, perfect for a weekend project or a collaborative activity with family and friends.
But the beauty of this DIY project lies in its adaptability. Feel free to experiment with different fabrics to match your existing decor. Consider using vibrant, patterned materials for a bold statement or opting for neutral tones for a more understated look. You can also play around with the size and shape of your ottoman. Create a small, round pouf for a cozy reading nook or a larger, rectangular ottoman to serve as a coffee table alternative.
For added comfort, consider adding an extra layer of padding on top of the egg carton structure before covering it with fabric. You could use foam, batting, or even old blankets to create a softer seating surface. Another variation is to paint the egg cartons before assembling them. This allows you to customize the color of the ottoman and add a pop of personality. Metallic paints can create a glamorous effect, while pastel shades can add a touch of whimsy.
Don’t be afraid to get creative with the legs of your ottoman, too. You can use wooden legs, metal legs, or even repurpose old furniture legs. Just make sure they are sturdy enough to support the weight of the ottoman and anyone who sits on it. If you’re feeling particularly adventurous, you could even create your own legs from recycled materials, such as wooden dowels or metal pipes.
The possibilities are truly endless! This DIY egg carton ottoman is a blank canvas for your imagination. So, gather your egg cartons, unleash your creativity, and get ready to transform your space with this unique and eco-friendly project.
We are confident that you’ll love the process and the end result. But don’t just take our word for it. We encourage you to try this DIY trick for yourself and share your experience with us. Post photos of your finished ottoman on social media using #EggCartonOttomanDIY and let us know what variations you tried and what challenges you overcame. We can’t wait to see your creations! Your feedback will not only inspire others but also help us refine and improve this DIY project for future crafters. Let’s build a community of resourceful and creative individuals who are passionate about sustainable living!
Frequently Asked Questions (FAQ)
How many egg cartons do I need to make an ottoman?
The number of egg cartons required depends on the desired size of your ottoman. A small, round pouf might require 50-75 egg cartons, while a larger, rectangular ottoman could need 100 or more. It’s always a good idea to collect more egg cartons than you think you’ll need, just in case. You can always use the extras for other craft projects or recycle them. Remember to clean and dry the egg cartons thoroughly before starting your project.
What kind of glue should I use to assemble the egg cartons?
A strong adhesive is essential for creating a sturdy ottoman. We recommend using a hot glue gun with high-quality glue sticks. Hot glue provides a strong bond and dries quickly, making it ideal for this project. Alternatively, you can use a construction adhesive or a strong wood glue. However, these types of glue may take longer to dry, so you’ll need to allow ample time for the adhesive to cure before moving on to the next step. Avoid using craft glue or school glue, as these adhesives are not strong enough to hold the egg cartons together securely.
How do I make the ottoman sturdy enough to sit on?
The key to creating a sturdy egg carton ottoman is to ensure that the egg cartons are tightly packed and securely glued together. Reinforce the structure by adding layers of cardboard or plywood to the top and bottom of the ottoman. This will distribute the weight evenly and prevent the egg cartons from collapsing. You can also add internal supports, such as wooden dowels or cardboard tubes, to further strengthen the structure. When choosing legs for your ottoman, make sure they are strong enough to support the weight of the ottoman and anyone who sits on it.
What kind of fabric should I use to cover the ottoman?
The choice of fabric depends on your personal preference and the style of your decor. Durable fabrics like canvas, denim, or upholstery fabric are good options for high-traffic areas. These fabrics are resistant to wear and tear and can withstand frequent use. For a more luxurious look, consider using velvet, brocade, or faux leather. These fabrics will add a touch of elegance to your ottoman. If you’re using a lightweight fabric, consider adding a layer of batting or interfacing to provide extra padding and support.
How do I clean and maintain my egg carton ottoman?
To clean your egg carton ottoman, start by vacuuming it regularly to remove dust and debris. For spills and stains, spot clean with a damp cloth and mild detergent. Avoid using harsh chemicals or abrasive cleaners, as these can damage the fabric. If the fabric cover is removable, you can wash it according to the manufacturer’s instructions. To prevent your ottoman from getting dirty, consider using a fabric protector spray. This will create a barrier that repels stains and makes it easier to clean.
Can I use different types of egg cartons for this project?
Yes, you can use different types of egg cartons, such as cardboard, styrofoam, or plastic. However, keep in mind that the type of egg carton you use will affect the overall look and feel of your ottoman. Cardboard egg cartons are the most eco-friendly option and are easy to paint and decorate. Styrofoam egg cartons are lightweight and durable, but they can be difficult to paint and may not be as aesthetically pleasing. Plastic egg cartons are waterproof and easy to clean, but they are not as environmentally friendly as cardboard egg cartons.
How long does it take to make an egg carton ottoman?
The time it takes to make an egg carton ottoman depends on the size and complexity of your design. A small, simple ottoman can be completed in a weekend, while a larger, more elaborate ottoman may take several days. The most time-consuming part of the project is collecting and preparing the egg cartons. Once you have enough egg cartons, the assembly process is relatively quick and easy. Remember to allow ample time for the glue to dry before moving on to the next step.
Is this project suitable for children?
This project can be a fun and educational activity for children, but adult supervision is required, especially when using hot glue guns or sharp tools. Children can help with tasks such as collecting egg cartons, painting them, and arranging them into the desired shape. However, the actual assembly of the ottoman should be done by an adult. This project is a great way to teach children about recycling, resourcefulness, and creativity.
What if I don’t have enough egg cartons?
If you don’t have enough egg cartons, you can ask friends, family, and neighbors to donate their used egg cartons. You can also check with local restaurants and grocery stores, as they often have a surplus of egg cartons. Alternatively, you can purchase egg cartons online or at craft stores. If you’re short on time, you can supplement the egg cartons with other recycled materials, such as cardboard boxes or plastic containers.
Can I sell egg carton ottomans that I make?
Yes, you can sell egg carton ottomans that you make. This is a great way to turn your crafting hobby into a profitable business. When selling your ottomans, be sure to emphasize the eco-friendly and handmade nature of the product. You can sell your ottomans online through platforms like Etsy or at local craft fairs and markets. Be sure to price your ottomans competitively and to provide excellent customer service.


Leave a Comment