

Daily Cleaning Routine: Are you tired of spending your weekends scrubbing and stressing over a messy house? Imagine reclaiming your precious free time and enjoying a consistently clean and inviting home, all thanks to a few simple, daily habits. That’s right, this isn’t about marathon cleaning sessions; it’s about incorporating a manageable daily cleaning routine that fits seamlessly into your life.
For centuries, cultures around the world have understood the importance of a clean living space. From the ancient Romans meticulously maintaining their villas to the minimalist traditions of Japanese homes, cleanliness has been linked to well-being, productivity, and even spiritual clarity. While we may not be building empires or practicing Zen meditation (though, feel free!), the principle remains the same: a tidy home contributes to a tidy mind.
Let’s face it, life is busy! Between work, family, and social commitments, finding time for deep cleaning can feel impossible. That’s where this DIY guide comes in. I’m going to share my tried-and-true tips and tricks for establishing a daily cleaning routine that’s not only effective but also sustainable. We’ll break down the tasks into bite-sized pieces, making them less daunting and more achievable. Get ready to say goodbye to weekend cleaning dread and hello to a sparkling, stress-free home!
Creating Your Own Sparkling Clean Daily Cleaning Routine
Okay, let’s be honest, nobody *loves* cleaning. But a little bit of daily effort can save you from those overwhelming weekend cleaning marathons. I’m going to walk you through how to create a daily cleaning routine that’s manageable, effective, and tailored to *your* life. The key is to break it down into small, achievable tasks. Trust me, you’ll thank yourself later!
Understanding Your Needs
Before we dive into the nitty-gritty, let’s figure out what areas of your home need the most daily attention. This will depend on your lifestyle, the size of your household, and whether you have pets (furry friends definitely add to the cleaning workload!).
* High-Traffic Areas: Think about the areas you use most often. For me, that’s the kitchen, bathrooms, and entryway. These areas tend to get dirtier faster and need more frequent cleaning.
* Problem Zones: Every home has them! Maybe it’s the perpetually cluttered coffee table, the sink that always has dishes piled up, or the bathroom mirror that’s constantly covered in toothpaste splatters. Identify these problem zones and make them a priority in your daily routine.
* Time Constraints: Be realistic about how much time you can realistically dedicate to cleaning each day. Don’t try to cram too much in, or you’ll quickly get discouraged. Start small and gradually add more tasks as you get into the habit.
* Your Personal Preferences: Do you hate doing dishes? Does the thought of wiping down countertops make you cringe? Identify the tasks you dislike the most and find ways to make them more bearable. Maybe you can listen to your favorite podcast while you clean, or reward yourself with a treat afterwards.
Building Your Daily Cleaning Checklist
Now that we’ve assessed your needs, let’s create a personalized daily cleaning checklist. Remember, this is just a starting point – feel free to adjust it to fit your specific circumstances.
* Make the Bed: This is the easiest and most impactful task on the list. It instantly makes your bedroom look tidier and sets a positive tone for the day.
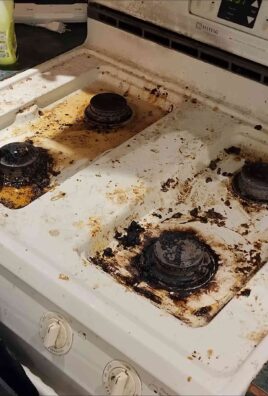
* Wipe Down Kitchen Counters and Sink: After each meal, take a few minutes to wipe down the kitchen counters and sink. This prevents food buildup and keeps your kitchen looking fresh.
* Load and Run the Dishwasher (or Wash Dishes): Don’t let dishes pile up in the sink! Load the dishwasher after each meal, or wash the dishes by hand if you don’t have a dishwasher.
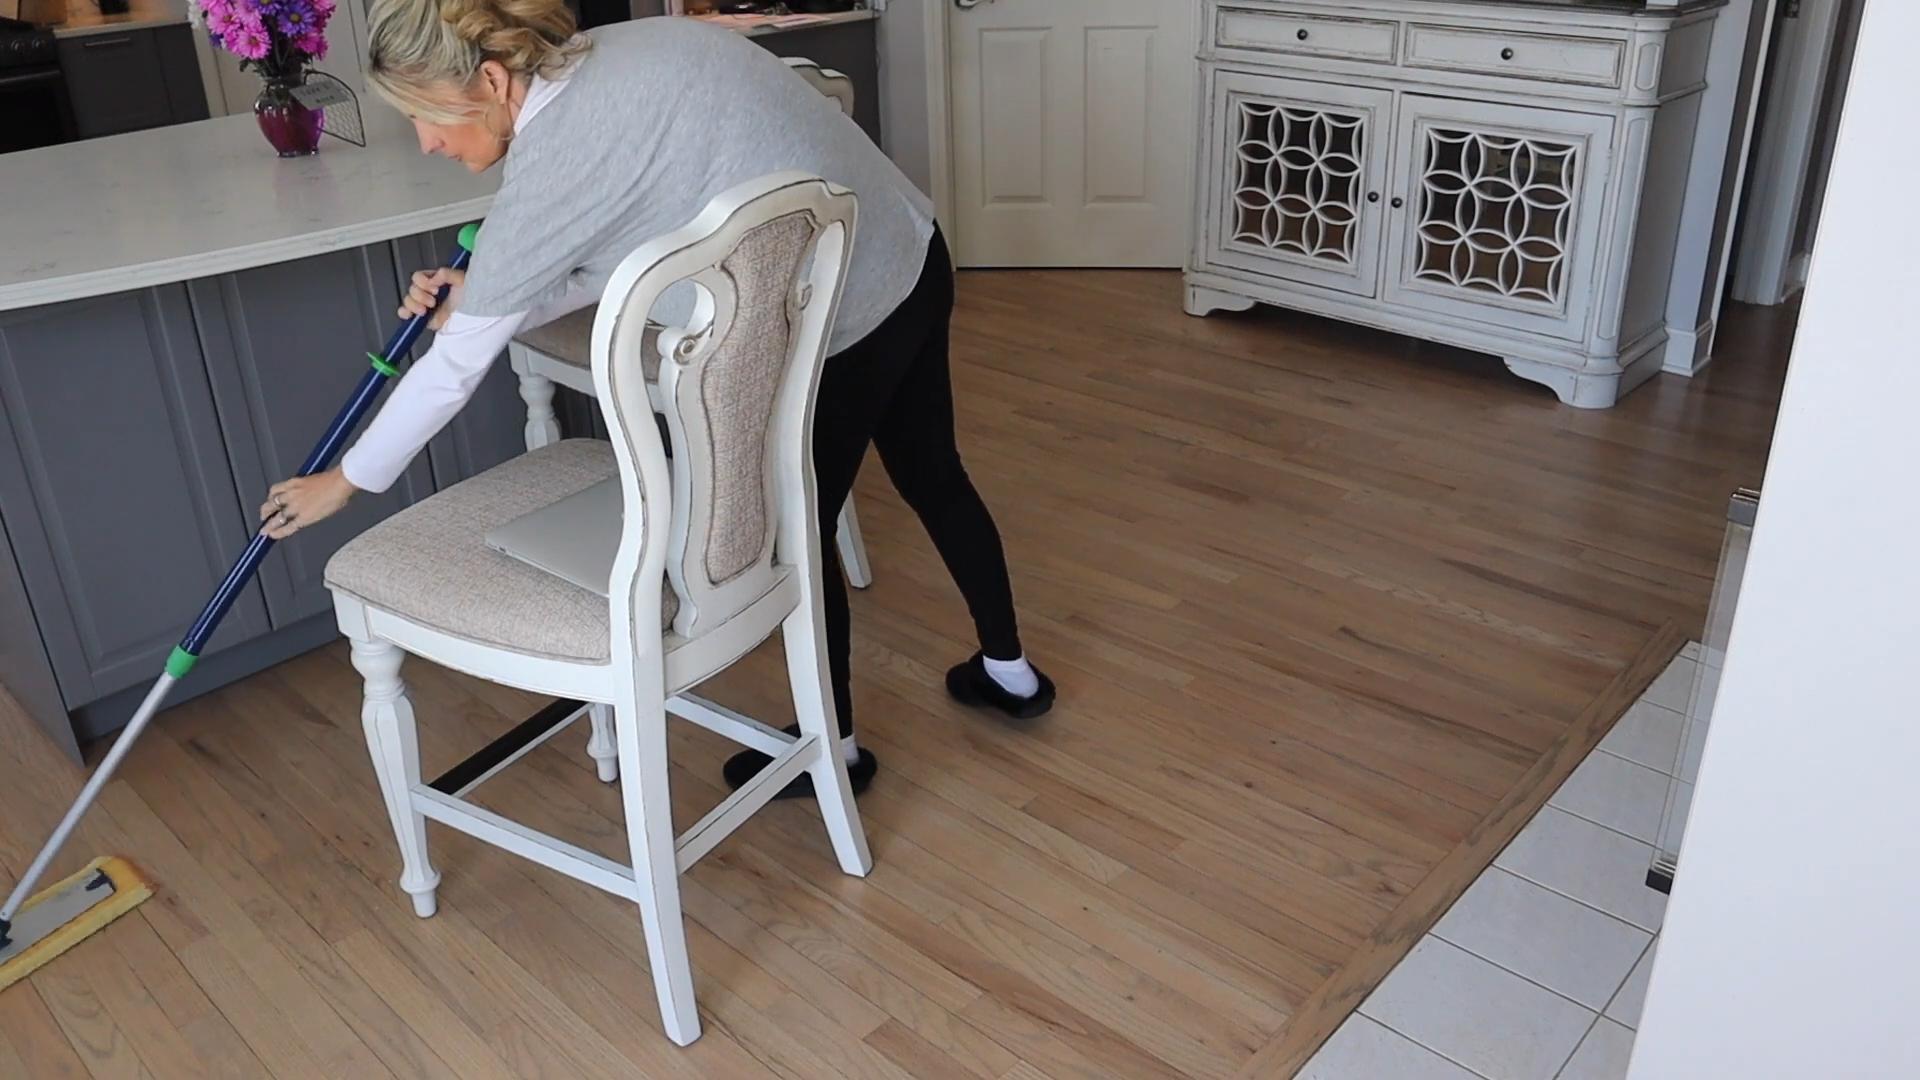
* Sweep or Vacuum High-Traffic Areas: A quick sweep or vacuum of high-traffic areas will prevent dirt and dust from accumulating.
* Wipe Down Bathroom Counters and Sink: Just like the kitchen, bathroom counters and sinks can get dirty quickly. Wipe them down daily to prevent soap scum and toothpaste buildup.
* Take Out the Trash: Don’t let the trash overflow! Take it out daily to prevent odors and keep your home smelling fresh.
* Quick Tidy-Up: Spend 5-10 minutes tidying up any clutter that has accumulated throughout the day. This could involve putting away toys, folding blankets, or organizing papers.
* One Load of Laundry: Doing one load of laundry each day will prevent laundry from piling up and becoming overwhelming.
Step-by-Step Instructions for Each Task
Let’s break down each task into simple, easy-to-follow steps.
1. Making the Bed
This is so simple, but it makes a huge difference!
1. Straighten the Sheets: Pull the sheets up and smooth them out.
2. Arrange the Blanket or Comforter: Fold the blanket or comforter neatly and place it on top of the sheets.
3. Fluff the Pillows: Fluff the pillows and arrange them neatly on the bed.
4. Add Decorative Pillows (Optional): If you have decorative pillows, arrange them in front of the sleeping pillows.
2. Wiping Down Kitchen Counters and Sink
This is crucial for preventing food buildup and keeping your kitchen sanitary.
1. Clear the Counters: Remove any items from the counters, such as appliances, dishes, or food containers.
2. Spray with Cleaner: Spray the counters and sink with your favorite all-purpose cleaner. I like to use a natural cleaner with a pleasant scent.
3. Wipe with a Cloth: Wipe the counters and sink with a clean cloth or sponge. Pay attention to any spills or sticky spots.
4. Rinse (If Necessary): If your cleaner leaves a residue, rinse the counters and sink with water.
5. Dry with a Clean Cloth: Dry the counters and sink with a clean, dry cloth. This will prevent water spots.
3. Loading and Running the Dishwasher (or Washing Dishes)
Nobody likes a sink full of dirty dishes!
Dishwasher:
1. Scrape Food Scraps: Scrape any food scraps off the dishes into the trash or garbage disposal.
2. Load the Dishwasher: Load the dishes into the dishwasher, making sure not to overcrowd it. Follow the manufacturer’s instructions for proper loading.
3. Add Detergent: Add dishwasher detergent to the dispenser.
4. Run the Dishwasher: Select the appropriate cycle and run the dishwasher.
Hand Washing:
1. Fill the Sink: Fill the sink with hot, soapy water.
2. Wash the Dishes: Wash the dishes one by one, starting with the least dirty items.
3. Rinse the Dishes: Rinse the dishes thoroughly with hot water.
4. Dry the Dishes: Dry the dishes with a clean dish towel or let them air dry.
4. Sweeping or Vacuuming High-Traffic Areas
This will keep your floors clean and prevent dirt from being tracked throughout the house.
Sweeping:
1. Gather Your Supplies: Grab a broom and dustpan.
2. Sweep the Floor: Sweep the floor, starting in one corner and working your way across the room.
3. Collect the Dirt: Sweep the dirt into the dustpan.
4. Dispose of the Dirt: Dispose of the dirt in the trash.
Vacuuming:
1. Gather Your Supplies: Grab your vacuum cleaner.
2. Vacuum the Floor: Vacuum the floor, paying attention to high-traffic areas and corners.
3. Empty the Vacuum: Empty the vacuum cleaner bag or canister when it’s full.
5. Wiping Down Bathroom Counters and Sink
Just like the kitchen, the bathroom needs daily attention.
1. Clear the Counters: Remove any items from the counters, such as toiletries, makeup, or hair products.
2. Spray with Cleaner: Spray the counters and sink with your favorite bathroom cleaner.
3. Wipe with a Cloth: Wipe the counters and sink with a clean cloth or sponge. Pay attention to any soap scum or toothpaste splatters.
4. Rinse (If Necessary): If your cleaner leaves a residue, rinse the counters and sink with water.
5. Dry with a Clean Cloth: Dry the counters and sink with a clean, dry cloth. This will prevent water spots.
6. Taking Out the Trash
A simple task that makes a big difference in preventing odors.
1. Gather the Trash Bags: Grab a new trash bag.
2. Remove the Full Bag: Remove the full trash bag from the trash can.
3. Tie the Bag: Tie the trash bag securely.
4. Replace the Bag: Place a new trash bag in the trash can.
5. Dispose of the Trash: Take the trash bag outside to the trash bin.
7. Quick Tidy-Up
This is all about putting things back where they belong.
1. Walk Through Each Room: Walk through each room in your house.
2. Put Away Clutter: Put away any items that are out of place, such as toys, books, or clothes.
3. Straighten Furniture: Straighten any furniture that is out of alignment, such as chairs or cushions.
4. Fluff Pillows: Fluff any pillows that are looking flat.
8. One Load of Laundry
Doing a little laundry each day prevents mountains of clothes from piling up.
1. Gather the Laundry: Gather a load of laundry.
2. Sort the Laundry: Sort the laundry by color and fabric type.
3. Load the Washing Machine: Load the laundry into the washing machine.
4. Add Detergent: Add laundry detergent to the dispenser.
5. Select the Cycle: Select the appropriate cycle and start the washing machine.
6. Transfer to Dryer (or Hang to Dry

Conclusion
So, there you have it! Transforming your daily cleaning routine with this simple yet incredibly effective DIY trick is more than just a way to save money; it’s about reclaiming your time, reducing your exposure to harsh chemicals, and creating a home environment that truly feels clean and healthy. We’ve shown you how easy it is to create a powerful cleaning solution using ingredients you likely already have in your pantry.
Why is this a must-try? Because it’s efficient, eco-friendly, and customizable. Store-bought cleaners often contain a cocktail of ingredients that can be irritating to the skin, harmful to the environment, and frankly, unnecessary. This DIY approach allows you to control exactly what goes into your cleaning products, ensuring a safer and more pleasant experience. Plus, the satisfaction of knowing you’ve created something effective with your own two hands is a reward in itself.
But the benefits don’t stop there. This DIY cleaning solution is incredibly versatile. You can adjust the ratios of ingredients to suit your specific needs. For example, if you’re dealing with particularly stubborn grime, you might want to increase the concentration of vinegar or add a few drops of essential oil known for its degreasing properties, like lemon or tea tree oil.
Consider these variations to further personalize your cleaning experience:
* For a refreshing scent: Infuse your vinegar with citrus peels for a week before using it in the recipe. This will add a subtle and natural fragrance to your cleaning solution.
* For extra disinfecting power: Add a few drops of tea tree oil or eucalyptus oil. These essential oils have natural antibacterial and antiviral properties.
* For a gentler solution: Reduce the amount of vinegar and increase the amount of water. This is ideal for delicate surfaces or for those with sensitive skin.
* For cleaning glass and mirrors: Use distilled water instead of tap water to prevent streaks.
We understand that trying something new can sometimes feel daunting, but we promise this DIY trick is incredibly simple and rewarding. The initial investment of a few minutes to mix the ingredients will pay off tenfold in the long run. You’ll save money, reduce waste, and enjoy a cleaner, healthier home.
Don’t just take our word for it, though. We wholeheartedly encourage you to give this DIY cleaning solution a try. Experiment with different variations, find what works best for your home and your needs, and most importantly, share your experience with us! We’d love to hear your feedback, your tips, and any creative adaptations you come up with. Let’s build a community of DIY cleaning enthusiasts who are passionate about creating a cleaner, greener, and healthier world, one homemade cleaning solution at a time. Share your successes (and even your learning curves!) in the comments below. Let us know how this DIY cleaning routine has transformed your daily cleaning tasks. We are excited to hear from you!
Frequently Asked Questions (FAQ)
Q: What surfaces can I safely use this DIY cleaning solution on?
A: This DIY cleaning solution is generally safe for most non-porous surfaces, including countertops, sinks, tiles, glass, and mirrors. However, it’s always a good idea to test it on an inconspicuous area first, especially on delicate surfaces like marble or granite. Avoid using it on unsealed wood, as the vinegar can damage the finish. For natural stone surfaces, a pH-neutral cleaner is generally recommended. When in doubt, consult the manufacturer’s instructions for your specific surface.
Q: How long will this DIY cleaning solution last?
A: When stored in a cool, dark place in an airtight container, this DIY cleaning solution can last for several months. The vinegar acts as a natural preservative, helping to prevent bacterial growth. However, it’s always a good idea to give it a sniff before each use to ensure it still smells fresh and clean. If you notice any discoloration or unusual odors, it’s best to discard it and make a fresh batch.
Q: Can I use different types of vinegar?
A: White distilled vinegar is the most commonly recommended type of vinegar for cleaning due to its high acidity and lack of color, which minimizes the risk of staining. However, you can experiment with other types of vinegar, such as apple cider vinegar, but be aware that they may have a slightly different scent and could potentially leave a residue on some surfaces. Avoid using balsamic vinegar, as its dark color can definitely stain.
Q: Is this DIY cleaning solution safe for pets and children?
A: While this DIY cleaning solution is generally safer than many commercial cleaners, it’s still important to exercise caution when using it around pets and children. Keep the solution out of their reach and avoid spraying it directly on them. If your pet or child ingests the solution, contact your veterinarian or poison control center immediately. As with any cleaning product, proper ventilation is important.
Q: Can I add other ingredients to this DIY cleaning solution?
A: Yes, you can definitely customize this DIY cleaning solution to suit your specific needs and preferences. As mentioned earlier, essential oils can be added for their fragrance and antibacterial properties. You can also add a small amount of dish soap for extra cleaning power, but be careful not to add too much, as it can leave a residue. Borax can also be added for extra cleaning power, but it should be used with caution and kept away from children and pets. Always research the safety of any new ingredient before adding it to your cleaning solution.
Q: My DIY cleaning solution smells too strongly of vinegar. What can I do?
A: The strong smell of vinegar is a common concern, but it typically dissipates quickly after the solution dries. If you find the smell overwhelming, you can try reducing the amount of vinegar in the recipe or adding a few drops of your favorite essential oil to mask the scent. Citrus essential oils, like lemon, orange, or grapefruit, are particularly effective at neutralizing the vinegar smell. You can also infuse your vinegar with citrus peels for a more subtle and natural fragrance.
Q: Can I use this DIY cleaning solution in a spray bottle?
A: Absolutely! A spray bottle is the perfect way to apply this DIY cleaning solution to various surfaces. Just make sure the spray bottle is clean and free of any residue from previous cleaning products. It’s also a good idea to label the bottle clearly to avoid any confusion.
Q: What is the best way to store this DIY cleaning solution?
A: The best way to store this DIY cleaning solution is in a cool, dark place in an airtight container. This will help to prevent the ingredients from degrading and maintain the solution’s effectiveness. Avoid storing it in direct sunlight or near heat sources, as this can cause the ingredients to break down. A glass or plastic spray bottle with a tight-fitting lid is ideal for storage.
Q: How often should I use this DIY cleaning solution?
A: The frequency of use will depend on your individual cleaning needs and preferences. You can use this DIY cleaning solution as part of your daily cleaning routine, or you can use it less frequently for specific cleaning tasks. It’s a versatile solution that can be adapted to suit your lifestyle.
Q: What if I don’t have all the ingredients on hand?
A: The beauty of this DIY cleaning solution is that it’s very flexible. If you don’t have all the ingredients on hand, you can still make a basic cleaning solution with just vinegar and water. While it may not be as powerful as the full recipe, it will still be effective for light cleaning tasks. You can always add the other ingredients later when you have them available.

Leave a Comment