

Coral Cactus Care: Ever dreamt of having a quirky, eye-catching plant that sparks conversation? Well, look no further! I’m about to let you in on some amazing DIY tricks and hacks that will not only help your Coral Cactus thrive but also turn you into a bonafide succulent whisperer. Forget those complicated plant care guides – we’re diving into simple, effective methods that even a beginner can master.
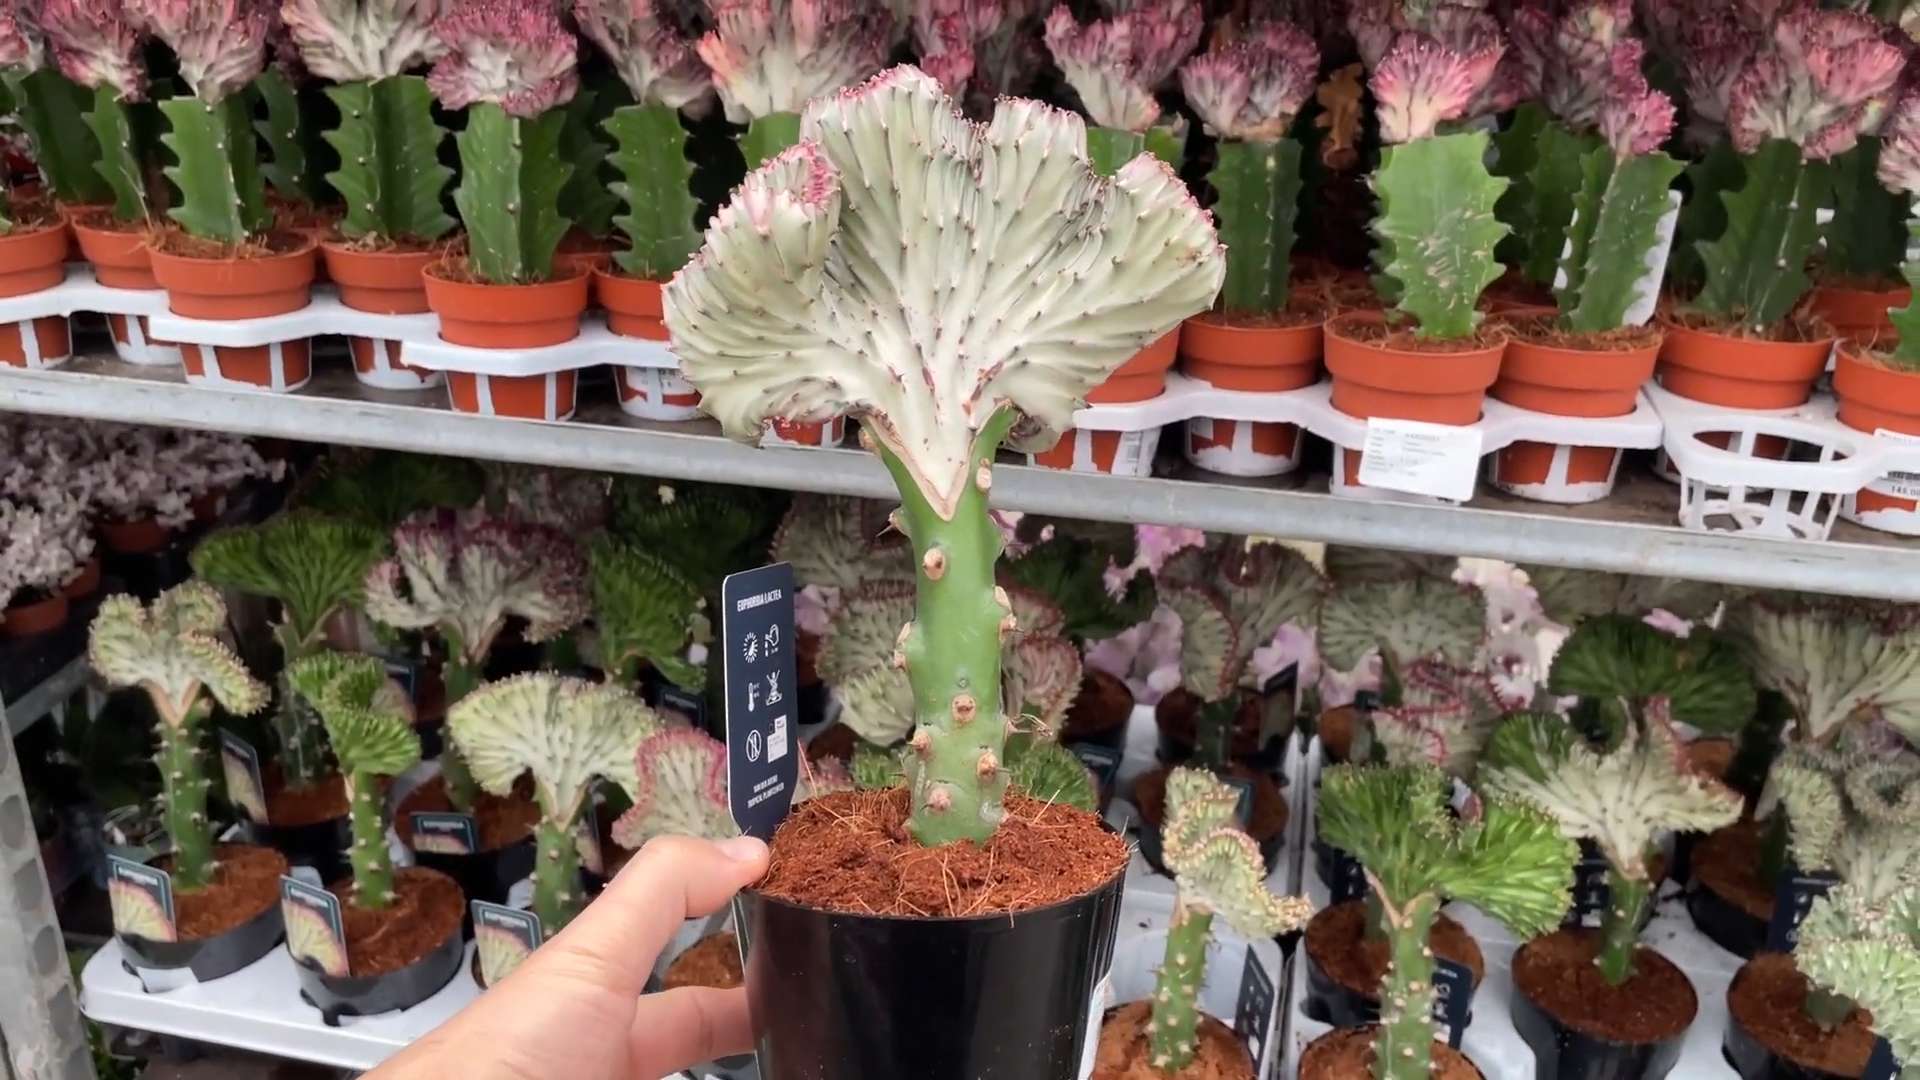
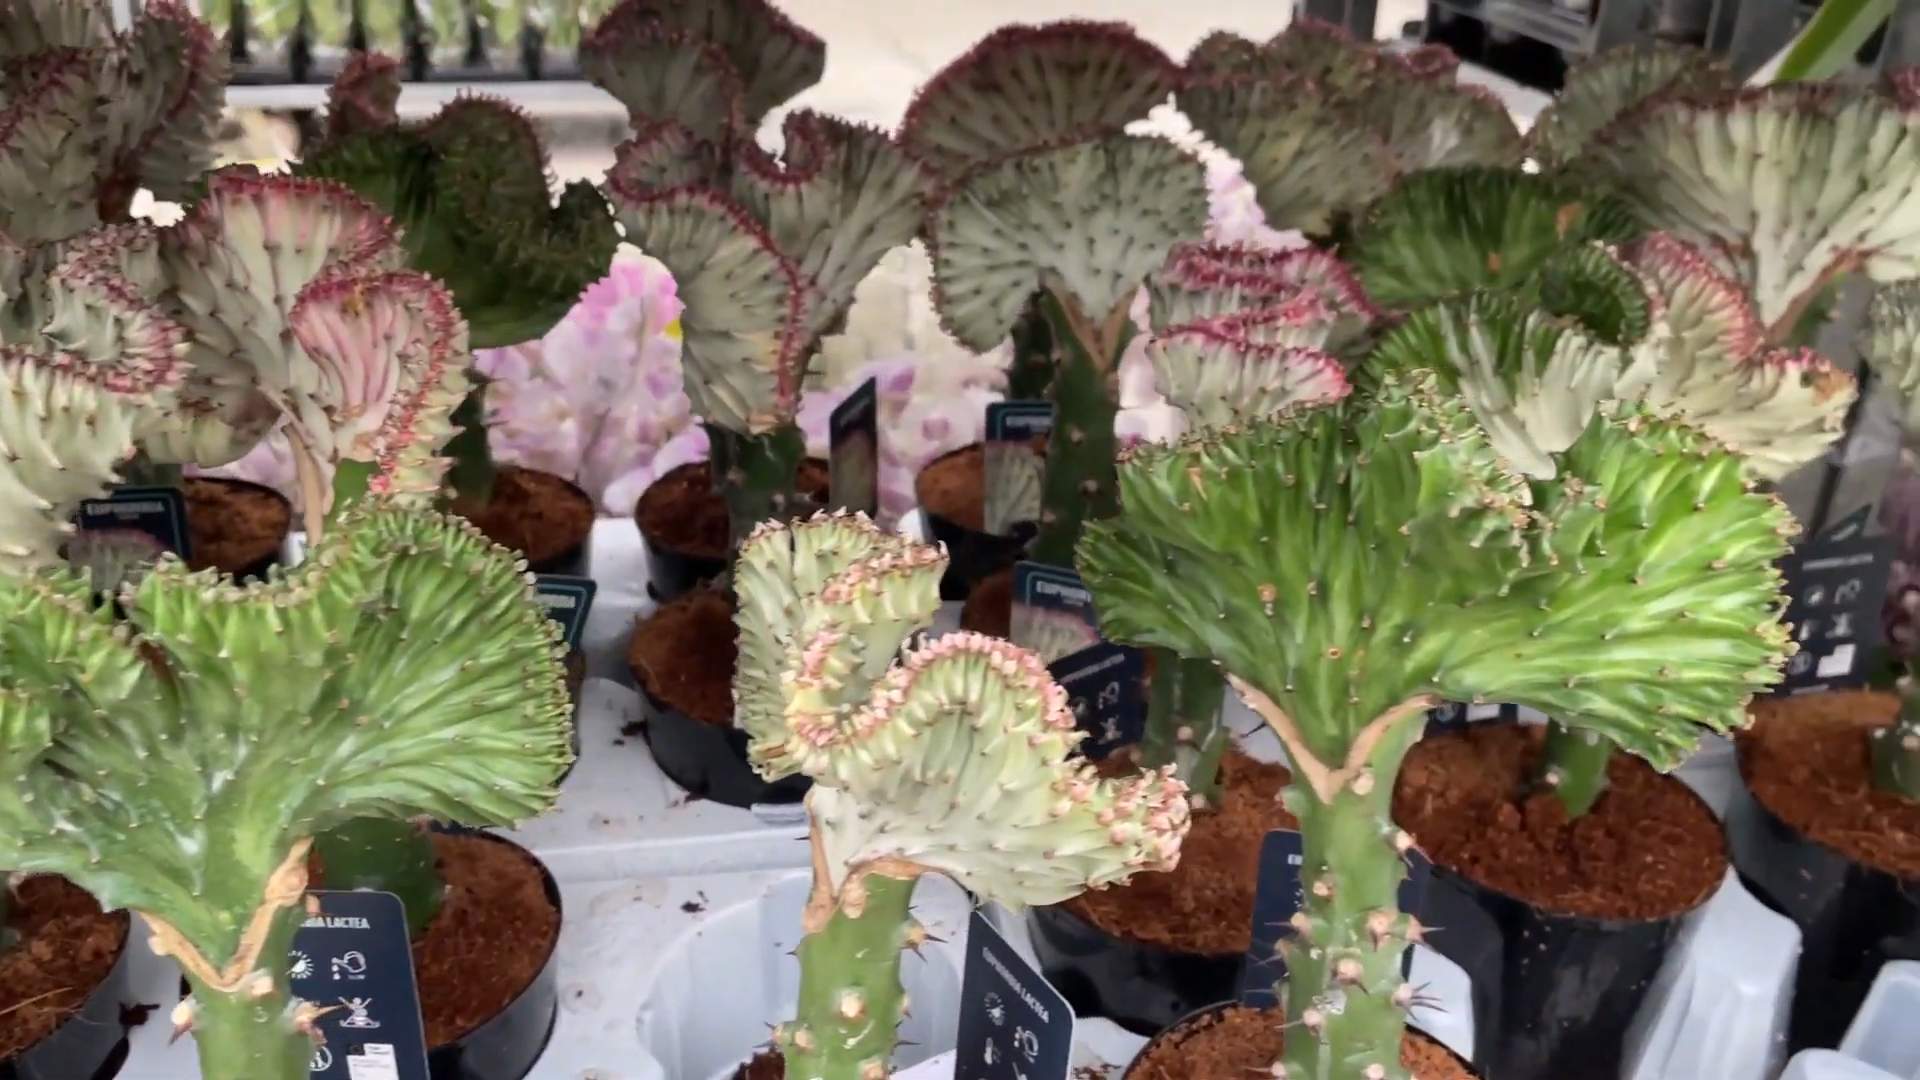
The Coral Cactus, also known as Euphorbia lactea cristata, isn’t actually a cactus at all! It’s a fascinating grafted succulent, combining two different Euphorbia species. Grafting, a technique used for centuries in horticulture, allows us to enjoy the unique crested form of the Euphorbia lactea cristata atop a sturdy base. This technique has been used for centuries, and it’s a testament to our ingenuity in the plant world.
Why do you need these DIY tricks? Because Coral Cactus care can be a little tricky! They’re prone to root rot if overwatered and can suffer from sunburn if exposed to harsh sunlight. But don’t worry, I’m here to guide you through the common pitfalls and share my secrets for keeping your Coral Cactus happy and healthy. With these simple hacks, you’ll be amazed at how easy it is to provide the best Coral Cactus care and enjoy its unique beauty for years to come. Let’s get started!
DIY Coral Cactus Propagation: A Beginner’s Guide
Hey plant lovers! Today, I’m super excited to share my secrets for propagating Coral Cactus (Euphorbia lactea cristata). These quirky, eye-catching succulents are relatively easy to propagate, and it’s a fantastic way to expand your collection or share the love with friends. Let’s dive in!
Understanding Coral Cactus Structure
Before we get started, it’s important to understand the unique structure of a Coral Cactus. It’s actually two different Euphorbia species grafted together! The base is usually *Euphorbia neriifolia*, providing the roots and stability. The top, the “coral” part, is *Euphorbia lactea cristata*, known for its fascinating crested growth. Because of this grafting, propagation can be a little trickier than with other succulents, but don’t worry, I’ll guide you through it.
Choosing Your Propagation Method
There are two main ways to propagate Coral Cactus:
* **Grafting:** This is the most common and reliable method, as it replicates the original plant’s structure. You’ll need a healthy *Euphorbia neriifolia* base (the “rootstock”) and a piece of *Euphorbia lactea cristata* (the “scion”).
* **Cutting (with rooting hormone):** While less reliable, you can try rooting a cutting of the *Euphorbia lactea cristata*. This method requires patience and a good rooting hormone.
I’ll focus primarily on grafting, as it’s the method I’ve had the most success with. I’ll also touch on the cutting method later.
Grafting Your Coral Cactus: Step-by-Step
This is where the magic happens! Grafting might sound intimidating, but trust me, it’s totally doable with a little patience and the right tools.
Materials You’ll Need:
* A healthy *Euphorbia neriifolia* rootstock (at least 4-6 inches tall)
* A healthy piece of *Euphorbia lactea cristata* scion (about 2-3 inches long)
* A sharp, sterilized knife or grafting tool (I use a utility knife and sterilize it with rubbing alcohol)
* Gloves (Euphorbia sap is irritating!)
* Grafting tape or rubber bands
* Rubbing alcohol for sterilization
* A well-draining potting mix (cactus mix is ideal)
* A small pot for your new grafted cactus
Step-by-Step Instructions:
1. **Prepare Your Rootstock:** Carefully remove the *Euphorbia neriifolia* rootstock from its pot. Using your sterilized knife, make a clean, horizontal cut across the top of the rootstock. The cut should be smooth and even.
2. **Prepare Your Scion:** Now, take your *Euphorbia lactea cristata* scion and make a similar clean, horizontal cut across the bottom. Make sure the cut surface is fresh and healthy.
3. **Join the Rootstock and Scion:** This is the crucial step! Carefully align the cut surfaces of the rootstock and scion. You want the vascular cambium (the green ring just under the bark) of both plants to make good contact. This is where the plants will fuse together.
4. **Secure the Graft:** Once the scion is in place, use grafting tape or rubber bands to secure it tightly to the rootstock. Wrap the tape or bands around the graft union, ensuring firm pressure. This will help the plants stay in contact and promote healing.
5. **Potting Your Grafted Cactus:** Fill your small pot with well-draining potting mix. Gently plant the grafted cactus in the pot, being careful not to disturb the graft union.
6. **Post-Grafting Care:** Place your newly grafted cactus in a warm, bright location, but avoid direct sunlight for the first few weeks. Water sparingly, allowing the soil to dry out completely between waterings.
7. **Monitor the Graft:** Keep a close eye on the graft union. After a few weeks, you should start to see signs of growth on the scion. This means the graft has been successful!
8. **Remove the Grafting Tape:** Once the graft union is strong and the scion is growing well (usually after 4-6 weeks), you can carefully remove the grafting tape or rubber bands.
Propagating Coral Cactus from Cuttings (The Riskier Route)
While grafting is the preferred method, you can also try propagating Coral Cactus from cuttings. This method is less reliable, as the *Euphorbia lactea cristata* doesn’t always root easily on its own.
Materials You’ll Need:
* A healthy cutting of *Euphorbia lactea cristata* (about 3-4 inches long)
* Gloves (Euphorbia sap is irritating!)
* Rooting hormone powder or liquid
* A well-draining potting mix (cactus mix is ideal)
* A small pot
* A clean, sterilized knife or pruning shears
Step-by-Step Instructions:
1. **Take the Cutting:** Using your sterilized knife or pruning shears, take a clean cutting from a healthy part of the *Euphorbia lactea cristata*.
2. **Callus the Cutting:** Allow the cut end of the cutting to callus over for several days. This will help prevent rot. Place the cutting in a dry, shaded location.
3. **Apply Rooting Hormone:** Once the cutting has callused, dip the cut end in rooting hormone powder or liquid. This will encourage root growth.
4. **Plant the Cutting:** Fill your small pot with well-draining potting mix. Plant the cutting in the pot, burying the callused end about 1-2 inches deep.
5. **Post-Planting Care:** Place the pot in a warm, bright location, but avoid direct sunlight. Water sparingly, allowing the soil to dry out completely between waterings.
6. **Patience is Key:** Rooting Coral Cactus cuttings can take several weeks or even months. Be patient and avoid overwatering. You can gently tug on the cutting after a few weeks to see if it has rooted. If it resists, it has likely developed roots.
Troubleshooting Your Coral Cactus Propagation
Even with the best intentions, things don’t always go as planned. Here are some common problems you might encounter and how to fix them:
* **Graft Failure:** If the scion starts to shrivel or turn brown, the graft may have failed. This can be due to poor contact between the rootstock and scion, infection, or improper care. You can try again with a fresh cut on both plants, ensuring good contact and proper sterilization.
* **Rot:** Overwatering is the most common cause of rot. Make sure your potting mix is well-draining and allow the soil to dry out completely between waterings. If you see signs of rot, remove the affected areas and repot the plant in fresh soil.
* **Lack of Rooting:** If your cutting doesn’t root after several weeks, it may be due to insufficient light, improper watering, or lack of rooting hormone. Try moving the cutting to a brighter location, adjusting your watering schedule, and reapplying rooting hormone.
* **Yellowing:** Yellowing can be caused by overwatering, underwatering, or nutrient deficiencies. Check the soil moisture and adjust your watering schedule accordingly. You can also fertilize your Coral Cactus with a balanced cactus fertilizer during the growing season.
Tips for Success
Here are a few extra tips to help you succeed with Coral Cactus propagation:
* Sterilize your tools! This is crucial to prevent infection.
* Use a sharp knife or grafting tool. A clean cut is essential for good contact between the rootstock and scion.
* Be patient! Propagation can take time, so don’t get discouraged if you don’t see results immediately.
* Provide proper care. Coral Cactus needs bright light, well-draining soil, and infrequent watering.
* Don’t be afraid to experiment! Every plant is different, so try different techniques and see what works best for you.
* Wear Gloves! The sap from Euphorbia plants is an irritant.
Choosing the Right Rootstock
The health and vigor of your *Euphorbia neriifolia* rootstock are crucial for a successful graft. Look for a rootstock that is:
* Healthy and strong: Choose a plant that is free from pests, diseases, and signs of stress.
* Well-established: The rootstock should have a strong root system and be actively growing.
* The right size: The rootstock should be large enough to support the scion, but not so large that it overwhelms it. A rootstock that is 4-6 inches tall is usually a good size.
Understanding Graft Compatibility
While *Euphorbia neriifolia* is the most common rootstock for *Euphorbia lactea cristata*, it’s important to understand the concept of graft compatibility. Grafting only works when two plants are
Conclusion
So, there you have it! Mastering coral cactus care doesn’t have to be a daunting task. By understanding its unique needs and implementing these simple DIY tricks, you can unlock the full potential of this fascinating succulent and enjoy its vibrant, otherworldly beauty for years to come. This isn’t just about keeping a plant alive; it’s about creating a thriving environment where your coral cactus can flourish and become a true statement piece in your home.
The key takeaway is that well-draining soil is non-negotiable. Remember that root rot is the coral cactus’s biggest enemy, and proper drainage is the best defense. Don’t be afraid to experiment with different soil mixes to find what works best for your specific environment. Consider adding extra perlite or pumice for enhanced aeration.
Beyond the basics, there are several ways to personalize your coral cactus care routine. For example, if you live in a particularly humid climate, you might want to increase the frequency of ventilation around your plant. A small fan can work wonders in preventing moisture buildup. Conversely, if you live in a dry climate, you might need to mist your coral cactus occasionally, especially during the hottest months. However, always err on the side of caution and avoid overwatering.
Another variation to consider is the type of pot you use. Terracotta pots are an excellent choice because they are porous and allow for better airflow. However, plastic pots can also work well, as long as you ensure they have adequate drainage holes. Regardless of the pot material, make sure it’s appropriately sized for your coral cactus. A pot that’s too large can retain too much moisture, while a pot that’s too small can restrict root growth.
Furthermore, think about the aesthetic presentation. While the health of your coral cactus is paramount, its visual appeal is also important. Consider adding a layer of decorative gravel or pebbles to the top of the soil. This can help retain moisture, suppress weeds, and add a touch of elegance to your display. You can also experiment with different pot designs and arrangements to create a unique and eye-catching focal point.
Don’t be intimidated by the perceived complexity of coral cactus care. With a little knowledge and attention, you can easily provide your plant with the conditions it needs to thrive. The rewards are well worth the effort. Imagine the satisfaction of watching your coral cactus grow and flourish, its vibrant colors and unique form adding a touch of the exotic to your home.
We wholeheartedly encourage you to try these DIY tricks and embark on your own coral cactus care journey. Remember, every plant is different, and what works for one person might not work for another. The key is to observe your plant closely, pay attention to its needs, and adjust your care routine accordingly.
And most importantly, we want to hear about your experiences! Share your tips, tricks, and successes (and even your failures!) in the comments below. Let’s create a community of coral cactus enthusiasts who can learn from each other and help each other grow. Together, we can unlock the secrets to successful coral cactus care and enjoy the beauty of these amazing plants for years to come. So, go ahead, give it a try, and let us know how it goes! Your insights could be invaluable to other readers.
Frequently Asked Questions (FAQ)
What exactly is a coral cactus, and why is it so unique?
The “coral cactus” is not actually a cactus, but rather a grafted succulent. It typically consists of a *Euphorbia neriifolia* (the base, providing roots) and a *Euphorbia lactea cristata* (the crested top, resembling coral). This grafting creates a visually striking plant with unique care requirements stemming from both components. The crested top lacks chlorophyll, hence the need for the base plant to provide sustenance. Its unusual form and vibrant colors make it a popular choice for plant enthusiasts seeking something different.
How often should I water my coral cactus?
Watering frequency is crucial and depends on several factors, including the season, climate, and pot size. As a general rule, water thoroughly only when the soil is completely dry to the touch. Overwatering is a common mistake that can lead to root rot. During the active growing season (spring and summer), you may need to water more frequently, perhaps once every 1-2 weeks. In the dormant season (fall and winter), reduce watering significantly, perhaps once a month or even less. Always check the soil moisture before watering to avoid overwatering. Use your finger to probe the soil a couple of inches deep. If it feels dry, it’s time to water.
What kind of soil is best for a coral cactus?
Well-draining soil is absolutely essential for coral cactus care. A standard cactus or succulent potting mix is a good starting point, but you may want to amend it further to improve drainage. Consider adding perlite, pumice, or coarse sand to the mix. A good ratio is typically 1 part potting mix, 1 part perlite, and 1 part coarse sand. This will ensure that excess water drains quickly and doesn’t sit around the roots, preventing root rot. Avoid using heavy, clay-based soils, as they retain too much moisture.
How much sunlight does a coral cactus need?
Coral cacti thrive in bright, indirect sunlight. Direct sunlight can scorch the crested top, especially during the hottest part of the day. An east-facing window is often ideal, providing morning sun without the harsh afternoon rays. If you’re growing your coral cactus outdoors, place it in a location that receives filtered sunlight or partial shade. If you notice the crested top becoming pale or bleached, it’s likely getting too much sun. Conversely, if it’s not getting enough light, it may become leggy or etiolated (stretched out).
What are the signs of overwatering or underwatering a coral cactus?
Overwatering is a more common problem than underwatering. Signs of overwatering include yellowing or browning of the stems, mushy or soft spots, and a foul odor coming from the soil. If you suspect overwatering, stop watering immediately and allow the soil to dry out completely. You may even need to repot the plant with fresh, dry soil. Signs of underwatering include shriveling or wrinkling of the stems, dry and brittle leaves, and stunted growth. If you suspect underwatering, water thoroughly and allow the soil to soak.
Is it necessary to fertilize my coral cactus?
Yes, fertilizing can help promote healthy growth, but it’s important to use a fertilizer specifically formulated for cacti and succulents. These fertilizers are typically lower in nitrogen and higher in phosphorus and potassium. Fertilize during the active growing season (spring and summer) every 4-6 weeks. Dilute the fertilizer to half strength to avoid burning the roots. Avoid fertilizing during the dormant season (fall and winter).
How do I propagate a coral cactus?
Propagating a coral cactus is challenging due to its grafted nature. You cannot propagate the crested top on its own, as it lacks chlorophyll. You can, however, propagate the base plant (*Euphorbia neriifolia*) through stem cuttings. Allow the cutting to callous over for several days before planting it in well-draining soil. Keep the soil slightly moist until roots develop. Grafting is a more complex process that requires specialized skills and equipment.
My coral cactus is leaning. What should I do?
Leaning can be caused by several factors, including uneven light exposure or a weak base plant. Rotate your coral cactus regularly to ensure that all sides receive equal light. If the base plant is weak or unstable, you may need to provide support with a stake or by repotting the plant in a larger pot with fresh soil.
Are coral cacti toxic to pets and humans?
Yes, coral cacti are toxic. The sap contains irritants that can cause skin irritation, eye irritation, and gastrointestinal upset if ingested. Keep coral cacti out of reach of children and pets. Wear gloves when handling the plant to avoid skin contact with the sap. If you or your pet comes into contact with the sap, wash the affected area thoroughly with soap and water.
How do I prevent root rot in my coral cactus?
Preventing root rot is the most important aspect of coral cactus care. Ensure that your plant is planted in well-draining soil, avoid overwatering, and provide adequate ventilation. Allow the soil to dry out completely between waterings. If you live in a humid climate, consider using a terracotta pot, which will help the soil dry out more quickly. Regularly inspect the roots for signs of rot, such as mushy or brown spots. If you detect root rot, remove the affected roots and repot the plant in fresh, dry soil.
Leave a Comment