

Clean keyboard safely – it’s something we all need to do, but often dread! Let’s be honest, our keyboards are magnets for dust, crumbs, and who-knows-what-else. Think about it: your keyboard is a modern-day extension of your hands, touching everything from your morning coffee to that bag of chips during your late-night work session. It’s no wonder they get so grimy!
Throughout history, tools for writing and communication have always required maintenance. From cleaning inkwells and quills to dusting off typewriters, keeping our instruments in good working order has always been essential. Today, the keyboard is our primary tool for communication and creation, and keeping it clean is not just about aesthetics; it’s about hygiene and extending its lifespan.
But fear not! You don’t need to be a tech wizard to clean keyboard safely and effectively. I’m here to share some simple, DIY tricks and hacks that will have your keyboard looking and feeling brand new in no time. These methods are not only easy and affordable, but they also avoid harsh chemicals that could damage your precious device. So, ditch the canned air and get ready to learn some clever ways to keep your keyboard sparkling clean and functioning flawlessly. Let’s get started!
DIY: Revive Your Grimy Keyboard with These Simple Cleaning Hacks!
Okay, let’s face it, our keyboards are like little petri dishes. Crumbs, dust, and who-knows-what-else accumulate between the keys, turning them into a breeding ground for… well, let’s not think about it too much. But fear not! I’m here to guide you through a safe and effective cleaning process that will leave your keyboard sparkling and germ-free.
What You’ll Need: Your Cleaning Arsenal
Before we dive in, gather your supplies. Having everything ready will make the process smooth and efficient. Here’s what I recommend:
* A can of compressed air (essential for blasting out debris)
* Isopropyl alcohol (70% or higher is ideal)
* Microfiber cloths (lint-free is key!)
* Cotton swabs (for those hard-to-reach spots)
* A small bowl of warm water
* Mild dish soap (just a drop or two)
* A keycap puller (optional, but highly recommended)
* A small, soft brush (like a paintbrush or toothbrush)
* A vacuum cleaner with a brush attachment (optional, for a deeper clean)
Phase 1: The Great Debris Removal
This is where we tackle the loose stuff. Think crumbs, dust bunnies, and anything else that’s just hanging out on the surface.
1. Unplug Your Keyboard: This is absolutely crucial! We’re dealing with electronics and liquids, so safety first. Disconnect your keyboard from your computer.
2. Turn It Upside Down and Shake It: Seriously, give it a good shake! Hold it over a trash can or a sheet of newspaper to catch all the falling debris. You’d be surprised how much stuff comes out.
3. Compressed Air Attack: Now for the fun part! Using short bursts, direct the compressed air between the keys. Angle the nozzle to get into all the nooks and crannies. Work your way across the entire keyboard, paying special attention to areas where you see a lot of buildup. Remember to hold the can upright to avoid spraying liquid propellant.
4. Vacuuming (Optional): If you have a vacuum cleaner with a brush attachment, you can use it to gently vacuum up any remaining debris. Be careful not to press too hard, as you don’t want to damage the keys.
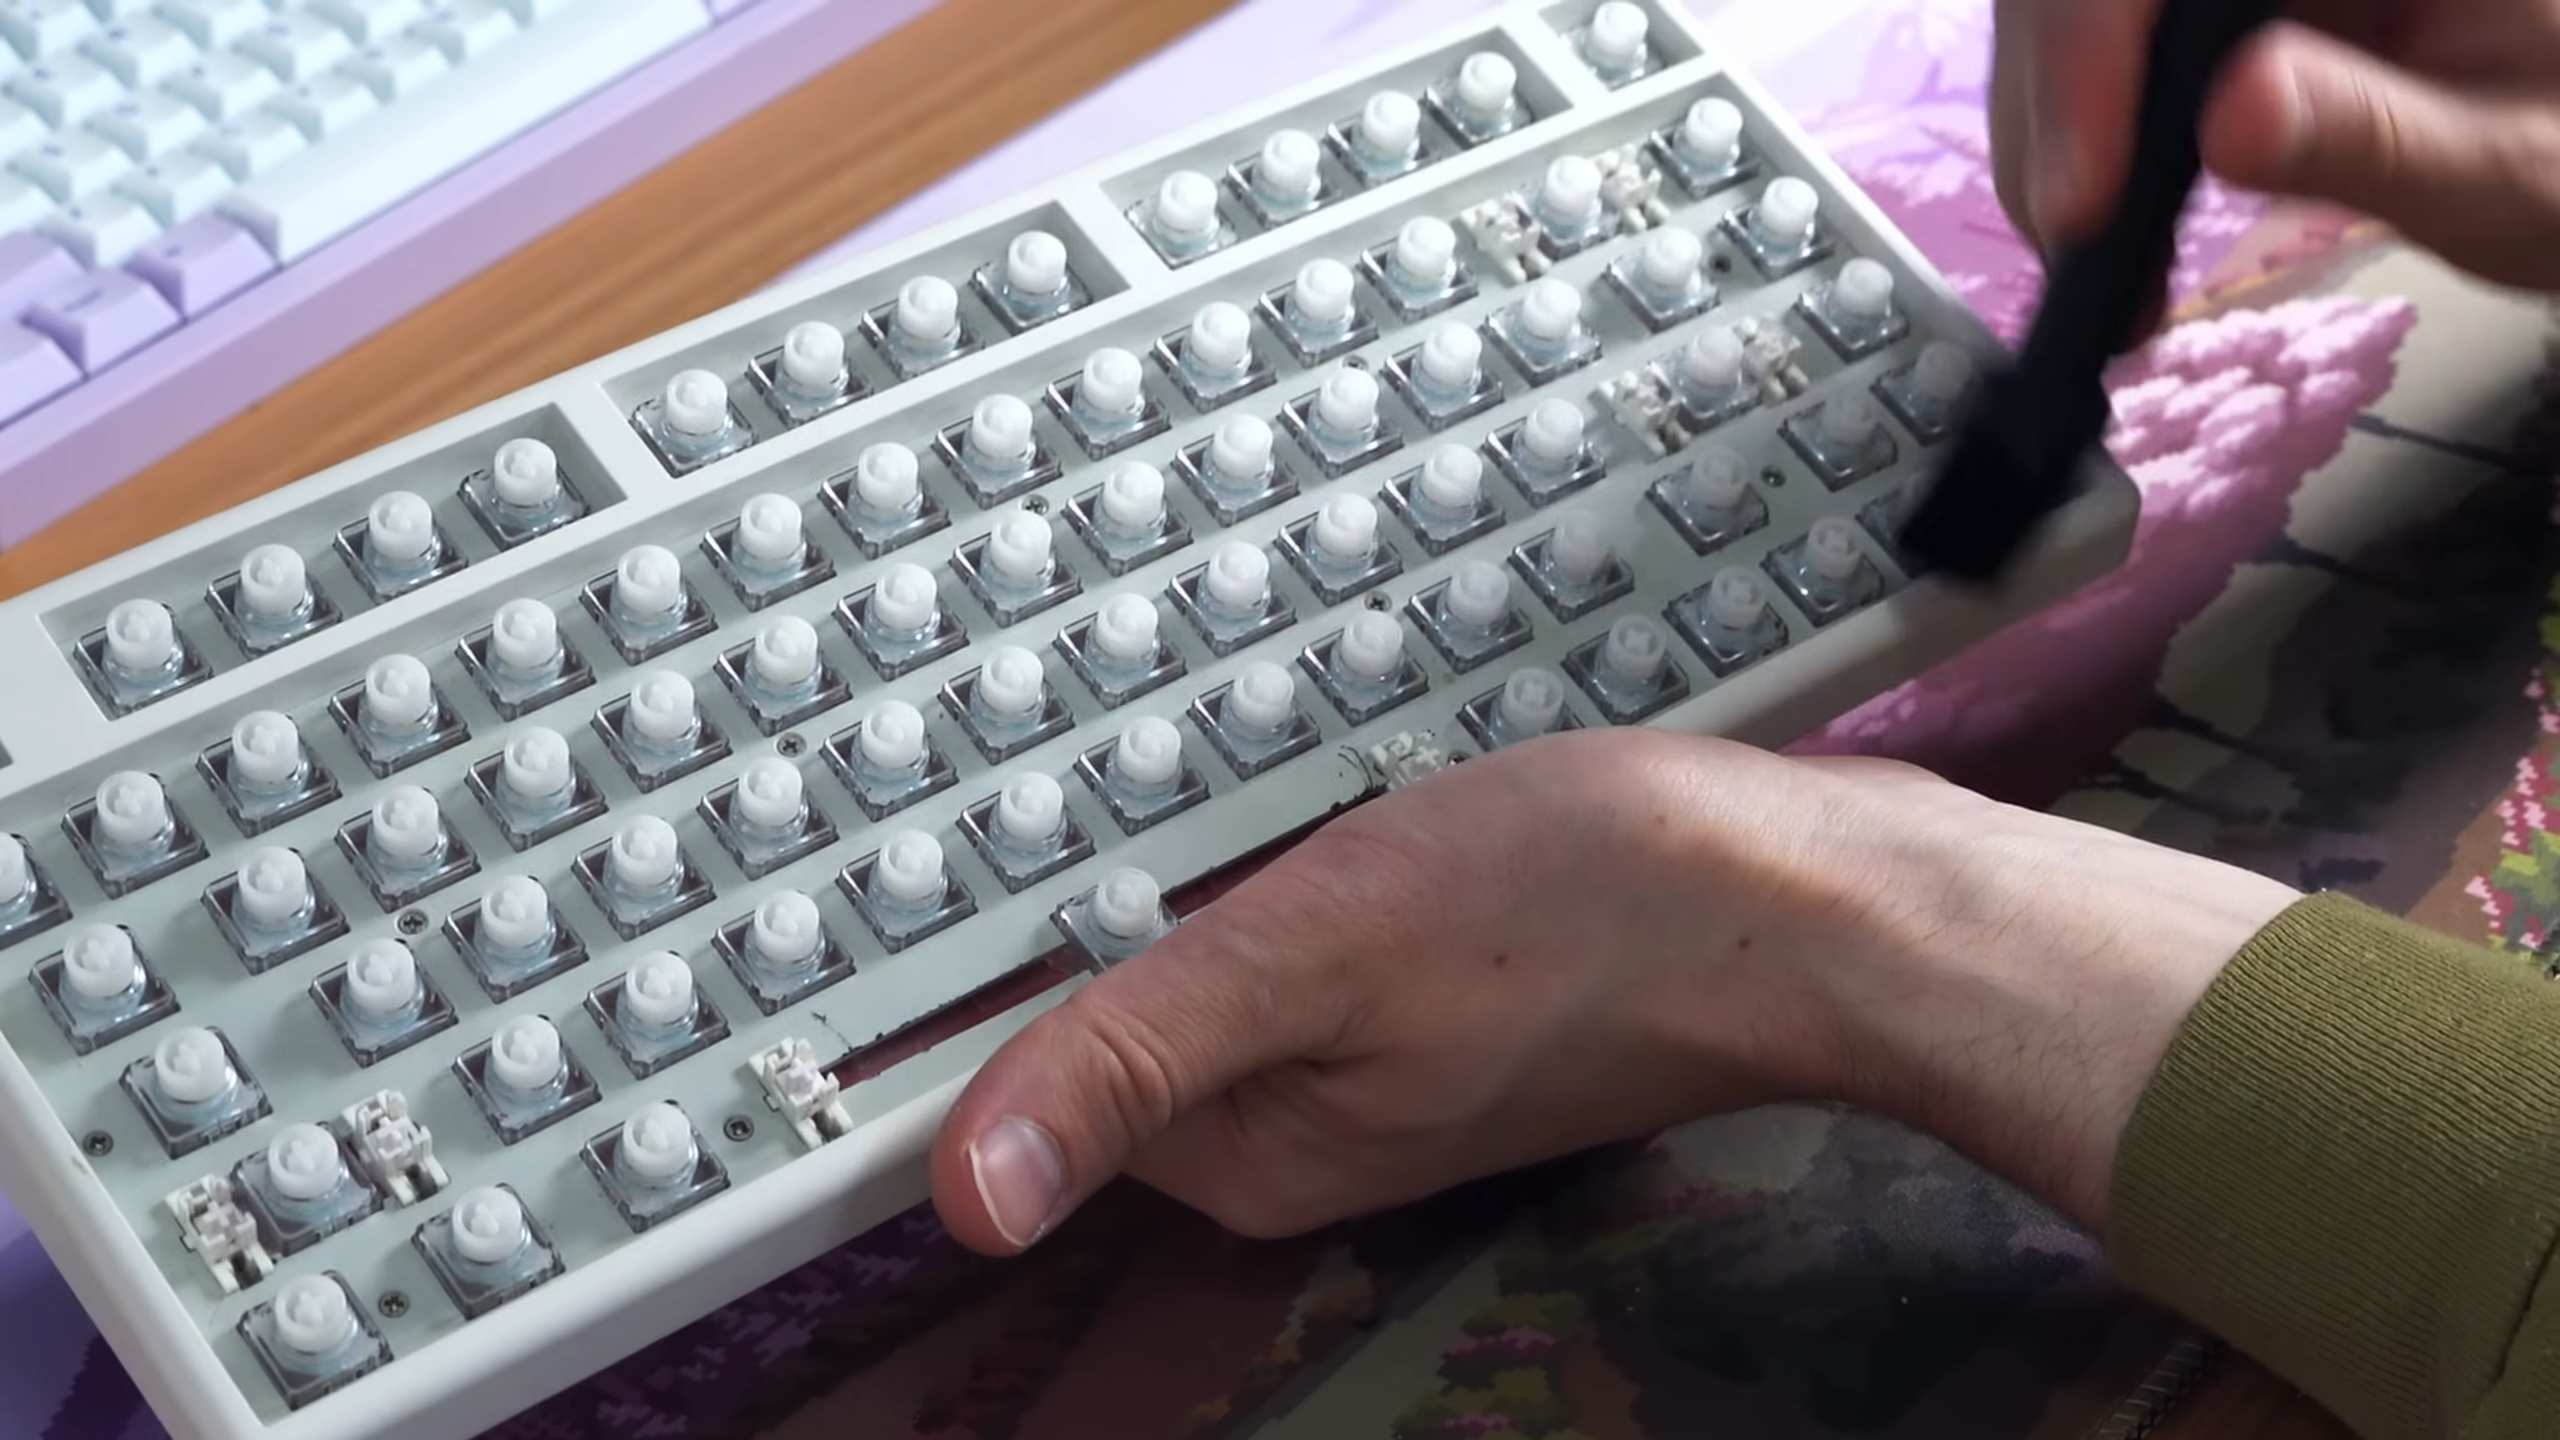
Phase 2: Keycap Removal (Optional but Recommended)
Removing the keycaps allows for a much more thorough cleaning. If you’re comfortable doing this, I highly recommend it. If not, you can skip this step and move on to Phase 3.
1. Photograph Your Keyboard: Before you start pulling keys, take a picture of your keyboard layout. This will be a lifesaver when it comes time to put everything back together! Trust me on this one.
2. Use a Keycap Puller: A keycap puller is a small tool designed to safely remove keycaps without damaging them or the keyboard. Gently slide the puller over the keycap and pull straight up. If you don’t have a keycap puller, you can try using a small, flathead screwdriver, but be extremely careful not to scratch the keycaps or the keyboard.
3. Remove Keycaps in Sections: I like to remove keycaps in sections (e.g., the QWERTY row, the number row, etc.). This helps me keep track of where everything goes. Place the removed keycaps in a container or on a clean surface.
4. Special Keys: Be extra careful when removing larger keys like the spacebar, shift keys, and enter key. These keys often have stabilizers underneath, which can be delicate. Take your time and gently wiggle the keycap until it comes loose.
Phase 3: Cleaning the Keycaps
Now that the keycaps are removed (or if you skipped Phase 2), it’s time to give them a good cleaning.
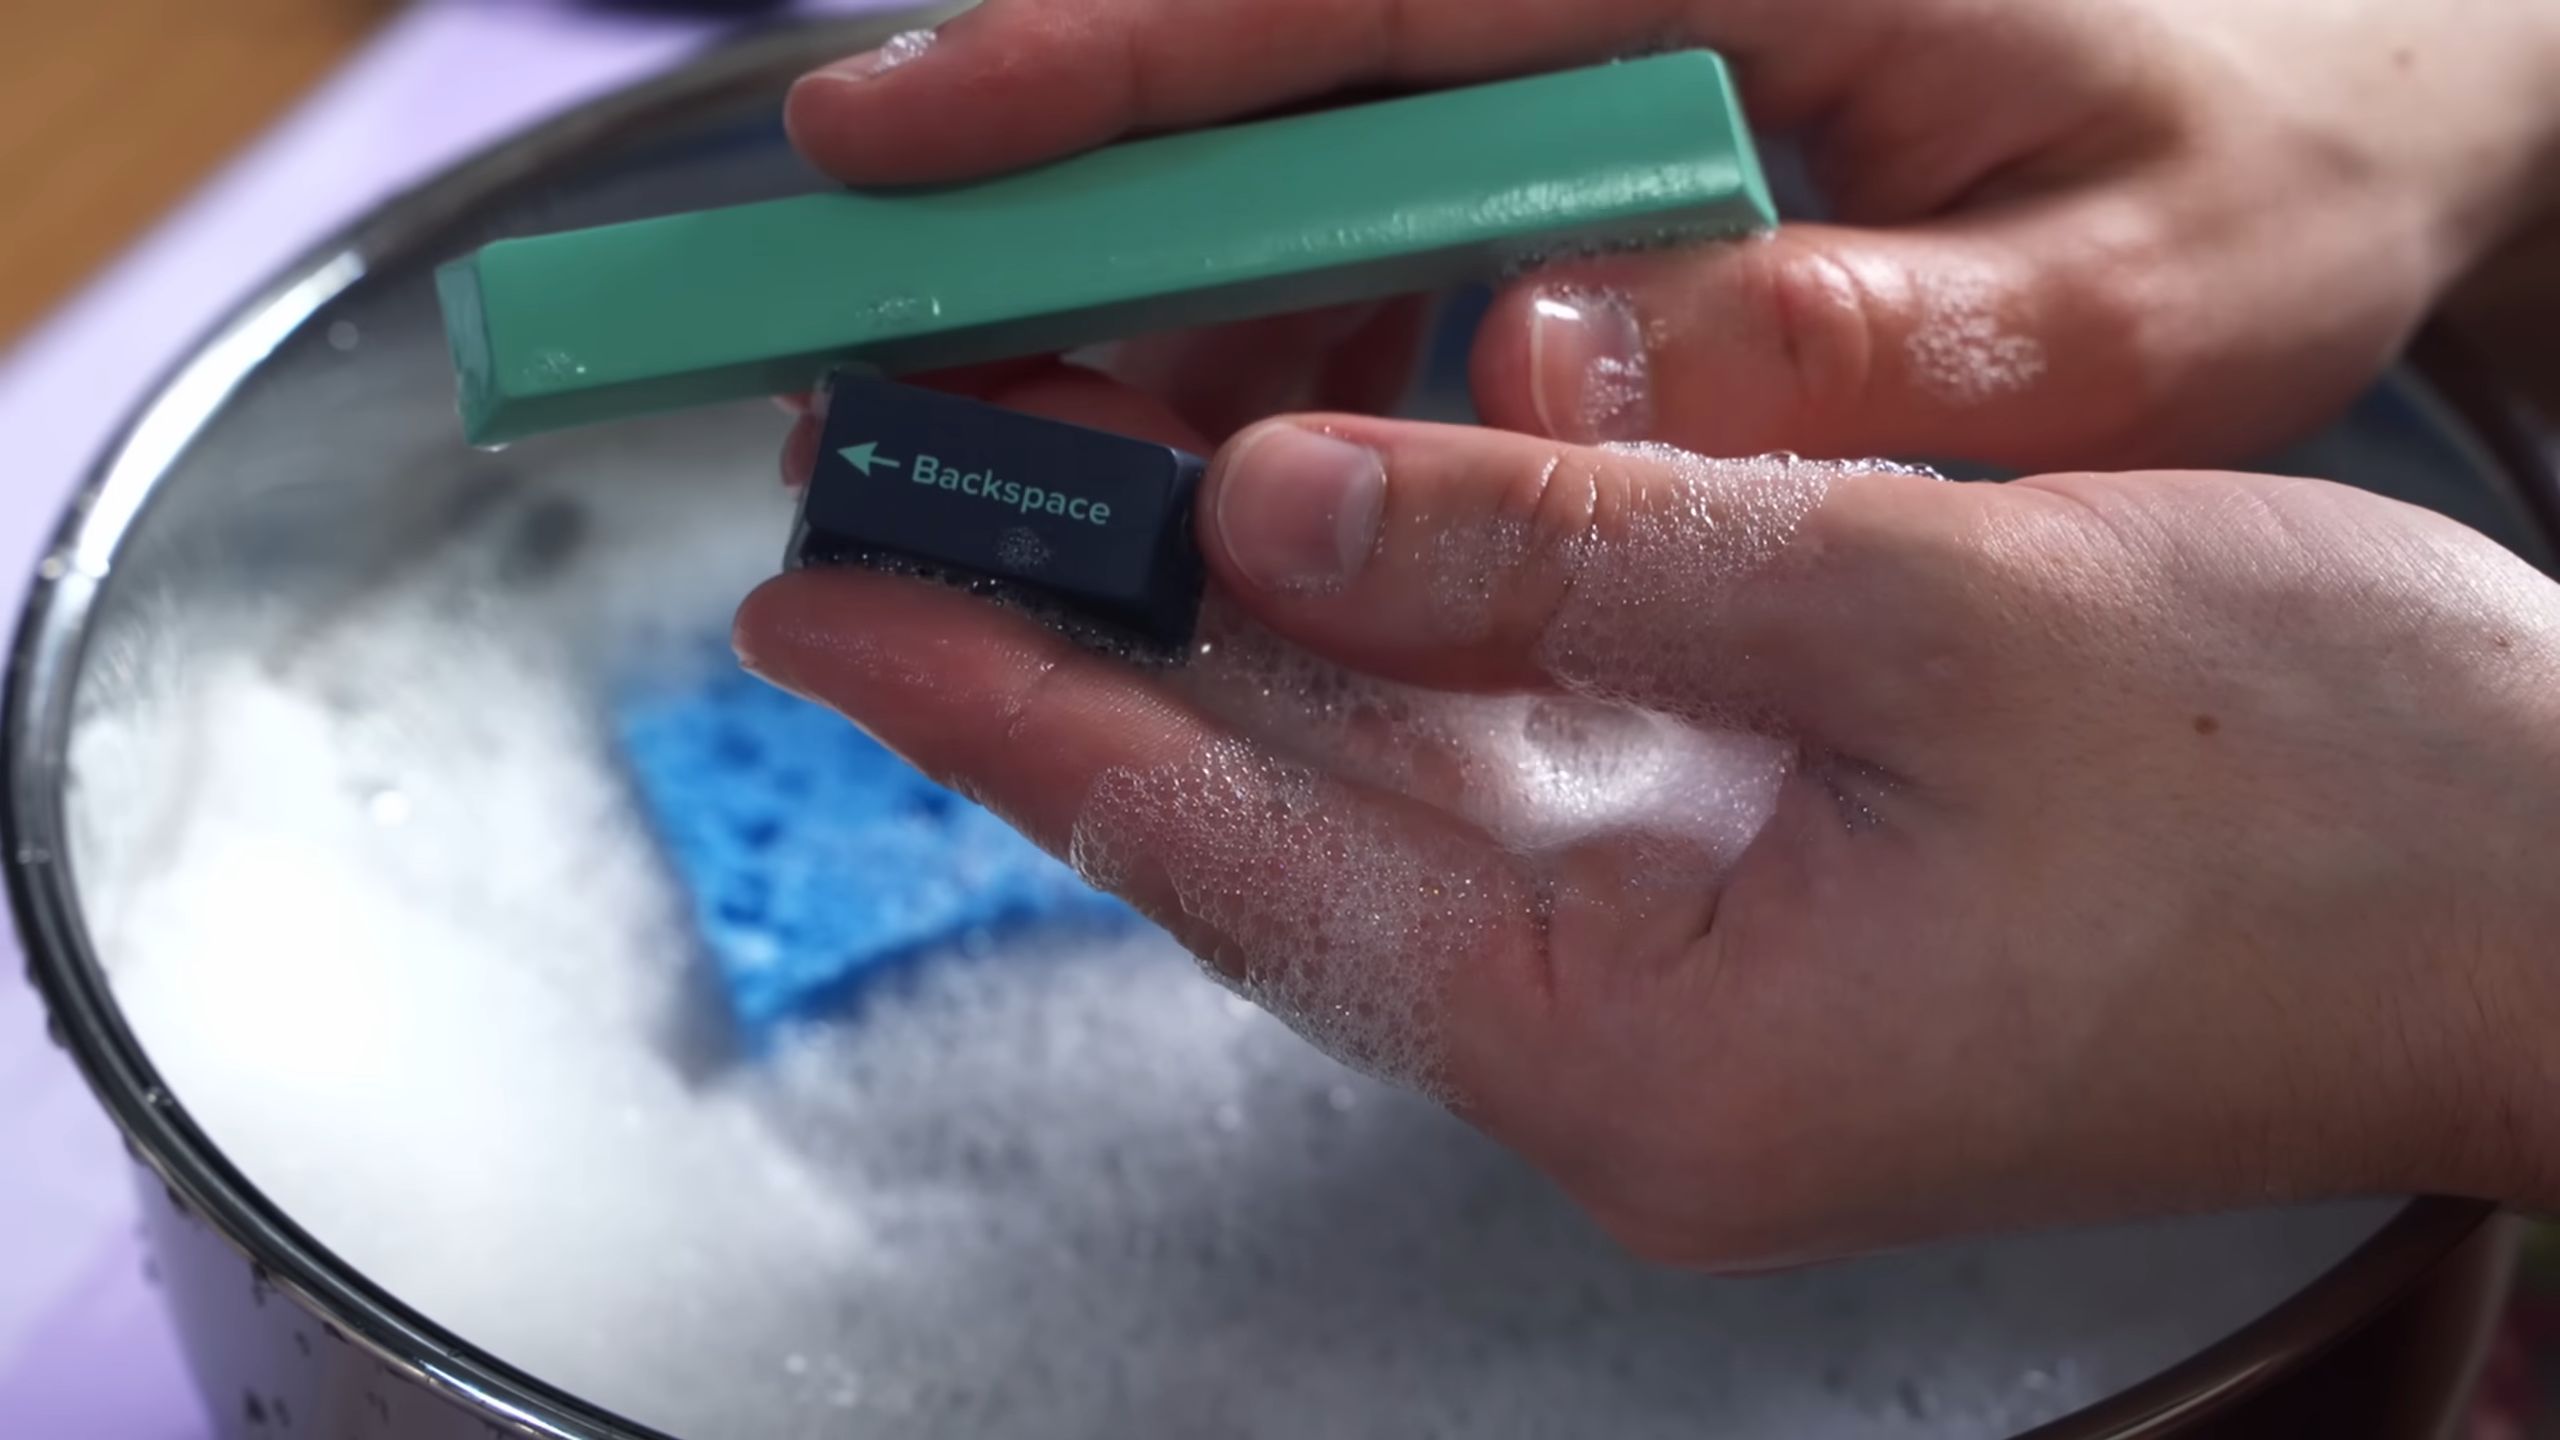
1. Prepare Your Cleaning Solution: In a small bowl, mix warm water with a drop or two of mild dish soap. Don’t use too much soap, as it can be difficult to rinse off completely.
2. Soak the Keycaps: Place the keycaps in the soapy water and let them soak for about 15-20 minutes. This will help loosen any dirt and grime.
3. Scrub the Keycaps: After soaking, use a soft brush (like a toothbrush) to gently scrub each keycap. Pay attention to any areas with stubborn dirt or grime.
4. Rinse Thoroughly: Rinse the keycaps thoroughly with clean water to remove all traces of soap.
5. Dry Completely: Spread the keycaps out on a clean towel and let them air dry completely. Make sure they are completely dry before reattaching them to the keyboard. You can also use a microfiber cloth to gently pat them dry.
Phase 4: Cleaning the Keyboard Base
With the keycaps removed, you can now clean the keyboard base itself.
1. Dampen a Microfiber Cloth: Lightly dampen a microfiber cloth with isopropyl alcohol. Make sure the cloth is not dripping wet, as you don’t want to get liquid inside the keyboard.
2. Wipe Down the Keyboard Base: Gently wipe down the entire keyboard base, paying attention to any areas with dirt or grime. Use cotton swabs dipped in isopropyl alcohol to clean hard-to-reach areas, such as around the switches.
3. Remove Stubborn Stains: For stubborn stains, you can try using a slightly more concentrated solution of isopropyl alcohol. However, be careful not to damage the keyboard’s finish.
4. Dry the Keyboard Base: Use a clean, dry microfiber cloth to wipe down the keyboard base and remove any remaining moisture.
Phase 5: Reassembly
This is the final step! Time to put everything back together.
1. Ensure Everything is Dry: Before reassembling, make sure that both the keycaps and the keyboard base are completely dry. Any moisture can damage the keyboard.
2. Reattach the Keycaps: Using the photograph you took earlier as a guide, carefully reattach the keycaps to the keyboard. Press down firmly until you hear a click.
3. Stabilizers: If you removed any keys with stabilizers (like the spacebar), make sure to reattach the stabilizers correctly before reattaching the keycap. This can be a bit tricky, so take your time and refer to online resources if needed.
4. Double-Check: Once you’ve reattached all the keycaps, double-check to make sure that everything is in the correct place and that all the keys are working properly.
5. Plug It In: Once you are sure everything is dry and assembled correctly, plug your keyboard back into your computer.
Extra Tips and Tricks for a Sparkling Keyboard
* Regular Cleaning: To prevent buildup, clean your keyboard regularly (at least once a month). A quick wipe-down with a microfiber cloth can go a long way.
* Eat Away From Your Keyboard: Try to avoid eating or drinking near your keyboard. This will help prevent crumbs and spills from getting into the keys.
* Keyboard Covers: Consider using a keyboard cover to protect your keyboard from dust and spills.
* Specialized Keyboard Cleaners: There are also specialized keyboard cleaners available on the market. These cleaners are designed to be safe and effective for cleaning keyboards.
* For Mechanical Keyboards: If you have a mechanical keyboard, you may want to consider using a keycap puller specifically designed for mechanical keyboards. These pullers are less likely to damage the keycaps or the switches. Also, research the specific type of switches your keyboard uses, as some switches may require special cleaning techniques.
* Don’t Use Harsh Chemicals: Avoid using harsh chemicals like bleach or ammonia to clean your keyboard, as these can damage the keyboard’s finish.
* Be Gentle: When cleaning your keyboard, be gentle and avoid using excessive force. You don’t want to damage the keys or the keyboard itself.
* Patience is Key: Cleaning a keyboard can be a bit time-consuming, but it’s worth it to have a clean and functional keyboard. Take your time and be patient, and you’ll be rewarded with a sparkling clean keyboard.
And there you have it! A clean keyboard, ready for action. Enjoy the satisfying feeling of typing on a keyboard free from grime and gunk. Happy typing!
Conclusion
So, there you have it! Mastering the art of cleaning your keyboard safely at home is not just about aesthetics; it’s about extending the life of your device, improving your typing experience, and maintaining a healthier workspace. We’ve walked you through a simple, effective, and affordable method that utilizes items you likely already have in your home.
Why is this DIY keyboard cleaning trick a must-try? Because it empowers you to take control of your keyboard’s hygiene without relying on expensive cleaning services or potentially damaging harsh chemicals. Think about it: your keyboard is a breeding ground for dust, crumbs, and even bacteria. Regular cleaning, using the gentle methods we’ve outlined, prevents these build-ups from interfering with the keys’ functionality and keeps your workspace more sanitary.
But the benefits don’t stop there. A clean keyboard is a happy keyboard, and a happy keyboard translates to a more efficient and enjoyable typing experience. No more sticky keys, no more frustrating typos caused by debris lodged underneath the keycaps. Just smooth, responsive typing that allows you to focus on the task at hand.
Looking for variations? Absolutely! For a deeper clean, consider using a keycap puller to remove the keycaps entirely. This allows you to access the hidden crevices and remove any stubborn debris. You can then soak the keycaps in warm, soapy water, rinse them thoroughly, and let them air dry completely before reattaching them. If you’re dealing with particularly stubborn grime, a small amount of isopropyl alcohol (90% or higher) on a cotton swab can be used to gently scrub the affected areas. Just be sure to avoid getting any liquid inside the keyboard’s internal components.
Another variation involves using a small, portable vacuum cleaner with a brush attachment. This can be particularly effective for removing loose dust and debris from between the keys. Just be sure to use a low suction setting to avoid damaging the keyboard.
We understand that trying a new DIY method can sometimes feel daunting, but we encourage you to give this keyboard cleaning technique a try. It’s simple, safe, and incredibly rewarding. The satisfaction of typing on a sparkling clean keyboard is truly unmatched.
Don’t just take our word for it! We want to hear about your experiences. Did you find this method helpful? Did you discover any other tips or tricks along the way? Share your thoughts and photos in the comments below. Let’s create a community of keyboard cleaning enthusiasts and help each other maintain pristine and functional keyboards. Remember, a clean keyboard is a productive keyboard! So, grab your supplies, follow our guide, and get ready to experience the joy of a truly clean keyboard. You’ll be amazed at the difference it makes.
Frequently Asked Questions (FAQ)
Q: How often should I clean my keyboard?
A: The frequency of cleaning depends on your usage habits and environment. If you use your keyboard frequently and eat near it, you should aim to clean it at least once a week. If you’re a light user or work in a relatively clean environment, cleaning it every two to four weeks may suffice. However, if you notice visible dust, crumbs, or sticky keys, it’s time for a cleaning session regardless of the schedule. Regular light cleaning is always better than infrequent deep cleaning.
Q: What if I spill liquid on my keyboard?
A: Spilling liquid on your keyboard requires immediate action. First, immediately disconnect the keyboard from the power source (unplug it from your computer). Turn the keyboard upside down to allow any excess liquid to drain out. Use a clean, absorbent cloth to blot up as much liquid as possible. Do not use a hairdryer or other heat source to dry the keyboard, as this can damage the internal components. Allow the keyboard to air dry completely for at least 24-48 hours before reconnecting it. If the liquid was sugary or sticky, you may need to disassemble the keyboard and clean the individual components with isopropyl alcohol. If you’re not comfortable disassembling your keyboard, it’s best to take it to a professional repair shop.
Q: Can I use compressed air to clean my keyboard?
A: Yes, compressed air can be a helpful tool for cleaning your keyboard, but it’s important to use it correctly. Hold the can of compressed air upright and use short bursts to blow away dust and debris from between the keys. Avoid holding the can upside down, as this can release liquid propellant that can damage the keyboard. Be sure to direct the airflow at an angle to avoid pushing debris further into the keyboard. Compressed air is most effective for removing loose particles; it may not be sufficient for removing sticky or stubborn grime.
Q: Is it safe to use household cleaners on my keyboard?
A: It’s generally not recommended to use harsh household cleaners on your keyboard, as they can damage the plastic or the internal components. Avoid using bleach, ammonia, or abrasive cleaners. If you need to use a cleaning solution, opt for a mild mixture of dish soap and water. Always apply the solution to a cloth first, rather than directly to the keyboard. Be sure to wring out the cloth thoroughly to prevent excess moisture from entering the keyboard.
Q: How do I clean a mechanical keyboard?
A: Cleaning a mechanical keyboard is similar to cleaning a regular keyboard, but there are a few additional considerations. Mechanical keyboards often have removable keycaps, which makes cleaning easier. Use a keycap puller to remove the keycaps and soak them in warm, soapy water. Clean the keyboard base with a damp cloth and a mild cleaning solution. Use compressed air to remove any dust or debris from the switches. Allow the keycaps to dry completely before reattaching them. Be careful not to damage the switches when cleaning the keyboard base.
Q: What are some signs that my keyboard needs cleaning?
A: There are several signs that indicate your keyboard needs cleaning. These include visible dust, crumbs, or debris between the keys, sticky or unresponsive keys, a buildup of grime on the keycaps, and an overall feeling of uncleanliness. If you notice any of these signs, it’s time to give your keyboard a good cleaning.
Q: Can I put my keyboard in the dishwasher?
A: Absolutely not! Putting your keyboard in the dishwasher is a surefire way to damage it beyond repair. The high heat and harsh detergents can melt the plastic components and corrode the internal circuitry. Never submerge your keyboard in water or any other liquid.
Q: What type of cloth should I use to clean my keyboard?
A: A microfiber cloth is the best choice for cleaning your keyboard. Microfiber cloths are soft, absorbent, and lint-free, which makes them ideal for removing dust and grime without scratching the surface. Avoid using paper towels or abrasive cloths, as these can damage the keyboard.
Q: How do I prevent my keyboard from getting dirty in the first place?
A: There are several steps you can take to prevent your keyboard from getting dirty. Avoid eating or drinking near your keyboard. Wash your hands regularly to prevent the transfer of dirt and oil to the keys. Use a keyboard cover to protect the keyboard from dust and spills. Regularly dust your workspace to minimize the amount of airborne particles that can settle on your keyboard. By following these simple tips, you can keep your keyboard cleaner for longer.
Q: Where can I find a keycap puller?
A: Keycap pullers are readily available online from retailers like Amazon, as well as from specialty keyboard stores. They are inexpensive and a worthwhile investment if you plan on regularly cleaning your keyboard or customizing your keycaps. There are two main types: wire keycap pullers and plastic keycap pullers. Wire keycap pullers are generally considered to be more effective and less likely to damage the keycaps.
Leave a Comment