

Refrigerator odor removal can feel like an uphill battle, can’t it? You open the fridge, expecting a refreshing blast of coolness, but instead, you’re greeted by a funky, lingering smell that makes you question everything you’ve ever stored in there. I’ve been there, trust me! It’s a common problem, and thankfully, one with surprisingly simple solutions.
For generations, keeping food fresh and odor-free has been a concern. Before the advent of modern refrigeration, people relied on root cellars, salting, and pickling to preserve their food. While those methods addressed spoilage, they didn’t always tackle the lingering smells. Now, we have refrigerators, but sometimes, those smells just won’t quit! That’s where these DIY tricks come in.
Why is refrigerator odor removal so important? Well, beyond the unpleasantness, lingering smells can actually affect the taste of your food! That innocent-looking cake you’ve been saving? It might just absorb some of that oniony aroma. Plus, a smelly fridge can be a sign of bacteria or mold growth, which is definitely something we want to avoid. In this article, I’m going to share some easy, effective, and budget-friendly DIY methods to banish those unwanted odors and keep your refrigerator smelling fresh and clean. Get ready to say goodbye to funky fridge smells forever!

DIY Refrigerator Odor Removal: A Comprehensive Guide
Hey everyone! Is your refrigerator smelling less like fresh groceries and more like… well, something you’d rather not describe? Don’t worry, you’re not alone! Refrigerator odors are a common problem, but thankfully, they’re usually pretty easy to fix. I’m going to walk you through a comprehensive guide to banishing those funky smells and keeping your fridge fresh and clean.
Understanding the Source of the Stink
Before we dive into the solutions, let’s quickly understand why your fridge might be smelling less than pleasant. Common culprits include:
* Spoiled Food: This is the most obvious one! Forgotten leftovers, expired dairy, or moldy produce can all contribute to a nasty odor.
* Spills and Leaks: Even small spills of milk, juice, or sauces can quickly become breeding grounds for bacteria and mold.
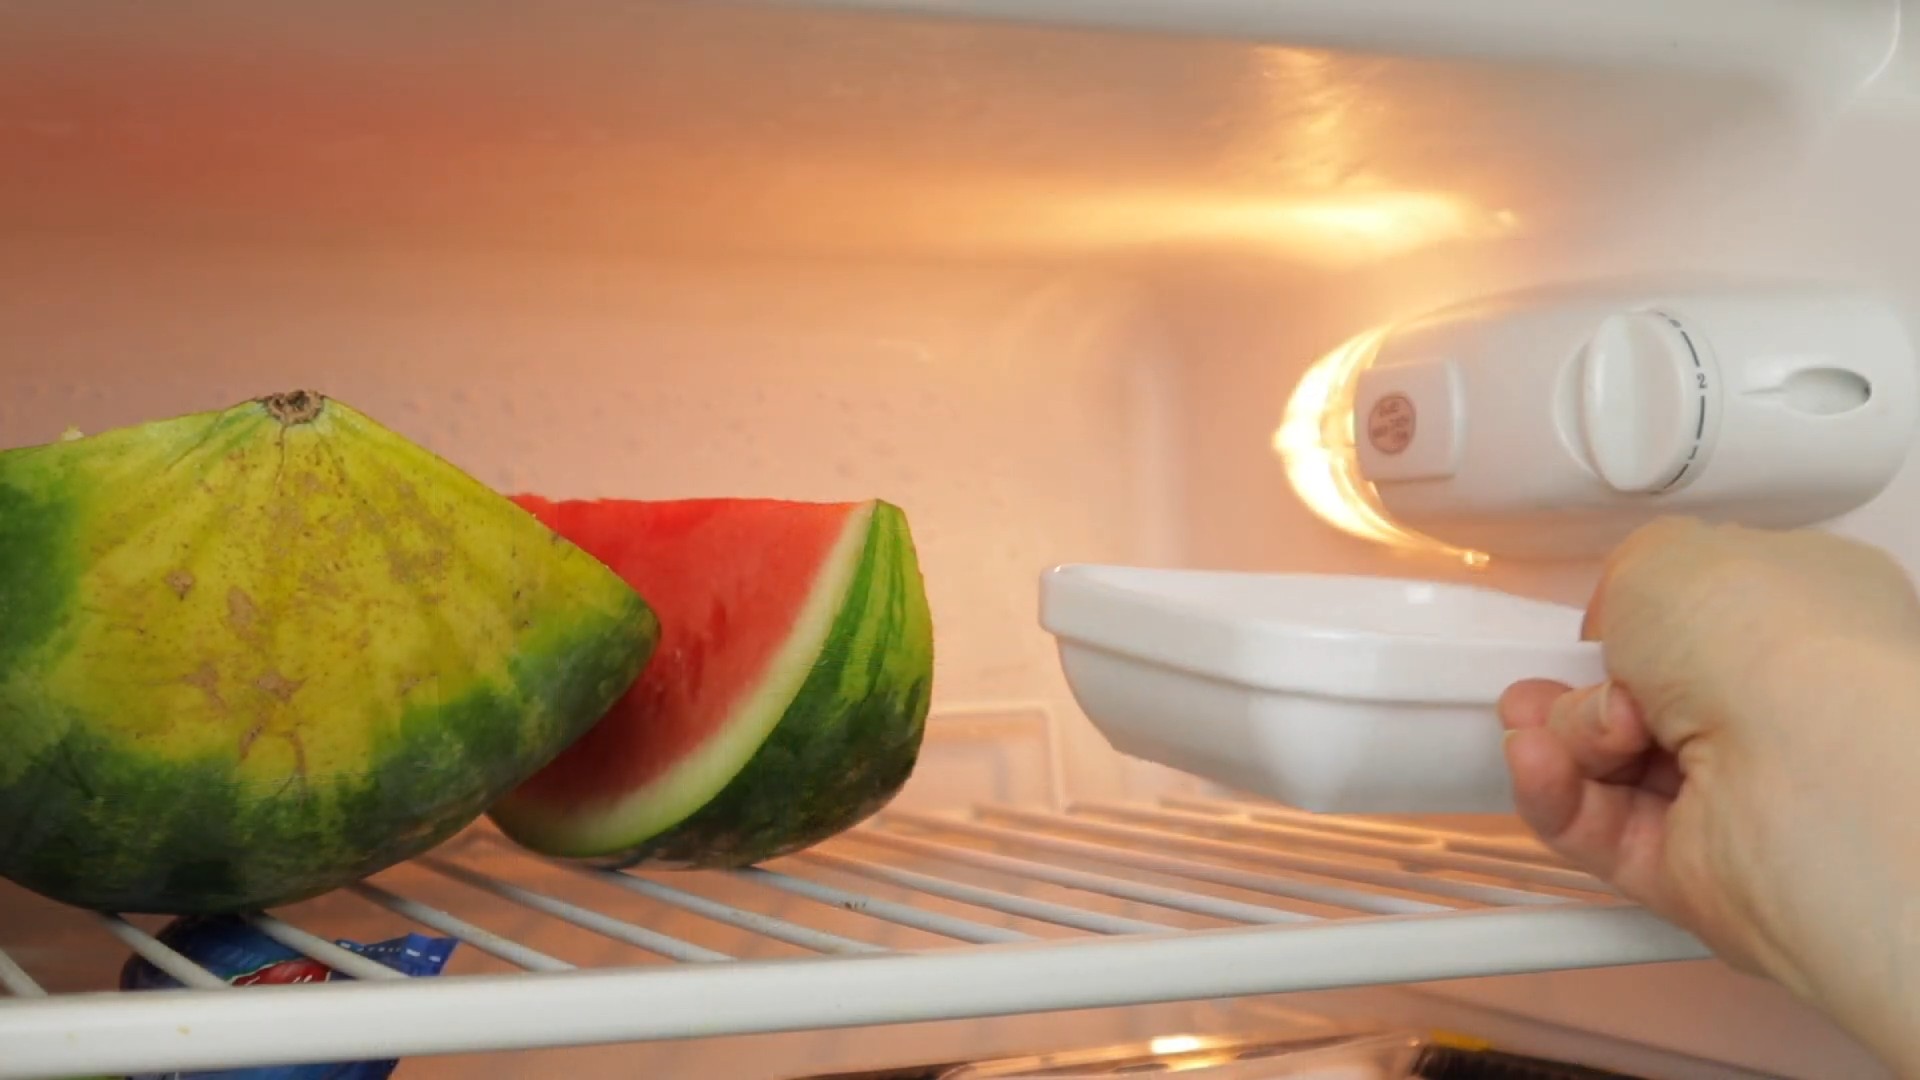
* Open Containers: Strong-smelling foods like onions, garlic, or certain cheeses can release odors that permeate the entire fridge.
* Dirty Drip Pans: The drip pan underneath your fridge can collect condensation and debris, leading to mold and mildew growth.
* Old Air Filter: Some refrigerators have air filters that need to be replaced regularly. A clogged or dirty filter can trap odors and prevent proper air circulation.
The Ultimate Refrigerator Cleaning Checklist
Okay, now that we know what we’re up against, let’s get to the cleaning! This checklist will help you tackle every nook and cranny of your fridge.
* Gather Your Supplies: You’ll need:
* Baking soda
* White vinegar
* Warm water
* Dish soap
* Clean cloths or sponges
* An old toothbrush
* Trash bags
* Cooler or insulated bags (to keep food cold while you clean)
* Empty the Refrigerator: Remove all food items from the fridge. Check expiration dates and discard anything that’s spoiled or past its prime. This is a great opportunity to declutter!
* Remove Shelves and Drawers: Take out all removable shelves, drawers, and bins.
* Wash Shelves and Drawers: Wash the shelves and drawers with warm, soapy water. For stubborn stains or odors, you can soak them in a solution of baking soda and water. Rinse thoroughly and let them air dry.
* Clean the Interior: Wipe down the interior walls, ceiling, and floor of the refrigerator with a solution of warm water and baking soda. Pay special attention to any areas with spills or stains.
* Clean the Door Seals: Use an old toothbrush and a solution of warm water and dish soap to clean the door seals. This will help prevent mold and mildew growth.
* Clean the Drip Pan: Locate the drip pan (usually at the bottom of the fridge or in the back). Remove it and wash it with warm, soapy water. Rinse thoroughly and let it air dry.
* Dry Everything Thoroughly: Before putting everything back, make sure all surfaces are completely dry. This will help prevent mold and mildew growth.
* Replace Shelves and Drawers: Put the clean and dry shelves, drawers, and bins back into the refrigerator.
* Restock the Refrigerator: Put the food items back into the refrigerator, making sure to organize them properly. Keep raw meats on the bottom shelf to prevent cross-contamination.
* Replace Air Filter (if applicable): If your refrigerator has an air filter, replace it according to the manufacturer’s instructions.
Step-by-Step Cleaning Instructions
Now, let’s break down the cleaning process into easy-to-follow steps:
1. Unplug the Refrigerator (Optional but Recommended): For safety, especially if you’re going to be using water extensively, unplugging the refrigerator is a good idea. It also gives the fridge a chance to warm up slightly, making it easier to remove stuck-on food.
2. Empty and Sort: This is the most crucial step! Take everything out of your fridge. I mean *everything*. As you remove items, check expiration dates and be ruthless! Toss anything that’s past its prime, looks questionable, or you know you won’t use. This is also a good time to consolidate condiments and get rid of duplicates. Use your cooler or insulated bags to keep perishable items cold while you’re cleaning.
3. Remove Removable Parts: Take out all the shelves, drawers, crispers, and any other removable parts. This will give you full access to the interior of the fridge and allow you to clean these parts thoroughly.
4. Wash Removable Parts: Head to the sink with your shelves and drawers. Wash them with warm, soapy water. For stubborn stains or dried-on food, let them soak in the soapy water for a few minutes. A paste of baking soda and water can also work wonders on tough spots. Rinse everything thoroughly with clean water and let them air dry.
5. Prepare Your Cleaning Solution: I prefer a simple and natural cleaning solution of warm water and baking soda. Mix about 1 tablespoon of baking soda per quart of warm water. You can also use a solution of equal parts white vinegar and water. Vinegar is a great disinfectant and deodorizer.
6. Clean the Interior: Dip a clean cloth or sponge into your cleaning solution and start wiping down the interior of the refrigerator. Pay close attention to any areas with spills, stains, or visible mold. Don’t forget the walls, ceiling, and floor of the fridge. For tight corners and crevices, use an old toothbrush to scrub away any grime.
7. Tackle the Door Seals: The door seals are often overlooked, but they can harbor a lot of dirt and bacteria. Use an old toothbrush and a solution of warm water and dish soap to clean the seals thoroughly. Make sure to get into all the nooks and crannies.
8. Clean the Drip Pan: Locate the drip pan, which is usually at the bottom of the fridge or in the back. Carefully remove it and empty any water or debris. Wash the drip pan with warm, soapy water and rinse thoroughly. Let it air dry completely before putting it back in place.
9. Dry Everything: Before putting everything back into the fridge, make sure all surfaces are completely dry. Use a clean cloth or paper towels to dry the interior of the fridge, the shelves, drawers, and the drip pan. Moisture can lead to mold and mildew growth, so this step is important.
10. Reassemble and Restock: Once everything is dry, put the shelves, drawers, and other removable parts back into the refrigerator. Then, carefully restock the fridge with your food items. Be mindful of organization! Keep raw meats on the bottom shelf to prevent cross-contamination, and store leftovers in airtight containers.
11. Replace Air Filter (If Applicable): If your refrigerator has an air filter, now is the time to replace it. Refer to your refrigerator’s manual for instructions on how to replace the filter.
Maintaining a Fresh-Smelling Fridge
Cleaning is just the first step! Here are some tips to keep your refrigerator smelling fresh and clean in the long run:
* Regularly Check for Spoiled Food: Make it a habit to check your refrigerator for spoiled food at least once a week. Toss anything that’s past its prime or looks questionable.
* Wipe Up Spills Immediately: Don’t let spills sit and fester! Wipe them up as soon as they happen to prevent odors and bacteria growth.
* Store Food Properly: Store leftovers in airtight containers to prevent odors from escaping and contaminating other foods.
* Use Odor Absorbers: Place an open box of baking soda in the refrigerator to absorb odors. You can also use other odor absorbers like activated charcoal or coffee grounds.
* Clean Regularly: Give your refrigerator a thorough cleaning at least once a month to prevent odors from building up.
Odor Absorbing Powerhouses
Here are some natural odor absorbers you can keep in your fridge:
* Baking Soda: This is the classic choice! An open box of baking soda absorbs odors like a champ. Replace it every month or two.
* Activated Charcoal: Activated charcoal is even more effective at absorbing odors than baking soda. You can find activated charcoal in powder or briquette form. Place it in a container in the fridge.
* Coffee Grounds: Used coffee grounds can also absorb odors. Place them in a bowl or container in the fridge.
* Oatmeal: A bowl of dry oatmeal can help absorb odors.
* Lemon: Cut a lemon in half and place it in the fridge to absorb odors and leave a fresh scent.
* Potatoes: A sliced potato can absorb odors. Replace it every few days.
Dealing with Stubborn Odors
Sometimes, even after a thorough cleaning, stubborn odors can linger. Here are some tips for dealing with those persistent smells:
* Vinegar Soak: Place a bowl of white vinegar in the refrigerator overnight. The vinegar will help absorb
Conclusion
So, there you have it! Banishing refrigerator odors doesn’t require expensive gadgets or harsh chemicals. This simple, effective, and budget-friendly DIY trick using readily available household items is a game-changer for maintaining a fresh and inviting kitchen. We’ve walked you through the steps, explained the science behind why it works, and hopefully, inspired you to ditch those lingering smells for good.
Why is this a must-try? Because a smelly refrigerator isn’t just unpleasant; it can actually affect the taste of your food and even shorten its shelf life. No one wants their perfectly good leftovers tainted by the aroma of last week’s forgotten broccoli! This DIY method is a proactive way to ensure your food stays fresh and your refrigerator remains a welcoming space. Plus, it’s incredibly satisfying to tackle a common household problem with such a simple solution.
But don’t stop there! Feel free to experiment and personalize this odor-busting technique. For a subtle, refreshing scent, try adding a few drops of your favorite essential oil (lemon, grapefruit, or tea tree are excellent choices) to the baking soda paste. You could also explore using activated charcoal, another powerful odor absorber, in a similar fashion. Instead of a paste, place a small bowl of activated charcoal powder in your refrigerator. Remember to replace it every month or so. Another variation involves using coffee grounds. Place a bowl of dry, unused coffee grounds in your refrigerator to absorb odors.
The key is consistency. Regularly checking your refrigerator for expired food and wiping up spills promptly will significantly reduce the likelihood of unpleasant odors developing in the first place. This DIY refrigerator odor removal trick is a fantastic tool, but it works best in conjunction with good refrigerator hygiene.
We are confident that this DIY refrigerator odor removal method will become your go-to solution for a fresh-smelling fridge. It’s easy, affordable, and effective – what’s not to love?
Now, it’s your turn! We encourage you to give this DIY trick a try and experience the difference for yourself. Share your results with us in the comments below! Let us know what variations you tried, what worked best for you, and any other tips you have for keeping your refrigerator smelling its best. We can’t wait to hear your success stories and learn from your experiences. Let’s create a community of fresh-fridge enthusiasts!
Frequently Asked Questions (FAQs)
Why does my refrigerator smell in the first place?
Refrigerators can develop unpleasant odors for a variety of reasons. The most common culprit is spoiled food. Bacteria and mold thrive on decaying organic matter, releasing volatile compounds that create those funky smells. Spills, leaks, and forgotten leftovers are prime breeding grounds for these odor-causing microorganisms. Additionally, some foods, like onions, garlic, and certain cheeses, naturally have strong aromas that can permeate the refrigerator environment. Poor ventilation and infrequent cleaning can also contribute to the buildup of odors.
How often should I clean my refrigerator to prevent odors?
A quick wipe-down of spills and visible messes should be done immediately. A more thorough cleaning, including removing all items, wiping down shelves and drawers, and checking expiration dates, should be done at least once a month. This regular maintenance will prevent the buildup of food debris and minimize the chance of odors developing. Consider a deep clean every three to six months, which involves removing and washing all removable parts of the refrigerator.
What if the odor persists even after cleaning and using the DIY trick?
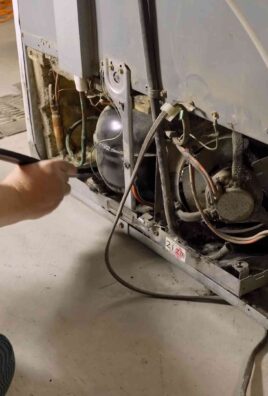
If the odor persists despite your best efforts, there might be a more serious underlying issue. Check the drip pan underneath the refrigerator, as stagnant water can be a breeding ground for bacteria. Also, inspect the door seals to ensure they are airtight. Damaged seals can allow warm air to enter, creating condensation and promoting mold growth. If you suspect a mechanical problem, such as a refrigerant leak, it’s best to consult a qualified appliance repair technician.
Can I use other ingredients besides baking soda for odor removal?
Yes, several other ingredients can effectively absorb refrigerator odors. Activated charcoal is a powerful odor absorber and can be used in a similar way to baking soda. Place a bowl of activated charcoal powder in your refrigerator and replace it monthly. Coffee grounds (dry, unused) are another option. They have a strong aroma that can help mask and absorb unpleasant smells. White vinegar is also a good choice. Place a bowl of white vinegar in the refrigerator to neutralize odors. Lemon juice can also be used; soak a cotton ball in lemon juice and place it in the refrigerator.
Is baking soda safe to use in my refrigerator?
Yes, baking soda is completely safe to use in your refrigerator. It’s a non-toxic and natural substance that won’t harm your food or your appliance. However, avoid using excessive amounts of baking soda, as it can leave a powdery residue.
How long does the baking soda solution last?
The baking soda solution typically lasts for about a month. After that, it will start to lose its effectiveness as it becomes saturated with odors. It’s best to replace the baking soda paste or open box of baking soda every month to maintain optimal odor absorption.
Can I use this trick in other appliances besides the refrigerator?
While this trick is primarily designed for refrigerator odor removal, it can also be used in other appliances that tend to develop odors, such as freezers, dishwashers, and even microwave ovens. Just be sure to adapt the method to the specific appliance. For example, you can place a small bowl of baking soda in your freezer or run an empty dishwasher cycle with a cup of baking soda in the top rack.
What are some other tips for preventing refrigerator odors?
In addition to regular cleaning and using odor absorbers, there are several other things you can do to prevent refrigerator odors:
* Store food properly in airtight containers to prevent spills and leaks.
* Label and date leftovers so you know when they need to be eaten or discarded.
* Keep your refrigerator at the correct temperature (between 37°F and 40°F) to slow down bacterial growth.
* Avoid overcrowding your refrigerator, as this can restrict airflow and promote odor buildup.
* Check your refrigerator regularly for expired or spoiled food and discard it immediately.
What if the odor is coming from the freezer?
Freezer odors can be particularly stubborn. If you suspect the odor is coming from the freezer, start by defrosting it completely. This will allow you to remove any ice buildup that may be harboring odors. Once the freezer is defrosted, clean it thoroughly with a solution of baking soda and water. You can also place a bowl of baking soda or activated charcoal in the freezer to absorb any lingering odors. Make sure to properly wrap and seal all food items before returning them to the freezer.
My refrigerator smells like chemicals. What should I do?
A chemical smell in your refrigerator could indicate a refrigerant leak, which is a serious issue. If you suspect a refrigerant leak, unplug your refrigerator immediately and contact a qualified appliance repair technician. Do not attempt to repair the leak yourself, as refrigerant is a hazardous substance.


Leave a Comment