

Toothpaste for bathroom salt stains? Yes, you read that right! I know it sounds a little crazy, but trust me, this simple household item might just be the secret weapon you’ve been searching for to combat those stubborn, crusty salt stains that plague our bathrooms. We’ve all been there – battling unsightly white marks around faucets, showerheads, and even on tiles. It’s a common problem, especially if you have hard water, and it can make even the cleanest bathroom look a little… neglected.
While the use of toothpaste for cleaning isn’t exactly a new invention (people have been using it for polishing silver and other surfaces for ages!), its effectiveness against bathroom salt stains is a trick that deserves a wider audience. Think of it as a modern twist on a classic cleaning hack. These stains, primarily composed of mineral deposits left behind by evaporating water, can be incredibly difficult to remove with ordinary cleaners. They cling stubbornly to surfaces, resisting even the most vigorous scrubbing.
That’s where toothpaste for bathroom salt stains comes in! I’m going to show you how this readily available, inexpensive solution can gently yet effectively dissolve those mineral deposits, leaving your bathroom sparkling clean. Forget harsh chemicals and endless scrubbing – with this DIY trick, you’ll be amazed at how easily you can restore your bathroom to its former glory. So, grab your tube of toothpaste, and let’s get started!
DIY Hack: Banishing Bathroom Salt Stains with Toothpaste!
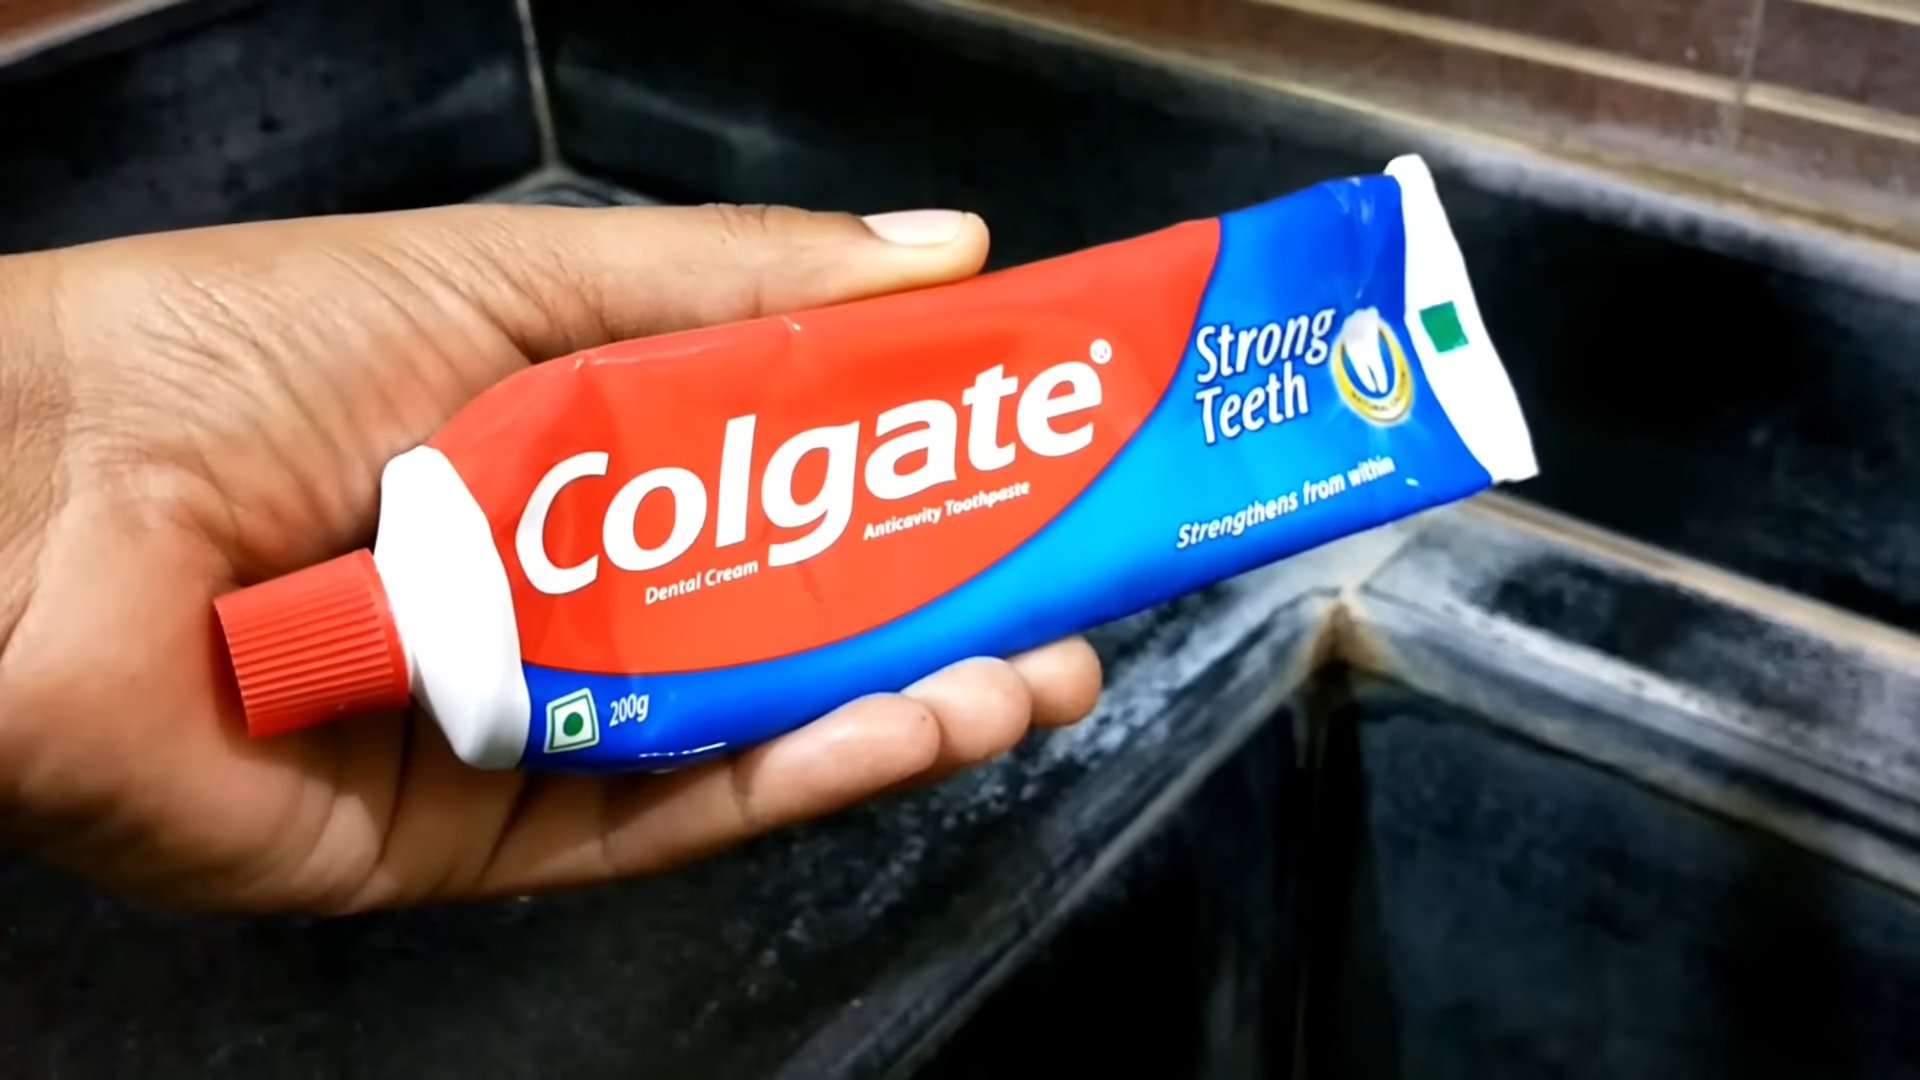
Okay, so you’re battling those unsightly salt stains in your bathroom, right? I totally get it! Hard water can be a real pain, leaving behind those crusty, white deposits on your faucets, showerheads, and even your tiles. But don’t worry, you don’t need harsh chemicals or expensive cleaners. My secret weapon? Good old toothpaste! It’s surprisingly effective, gentle, and you probably already have some in your bathroom. Let’s get started!
What You’ll Need:
* Toothpaste (non-gel, preferably white)
* Soft-bristled toothbrush (an old one is perfect!)
* Microfiber cloth or soft sponge
* Warm water
* Spray bottle (optional, for rinsing)
* White vinegar (for stubborn stains – use with caution!)
* Baking soda (for extra scrubbing power – use with caution!)
* Gloves (optional, but recommended if you have sensitive skin)
Why Toothpaste Works:
Toothpaste contains mild abrasives that help to gently scrub away the mineral deposits without scratching your surfaces. The fluoride in some toothpastes can also help to break down the salt buildup. Plus, it’s a lot less harsh than many commercial cleaners, making it a great option for delicate surfaces like chrome and porcelain.
Step-by-Step Guide:
Here’s how I tackle those pesky salt stains using toothpaste:
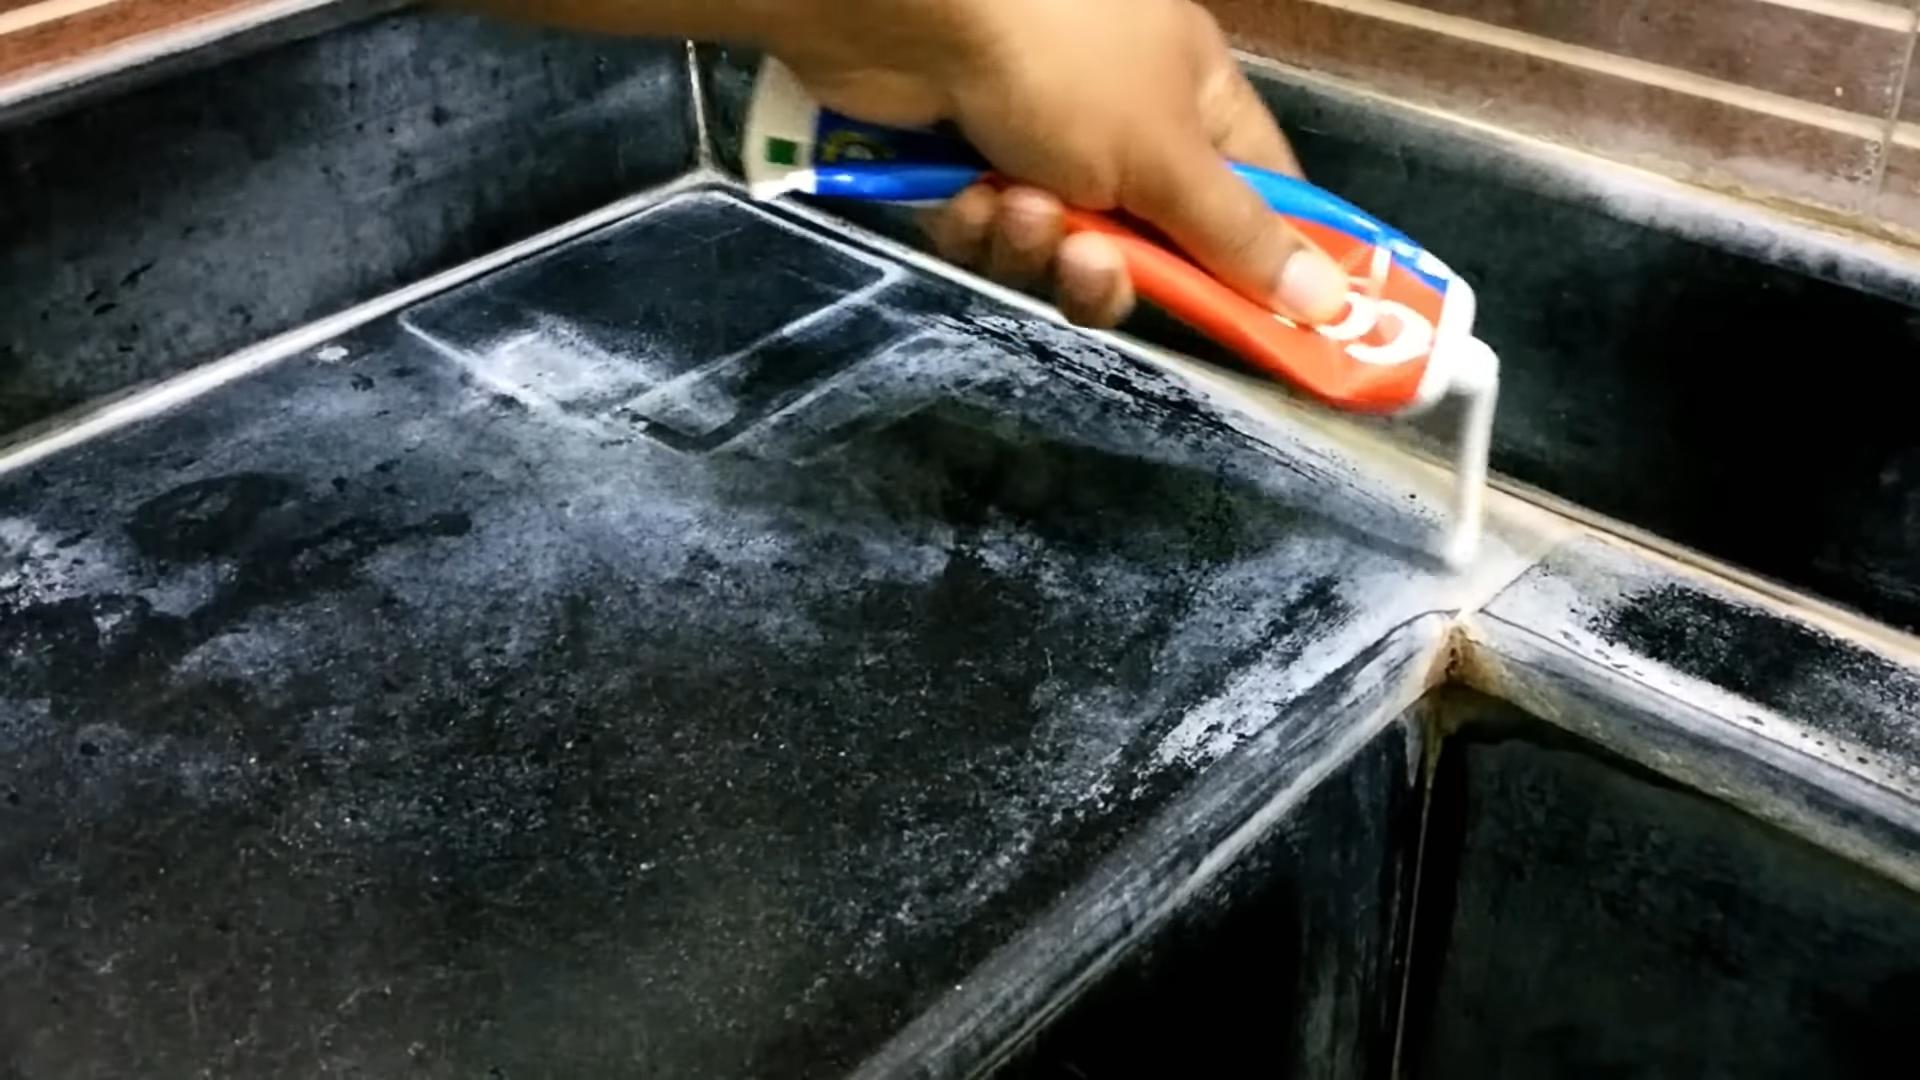
1. Prepare the Area: Before you start, give the area a quick wipe down with a damp cloth to remove any loose dirt or debris. This will help the toothpaste work more effectively.
2. Apply the Toothpaste: Squeeze a small amount of toothpaste (about the size of a pea) onto your toothbrush. You don’t need a ton!
3. Scrub Gently: Gently scrub the affected area with the toothbrush using small, circular motions. Don’t press too hard, especially on delicate surfaces. The goal is to loosen the salt deposits, not scratch the finish. I usually focus on one small area at a time.
4. Let it Sit (Optional): For tougher stains, let the toothpaste sit on the area for about 5-10 minutes. This gives the abrasives time to work their magic and break down the mineral buildup. Don’t let it dry completely, though!
5. Rinse Thoroughly: After scrubbing or letting it sit, rinse the area thoroughly with warm water. You can use a damp cloth or sponge to wipe away the toothpaste residue. A spray bottle filled with water can also be helpful for rinsing hard-to-reach areas.
6. Dry and Buff: Once you’ve rinsed away all the toothpaste, dry the area with a clean microfiber cloth. Buffing the surface will help to restore its shine and remove any remaining residue.
7. Inspect and Repeat: Take a look at the area. If the salt stains are still visible, repeat the process. Sometimes it takes a few applications to completely remove stubborn buildup.
Tackling Stubborn Stains:
Sometimes, toothpaste alone isn’t enough to conquer those really tough salt stains. Here are a couple of extra tricks I use:
Using White Vinegar:
Important Note: Vinegar is acidic and can damage some surfaces, so always test it in an inconspicuous area first! Avoid using vinegar on natural stone like marble or granite.
1. Dilute the Vinegar: Mix equal parts white vinegar and warm water in a spray bottle.
2. Spray and Let Sit: Spray the vinegar solution onto the salt-stained area and let it sit for about 10-15 minutes. This will help to dissolve the mineral deposits.
3. Apply Toothpaste: After the vinegar has had time to work, apply toothpaste to the area and scrub gently with a toothbrush.
4. Rinse and Dry: Rinse thoroughly with warm water and dry with a clean microfiber cloth.
Using Baking Soda:
Baking soda is a mild abrasive that can help to scrub away stubborn stains.
1. Make a Paste: Mix baking soda with a small amount of water to create a thick paste.
2. Apply the Paste: Apply the baking soda paste to the salt-stained area.
3. Scrub Gently: Scrub gently with a toothbrush or a soft sponge.
4. Apply Toothpaste: After scrubbing with baking soda, apply toothpaste to the area and scrub gently with a toothbrush.
5. Rinse and Dry: Rinse thoroughly with warm water and dry with a clean microfiber cloth.
Specific Areas and Surfaces:
Here’s how I adapt the toothpaste method for different areas in my bathroom:
Faucets and Showerheads:
These are prime targets for salt stains! I usually apply the toothpaste directly to the faucet or showerhead and scrub with a toothbrush. For showerheads with small nozzles, I sometimes use a toothpick to gently clean out any buildup inside the holes. Be sure to rinse thoroughly to remove all traces of toothpaste.
Tiles:
Toothpaste works great on tile, but be careful with grout! Grout is porous and can absorb the toothpaste, making it difficult to rinse. I usually apply the toothpaste to the tile only, avoiding the grout lines as much as possible. If you do get toothpaste on the grout, rinse it immediately with plenty of water. For grout, I prefer a dedicated grout cleaner or a baking soda paste.
Shower Doors:
Salt stains on shower doors can be particularly stubborn. I find that letting the toothpaste sit for a longer period (15-20 minutes) helps to loosen the buildup. You can also use a squeegee after rinsing to prevent water spots from forming.
Porcelain Sinks and Toilets:
Toothpaste is safe to use on porcelain, but avoid using abrasive scrub brushes, as they can scratch the surface. A soft-bristled toothbrush or a sponge is all you need.
Tips and Tricks:
* Choose the Right Toothpaste: I recommend using a non-gel, white toothpaste for the best results. Gel toothpastes may not have the same abrasive properties. Avoid using whitening toothpastes on colored surfaces, as they may cause discoloration.
* Don’t Overdo It: A little toothpaste goes a long way! You don’t need to slather it on.
* Be Gentle: Avoid using excessive pressure when scrubbing, especially on delicate surfaces.
* Rinse Thoroughly: Make sure to rinse away all traces of toothpaste to prevent residue buildup.
* Prevent Future Stains: To prevent salt stains from returning, try wiping down your faucets and shower doors after each use. You can also install a water softener to reduce the mineral content of your water.
* Test in an Inconspicuous Area: Before using any cleaning product, including toothpaste, on a new surface, always test it in an inconspicuous area first to make sure it doesn’t cause any damage or discoloration.
* Regular Cleaning is Key: The more often you clean, the less likely you are to have stubborn salt stains. A quick wipe-down once a week can make a big difference.
Safety Precautions:
* Wear Gloves: If you have sensitive skin, wear gloves to protect your hands from irritation.
* Avoid Contact with Eyes: Avoid getting toothpaste in your eyes. If contact occurs, rinse immediately with plenty of water.
* Ventilation: Ensure good ventilation when using vinegar or baking soda.
* Keep Out of Reach of Children: Keep all cleaning products, including toothpaste, out of reach of children and pets.
* Don’t Mix Chemicals: Never mix different cleaning products together, as this can create dangerous fumes.
I hope this guide helps you banish those bathroom salt stains for good! It’s a simple, affordable, and effective way to keep your bathroom sparkling clean. Happy cleaning!
Conclusion
So, there you have it! This simple, yet incredibly effective, DIY trick using toothpaste to combat those unsightly bathroom salt stains is a game-changer. We’ve all been there, scrubbing tirelessly with harsh chemicals, only to be met with minimal results and a lingering chemical odor. But with this method, you’re not only saving money by utilizing a product you likely already have on hand, but you’re also opting for a gentler approach that’s less abrasive and better for your bathroom surfaces.
The beauty of this DIY solution lies in its simplicity and accessibility. No need for specialized cleaning agents or complicated procedures. Just a tube of toothpaste, a damp cloth, and a little elbow grease are all you need to restore your bathroom fixtures to their former glory. Think of the time and energy you’ll save, not to mention the peace of mind knowing you’re not exposing yourself or your family to harsh chemicals.
But the benefits don’t stop there. This method is particularly effective on chrome fixtures, shower doors, and even tile grout, making it a versatile solution for tackling salt stains throughout your bathroom. And if you’re looking to take things a step further, consider these variations:
* For stubborn stains: Let the toothpaste sit on the affected area for a longer period, perhaps 15-20 minutes, before scrubbing. This allows the toothpaste to penetrate the stain more effectively.
* For delicate surfaces: Use a soft-bristled toothbrush instead of a cloth to avoid scratching. This is especially useful for cleaning around faucets and other intricate areas.
* For added cleaning power: Mix a small amount of baking soda with the toothpaste to create a more abrasive paste. This can be particularly effective for removing tough, built-up salt deposits.
* For a fresh scent: Choose a toothpaste with a refreshing scent, such as mint or citrus, to leave your bathroom smelling clean and revitalized.
Ultimately, this DIY toothpaste trick for removing bathroom salt stains is a must-try for anyone looking for a simple, effective, and affordable solution. It’s a testament to the power of everyday household items and a reminder that sometimes the best solutions are the ones we already have within reach.
We’re confident that you’ll be amazed by the results. So, ditch the harsh chemicals and give this DIY trick a try. We encourage you to experiment with the variations and find what works best for your specific needs. And most importantly, we want to hear about your experience! Share your before-and-after photos, tips, and tricks in the comments below. Let’s create a community of clean bathroom enthusiasts and help each other conquer those pesky salt stains once and for all! Your feedback will not only help us improve this guide but also inspire others to embrace the power of DIY cleaning. Let’s make those bathroom salt stains a thing of the past, one tube of toothpaste at a time!
Frequently Asked Questions (FAQs)
1. What kind of toothpaste works best for removing bathroom salt stains?
Any non-gel toothpaste will generally work for removing bathroom salt stains. However, plain white toothpaste is often recommended as it contains mild abrasives that help to scrub away the mineral deposits without being overly harsh. Avoid using gel toothpastes, as they lack the abrasive properties needed for effective stain removal. Toothpastes with whitening agents can also be used, but test them on an inconspicuous area first to ensure they don’t discolor the surface. Ultimately, the best toothpaste is the one you already have on hand!
2. Can I use this method on all bathroom surfaces?
While this method is generally safe for most bathroom surfaces, it’s always a good idea to test it on a small, inconspicuous area first, especially on delicate surfaces like natural stone or painted finishes. Avoid using excessive pressure when scrubbing, as this can scratch or damage the surface. This method is particularly effective on chrome fixtures, shower doors, and tile grout. If you’re unsure about a particular surface, consult the manufacturer’s instructions or a professional cleaner.
3. How often should I use this method to clean bathroom salt stains?
The frequency of cleaning depends on the severity of the salt stains and how often your bathroom is exposed to hard water. For bathrooms with frequent salt buildup, you may need to clean every week or two. For bathrooms with less buildup, cleaning once a month may be sufficient. Regular cleaning will prevent the stains from becoming too stubborn and difficult to remove.
4. What are some alternative methods for removing bathroom salt stains?
Besides toothpaste, several other DIY methods can be used to remove bathroom salt stains. These include:
* Vinegar: Diluted white vinegar is a natural descaler that can effectively dissolve mineral deposits. Spray the affected area with vinegar, let it sit for a few minutes, and then scrub with a cloth or brush.
* Lemon juice: Similar to vinegar, lemon juice contains citric acid that can break down salt stains. Apply lemon juice to the stains, let it sit for a few minutes, and then scrub.
* Baking soda paste: Mix baking soda with water to create a paste and apply it to the stains. Let it dry, and then scrub with a damp cloth.
* Commercial descalers: Numerous commercial descalers are available that are specifically designed to remove mineral deposits. Follow the manufacturer’s instructions carefully when using these products.
5. How can I prevent bathroom salt stains from forming in the first place?
Preventing salt stains is often easier than removing them. Here are some tips to minimize buildup:
* Wipe down surfaces after each use: Regularly wiping down shower doors, faucets, and other surfaces after each use will prevent water from evaporating and leaving behind mineral deposits.
* Use a water softener: If you have hard water, consider installing a water softener to reduce the mineral content of your water.
* Install a shower filter: A shower filter can remove minerals and other impurities from your shower water.
* Ventilate your bathroom: Proper ventilation will help to reduce humidity and prevent water from lingering on surfaces.
* Use a squeegee: After showering, use a squeegee to remove water from shower doors and walls.
6. Is it safe to use toothpaste on colored bathroom fixtures?
While toothpaste is generally safe, it’s always best to test it on an inconspicuous area first, especially on colored or painted fixtures. Some toothpastes may contain abrasive ingredients that could potentially scratch or dull the finish. If you’re concerned, use a gentler cleaning method, such as diluted vinegar or lemon juice.
7. Can I use an electric scrubber with toothpaste to remove salt stains?
Using an electric scrubber can be effective for removing stubborn salt stains, but it’s important to use it with caution. Choose a scrubber with soft bristles to avoid scratching the surface. Apply the toothpaste to the affected area, and then gently scrub with the electric scrubber. Avoid applying too much pressure, as this can damage the surface.
8. What if the toothpaste doesn’t completely remove the salt stains?
If the toothpaste doesn’t completely remove the salt stains, try letting it sit on the affected area for a longer period, perhaps 30 minutes to an hour, before scrubbing. You can also try using a more abrasive toothpaste or adding a small amount of baking soda to the toothpaste to create a more powerful cleaning paste. If the stains are particularly stubborn, you may need to repeat the process several times or try a different cleaning method, such as vinegar or a commercial descaler.
9. Will this method work on rust stains as well as salt stains?
While toothpaste can be effective for removing mild rust stains, it may not be as effective for removing heavy or deeply embedded rust. For rust stains, you may need to use a specialized rust remover or a more abrasive cleaning method, such as a baking soda paste or a commercial rust remover. Always test any cleaning product on an inconspicuous area first to ensure it doesn’t damage the surface.
10. How do I clean salt stains from shower heads?
To clean salt stains from shower heads, you can soak the shower head in a solution of vinegar and water. Remove the shower head from the shower arm, if possible, and soak it in a bowl of equal parts vinegar and water for several hours or overnight. After soaking, scrub the shower head with a brush to remove any remaining mineral deposits. Rinse thoroughly with water before reattaching it to the shower arm. You can also use a toothbrush and toothpaste to scrub the shower head directly, focusing on the areas with the most buildup.

Leave a Comment