

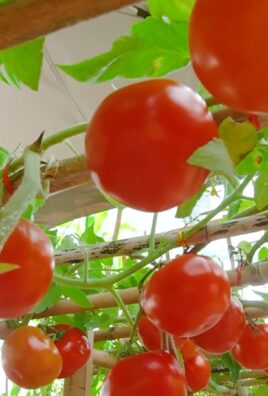
Watermelon harvest at home – the very words conjure images of juicy, sun-ripened sweetness bursting with flavor! Imagine sinking your teeth into a watermelon you nurtured from a tiny seed, right in your own backyard. It’s a dream for many home gardeners, and I’m here to tell you, it’s absolutely achievable with a few clever tricks and DIY hacks.
For centuries, watermelons have been a symbol of summer abundance and shared joy. Originating in Africa, they’ve traveled the globe, becoming a beloved treat in countless cultures. Think about the picnics, the barbecues, the sheer delight of a perfectly ripe watermelon on a hot day. But what if you could skip the grocery store and experience that joy with a watermelon you grew yourself?
That’s where this DIY guide comes in. Many gardeners struggle with knowing exactly when their watermelons are ready to pick. Harvesting too early results in a bland, disappointing fruit, while waiting too long can lead to an overripe, mushy mess. I’m going to share some simple, foolproof methods to ensure you nail that perfect watermelon harvest at home every single time. These aren’t complicated techniques; they’re easy-to-follow tips that will empower you to confidently grow and harvest your own delicious watermelons. Get ready to impress your friends and family with your homegrown bounty!
Growing Your Own Watermelon: From Seed to Sweetness!
Okay, let’s talk watermelons! There’s nothing quite like biting into a juicy, homegrown watermelon on a hot summer day. And guess what? You don’t need a sprawling farm to make it happen. With a little planning and effort, you can absolutely grow your own watermelons, even in a smaller garden or raised bed. I’m going to walk you through everything you need to know, from starting seeds to harvesting your prize-winning melon.
What You’ll Need: The Essentials for Watermelon Success
Before we dive into the nitty-gritty, let’s gather our supplies. Having everything on hand will make the process much smoother.
* Watermelon Seeds: Choose a variety that suits your climate and space. Smaller “icebox” varieties are great for smaller gardens. I personally love Sugar Baby for its compact size and sweet flavor.
* Seed Starting Trays or Pots: These will give your seedlings a head start.
* Seed Starting Mix: This is a light, sterile mix that’s perfect for delicate seedlings.
* Larger Pots (if starting indoors): You’ll need these to transplant your seedlings into before moving them outdoors.
* Well-Draining Soil: Watermelons need rich, well-draining soil. Amend your garden soil with compost or aged manure.
* Compost or Aged Manure: This will provide essential nutrients for your growing watermelons.
* Water: Obvious, but crucial!
* Fertilizer: A balanced fertilizer, and later, a fertilizer higher in phosphorus and potassium.
* Trowel or Shovel: For planting and transplanting.
* Mulch: Straw or plastic mulch to help retain moisture and suppress weeds.
* Row Covers (optional): To protect young plants from pests and cold snaps.
* Gardening Gloves: To keep your hands clean and protected.
* Pruning Shears or Scissors: For pruning vines (if needed).
* A Sunny Spot: Watermelons need at least 6-8 hours of direct sunlight per day.
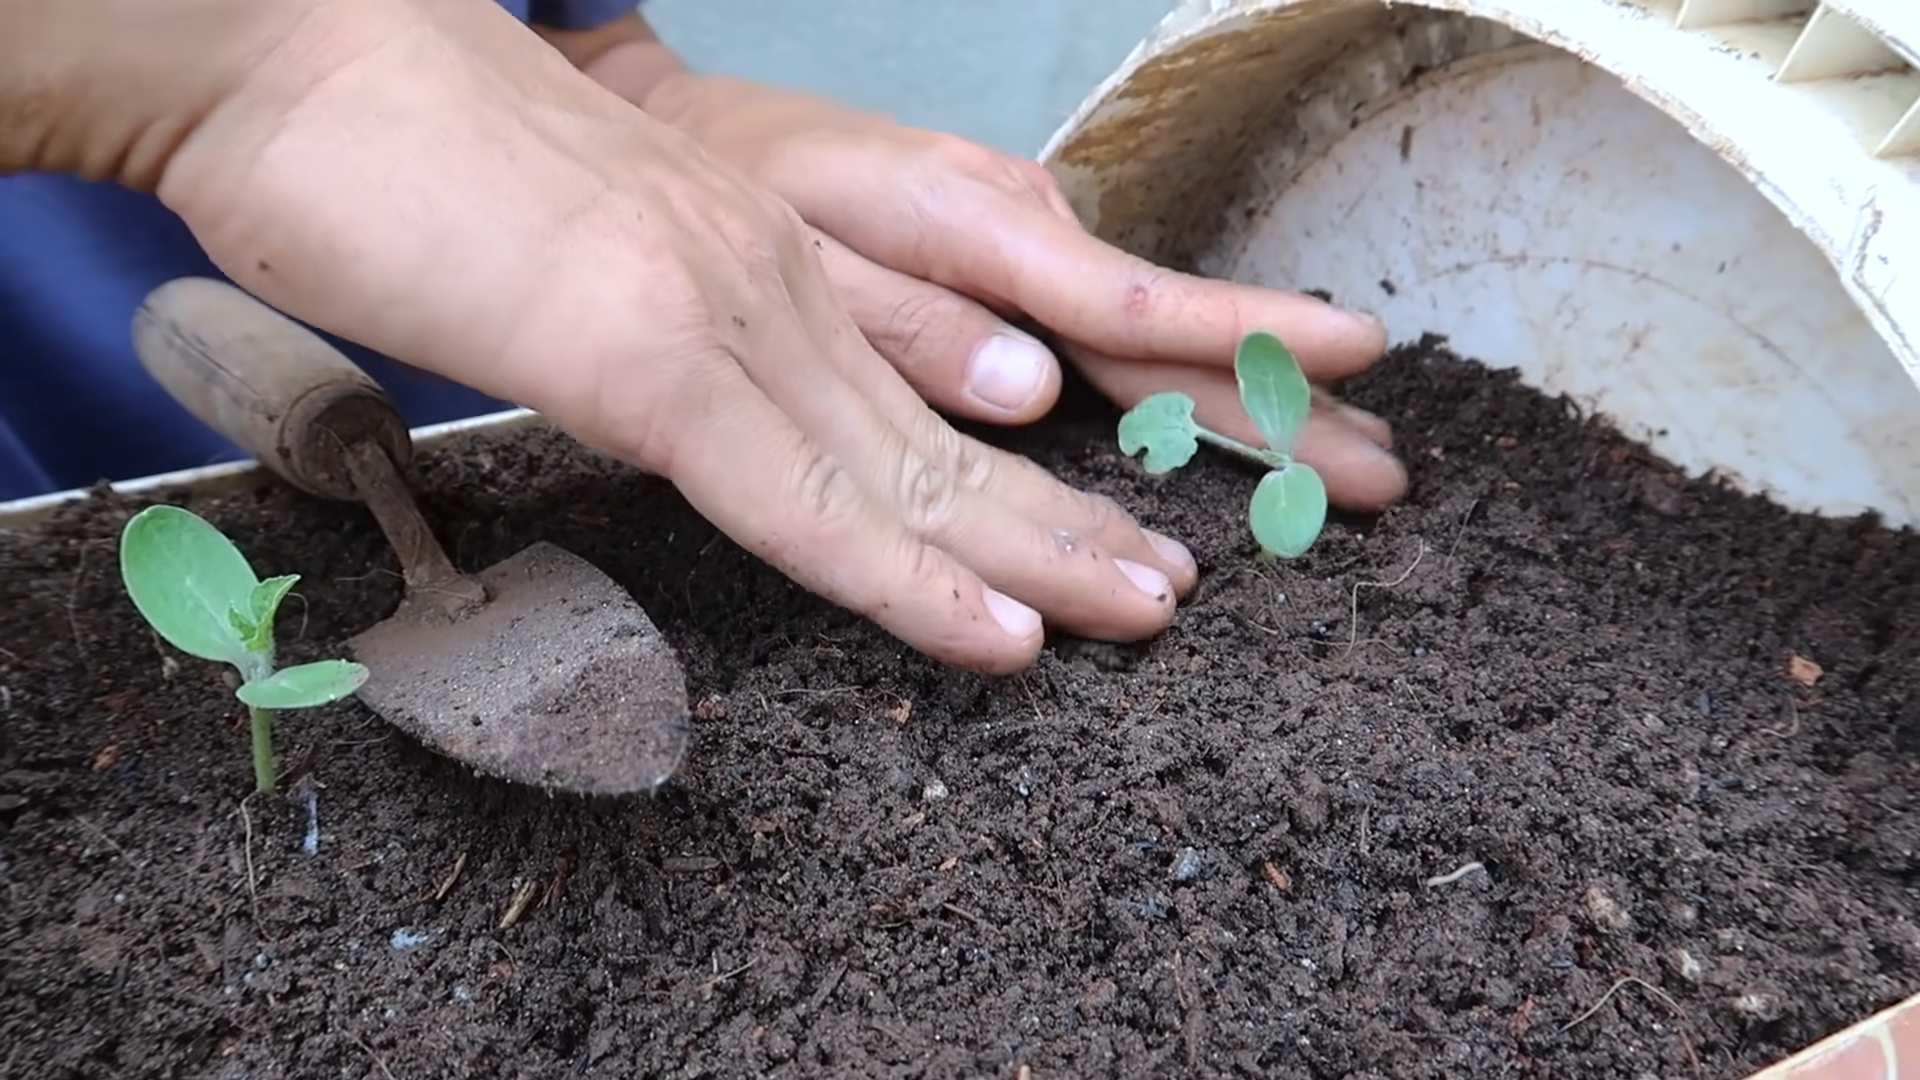
Starting Your Watermelon Seeds: Giving Them a Head Start
This is where the magic begins! Starting your seeds indoors gives them a significant advantage, especially if you live in a region with a shorter growing season.
1. Sow the Seeds: Fill your seed starting trays or pots with seed starting mix. Moisten the mix thoroughly. Plant 2-3 watermelon seeds per cell or pot, about 1 inch deep.
2. Provide Warmth: Watermelon seeds need warmth to germinate. The ideal soil temperature is between 70-85°F (21-29°C). You can use a heat mat to provide consistent warmth.
3. Keep Moist: Keep the soil consistently moist, but not soggy. Use a spray bottle to gently mist the soil.
4. Provide Light: Once the seedlings emerge (usually within 5-10 days), provide them with plenty of light. A sunny windowsill or grow lights will work well.
5. Thin the Seedlings: Once the seedlings have their first true leaves (the second set of leaves), thin them to one strong seedling per cell or pot. Snip off the weaker seedlings at the soil line.
6. Transplant (if needed): If your seedlings are getting too big for their starting trays, transplant them into larger pots (4-6 inches in diameter) filled with potting mix.
Preparing Your Garden Bed: Creating the Perfect Watermelon Home
Watermelons are heavy feeders, so preparing your garden bed properly is essential for a bountiful harvest.
1. Choose a Sunny Location: As I mentioned before, watermelons need at least 6-8 hours of direct sunlight per day.
2. Amend the Soil: Watermelons thrive in rich, well-draining soil. Amend your garden soil with plenty of compost or aged manure. Work the amendments into the soil to a depth of at least 12 inches.
3. Create Mounds or Rows: Watermelons grow best in slightly raised mounds or rows. This helps with drainage and warms the soil. Create mounds or rows that are about 12 inches high and 3-4 feet apart.
4. Consider Plastic Mulch: Black plastic mulch can help warm the soil, retain moisture, and suppress weeds. Lay the plastic mulch over the mounds or rows before planting.
Transplanting Your Watermelon Seedlings: Moving to Their Forever Home
Once the danger of frost has passed and the soil has warmed up, it’s time to transplant your watermelon seedlings into the garden.
1. Harden Off the Seedlings: Before transplanting, you need to “harden off” the seedlings. This means gradually exposing them to outdoor conditions over a period of 7-10 days. Start by placing them in a sheltered location for a few hours each day, gradually increasing the amount of time they spend outdoors.
2. Plant the Seedlings: Dig a hole in the mound or row that is slightly larger than the root ball of the seedling. Gently remove the seedling from its pot and place it in the hole. Backfill with soil and gently firm around the base of the plant.
3. Water Thoroughly: Water the seedlings thoroughly after planting.
4. Space the Plants: Space the plants according to the variety you are growing. Smaller “icebox” varieties can be spaced 2-3 feet apart, while larger varieties may need 4-6 feet of space.
Caring for Your Watermelon Plants: Nurturing Them to Maturity
Now that your watermelon plants are in the ground, it’s time to provide them with the care they need to thrive.
1. Water Regularly: Watermelons need consistent moisture, especially during hot, dry weather. Water deeply and regularly, aiming for about 1-2 inches of water per week. Avoid overhead watering, as this can promote fungal diseases. Drip irrigation is ideal.
2. Fertilize: Fertilize your watermelon plants every 2-3 weeks with a balanced fertilizer. Once the fruits start to develop, switch to a fertilizer that is higher in phosphorus and potassium.
3. Weed Control: Keep the area around your watermelon plants free of weeds. Weeds compete with the plants for water and nutrients. Mulch can help suppress weeds.
4. Pest and Disease Control: Keep an eye out for pests and diseases. Common watermelon pests include aphids, squash bugs, and cucumber beetles. Common diseases include powdery mildew and fusarium wilt. Treat any problems promptly with appropriate organic or chemical controls.
5. Vine Training (Optional): If you have limited space, you can train your watermelon vines to grow vertically on a trellis. This will require some pruning and tying.
6. Protect Developing Fruits: As the watermelons develop, you may want to place them on a bed of straw or cardboard to prevent them from rotting on the ground.
Pollination: Ensuring Fruit Set
Watermelons need to be pollinated in order to produce fruit. They have separate male and female flowers on the same plant. Bees are the primary pollinators.
1. Attract Pollinators: Plant flowers that attract bees and other pollinators near your watermelon patch.
2. Hand Pollination (if needed): If you are not seeing enough bee activity, you can hand-pollinate the flowers. Use a small paintbrush to transfer pollen from the male flowers to the female flowers. The female flowers have a small, immature watermelon at the base.
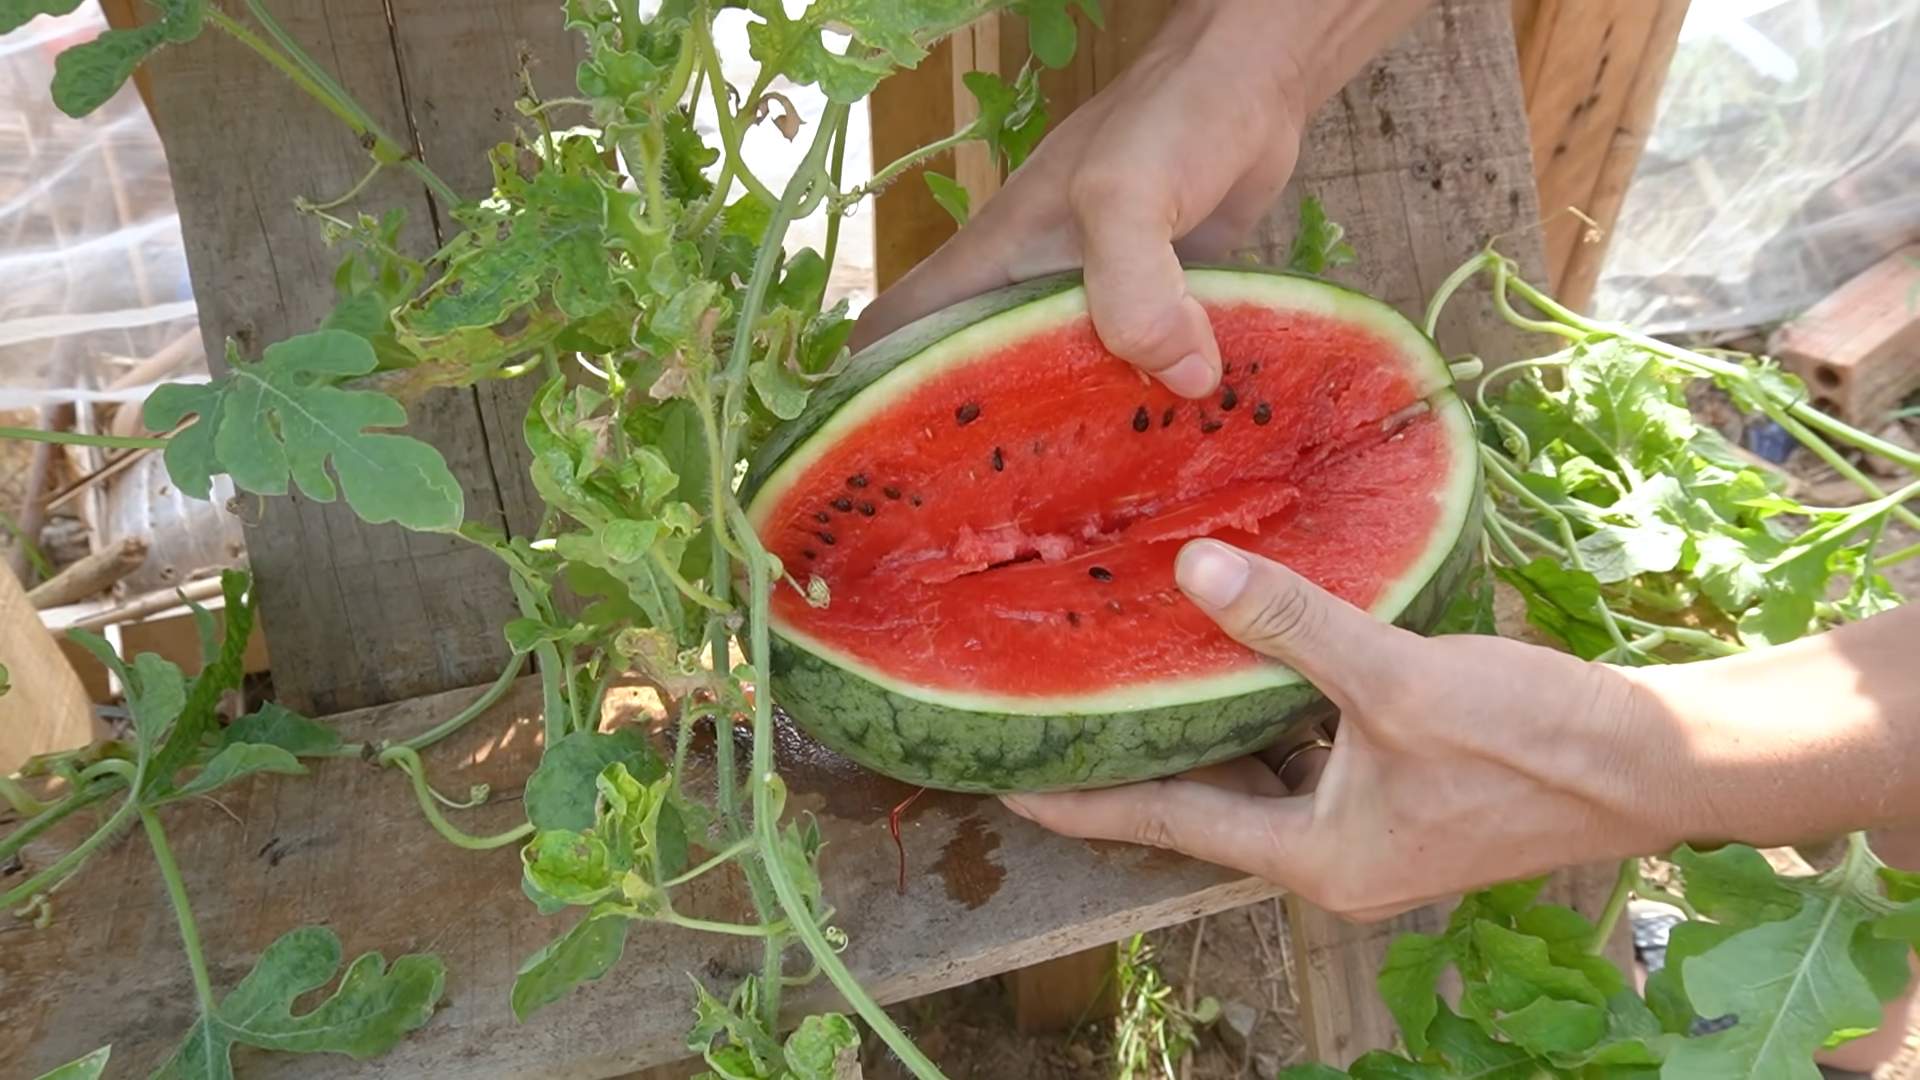
Harvesting Your Watermelons: The Sweet Reward
This is the moment you’ve been waiting for! Knowing when to harvest a watermelon can be tricky, but here are a few signs to look for:
1. The Tendril Test: The tendril closest to the fruit stem will turn brown and dry.
2. The Ground Spot: The spot where the watermelon rests on the ground (the “ground spot”) will turn from white to yellow.
3. The Thump Test: A ripe watermelon will have a deep, hollow sound when you thump it. An unripe watermelon will sound dull and solid.
4. Days to Maturity: Check the seed packet for the number of days to maturity for your variety. This is a good guideline, but it’s not always accurate.
5. Stem Condition: The stem connecting the watermelon to the vine will start to dry and crack.
Once you’ve determined that your watermelon is ripe, use a sharp knife to cut it from the vine, leaving a few inches of stem attached.
Enjoying Your Homegrown Watermelon: The Best Part!
Now it’s time to savor the fruits (literally!) of your labor. Cut open your watermelon and enjoy its sweet, juicy goodness. Store any leftover watermelon in the refrigerator.
Tips for Success:
* Choose the Right Variety: Select a watermelon variety that is well-suited to your
Conclusion
So, there you have it! Harvesting your own watermelon at home isn’t just about saving money; it’s about experiencing the pure joy of nurturing something from seed to table. It’s about connecting with nature, understanding the rhythms of the seasons, and savoring the unparalleled sweetness of a watermelon you’ve grown yourself. Forget the bland, mass-produced watermelons from the grocery store – this is about unlocking a flavor explosion that only comes from homegrown goodness.
This DIY trick, knowing precisely when to harvest based on visual cues, sound, and feel, is a game-changer. It eliminates the guesswork and ensures you’re always enjoying your watermelon at its peak ripeness. No more disappointing, pale pink disappointments!
But don’t stop there! Once you’ve mastered the art of harvesting, experiment with different watermelon varieties. Try growing a classic Crimson Sweet, a personal-sized Sugar Baby, or even a unique yellow watermelon for a vibrant twist. Consider companion planting with basil or marigolds to deter pests and enhance the flavor of your watermelons. You can even save the seeds from your best watermelons to plant next year, continuing the cycle of homegrown deliciousness.
And the fun doesn’t end with the harvest. Get creative with your watermelon! Beyond the classic slices, try grilling watermelon for a smoky sweetness, blending it into refreshing smoothies, or using it to create a vibrant watermelon salsa. The possibilities are endless!
We truly believe that this DIY watermelon harvesting trick is a must-try for any home gardener or fruit enthusiast. It’s simple, effective, and incredibly rewarding. Imagine the satisfaction of sharing a perfectly ripe, homegrown watermelon with your family and friends, knowing that you nurtured it from start to finish.
So, grab your gardening gloves, plant those watermelon seeds, and get ready for a summer filled with sweet, juicy goodness. We’re confident that once you experience the joy of harvesting your own watermelons, you’ll never go back to store-bought again.
Don’t just take our word for it – try it yourself! We’re eager to hear about your experiences. Share your watermelon harvesting stories, tips, and photos in the comments below. Let’s build a community of watermelon enthusiasts and spread the joy of homegrown goodness! What varieties did you grow? What harvesting techniques worked best for you? What delicious recipes did you create with your homegrown watermelon? We can’t wait to hear from you!
Frequently Asked Questions (FAQ)
Q: How long does it take for a watermelon to mature after planting?
A: The time it takes for a watermelon to mature depends on the variety and growing conditions. Generally, it takes between 70 and 90 days from planting seedlings to harvest. Some smaller varieties may mature in as little as 65 days, while larger varieties can take up to 100 days. Factors like sunlight, temperature, and soil fertility also play a role in the maturation process. Consistent watering and proper fertilization can help speed up the process. Keep a close eye on your watermelons and use the harvesting techniques described above to determine when they are ripe, rather than relying solely on the number of days since planting.
Q: What are the key signs that a watermelon is ripe and ready to harvest?
A: There are several key indicators that a watermelon is ripe:
* **The tendril closest to the fruit turns brown and dries out:** This is one of the most reliable signs. When the tendril connecting to the watermelon stem dries up, it signals that the fruit is no longer receiving nutrients and is likely ripe.
* **The ground spot turns from white to yellow:** The ground spot is the area of the watermelon that rests on the ground. As the watermelon ripens, this spot will change color from a pale white to a creamy yellow or even a deep orange.
* **The watermelon sounds hollow when thumped:** Gently tap the watermelon with your knuckles. A ripe watermelon will produce a deep, hollow sound, while an unripe watermelon will sound dull and solid.
* **The rind becomes dull and waxy:** The shiny, bright green rind of an unripe watermelon will become dull and slightly waxy as it ripens.
* **The stem dries slightly:** The stem connecting the watermelon to the vine will start to dry and shrivel slightly.
Using a combination of these signs will give you the best indication of ripeness.
Q: What if I harvest a watermelon and it’s not quite ripe? Can I ripen it further?
A: Unfortunately, once a watermelon is harvested, it will not ripen further. Unlike some fruits that continue to ripen after being picked, watermelons stop ripening once they are detached from the vine. However, you can still enjoy a slightly underripe watermelon. It may not be as sweet or juicy as a fully ripe one, but it can still be used in salads, smoothies, or pickled. To avoid harvesting an unripe watermelon, be sure to use all the ripeness indicators mentioned above before cutting it from the vine.
Q: What are some common problems that can affect watermelon growth and how can I prevent them?
A: Several common problems can affect watermelon growth, including:
* **Pests:** Aphids, squash bugs, and vine borers can damage watermelon plants. To prevent pest problems, use row covers to protect young plants, inspect plants regularly for signs of infestation, and use organic pest control methods like insecticidal soap or neem oil.
* **Diseases:** Fusarium wilt, powdery mildew, and anthracnose are common watermelon diseases. To prevent diseases, choose disease-resistant varieties, provide good air circulation, avoid overhead watering, and use fungicides if necessary.
* **Poor pollination:** Watermelons require pollination to set fruit. If you’re not seeing fruit develop, it could be due to poor pollination. Attract pollinators to your garden by planting flowers that attract bees and other beneficial insects. You can also hand-pollinate the flowers if necessary.
* **Nutrient deficiencies:** Watermelons need adequate nutrients to grow and produce fruit. Amend your soil with compost or other organic matter before planting, and fertilize regularly with a balanced fertilizer.
Q: Can I grow watermelons in containers?
A: Yes, you can grow watermelons in containers, but it requires careful planning and attention. Choose a large container (at least 20 gallons) with good drainage. Use a high-quality potting mix and select a compact or bush-type watermelon variety. Provide plenty of sunlight (at least 6-8 hours per day) and water regularly. You may also need to provide support for the vines as they grow. Container-grown watermelons may not be as large as those grown in the ground, but you can still enjoy a delicious harvest.
Q: How do I store a harvested watermelon?
A: A whole, uncut watermelon can be stored at room temperature for about a week. For longer storage, keep it in a cool, dry place (around 50-60°F). Once you cut into a watermelon, wrap the cut surface tightly with plastic wrap and store it in the refrigerator. Cut watermelon should be consumed within 3-5 days.
Q: What are some creative ways to use watermelon besides just eating it in slices?
A: Watermelon is incredibly versatile! Here are a few creative ideas:
* **Watermelon juice or smoothies:** Blend watermelon chunks for a refreshing and hydrating drink.
* **Watermelon salsa:** Combine diced watermelon with red onion, jalapeno, cilantro, lime juice, and a pinch of salt for a sweet and spicy salsa.
* **Grilled watermelon:** Grill watermelon slices for a smoky and caramelized flavor.
* **Watermelon salad:** Combine watermelon with feta cheese, mint, and a balsamic glaze for a refreshing and savory salad.
* **Watermelon gazpacho:** Blend watermelon with tomatoes, cucumbers, peppers, and onions for a chilled summer soup.
* **Watermelon rind pickles:** Don’t throw away the rind! Pickle it for a tangy and crunchy treat.
* **Watermelon infused water:** Add watermelon chunks to a pitcher of water for a refreshing and flavorful drink.
Q: Is there a difference in taste between different watermelon varieties?
A: Absolutely! Different watermelon varieties offer distinct flavor profiles. Some are sweeter, some are tangier, and some have a more subtle flavor. Seedless watermelons tend to be slightly less flavorful than seeded varieties, but they are more convenient to eat. Yellow watermelons often have a honey-like sweetness. Experiment with different varieties to find your favorite!
Q: What is the best time of year to plant watermelon?
A: Watermelons are warm-season crops and require warm soil and air temperatures to thrive. The best time to plant watermelon is in late spring or early summer, after the last frost has passed and the soil has warmed to at least 70°F (21°C). You can start seeds indoors 4-6 weeks before the last frost to get a head start on the growing season.
Leave a Comment