

Home cleaning supplies checklist – that’s the secret weapon you need to conquer clutter and grime! Let’s face it, nobody *loves* cleaning, but having the right tools at your fingertips can make the whole process faster, easier, and dare I say, even a little bit enjoyable. I’m here to help you create the ultimate list, so you’re always prepared to tackle any mess that comes your way.
For generations, a clean home has been a symbol of health, prosperity, and well-being. Think about it – from ancient rituals involving natural cleansers to the meticulously kept homes of the Victorian era, cleanliness has always been valued. While the methods have evolved, the desire for a tidy and hygienic living space remains constant.
But in today’s busy world, who has time to rummage through cabinets searching for the right cleaner? That’s where this home cleaning supplies checklist comes in! It’s your shortcut to a sparkling home, saving you time, money, and frustration. No more impulse buys of unnecessary products – just a curated list of essentials that will get the job done right. Plus, I’ll share some DIY alternatives to keep your home clean and green. So, let’s get started and create a checklist that works for you!
DIY All-Purpose Citrus Cleaner: Sparkling Clean, Naturally!
Hey there, fellow cleaning enthusiasts! I’m always on the lookout for ways to ditch harsh chemicals and embrace a more natural approach to cleaning. And let me tell you, this DIY all-purpose citrus cleaner is a game-changer. It’s incredibly effective, smells amazing, and uses ingredients you probably already have lying around. Plus, it’s super satisfying to make your own cleaning supplies! So, let’s get started!
What You’ll Need: The Essential Supplies
Before we dive into the nitty-gritty, let’s gather our supplies. This is a pretty straightforward recipe, so you won’t need anything too fancy.
* **Citrus Peels:** This is the star of the show! You can use peels from lemons, oranges, grapefruits, limes, or a combination. The more, the merrier (and the stronger the scent!). I usually save my citrus peels after juicing or eating the fruit.
* **White Vinegar:** This is our cleaning powerhouse. Vinegar is a natural disinfectant and degreaser.
* **Water:** Distilled water is best, but tap water works just fine.
* **Spray Bottle:** A clean, empty spray bottle is essential for dispensing your cleaner.
* **Large Jar or Container:** You’ll need a jar or container large enough to hold all the citrus peels and vinegar. A mason jar works great!
* **Optional: Essential Oils:** If you want to boost the scent or add extra cleaning power, you can add a few drops of your favorite essential oils. Lavender, tea tree, and eucalyptus are all great choices.
* **Optional: Funnel:** A funnel can make transferring the cleaner to the spray bottle easier.
Step-by-Step Guide: Making Your Citrus Cleaner
Okay, now for the fun part! Here’s how to make your own all-purpose citrus cleaner:
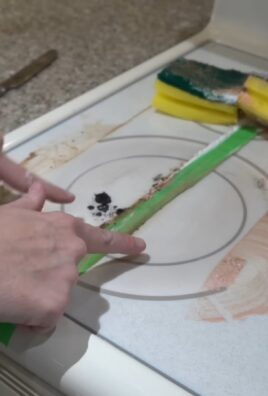
1. **Prepare the Citrus Peels:** First, make sure your citrus peels are relatively clean. You don’t need to scrub them, but remove any large pieces of pulp or stickers. I usually just give them a quick rinse. Then, cut the peels into smaller pieces. This will help the citrus oils infuse into the vinegar more effectively.
2. **Combine Peels and Vinegar:** Place the citrus peels into your large jar or container. Then, pour white vinegar over the peels until they are completely submerged. Make sure there’s enough vinegar to cover all the peels, as this will prevent mold growth.
3. **Infuse the Vinegar:** This is where the magic happens! Seal the jar tightly and store it in a cool, dark place for at least two weeks, but ideally longer. I usually let mine sit for 4-6 weeks for maximum potency. The longer it sits, the stronger the citrus scent and cleaning power will be. During this time, the vinegar will extract the oils and acids from the citrus peels, creating a potent cleaning solution.
4. **Strain the Mixture:** After the infusion period, it’s time to strain the mixture. Place a fine-mesh strainer or cheesecloth over a bowl or measuring cup. Pour the vinegar and citrus peels through the strainer, catching the liquid in the bowl. Discard the citrus peels (or compost them!).
5. **Dilute the Concentrate:** Now, you’ll need to dilute the citrus-infused vinegar with water. The ratio depends on your preference and the strength of the vinegar. I usually use a 1:1 ratio (one part citrus vinegar to one part water). If you have sensitive surfaces, you might want to use a higher water ratio (e.g., 1:2 or 1:3).
6. **Add Essential Oils (Optional):** If you’re using essential oils, now’s the time to add them. I usually add about 10-20 drops of essential oil per cup of diluted cleaner. Experiment with different scents to find your favorite combination.
7. **Transfer to Spray Bottle:** Using a funnel (if you have one), pour the diluted citrus cleaner into your clean spray bottle.
8. **Label Your Bottle:** Don’t forget to label your spray bottle with the contents and date. This will help you keep track of what’s inside and when you made it.
Using Your DIY Citrus Cleaner: Tips and Tricks
Now that you have your homemade citrus cleaner, it’s time to put it to work! Here are some tips and tricks for using it effectively:
* **Test on a Small Area First:** As with any cleaning product, it’s always a good idea to test the cleaner on a small, inconspicuous area first to make sure it doesn’t damage the surface.
* **Spray and Wipe:** Simply spray the cleaner onto the surface you want to clean and wipe it down with a clean cloth or sponge.
* **Use on a Variety of Surfaces:** This citrus cleaner is great for cleaning countertops, sinks, stovetops, bathroom surfaces, and more. However, avoid using it on natural stone surfaces like marble or granite, as the vinegar can etch the stone.
* **Tackle Tough Stains:** For tough stains, let the cleaner sit on the surface for a few minutes before wiping it away.
* **Freshen Up Your Home:** Use the cleaner as an air freshener by spraying it into the air. The citrus scent will leave your home smelling fresh and clean.
* **Clean Your Microwave:** Heat a cup of the cleaner in the microwave for a few minutes to loosen grime and make it easier to clean.
* **Deodorize Your Garbage Disposal:** Pour some of the cleaner down your garbage disposal to freshen it up and eliminate odors.
Troubleshooting: Common Issues and Solutions
Sometimes, things don’t go exactly as planned. Here are some common issues you might encounter and how to fix them:
* **Weak Citrus Scent:** If your cleaner doesn’t have a strong citrus scent, it could be because you didn’t use enough citrus peels or you didn’t let the vinegar infuse for long enough. Try using more peels next time or letting the mixture sit for a longer period.
* **Cloudy Cleaner:** The cleaner may appear cloudy, which is perfectly normal. This is due to the natural oils in the citrus peels. It doesn’t affect the cleaning power.
* **Vinegar Smell:** If you’re sensitive to the smell of vinegar, you can add more essential oils to mask the scent. You can also try using a higher water ratio when diluting the cleaner.
* **Mold Growth:** If you see mold growing in your jar during the infusion period, it means the citrus peels weren’t completely submerged in vinegar. Discard the entire batch and start over, making sure to use enough vinegar to cover all the peels.
Why This Works: The Science Behind the Clean
So, what makes this DIY citrus cleaner so effective? It’s all about the power of natural ingredients!
* **Citrus Oils:** Citrus peels contain natural oils that have degreasing and cleaning properties. These oils help to break down dirt, grime, and grease.
* **Acetic Acid:** White vinegar contains acetic acid, which is a natural disinfectant and deodorizer. It helps to kill bacteria and germs, leaving surfaces clean and fresh.
* **pH Balance:** The acidity of the vinegar helps to dissolve mineral deposits and soap scum.
Beyond the Basics: Variations and Add-Ins
Want to take your DIY citrus cleaner to the next level? Here are some variations and add-ins to try:
* **Herbs:** Add fresh herbs like rosemary, thyme, or lavender to the vinegar during the infusion period for a unique scent and added cleaning power.
* **Borax:** Add a tablespoon of borax to the diluted cleaner for extra cleaning power. Borax is a natural mineral that helps to remove stains and disinfect surfaces.
* **Castile Soap:** Add a squirt of castile soap to the diluted cleaner for extra suds and cleaning power.
* **Baking Soda:** Create a paste of baking soda and the citrus cleaner to tackle tough stains and grime.
Safety First: Important Precautions
While this DIY citrus cleaner is made with natural ingredients, it’s still important to take some safety precautions:
* **Keep Out of Reach of Children and Pets:** Although it’s made with natural ingredients, it’s still important to keep the cleaner out of reach of children and pets.
* **Avoid Contact with Eyes:** Avoid getting the cleaner in your eyes. If contact occurs, rinse thoroughly with water.
* **Don’t Mix with Bleach:** Never mix this cleaner with bleach, as it can create harmful fumes.
* **Use in a Well-Ventilated Area:** Use the cleaner in a well-ventilated area to avoid inhaling the fumes.
Environmental Benefits: Cleaning Green
One of the best things about making your own citrus cleaner is that it’s an environmentally friendly alternative to conventional cleaning products. By using natural ingredients and reusing citrus peels, you’re reducing your carbon footprint and helping to protect the planet. Plus, you’re avoiding the harsh chemicals found in many commercial cleaners, which can be harmful to your health and the environment.
So, there you have it! A comprehensive guide to making your own all-purpose citrus cleaner.

Conclusion
So, there you have it! Transforming your cleaning routine with this simple, yet incredibly effective DIY trick is more than just a cost-saving measure; it’s about taking control of the ingredients you bring into your home and creating a healthier, more sustainable living space. We’ve shown you how to create a powerful, all-purpose cleaner from readily available ingredients, eliminating the need for harsh chemicals and contributing to a cleaner planet.
This isn’t just about saving money, although that’s certainly a perk. It’s about knowing exactly what you’re spraying on your countertops, mopping onto your floors, and using to wipe down your children’s toys. In a world saturated with complex chemical formulas and misleading marketing, this DIY approach offers transparency and peace of mind.
But the benefits don’t stop there. This DIY cleaning solution is incredibly versatile. Feel free to experiment with different essential oils to create your signature scent. Lavender, lemon, tea tree, and eucalyptus are all excellent choices, each offering unique antibacterial and antiviral properties in addition to their delightful aromas. For a boost in cleaning power, consider adding a tablespoon of borax to the mixture, especially when tackling stubborn stains or grime. You can also adjust the vinegar-to-water ratio depending on the specific cleaning task. For heavily soiled areas, a stronger vinegar concentration might be necessary.
We understand that switching to a DIY cleaning routine can feel daunting at first, but we promise, the results are worth it. Not only will you be reducing your exposure to harmful chemicals, but you’ll also be contributing to a more sustainable lifestyle. Plus, the satisfaction of creating your own effective cleaning solution is incredibly rewarding.
We are confident that you will find this **home cleaning supplies checklist** and the DIY cleaning solution a game-changer for your home. It’s a simple, effective, and eco-friendly way to keep your living space sparkling clean.
Now, it’s your turn! We encourage you to try this DIY cleaning trick and experience the difference for yourself. Don’t be afraid to experiment with different variations and find what works best for you and your home. And most importantly, we want to hear about your experience! Share your tips, tricks, and successes in the comments below. Let’s build a community of DIY cleaning enthusiasts and create a healthier, cleaner world together. We can’t wait to see what you create!
Frequently Asked Questions (FAQ)
Q: Is vinegar safe to use on all surfaces?
A: While vinegar is a fantastic natural cleaner, it’s not suitable for all surfaces. Avoid using it on natural stone surfaces like marble, granite, and limestone, as the acidity can etch and damage them. It’s also best to avoid using vinegar on waxed wood furniture, as it can dull the finish. Always test the cleaning solution in an inconspicuous area first to ensure it doesn’t cause any damage or discoloration. For delicate surfaces, consider diluting the vinegar solution further or using a different cleaning agent altogether.
Q: Can I use any type of vinegar for this DIY cleaner?
A: White distilled vinegar is generally recommended for cleaning due to its higher acidity and lack of color, which minimizes the risk of staining. However, you can use other types of vinegar, such as apple cider vinegar, if you prefer. Keep in mind that apple cider vinegar has a distinct scent and may leave a slight residue, so it’s best to test it in an inconspicuous area first. Avoid using balsamic vinegar or red wine vinegar, as they can stain surfaces.
Q: How long will this DIY cleaning solution last?
A: This DIY cleaning solution typically lasts for several weeks when stored properly in a cool, dark place. The vinegar acts as a natural preservative, preventing the growth of bacteria and mold. However, it’s always a good idea to make a fresh batch every month or so to ensure optimal effectiveness. If you notice any changes in color, odor, or consistency, discard the solution and make a new batch.
Q: Can I add other ingredients to this DIY cleaner?
A: Absolutely! This DIY cleaner is highly customizable. As mentioned earlier, essential oils are a great addition for fragrance and added cleaning power. You can also add a tablespoon of borax for extra stain-fighting power, or a few drops of dish soap for added degreasing properties. However, be cautious when mixing different ingredients, as some combinations may not be effective or could even be harmful. Always research the compatibility of ingredients before adding them to your cleaning solution.
Q: Is this DIY cleaner safe for pets and children?
A: While this DIY cleaner is generally safer than commercial cleaning products, it’s still important to exercise caution when using it around pets and children. Keep the solution out of reach of children and pets, and avoid spraying it directly on them. If your pet or child ingests the solution, contact a medical professional or veterinarian immediately. When cleaning surfaces that pets and children come into contact with, rinse them thoroughly with water after cleaning to remove any residue.
Q: What essential oils are best for cleaning?
A: Several essential oils have excellent antibacterial, antiviral, and antifungal properties, making them ideal for cleaning. Some popular choices include:
* **Lemon:** Known for its uplifting scent and degreasing properties.
* **Tea Tree:** A powerful antiseptic and antifungal agent.
* **Lavender:** Offers a calming aroma and antibacterial benefits.
* **Eucalyptus:** Has a refreshing scent and antiviral properties.
* **Peppermint:** Provides a cooling sensation and antibacterial effects.
Experiment with different essential oils to find your favorite scent and cleaning properties. Remember to use pure, therapeutic-grade essential oils for the best results.
Q: How do I store this DIY cleaning solution?
A: Store your DIY cleaning solution in a clean, airtight spray bottle. Glass spray bottles are a great option, as they are durable and won’t react with the ingredients. Label the bottle clearly with the contents and date of preparation. Store the bottle in a cool, dark place away from direct sunlight and heat. This will help to preserve the effectiveness of the solution and prevent it from degrading.
Q: Can I use this cleaner on my windows and mirrors?
A: Yes, this DIY cleaner can be used on windows and mirrors for a streak-free shine. Simply spray the solution onto the surface and wipe clean with a microfiber cloth. For best results, use a clean, dry cloth to buff the surface after wiping. You can also add a few drops of dish soap to the solution for added cleaning power.
Q: What if I don’t have all the ingredients on the home cleaning supplies checklist?
A: Don’t worry! The beauty of this DIY cleaner is its flexibility. If you don’t have all the ingredients, you can still make a basic cleaning solution with just vinegar and water. While it may not be as potent as the full recipe, it will still be effective for light cleaning tasks. You can also substitute ingredients based on what you have available. For example, if you don’t have essential oils, you can use lemon juice or orange peels to add a natural fragrance.
Q: How does this DIY cleaner compare to commercial cleaning products?
A: This DIY cleaner offers several advantages over commercial cleaning products. It’s more affordable, eco-friendly, and allows you to control the ingredients you’re using. Commercial cleaning products often contain harsh chemicals that can be harmful to your health and the environment. This DIY cleaner is made with natural ingredients that are safer for you, your family, and the planet. While it may not be as powerful as some commercial cleaners, it’s still effective for most household cleaning tasks.


Leave a Comment