

DIY Bolster Pillow: Ever scrolled through Pinterest and drooled over those perfectly styled beds, complete with a chic bolster pillow, but balked at the price tag? I know I have! For centuries, bolster pillows have been adding a touch of elegance and comfort to homes, tracing their roots back to ancient civilizations where they served as both headrests and decorative accents. From the opulent palaces of emperors to the cozy nooks of commoners, these cylindrical cushions have always been a symbol of refined living.
But let’s be honest, who wants to spend a fortune on something you can easily create yourself? That’s where this DIY guide comes in! We’re diving headfirst into the world of crafting your very own DIY bolster pillow, saving you money and allowing you to customize it to perfectly match your unique style. Not only will you be adding a touch of sophistication to your space, but you’ll also experience the immense satisfaction of creating something beautiful with your own two hands. Plus, imagine the bragging rights when your friends ask where you got that amazing pillow! So, grab your sewing kit, choose your favorite fabric, and let’s get started on this fun and rewarding DIY project. You’ll be amazed at how simple and satisfying it is to create a stunning bolster pillow that elevates your home decor.
DIY Bolster Pillow: A Cozy Project for Any Skill Level
Hey there, fellow crafters! Ready to add a touch of comfort and style to your home? I’m going to walk you through creating your very own bolster pillow. It’s a surprisingly simple project, even if you’re a beginner, and the results are so rewarding. Plus, you can customize it to perfectly match your decor. Let’s get started!
What You’ll Need
Before we dive in, let’s gather our supplies. This is a crucial step, so make sure you have everything on hand to avoid any mid-project interruptions.
* **Fabric:** This is where you can really let your personality shine! Choose a fabric that complements your existing decor. Consider the texture, color, and pattern. I recommend a medium-weight fabric like cotton, linen, or even a durable upholstery fabric. You’ll need enough fabric for the pillow body and the end circles. To calculate the amount, you’ll need to decide on the desired length and diameter of your bolster. I’ll give you some example measurements later.
* **Inner Pillow Form:** You can buy a pre-made bolster pillow form, or you can create your own using stuffing. If you’re making your own, you’ll need plenty of stuffing material.
* **Stuffing:** If you’re making your own pillow form, you’ll need stuffing. Polyester fiberfill is a great option because it’s affordable, washable, and hypoallergenic. You can also use shredded foam or even old fabric scraps for a more eco-friendly approach.
* **Sewing Machine:** A sewing machine will make this project much faster and easier, but you can also sew it by hand if you’re feeling ambitious.
* **Thread:** Choose a thread that matches your fabric.
* **Scissors:** Sharp fabric scissors are essential for clean cuts.
* **Measuring Tape:** Accurate measurements are key to a well-made bolster pillow.
* **Ruler or Yardstick:** For drawing straight lines.
* **Pins:** To hold the fabric in place while you sew.
* **Pencil or Fabric Marker:** For marking your fabric.
* **Compass or Circular Object:** To trace the circles for the pillow ends. A plate or bowl works great!
* **Optional: Zipper or Buttons:** If you want to make a removable cover, you’ll need a zipper or buttons and buttonholes.
Determining Your Pillow Size and Fabric Requirements
Okay, let’s talk dimensions! The size of your bolster pillow is entirely up to you, but here are a few common sizes to get you started:
* **Small Bolster:** 6 inches in diameter and 18 inches long.
* **Medium Bolster:** 8 inches in diameter and 24 inches long.
* **Large Bolster:** 10 inches in diameter and 30 inches long.
Once you’ve decided on the size, you can calculate your fabric requirements.
* **For the Pillow Body:** You’ll need a rectangle of fabric that is the length of your pillow plus 1 inch for seam allowance, and the width should be the circumference of your pillow (diameter x pi, or approximately 3.14) plus 1 inch for seam allowance.
* **Example (Medium Bolster):** Length = 24 inches + 1 inch = 25 inches. Width = 8 inches x 3.14 + 1 inch = 26.12 inches (round up to 27 inches for easier cutting).
* **For the End Circles:** You’ll need two circles of fabric that are the diameter of your pillow plus 1 inch for seam allowance.
* **Example (Medium Bolster):** Diameter = 8 inches + 1 inch = 9 inches.
So, for a medium bolster pillow, you’d need approximately 25 inches by 27 inches of fabric for the body and two 9-inch circles for the ends. It’s always a good idea to buy a little extra fabric just in case!
Sewing the Bolster Pillow Cover
Alright, let’s get to the fun part – sewing!
1. **Cut Your Fabric:** Using your measurements, carefully cut out the rectangle for the pillow body and the two circles for the ends. Make sure your cuts are straight and accurate.
2. **Sew the Pillow Body Seam:** Fold the rectangle in half lengthwise, with the right sides of the fabric facing each other. Pin along the long edge. Sew along this edge with a 1/2-inch seam allowance. This will create a tube.
3. **Prepare the End Circles:** If you’re adding a zipper or buttons, now is the time to do it! If not, skip to step 5.
4. **Adding a Zipper (Optional):** This is a great way to make the cover removable for washing.
* Cut a slit along the seam of the pillow body, about 2/3 of the way down the length of the pillow.
* Insert the zipper into the slit, pinning it in place.
* Sew the zipper in place, using a zipper foot on your sewing machine.
5. **Adding Buttons (Optional):** This is another way to make the cover removable.
* Cut a slit along the seam of the pillow body, about 2/3 of the way down the length of the pillow.
* Create a button placket on one side of the slit.
* Sew buttons onto the other side of the slit, corresponding to the buttonholes.
6. **Pin the End Circles:** With the right side of the fabric facing out, pin one of the circles to one end of the tube. Make sure the edges are aligned. Pin all the way around the circle, using plenty of pins to keep the fabric in place.
7. **Sew the End Circle:** Sew the circle to the tube with a 1/2-inch seam allowance. Go slowly and carefully, easing the fabric as you go. It can be a little tricky to sew a circle to a straight edge, so take your time.
8. **Repeat for the Other End:** Repeat steps 6 and 7 for the other end of the pillow.
9. **Turn the Cover Right Side Out:** Carefully turn the pillow cover right side out. Use a point turner or a blunt pencil to gently push out the seams and create a crisp edge.
Creating the Inner Pillow Form (If Needed)
If you purchased a pre-made pillow form, you can skip this section. But if you’re making your own, here’s how:
1. **Cut Fabric for the Inner Form:** Use the same measurements as you did for the outer cover, but use a less expensive fabric like muslin or an old sheet.
2. **Sew the Inner Form:** Follow the same steps as you did for the outer cover, but leave a small opening (about 4-6 inches) on one of the end circles.
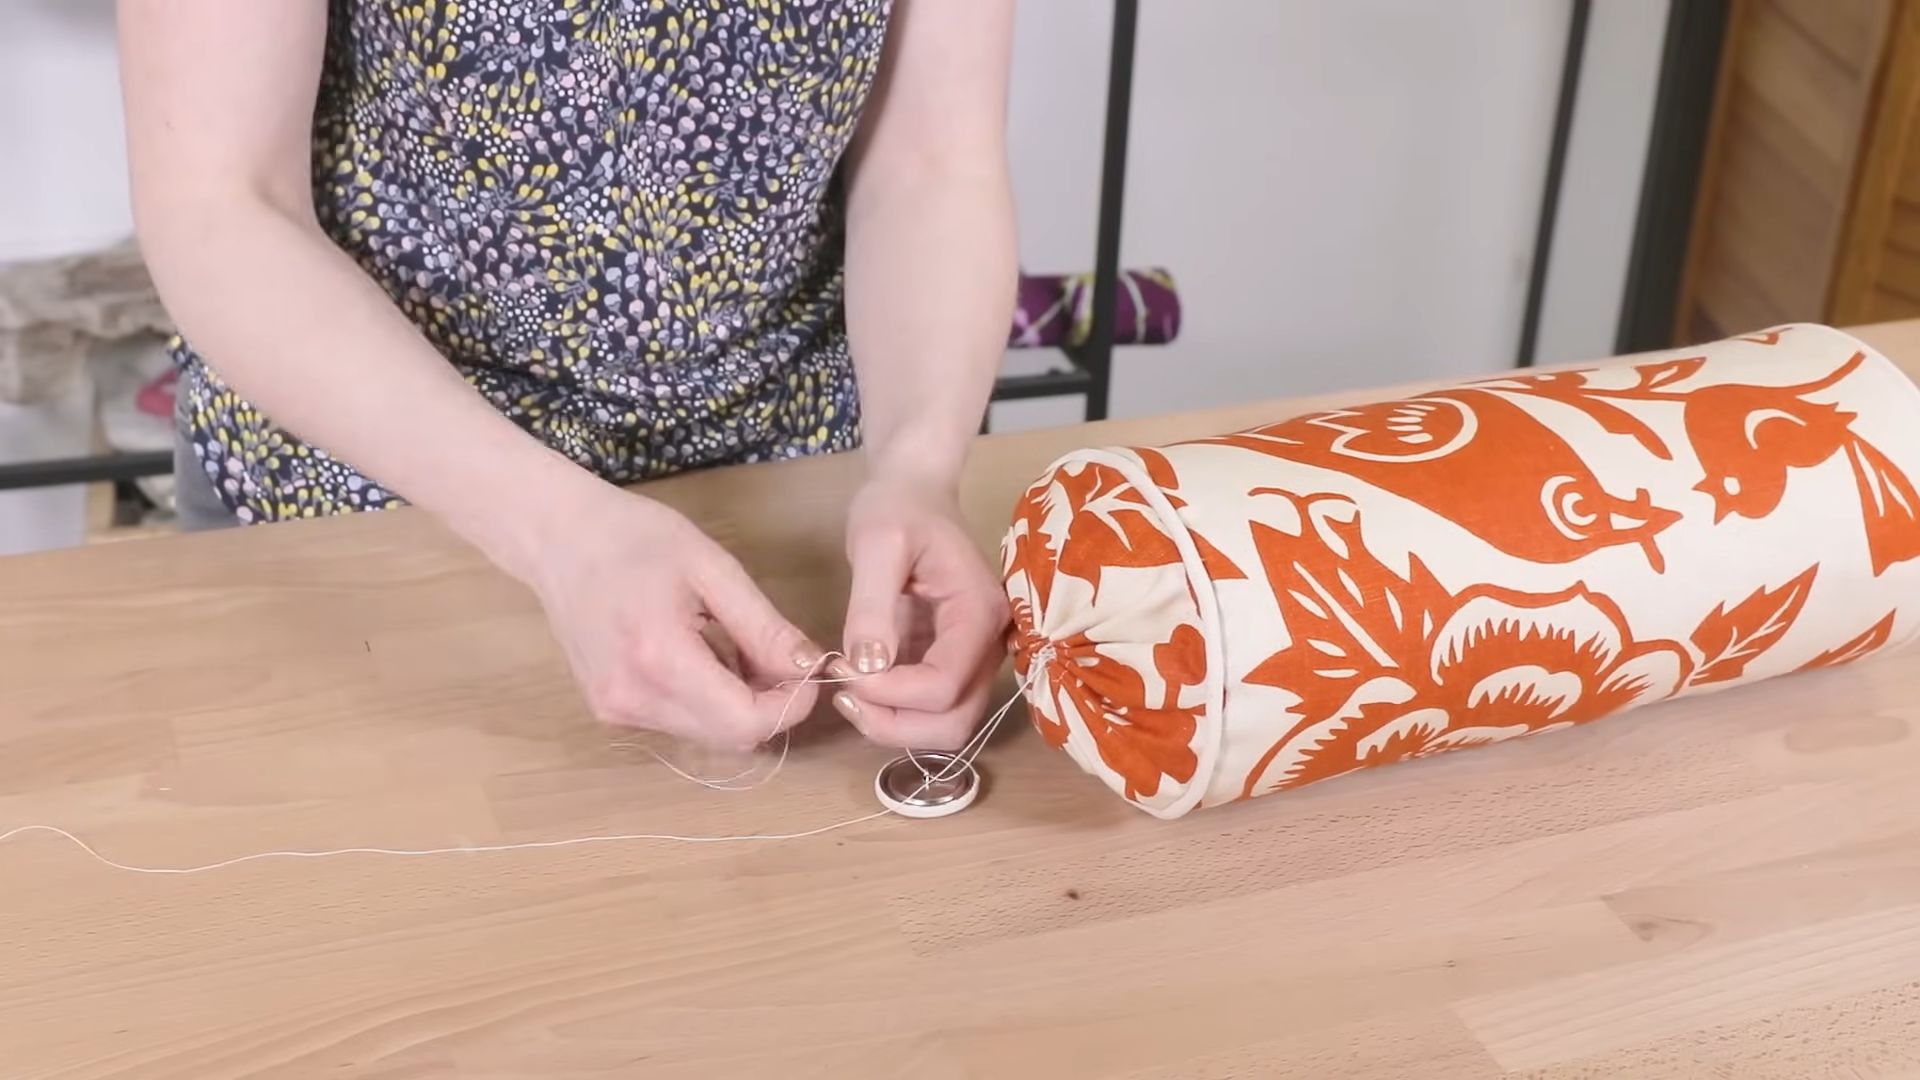
3. **Stuff the Pillow Form:** Start stuffing the pillow form with your chosen filling material. Add small amounts at a time, making sure to distribute the filling evenly. You want the pillow to be firm and supportive, but not too hard.
4. **Close the Opening:** Once the pillow is stuffed to your liking, carefully sew the opening closed by hand using a hidden stitch.
Finishing Touches
Now that you have your pillow cover and inner form (or pre-made form), it’s time to put it all together!
1. **Insert the Pillow Form:** Carefully insert the pillow form into the pillow cover. If you added a zipper or buttons, make sure they are closed securely.
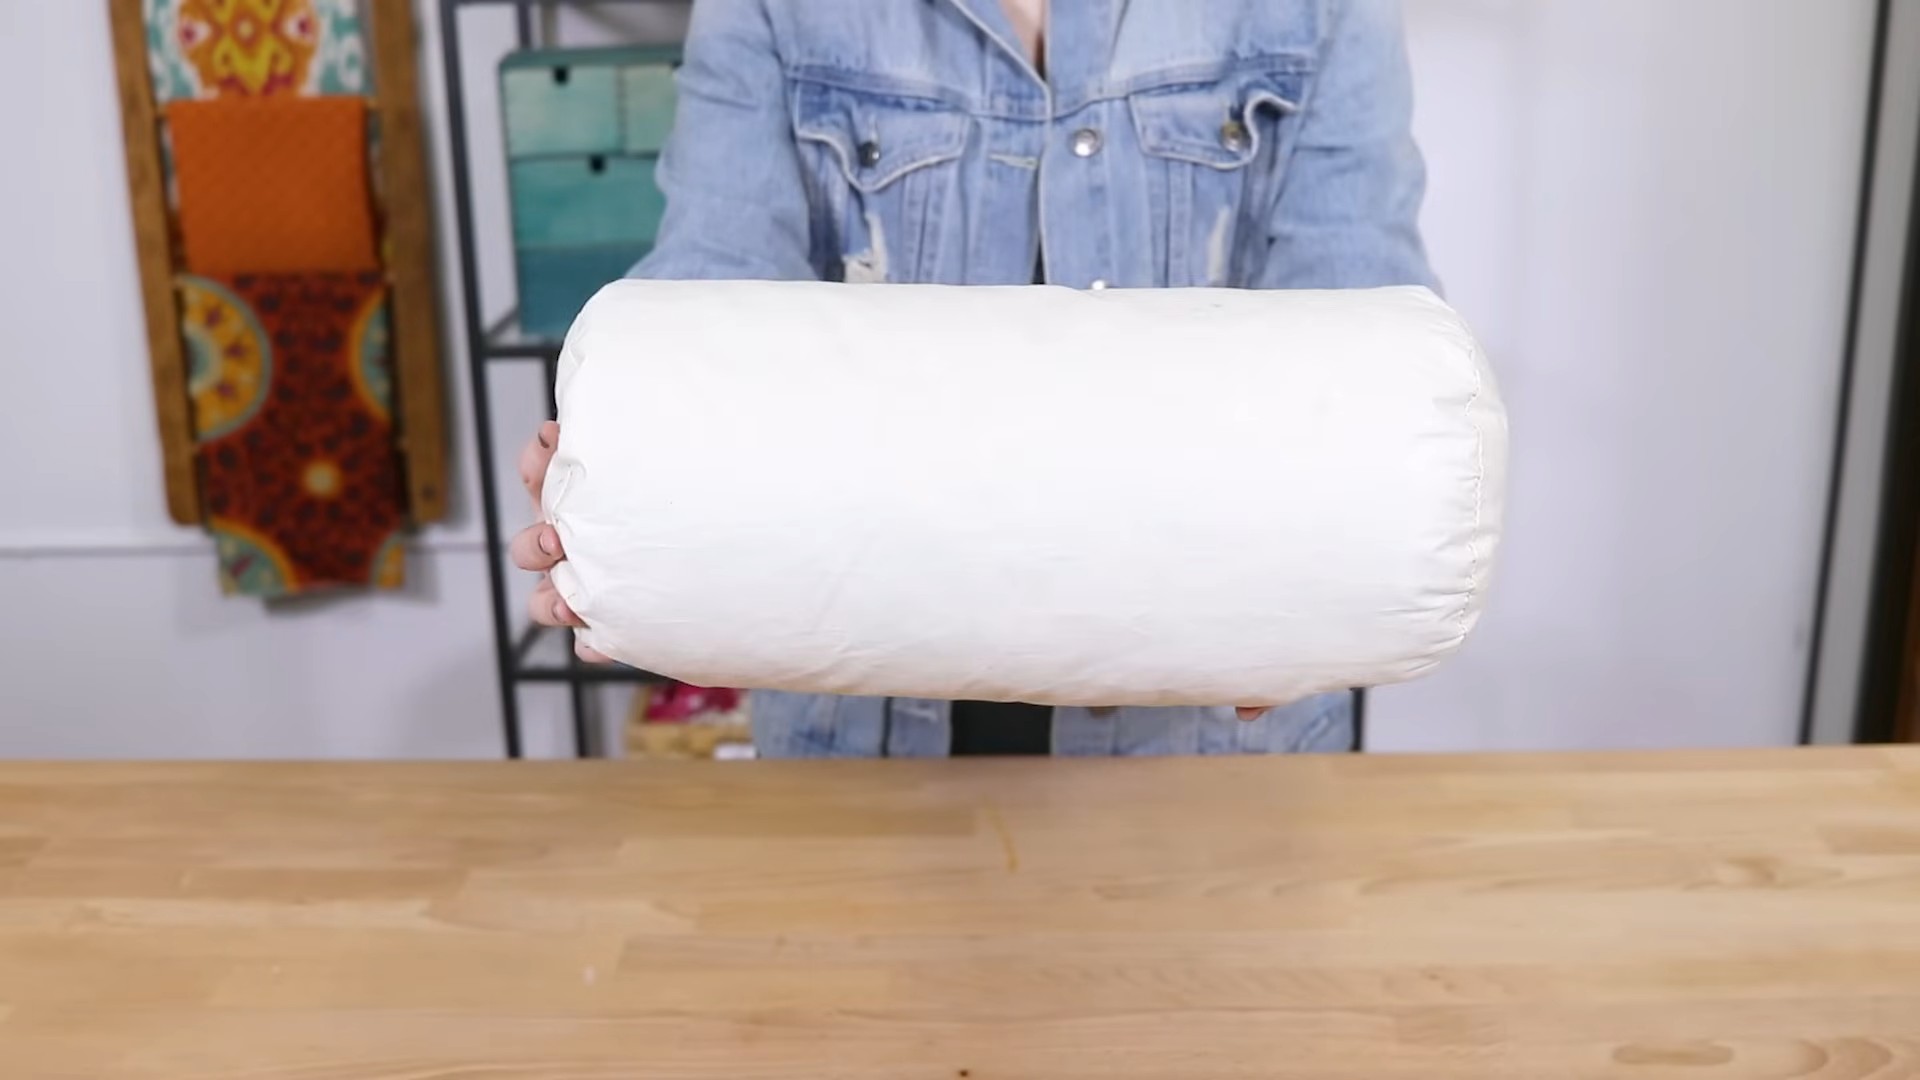
2. **Fluff and Shape:** Fluff the pillow and shape it to your liking.
3. **Admire Your Work:** Step back and admire your beautiful, handmade bolster pillow!
Tips and Tricks for a Perfect Bolster Pillow
* Choose the Right Fabric: The fabric you choose will greatly impact the look and feel of your bolster pillow. Consider the durability, texture, and color of the fabric.
* Use a Walking Foot: If you’re using a thick or slippery fabric, a walking foot on your sewing machine can help to prevent the fabric from shifting while you sew.
* Clip the Curves: After sewing the end circles to the pillow body, clip the curves of the seam allowance. This will help the fabric to lie flat and prevent puckering.
* Press the Seams: Pressing the seams after sewing will give your bolster pillow a professional finish.
* Experiment with Embellishments: Once you’ve mastered the basic bolster pillow, you can experiment with embellishments like piping, tassels, or embroidery.
Variations and Customizations
The possibilities are endless when it comes to customizing your bolster pillow! Here are a few ideas to get you started:
* **Piping:** Add piping around the edges of the pillow for a more polished look.
* **Tassels:** Attach tassels to the ends of the pillow for a touch of elegance.
* **Embroidery:** Embroider a design or monogram onto
Conclusion
So, there you have it! Crafting your own DIY bolster pillow isn’t just a cost-effective alternative to store-bought options; it’s a gateway to personalized comfort and style. We’ve walked you through the process, highlighting the simplicity and adaptability of this project. But why is this DIY trick a must-try?
Firstly, it’s about control. You dictate the size, the firmness, and, most importantly, the aesthetic. Tired of generic bolster pillows that clash with your carefully curated décor? With this DIY approach, you can select fabrics that perfectly complement your existing bedding, sofa, or reading nook. Imagine a luxurious velvet bolster pillow adding a touch of elegance to your bedroom, or a vibrant, patterned bolster pillow injecting personality into your living room. The possibilities are truly endless.
Secondly, it’s about sustainability. By repurposing old fabrics, blankets, or even clothing, you’re giving them a new lease on life and reducing textile waste. This is a fantastic way to contribute to a more eco-conscious lifestyle without sacrificing comfort or style. Think about transforming a beloved, but worn-out, quilt into a cozy bolster pillow that holds cherished memories.
Thirdly, it’s about the satisfaction of creating something with your own hands. There’s a unique sense of accomplishment that comes from completing a DIY project, knowing that you’ve poured your time and effort into crafting something beautiful and functional. This bolster pillow will not only provide physical support but also serve as a reminder of your creativity and resourcefulness.
Now, let’s talk about variations. Feel free to experiment with different fillings. While we suggested using fiberfill, you could also opt for down feathers for a softer feel, buckwheat hulls for a firmer, more supportive pillow, or even shredded memory foam for customized comfort. Consider adding embellishments like tassels, piping, or embroidery to further personalize your creation. For a bolster pillow designed for meditation or yoga, you might want to incorporate calming scents like lavender or chamomile into the filling. You could even create a bolster pillow with removable covers for easy cleaning.
Don’t be afraid to get creative with the shape and size, too. While the classic cylindrical shape is a popular choice, you could experiment with rectangular or even crescent-shaped bolster pillows to better suit your specific needs and preferences. A smaller, more compact bolster pillow could be perfect for travel, while a larger, longer bolster pillow could be ideal for supporting your entire back while reading in bed.
We wholeheartedly encourage you to give this DIY bolster pillow project a try. It’s a rewarding experience that will not only enhance your comfort but also allow you to express your personal style. And most importantly, have fun with it! Don’t be afraid to experiment, make mistakes, and learn along the way.
Once you’ve created your masterpiece, we’d love to hear about your experience! Share your photos and stories with us on social media using #DIYBolsterPillow. We can’t wait to see what you create! Let’s inspire each other with our creativity and resourcefulness.
Frequently Asked Questions (FAQ)
What kind of fabric is best for a DIY bolster pillow?
The best fabric for your DIY bolster pillow depends on your desired aesthetic and the pillow’s intended use. For a luxurious look and feel, consider velvet, silk, or linen. These fabrics are soft, elegant, and add a touch of sophistication to any space. However, they may require more delicate care. For a more durable and easy-to-clean option, consider cotton, canvas, or denim. These fabrics are more resistant to wear and tear and can withstand frequent washing. If you’re looking for a fabric that’s both durable and stylish, consider a blend of cotton and linen. Ultimately, the best fabric is one that you love and that complements your existing décor. Don’t be afraid to experiment with different textures and patterns to create a truly unique bolster pillow.
How much filling do I need for a bolster pillow?
The amount of filling you need will depend on the size of your bolster pillow and your desired level of firmness. A good rule of thumb is to start with slightly more filling than you think you’ll need and then gradually remove it until you achieve the perfect level of comfort. For a standard-sized bolster pillow (approximately 6 inches in diameter and 24 inches long), you’ll likely need around 2-3 pounds of fiberfill. However, this is just an estimate, and you may need more or less depending on the type of filling you use. If you’re using down feathers, you’ll need less filling than if you’re using fiberfill. If you’re using buckwheat hulls, you’ll need more filling than if you’re using fiberfill. The best way to determine the right amount of filling is to experiment and adjust until you’re happy with the result.
Can I use a sewing machine for this project?
Yes, absolutely! A sewing machine will make the process much faster and easier, especially if you’re working with thicker fabrics. However, if you don’t have a sewing machine, you can still sew the bolster pillow by hand. Hand-sewing will take longer, but it’s a perfectly viable option, especially for smaller bolster pillows or if you enjoy the meditative process of hand-stitching. If you’re hand-sewing, be sure to use a strong needle and thread and to take small, even stitches to ensure that the seams are secure.
How do I clean my DIY bolster pillow?
The cleaning method will depend on the fabric you used and the type of filling. If you used a washable fabric like cotton or linen and fiberfill, you can likely machine wash the entire bolster pillow on a gentle cycle. However, it’s always best to check the care instructions for your specific fabric. If you used a more delicate fabric like velvet or silk, you may need to spot clean the bolster pillow or have it professionally dry cleaned. If you used a filling that’s not washable, like buckwheat hulls, you’ll need to remove the filling before washing the cover. In this case, it’s a good idea to use a bolster pillow cover with a zipper or other closure so that you can easily remove and replace the filling. To prevent your bolster pillow from getting dirty in the first place, consider using a removable pillowcase that you can easily wash.
What if I don’t have any fabric to repurpose?
If you don’t have any fabric to repurpose, don’t worry! You can easily purchase fabric at your local fabric store or online. Look for sales and discounts to save money. You can also check out thrift stores or consignment shops for affordable fabric options. Sometimes you can find old curtains, tablecloths, or even clothing that can be repurposed into a bolster pillow. Get creative and think outside the box!
How can I make my bolster pillow firmer?
To make your bolster pillow firmer, you can use a denser filling, such as buckwheat hulls or shredded memory foam. You can also add more filling to the pillow. If you’re using fiberfill, you can compress it tightly as you stuff the pillow. Another option is to use a tighter weave fabric for the cover, which will help to prevent the filling from shifting and compressing.
Can I add a zipper to my bolster pillow cover?
Yes, adding a zipper to your bolster pillow cover is a great idea, especially if you plan to wash the cover frequently. A zipper will allow you to easily remove the cover for washing and to replace the filling if needed. When adding a zipper, be sure to use a zipper that’s the same length as the opening of the cover. You can sew the zipper in by hand or with a sewing machine.
What are some other uses for a bolster pillow besides decoration?
Bolster pillows are incredibly versatile and can be used for a variety of purposes beyond decoration. They can provide support for your back, neck, or knees while sleeping or relaxing. They can also be used for yoga or meditation to help you achieve a more comfortable and supported posture. Bolster pillows can also be used to elevate your legs, which can help to improve circulation and reduce swelling. They are also great for pregnant women to support their growing belly.

Leave a Comment