

Growing tomatoes backyard guide – that’s exactly what you need to transform your outdoor space into a vibrant, edible paradise! Have you ever dreamed of biting into a sun-ripened tomato, bursting with flavor, that you grew yourself? It’s an experience unlike any other, and trust me, it’s easier than you think! For centuries, cultivating tomatoes has been a cherished tradition, from the ancient Aztecs who first domesticated them to Italian grandmothers passing down secret growing techniques through generations.
But let’s be honest, sometimes getting those juicy red fruits can feel like a real challenge. Pests, diseases, and unpredictable weather can all throw a wrench in your plans. That’s where this DIY guide comes in! I’m going to share my favorite tried-and-true tricks and hacks for growing tomatoes backyard guide, even if you’re a complete beginner.
Imagine saving money on groceries, reducing your carbon footprint, and enjoying the unparalleled taste of homegrown tomatoes. This guide will equip you with the knowledge and confidence to nurture your tomato plants from tiny seedlings to bountiful producers. So, grab your gardening gloves, and let’s get started on this exciting journey together!
Growing Tomatoes Like a Pro: Your Backyard Guide
Okay, tomato lovers, let’s get down to business! I’m going to walk you through everything you need to know to grow juicy, delicious tomatoes right in your own backyard. Forget those bland supermarket tomatoes – we’re talking homegrown goodness! This guide is designed for beginners, so don’t worry if you’ve never grown anything before. We’ll take it one step at a time.
Choosing the Right Tomato Variety
Before we even think about planting, we need to pick the right tomato variety. This is crucial because different varieties thrive in different climates and have different uses.
* Determinate vs. Indeterminate: This is the first big decision. Determinate tomatoes grow to a certain size and then produce all their fruit at once, making them great for canning. Indeterminate tomatoes keep growing and producing fruit throughout the season, giving you a continuous harvest. I personally prefer indeterminate for fresh eating all summer long.
* Heirloom vs. Hybrid: Heirloom tomatoes are open-pollinated varieties that have been passed down for generations. They often have unique flavors and colors, but can be more susceptible to diseases. Hybrid tomatoes are bred for specific traits like disease resistance and higher yields. They’re a good choice if you’re concerned about pests or diseases.
* Consider Your Climate: Some varieties are better suited to hot climates, while others prefer cooler temperatures. Check the seed packet or plant label for information on the ideal growing conditions.
* Think About Your Needs: Do you want slicing tomatoes for sandwiches, cherry tomatoes for salads, or paste tomatoes for sauce? Choose varieties that match your culinary preferences.
Some of my personal favorites include:
* ‘Early Girl’: A reliable indeterminate variety that produces early in the season.
* ‘Beefsteak’: A classic indeterminate slicing tomato with a rich flavor.
* ‘Roma’: A determinate paste tomato perfect for making sauce.
* ‘Sungold’: An incredibly sweet and flavorful indeterminate cherry tomato.
Preparing the Soil
Tomatoes are heavy feeders, meaning they need a lot of nutrients to thrive. So, preparing the soil is essential for a successful harvest.
* Choose a Sunny Location: Tomatoes need at least 6-8 hours of sunlight per day. Pick a spot in your yard that gets plenty of sun.
* Test Your Soil: A soil test will tell you the pH level and nutrient content of your soil. You can buy a soil test kit at most garden centers or send a sample to your local agricultural extension office. Tomatoes prefer a slightly acidic soil with a pH of 6.0-6.8.
* Amend the Soil: Based on your soil test results, you may need to amend the soil with compost, manure, or other organic matter. This will improve drainage, aeration, and nutrient content. I always add a generous amount of compost to my tomato beds.
* Loosen the Soil: Use a garden fork or tiller to loosen the soil to a depth of at least 12 inches. This will make it easier for the tomato roots to grow.
* Consider Raised Beds: If you have poor soil or drainage, consider growing your tomatoes in raised beds. Raised beds also warm up faster in the spring, giving your plants a head start.
Planting Your Tomato Seedlings
Now for the fun part – planting! You can start your tomato seeds indoors 6-8 weeks before the last expected frost, or you can buy seedlings from a garden center. I usually do a bit of both.
* Harden Off Your Seedlings: If you started your seeds indoors, you’ll need to harden them off before planting them outdoors. This means gradually exposing them to outdoor conditions over a period of 1-2 weeks. Start by placing them in a sheltered spot for a few hours each day, and gradually increase the amount of time they spend outdoors.
* Choose a Planting Day: Wait until the danger of frost has passed and the soil has warmed up to at least 60°F (15°C) before planting your tomato seedlings.
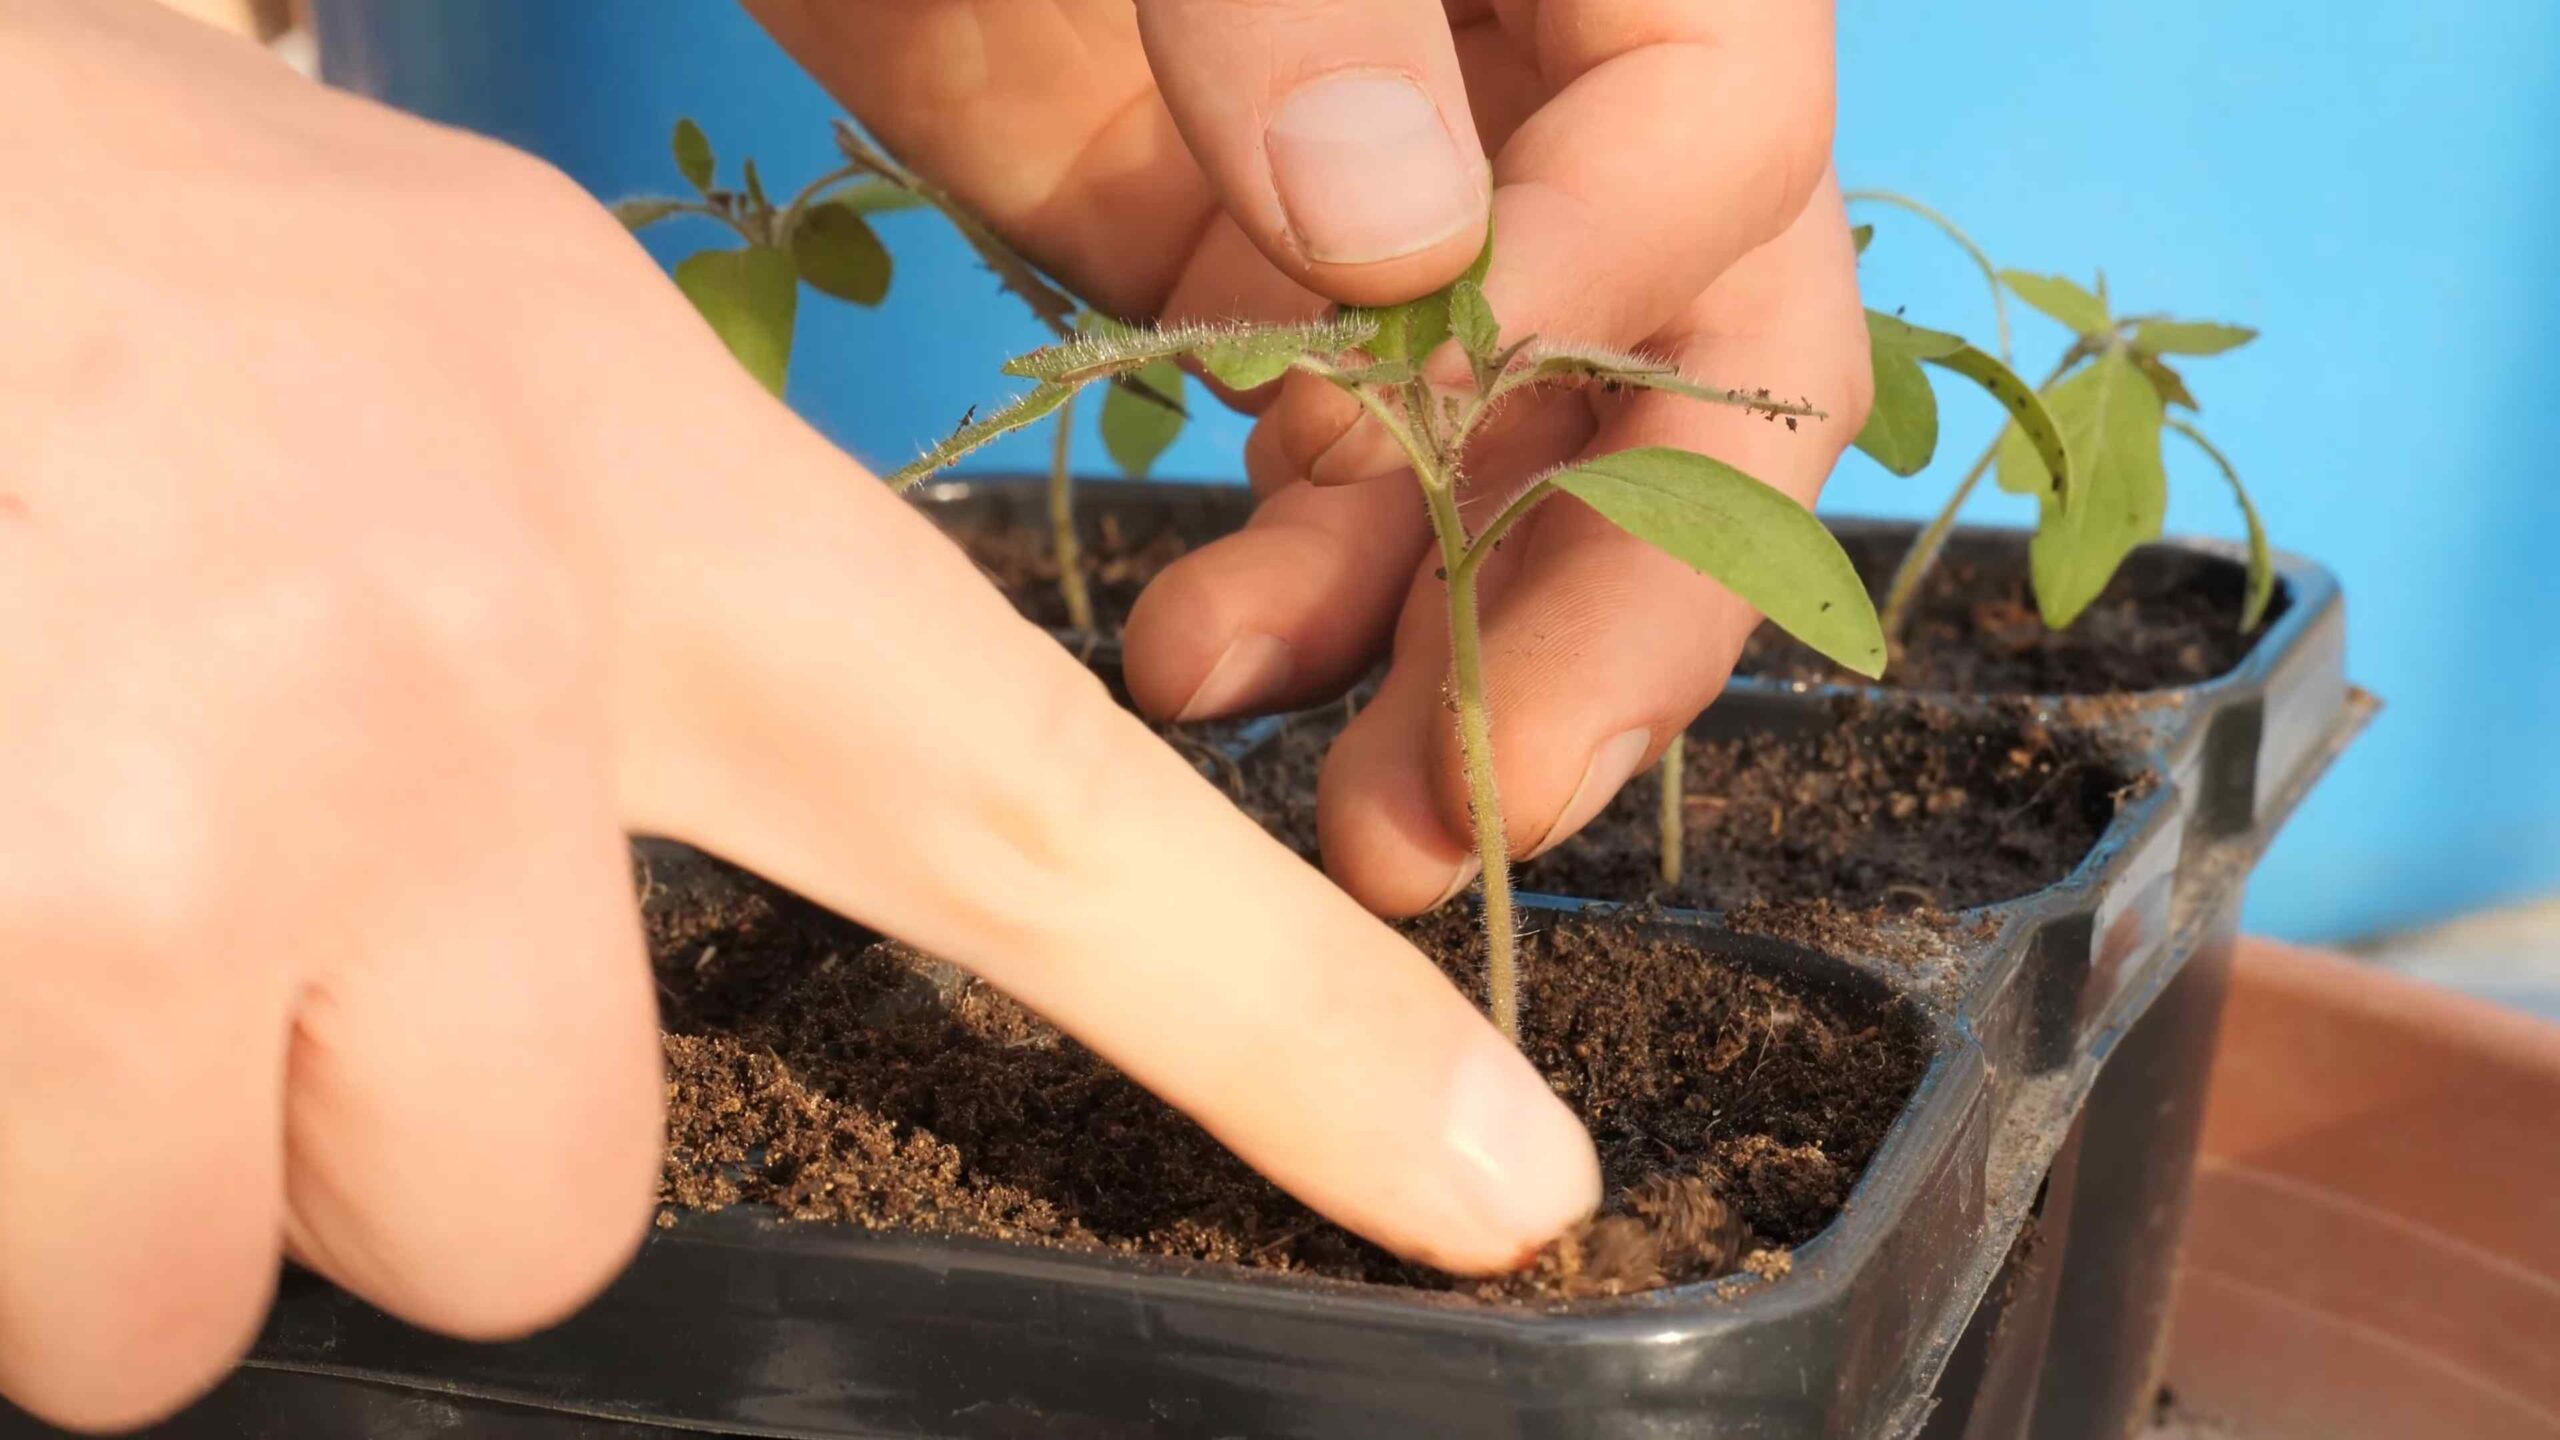
* Dig a Hole: Dig a hole that is deep enough to bury the bottom two-thirds of the tomato seedling’s stem. This may seem strange, but tomatoes can grow roots from their stems, so burying them deeper will encourage a stronger root system.
* Remove the Bottom Leaves: Remove the bottom leaves from the tomato seedling before planting. This will prevent them from rotting and attracting pests.
* Plant the Seedling: Place the tomato seedling in the hole and gently backfill with soil. Water thoroughly.
* Space Your Plants: Space your tomato plants according to the variety. Determinate tomatoes can be planted closer together than indeterminate tomatoes. Check the plant label for specific spacing recommendations. Generally, I space indeterminate varieties about 2-3 feet apart.
* Add Support: Tomato plants need support to prevent them from falling over and to keep the fruit off the ground. You can use stakes, cages, or trellises. I prefer using tomato cages because they’re easy to install and provide good support.
Caring for Your Tomato Plants
Once your tomato plants are in the ground, it’s important to provide them with the care they need to thrive.
* Water Regularly: Tomatoes need consistent watering, especially during hot, dry weather. Water deeply and infrequently, rather than shallowly and frequently. Aim to water at the base of the plant to avoid wetting the foliage, which can lead to disease.
* Fertilize Regularly: Tomatoes are heavy feeders, so you’ll need to fertilize them regularly throughout the growing season. Use a balanced fertilizer that is specifically formulated for tomatoes. Follow the instructions on the fertilizer label. I like to use a liquid fertilizer every 2-3 weeks.
* Mulch: Apply a layer of mulch around your tomato plants to help retain moisture, suppress weeds, and regulate soil temperature. Straw, wood chips, or shredded leaves are all good options.
* Prune: Pruning can help improve air circulation and sunlight penetration, which can reduce the risk of disease and increase fruit production. For indeterminate tomatoes, you’ll want to prune off the suckers that grow between the main stem and the branches. These suckers will eventually produce their own stems and fruit, but they can also overcrowd the plant and reduce overall yield.
* Watch Out for Pests and Diseases: Tomatoes are susceptible to a variety of pests and diseases. Keep an eye out for common problems like aphids, tomato hornworms, and blight. Treat any problems promptly with appropriate insecticides or fungicides. I prefer to use organic pest control methods whenever possible.
Harvesting Your Tomatoes
The moment we’ve all been waiting for – harvesting!
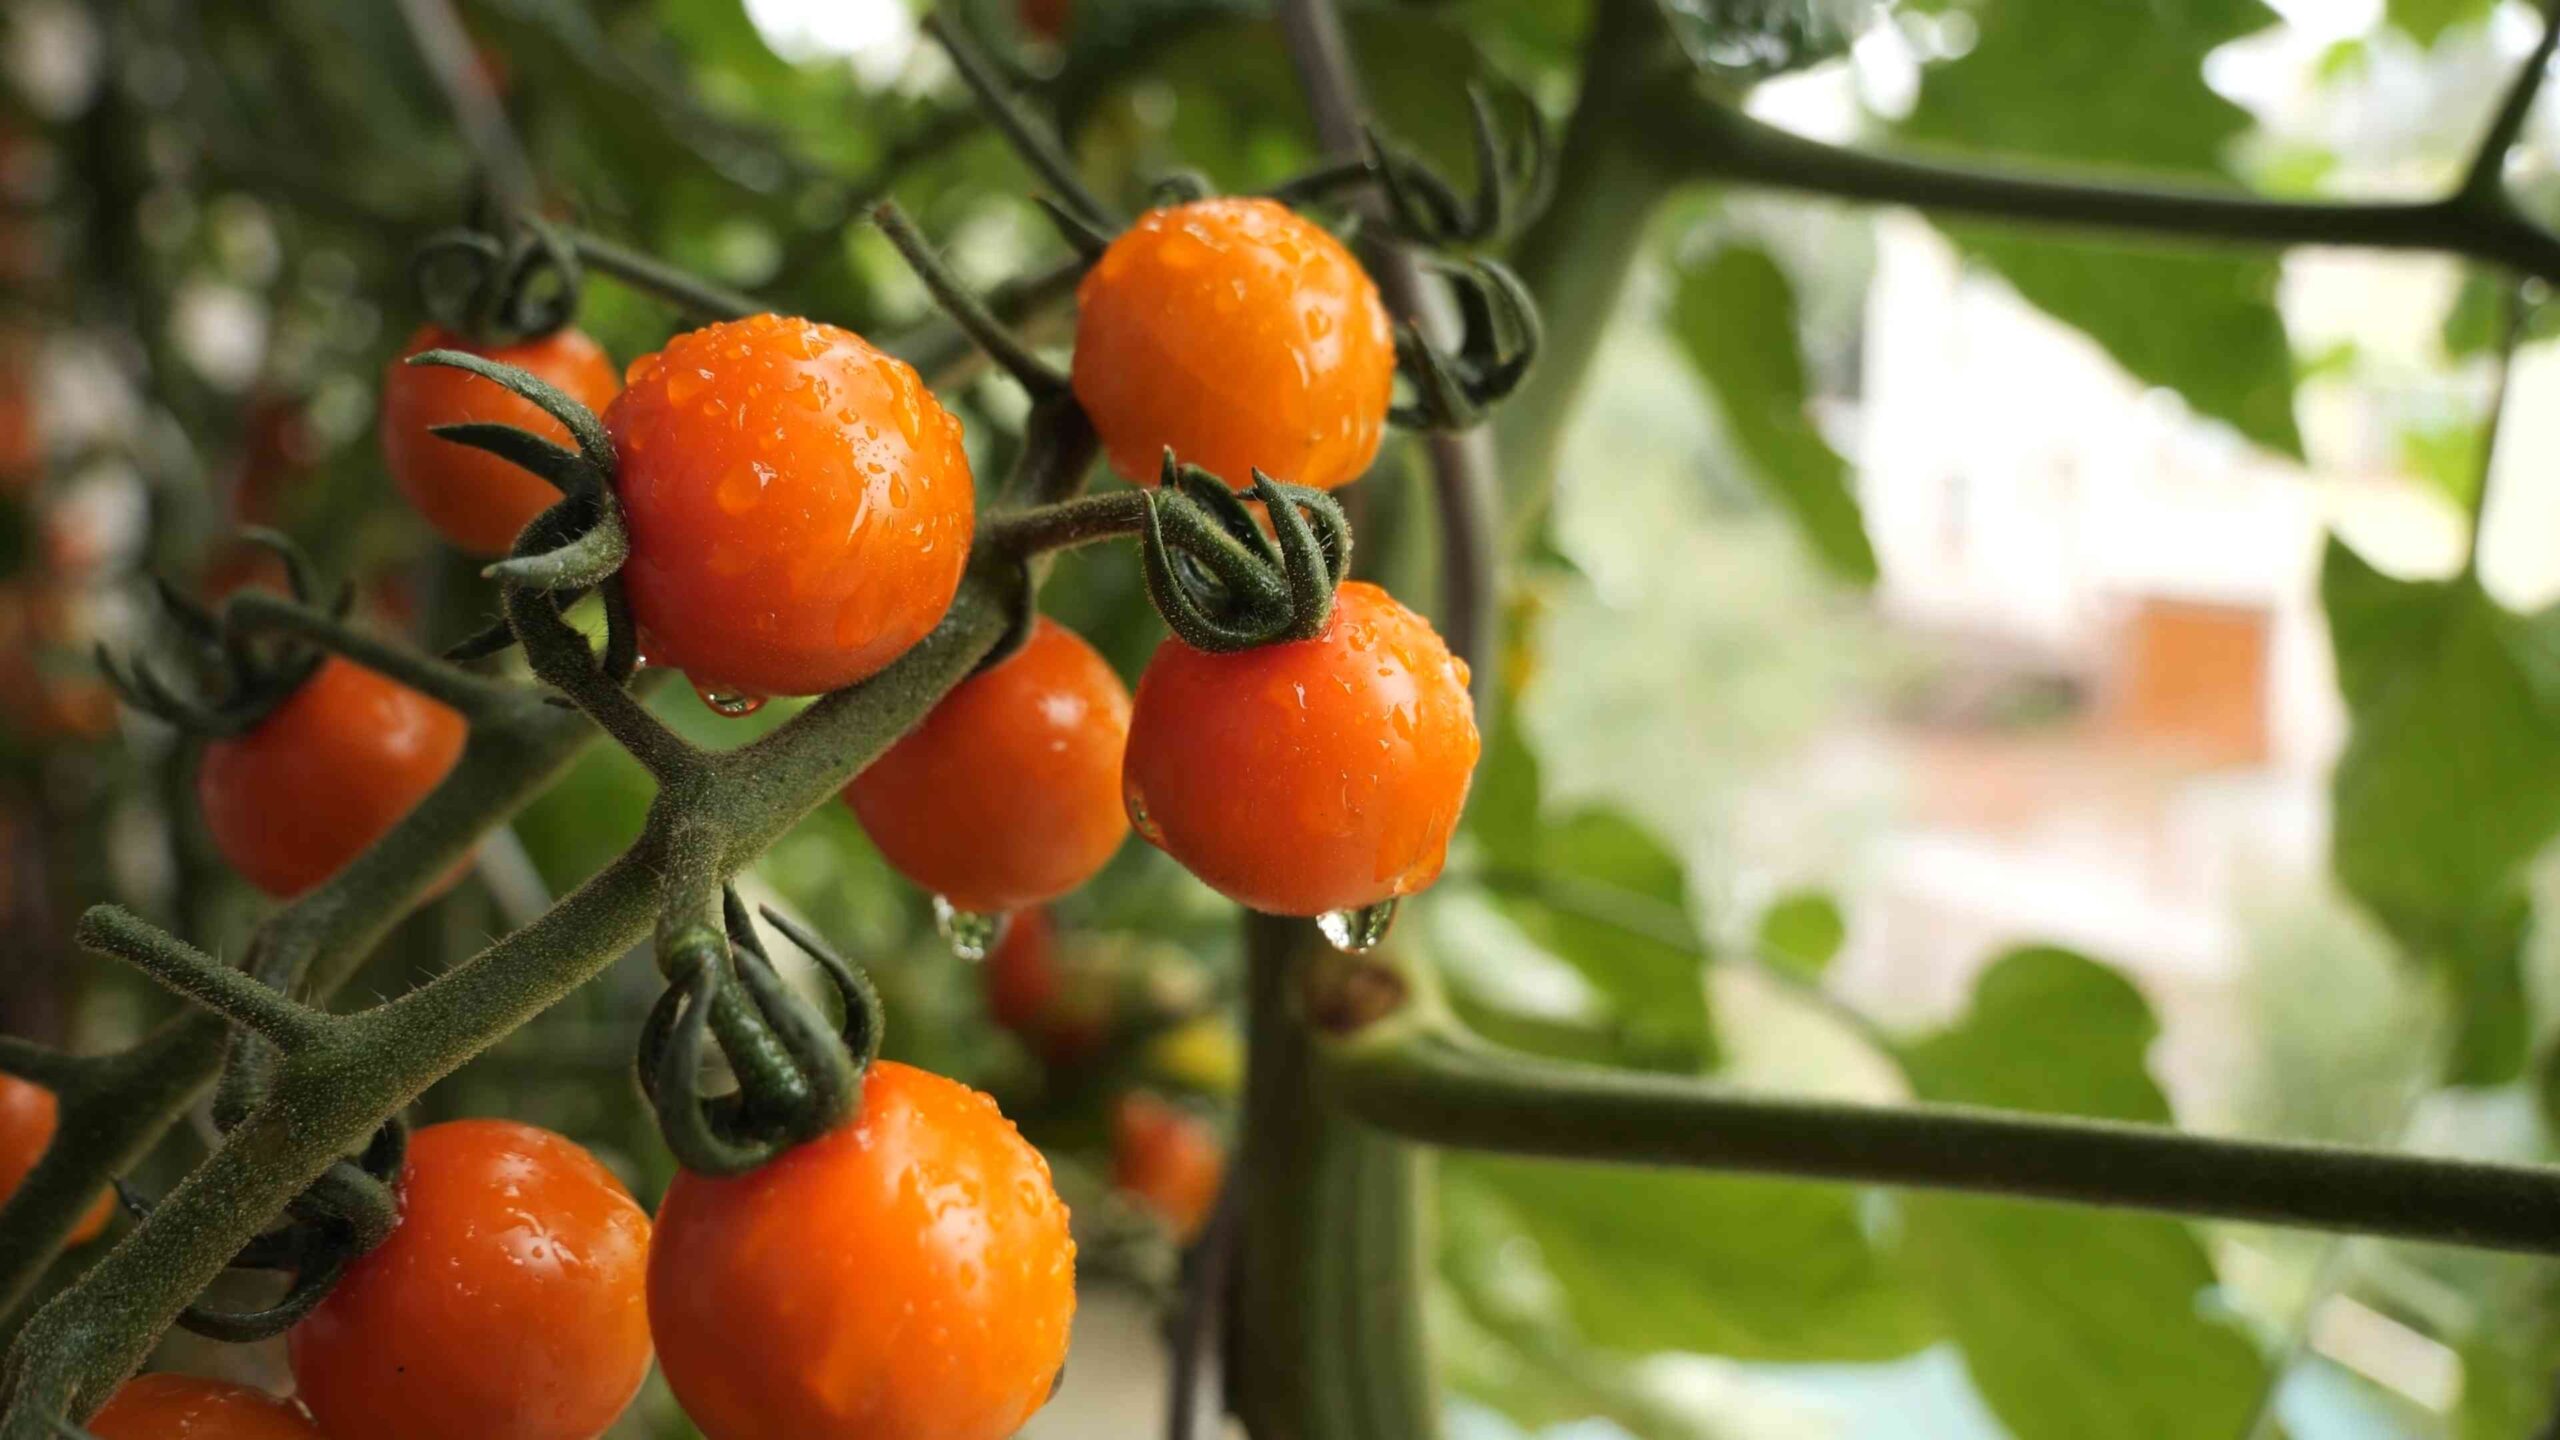
* Pick When Ripe: Tomatoes are ripe when they are fully colored and slightly soft to the touch. The color will depend on the variety.
* Gently Twist: Gently twist the tomato off the vine. If it doesn’t come off easily, it’s probably not quite ripe yet.
* Store Properly: Store ripe tomatoes at room temperature. Refrigerating them can affect their flavor and texture.
* Enjoy! Now it’s time to enjoy the fruits (or vegetables!) of your labor. Use your homegrown tomatoes in salads, sandwiches, sauces, or just eat them straight off the vine.
Troubleshooting Common Tomato Problems
Even with the best care, you may encounter some problems along the way. Here are a few common issues and how to deal with them:
* Blossom End Rot: This is caused by a calcium deficiency and results in a dark, leathery spot on the bottom of the tomato. To prevent blossom end rot, make sure your soil is well-drained and that you’re watering consistently. You can also add calcium to the soil by amending it with bone meal or crushed eggshells.
* Tomato Hornworms: These large green caterpillars can quickly defoliate your tomato plants. Handpick them off the plants and drop them into a bucket of soapy water.
* Aphids: These small, sap-sucking insects can weaken your tomato plants. Spray them off with a strong stream of water or use an insecticidal soap.
* Early Blight: This fungal disease causes dark spots on the leaves and can eventually kill the plant. Remove infected leaves and spray the plant with a fungicide.
* Cracking: This can happen when tomatoes get too much water after a dry spell. Try to water consistently and avoid overwatering.
Extra Tips for Tomato Success
Here are a few extra tips to help you grow the best tomatoes ever:
* Companion Planting: Plant basil, marigolds, or other companion plants near your tomatoes to help repel pests and attract beneficial insects.
* Rotate Your Crops: Don’t plant tomatoes in the same spot year after year. Rotate your crops to help prevent soilborne diseases.
* Save Your Seeds: If you’re growing heirloom tomatoes, you can save the seeds to plant next year. Let the tomatoes ripen fully on the vine, then scoop out the seeds and dry them on a paper towel.
*
Conclusion
So, there you have it! This DIY trick for nurturing your tomato plants is more than just a gardening hack; it’s a pathway to unlocking a bountiful harvest of juicy, flavorful tomatoes right in your own backyard. We’ve walked you through the simple steps, highlighting how easy it is to implement and the significant impact it can have on your tomato yield. Forget expensive fertilizers and complicated gardening techniques. This method is all about working *with* nature, providing your plants with the essential nutrients they crave in a readily available and sustainable way.
Why is this a must-try? Because it’s effective, economical, and environmentally friendly. You’re not just feeding your plants; you’re enriching the soil, creating a thriving ecosystem that supports healthy growth and delicious fruit. Imagine biting into a sun-ripened tomato, bursting with flavor, knowing that you nurtured it from seedling to table using a simple, natural technique. That’s the reward waiting for you.
Looking for variations? Absolutely! Consider adding crushed eggshells to your planting hole for an extra boost of calcium, which helps prevent blossom-end rot. You can also experiment with different types of organic matter, such as composted coffee grounds or banana peels, to see what works best for your soil and your tomato varieties. Remember to always monitor your plants and adjust your approach as needed. Gardening is a journey of learning and discovery, so don’t be afraid to experiment and find what works best for you.
We’re confident that this DIY trick will transform your tomato-growing experience. It’s a game-changer for both novice and experienced gardeners alike. The key is consistency and observation. Pay attention to your plants, provide them with the care they need, and watch them flourish.
Now, it’s your turn! We wholeheartedly encourage you to try this DIY trick for **growing tomatoes backyard** and witness the difference it makes. Don’t just take our word for it; experience the joy of harvesting your own homegrown tomatoes. And most importantly, share your experience with us! We’d love to hear about your successes, your challenges, and any variations you discover along the way. Share your photos, your tips, and your stories in the comments below. Let’s create a community of tomato-loving gardeners, all learning and growing together. Happy gardening!
Frequently Asked Questions (FAQ)
Q: What exactly is this DIY trick for growing tomatoes backyard, and why is it so effective?
A: The DIY trick we’re referring to involves enriching the soil with readily available organic matter during planting. This could include things like compost, well-rotted manure, or even specific amendments like bone meal or Epsom salts. The effectiveness stems from providing a slow-release source of essential nutrients directly to the roots of the tomato plants. Unlike synthetic fertilizers that can leach away quickly, organic matter breaks down gradually, feeding the plants consistently over time. This leads to stronger root systems, healthier foliage, and ultimately, a more abundant yield of delicious tomatoes. The specific blend of organic matter will depend on your soil type and the specific needs of your tomato variety, but the underlying principle remains the same: nourish the soil, and you’ll nourish your plants.
Q: What kind of organic matter is best to use for this DIY trick?
A: The best type of organic matter depends on your soil and what you have available. Compost is always a great choice, as it provides a balanced blend of nutrients and improves soil structure. Well-rotted manure is another excellent option, but be sure it’s fully composted to avoid burning the roots of your plants. Bone meal is a fantastic source of phosphorus, which is essential for root development and fruit production. Epsom salts can provide magnesium, which helps with chlorophyll production and overall plant health. You can also consider using coffee grounds (acidic, so use sparingly for acid-loving varieties), banana peels (rich in potassium), or even chopped-up leaves. The key is to use a variety of organic materials to provide a diverse range of nutrients.
Q: How much organic matter should I add to the planting hole?
A: A good rule of thumb is to amend the planting hole with about one-third organic matter. This means that about one-third of the soil in the hole should be compost, manure, or other organic amendments. Mix the organic matter thoroughly with the existing soil before planting your tomato seedling. Avoid adding too much organic matter, as this can create a soggy environment that can lead to root rot. It’s always better to err on the side of caution and add more organic matter later if needed.
Q: When is the best time to apply this DIY trick?
A: The best time to apply this DIY trick is at planting time. This allows the organic matter to start breaking down and releasing nutrients as the tomato plant’s roots are developing. You can also side-dress your tomato plants with additional organic matter throughout the growing season. This involves adding a layer of compost or manure around the base of the plant, being careful not to touch the stem.
Q: Can I use this DIY trick for all types of tomato plants?
A: Yes, this DIY trick is beneficial for all types of tomato plants, from determinate (bush) varieties to indeterminate (vining) varieties. However, the specific needs of each variety may vary slightly. For example, larger, indeterminate varieties may require more phosphorus to support their heavy fruit production. Be sure to research the specific needs of your tomato variety and adjust your approach accordingly.
Q: What if I don’t have access to compost or manure? Are there any other alternatives?
A: Absolutely! If you don’t have access to compost or manure, there are plenty of other alternatives. You can use commercially available organic fertilizers, such as fish emulsion or seaweed extract. These fertilizers provide a concentrated source of nutrients that can be easily applied to your tomato plants. You can also use cover crops, such as clover or buckwheat, to improve soil health and add organic matter to your garden. Simply plant the cover crop in the fall and till it into the soil in the spring before planting your tomatoes.
Q: How often should I water my tomato plants after applying this DIY trick?
A: Watering frequency depends on several factors, including the weather, soil type, and the size of your tomato plants. In general, you should water your tomato plants deeply and regularly, especially during hot, dry weather. Aim to keep the soil consistently moist, but not waterlogged. A good way to check if your plants need water is to stick your finger into the soil about an inch deep. If the soil feels dry, it’s time to water.
Q: What are some common problems that tomato plants face, and how can this DIY trick help prevent them?
A: Tomato plants are susceptible to a variety of problems, including blossom-end rot, fungal diseases, and pest infestations. This DIY trick can help prevent these problems by improving soil health and providing your plants with the nutrients they need to thrive. For example, adding calcium-rich amendments like crushed eggshells can help prevent blossom-end rot. Healthy plants are also more resistant to pests and diseases.
Q: How long will it take to see results from this DIY trick?
A: You should start to see results from this DIY trick within a few weeks of planting. Your tomato plants should be growing vigorously and producing healthy foliage. You may also notice an increase in the number of flowers and fruits. Keep in mind that results may vary depending on the specific conditions in your garden.
Q: Can I use this DIY trick in containers as well as in the ground?
A: Yes, this DIY trick works equally well in containers. When planting tomatoes in containers, be sure to use a high-quality potting mix and amend it with organic matter as described above. Container-grown tomatoes may require more frequent watering and fertilization than those grown in the ground.


Leave a Comment