

Growing Table Olives at Home might sound like a Mediterranean dream best left to sun-drenched groves, but I’m here to tell you it’s entirely achievable, even if your backyard is more suburban than Sicilian! For centuries, olives have been a symbol of peace, prosperity, and deliciousness, deeply woven into the cultures of the Mediterranean and beyond. Think of the ancient Greeks, crowning victors with olive wreaths, or the Roman Empire, relying on olive oil as a staple.
But why should you consider growing table olives at home? Well, imagine the satisfaction of harvesting your own plump, flavorful olives, knowing exactly where they came from and how they were grown. Plus, store-bought olives can be expensive and often lack the vibrant taste of freshly cured fruit. This DIY guide will walk you through everything you need to know, from selecting the right olive variety for your climate to the simple curing process that transforms bitter fruits into culinary delights.
Ready to ditch the store-bought jars and embark on a rewarding gardening adventure? Let’s get started and bring a taste of the Mediterranean to your own backyard!
Growing Table Olives at Home: A DIY Guide
Okay, so you want to grow your own table olives? Awesome! It’s a rewarding process, though it does require patience. Don’t expect a bumper crop overnight. But trust me, the taste of homegrown, cured olives is totally worth the effort. Here’s everything I’ve learned about growing and preparing table olives at home.
Choosing the Right Olive Variety
First things first, you can’t just plant any olive tree and expect delicious table olives. Some varieties are better suited for oil production, while others are specifically bred for eating. Here’s what to look for:
* **Size Matters:** Look for varieties that produce larger fruit. Bigger olives are easier to pit and have more flesh.
* **Oil Content:** While you want some oil for flavor, varieties with excessively high oil content can be harder to cure.
* **Taste Profile:** Consider the flavor you prefer. Some olives are naturally milder, while others have a more intense, briny taste.
* **Climate Compatibility:** This is crucial! Make sure the variety you choose is suited to your local climate. Olives generally thrive in Mediterranean climates with mild winters and hot, dry summers.
Some popular table olive varieties include:
* **Manzanilla:** A classic Spanish variety, known for its mild flavor and firm texture. It’s a good all-around choice.
* **Sevillano:** Another Spanish variety, larger than Manzanilla, with a slightly more robust flavor.
* **Ascolano:** An Italian variety, prized for its large size and buttery flavor. It’s often stuffed with pimentos.
* **Mission:** A California heirloom variety, known for its versatility and adaptability.
Do your research! Contact your local nursery or agricultural extension office to find out which varieties perform best in your area.
Planting Your Olive Tree
Okay, you’ve got your variety picked out. Now it’s time to get that tree in the ground!
1. **Timing is Key:** The best time to plant an olive tree is in the spring or early fall, when the weather is mild. This gives the tree time to establish its roots before the extremes of summer or winter.
2. **Choose the Right Location:** Olives need plenty of sunshine – at least 6-8 hours per day. They also prefer well-drained soil. Avoid planting in areas where water tends to pool.
3. **Prepare the Soil:** Dig a hole that’s twice as wide as the root ball and just as deep. Amend the soil with compost or other organic matter to improve drainage and fertility.
4. **Plant the Tree:** Gently remove the tree from its container and loosen any circling roots. Place the tree in the hole, making sure the top of the root ball is level with the surrounding soil.
5. **Backfill and Water:** Backfill the hole with the amended soil, tamping it down gently. Water thoroughly to settle the soil and remove any air pockets.
6. **Mulch:** Apply a layer of mulch around the base of the tree to help retain moisture and suppress weeds. Keep the mulch a few inches away from the trunk to prevent rot.
7. **Stake (Optional):** If you live in a windy area, you may want to stake the tree for the first year or two to provide support.
Caring for Your Olive Tree
Once your olive tree is planted, it’s important to provide it with proper care to ensure its health and productivity.
* **Watering:** Young olive trees need regular watering, especially during dry periods. Water deeply and infrequently, allowing the soil to dry out slightly between waterings. Once the tree is established, it will be more drought-tolerant.
* **Fertilizing:** Olives benefit from regular fertilization. Apply a balanced fertilizer in the spring, following the instructions on the package. You can also amend the soil with compost or other organic matter.
* **Pruning:** Pruning is essential for maintaining the shape and health of your olive tree. Prune in late winter or early spring, before new growth begins. Remove any dead, damaged, or crossing branches. Also, prune to open up the canopy and allow sunlight to penetrate.
* **Pest and Disease Control:** Olives are generally resistant to pests and diseases, but they can be susceptible to certain problems, such as olive fruit fly and verticillium wilt. Monitor your tree regularly for signs of trouble and take appropriate action if necessary. Consult your local agricultural extension office for advice on pest and disease control in your area.
Harvesting Your Olives
Okay, this is where the fun begins! Harvesting olives is a bit of an art, and the timing depends on the variety and your personal preference.
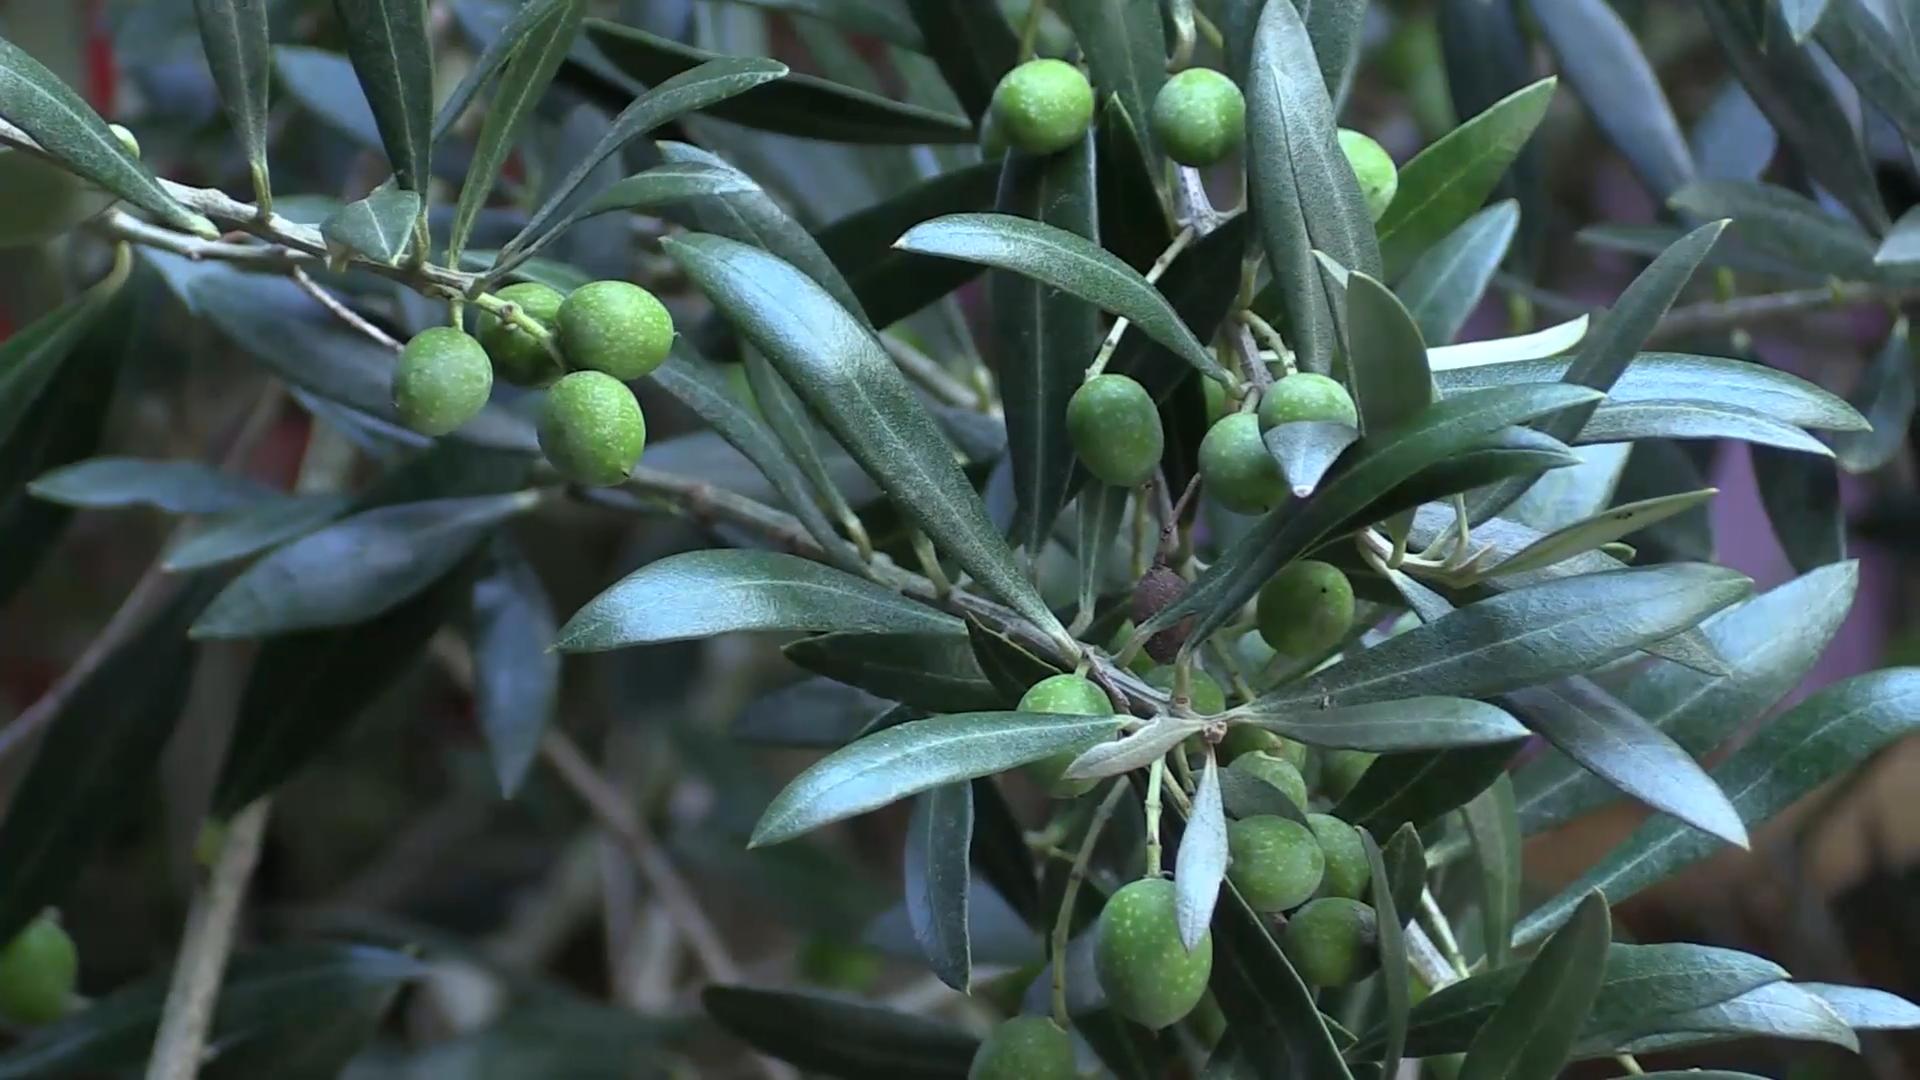
* **When to Harvest:** Table olives are typically harvested when they are still green or just starting to turn color. The exact timing will vary depending on the variety and your desired level of bitterness. Green olives are generally firmer and more bitter, while black olives are softer and milder.
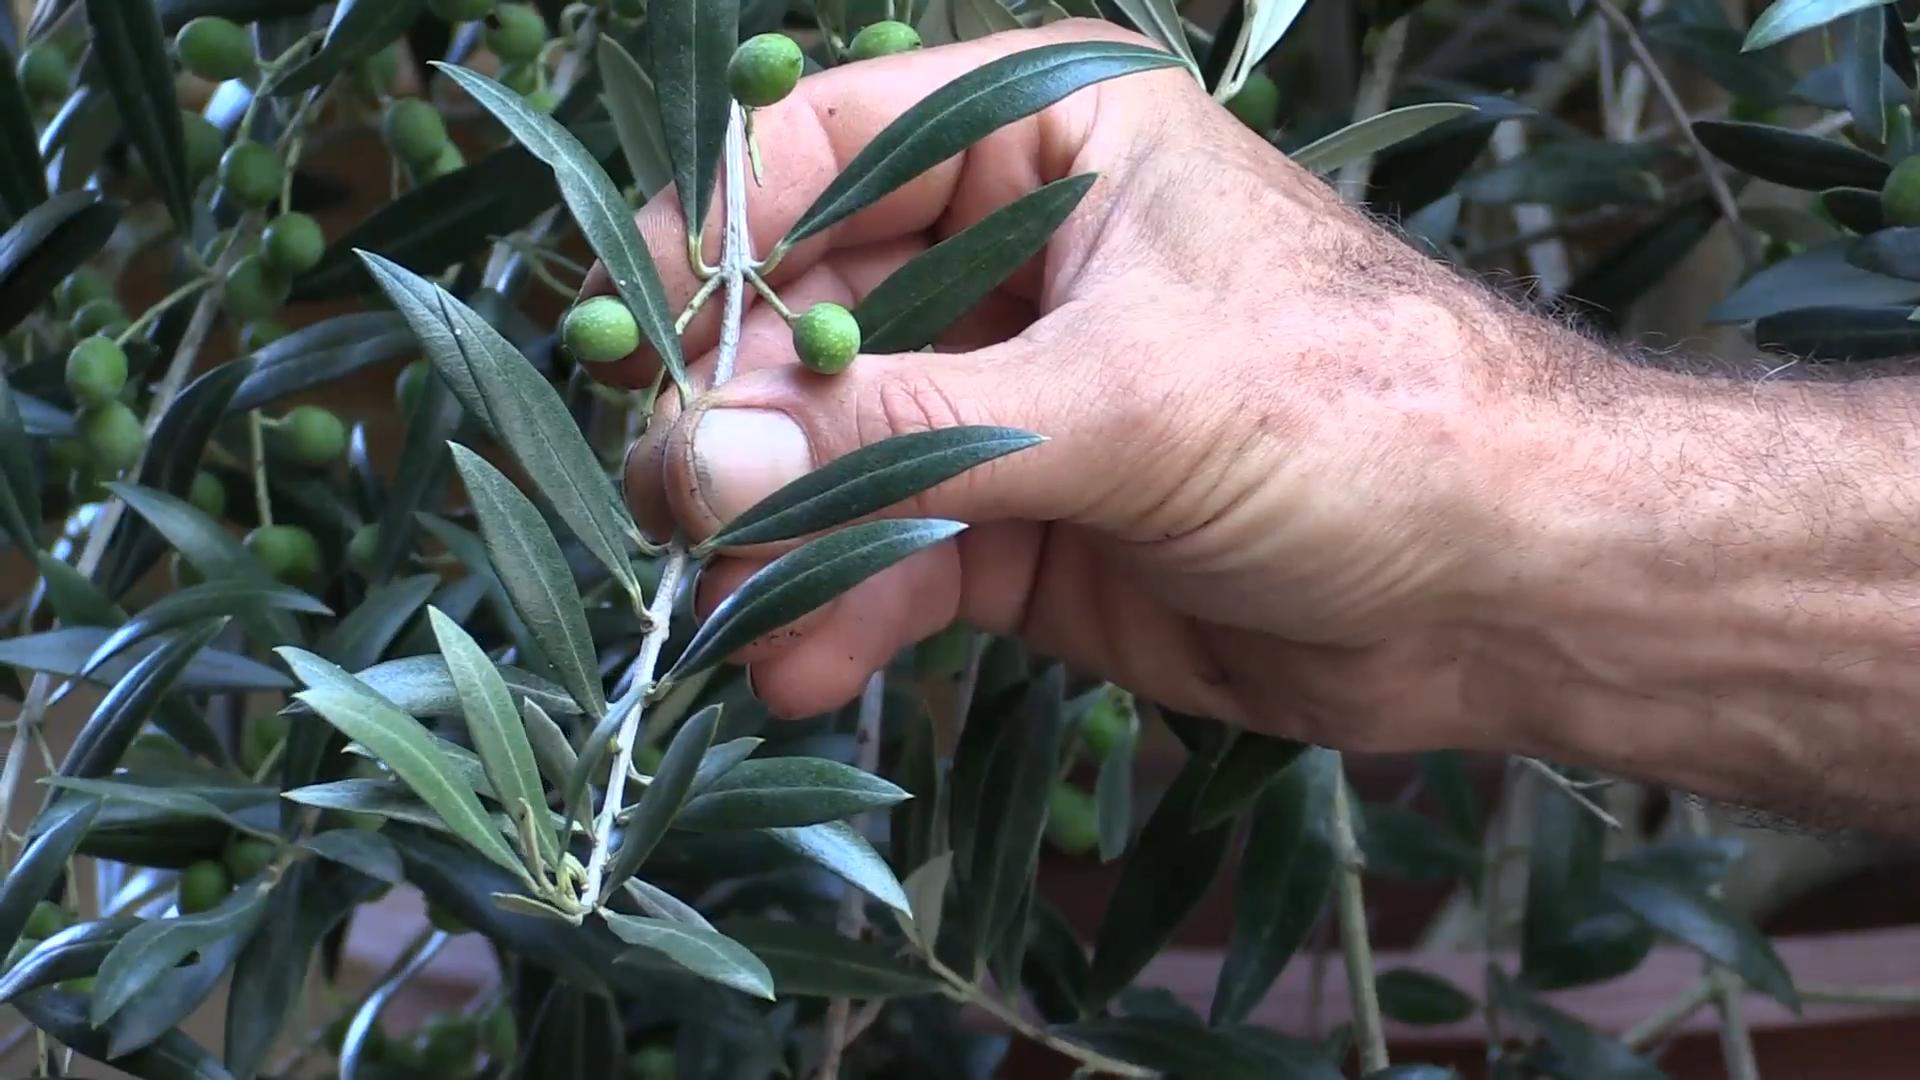
* **How to Harvest:** The easiest way to harvest olives is to hand-pick them from the tree. Gently twist the olives off the branches, being careful not to damage the tree. You can also use a fruit-picking tool to reach higher branches.
* **Handle with Care:** Olives are delicate and can bruise easily. Handle them gently to avoid damaging them.
Curing Your Olives: The Magic Begins!
This is the most crucial part! Raw olives are incredibly bitter and inedible. Curing removes the bitterness and transforms them into the delicious treats we know and love. There are several methods for curing olives, but here are two popular options:
Lye Curing
This is the fastest method, but it requires careful handling of lye (sodium hydroxide), which is a caustic substance. Always wear gloves and eye protection when working with lye.
1. **Prepare the Lye Solution:** Dissolve lye in water according to the instructions on the lye package. The concentration will vary depending on the type of lye you’re using. Always add lye to water, never water to lye.
2. **Soak the Olives:** Place the olives in a non-reactive container (glass, plastic, or stainless steel) and cover them with the lye solution.
3. **Monitor the Olives:** Soak the olives for 8-24 hours, depending on their size and variety. Check them periodically by cutting one open and tasting the flesh. The lye solution should have penetrated about halfway through the olive.
4. **Rinse Thoroughly:** Drain the lye solution and rinse the olives thoroughly with cold water. Repeat the rinsing process several times over the next few days, until all traces of lye are gone. You can test the pH of the water to ensure it’s neutral.
5. **Brine:** Once the olives are rinsed, place them in a brine solution (salt and water) for several weeks or months to ferment and develop flavor. The brine concentration should be around 8-10%. You can add herbs, spices, or vinegar to the brine for added flavor.
6. **Taste and Enjoy:** After several weeks, taste the olives. If they are still too bitter, continue brining them for longer. Once they are to your liking, they are ready to eat!
Water Curing
This method is slower and gentler than lye curing, but it’s also safer and easier.
1. **Soak the Olives:** Place the olives in a non-reactive container and cover them with fresh water.
2. **Change the Water Daily:** Change the water every day for several weeks or months. This will gradually leach out the bitterness.
3. **Taste and Test:** Taste the olives periodically to check their progress. The amount of time it takes to cure them will depend on their size and variety.
4. **Brine:** Once the olives are no longer bitter, place them in a brine solution (salt and water) for several weeks or months to ferment and develop flavor. The brine concentration should be around 8-10%. You can add herbs, spices, or vinegar to the brine for added flavor.
5. **Taste and Enjoy:** After several weeks, taste the olives. If they are still too bitter, continue brining them for longer. Once they are to your liking, they are ready to eat!
Brining and Flavoring Your Olives
Whether you’ve used lye or water curing, the brining process is essential for developing the final flavor of your olives.
* **Brine Solution:** A basic brine solution consists of salt and water. The concentration should be around 8-10%. You can use sea salt, kosher salt, or pickling salt.
* **Flavorings:** This is where you can get creative! Add herbs, spices, garlic, lemon peel, vinegar, or other flavorings to the brine to customize the taste of your olives. Some popular combinations include:
* Garlic and oregano
* Lemon peel and rosemary
* Chili flakes and garlic
* Vinegar and bay leaf
* **Fermentation:** The brining process allows the olives to ferment, which further enhances their flavor and texture.
Conclusion
So, there you have it! Growing table olives at home might seem like a daunting task, but with a little patience, the right techniques, and this simple DIY trick, you can transform those bitter fruits into delectable, brined olives ready to grace your next charcuterie board or Mediterranean feast. This isn’t just about saving money; it’s about connecting with your food, understanding the process from tree to table, and enjoying the unparalleled satisfaction of harvesting and preparing your own homegrown delicacies.
This DIY method, focusing on [Specific Brining Method – e.g., lye curing or water curing – choose one based on your article’s content], offers a gentler, more controlled approach compared to some commercial processes. You have complete control over the ingredients, ensuring a final product free from unwanted additives or excessive salt. Plus, it’s a fantastic way to reduce food waste if you have an olive tree in your backyard or access to locally grown olives.
Don’t be afraid to experiment! Once you’ve mastered the basic technique, consider variations. Infuse your brine with herbs like rosemary, thyme, or oregano for an aromatic twist. Add a chili pepper for a spicy kick. Try different types of vinegar, such as red wine vinegar or apple cider vinegar, to alter the flavor profile. You could even explore different brining solutions, adjusting the salt concentration to achieve your preferred level of saltiness. Another variation is to try different methods of scoring the olives before brining. Some people prefer a single deep cut, while others opt for multiple shallow slits. Each method can affect the speed and evenness of the curing process.
This DIY olive curing trick is a game-changer for anyone looking to enjoy the freshest, most flavorful table olives possible. It’s a rewarding project that connects you to the land and allows you to savor the fruits of your labor – literally!
We wholeheartedly encourage you to give this DIY trick a try. It’s easier than you might think, and the results are well worth the effort. Once you’ve successfully cured your own batch of table olives, we’d love to hear about your experience! Share your photos, tips, and variations in the comments below. Let’s build a community of home olive curers and inspire others to embark on this delicious journey. What are you waiting for? Get brining!
Frequently Asked Questions (FAQs)
What type of olives are best for curing?
The best olives for curing are those specifically grown for table olive production. These varieties tend to have a higher flesh-to-pit ratio and a more desirable flavor profile. Some popular choices include Manzanilla, Sevillano, Mission, and Kalamata olives. However, you can experiment with other varieties as well. Just be aware that the curing time and final flavor may vary. It’s important to research the specific characteristics of the olive variety you choose to ensure the best results. Also, make sure the olives are mature but not overripe. They should be firm to the touch and have a uniform color. Avoid using olives that are bruised, damaged, or have signs of insect infestation.
How long does it take to cure olives using this DIY method?
The curing time can vary depending on the method you choose (lye curing or water curing), the size and variety of the olives, and your personal preference. Lye curing is generally faster, taking anywhere from a few days to a week. Water curing, on the other hand, can take several weeks or even months. The key is to taste the olives periodically to check for bitterness. They are ready when they have reached your desired level of bitterness and have a pleasant, briny flavor. Remember that patience is key! Rushing the process can result in olives that are still bitter or have an unpleasant texture.
Can I use sea salt instead of regular table salt for the brine?
Yes, you can definitely use sea salt for the brine. In fact, many people prefer sea salt because it contains trace minerals that can enhance the flavor of the olives. However, it’s important to use a pure sea salt that doesn’t contain any additives or anti-caking agents. Also, be aware that sea salt can vary in salinity, so you may need to adjust the amount you use to achieve the desired salt concentration. Kosher salt is another good option, as it is also pure and doesn’t contain iodine. Avoid using iodized table salt, as the iodine can sometimes impart an unpleasant flavor to the olives.
How do I store cured olives?
Proper storage is essential to maintain the quality and flavor of your cured olives. The best way to store them is in an airtight container submerged in their brine. Make sure the brine completely covers the olives to prevent them from drying out or spoiling. Store the container in the refrigerator. Properly stored olives can last for several months in the refrigerator. If you notice any signs of spoilage, such as mold or an off odor, discard the olives immediately. You can also freeze cured olives, but be aware that this may affect their texture.
What if my olives are still bitter after curing?
If your olives are still bitter after the initial curing process, don’t worry! This is a common problem, and it’s easily remedied. Simply continue the curing process for a longer period of time. Change the water or brine regularly to help draw out the remaining bitterness. You can also try adding a small amount of vinegar to the brine, as this can help to neutralize the bitter compounds. Taste the olives periodically to check for bitterness. Once they have reached your desired level of bitterness, they are ready to eat.
Can I use this method to cure green olives?
Yes, this method is suitable for curing both green and black olives. However, green olives tend to be more bitter than black olives, so they may require a longer curing time. The key is to taste the olives periodically and adjust the curing time accordingly. Also, be aware that green olives may have a firmer texture than black olives, even after curing.
Is it safe to cure olives at home?
Yes, it is generally safe to cure olives at home, as long as you follow proper food safety guidelines. It’s important to use clean equipment and ingredients, and to store the olives properly to prevent spoilage. Also, be aware that raw olives contain a bitter compound called oleuropein, which can be irritating to the digestive system. The curing process helps to break down this compound, making the olives safe to eat. Always taste the olives before consuming them to ensure that they are not too bitter. If you have any concerns about food safety, consult with a food safety expert.
What are some common mistakes to avoid when curing olives?
Some common mistakes to avoid when curing olives include:
* Using olives that are not fully mature.
* Not changing the water or brine frequently enough.
* Using iodized table salt.
* Not storing the olives properly.
* Rushing the curing process.
* Not tasting the olives periodically to check for bitterness.
By avoiding these mistakes, you can ensure that your DIY olive curing project is a success. Remember to be patient, follow the instructions carefully, and enjoy the process!


Leave a Comment