

DIY Cucumber Soap Recipe: Who doesn’t love the refreshing feeling of clean, healthy skin? Imagine stepping out of the shower feeling invigorated, with a subtle, natural fragrance lingering on your skin. That’s the magic of homemade cucumber soap! For centuries, cucumbers have been celebrated for their soothing and hydrating properties, dating back to ancient civilizations where they were used in beauty rituals.
But why should you bother making your own soap when you can just buy it at the store? Well, store-bought soaps often contain harsh chemicals and artificial fragrances that can irritate sensitive skin. With my DIY Cucumber Soap Recipe, you have complete control over the ingredients, ensuring a gentle and nourishing cleanse. Plus, it’s incredibly rewarding to create something yourself!
This DIY project is perfect for anyone looking to reduce their exposure to synthetic ingredients, embrace a more sustainable lifestyle, or simply enjoy a fun and creative activity. I’ll guide you through each step, making it easy to whip up a batch of refreshing cucumber soap that will leave your skin feeling soft, hydrated, and revitalized. Get ready to ditch those harsh chemicals and embrace the natural goodness of homemade soap!
DIY Cucumber Soap: A Refreshing Treat for Your Skin
Hey there, fellow DIY enthusiasts! Today, I’m super excited to share one of my favorite homemade soap recipes: cucumber soap! This soap is incredibly refreshing, especially during the warmer months, and it’s packed with skin-loving benefits thanks to the cucumber. Plus, making your own soap is surprisingly easy and a whole lot of fun. Let’s dive in!
Why Cucumber Soap?
Cucumber isn’t just a tasty snack; it’s a powerhouse ingredient for skincare! It’s naturally hydrating, soothing, and contains antioxidants that can help protect your skin from damage. Cucumber soap can help:
* Hydrate and moisturize your skin: Cucumber has a high water content, making it a fantastic natural moisturizer.
* Soothe irritated skin: Its anti-inflammatory properties can calm redness, sunburn, and other skin irritations.
* Reduce puffiness: Cucumber can help reduce swelling and puffiness, especially around the eyes.
* Brighten your complexion: It contains vitamins and minerals that can help even out skin tone and give you a healthy glow.
* Gently cleanse: Cucumber is gentle enough for even sensitive skin, making it a great addition to your daily cleansing routine.
What You’ll Need: Gathering Your Supplies
Before we get started, let’s gather all the necessary ingredients and equipment. Safety first, so make sure you have everything ready before you begin!
Ingredients:
* Melt and Pour Soap Base (Glycerin or Goat Milk): 1 pound. I personally love using a clear glycerin base because it allows the green color of the cucumber to really shine through, but a goat milk base will give you a creamier, more moisturizing soap.
* Fresh Cucumber: 1 medium-sized cucumber. Organic is always best to avoid pesticides.
* Carrier Oil (Optional): 1 tablespoon. This is optional, but adding a carrier oil like sweet almond oil, jojoba oil, or avocado oil can boost the moisturizing properties of your soap.
* Essential Oil (Optional): 10-15 drops. Cucumber has a very mild scent, so adding a complementary essential oil can enhance the aroma. I recommend tea tree, peppermint, or spearmint for a refreshing scent.
* Green Soap Colorant (Optional): A few drops. If you want a more vibrant green color, you can add a few drops of soap-safe green colorant. Mica powder also works well.
* Dried Cucumber Slices (Optional): For decoration. These add a beautiful, natural touch to your finished soap.
Equipment:
* Double Boiler or Microwave-Safe Bowl: For melting the soap base. A double boiler provides more even heating, but a microwave works just fine.
* Sharp Knife and Cutting Board: For preparing the cucumber.
* Blender or Food Processor: To puree the cucumber.
* Spatula or Spoon: For stirring the soap.
* Soap Molds: Silicone molds are the easiest to use, but you can also use plastic containers or even cardboard boxes lined with parchment paper.
* Spray Bottle with Rubbing Alcohol: To remove bubbles from the surface of the soap.
* Measuring Cups and Spoons: For accurate measurements.
* Gloves and Eye Protection: Safety first! Always wear gloves and eye protection when working with hot soap.
Step-by-Step Instructions: Making Your Cucumber Soap
Alright, let’s get to the fun part! Follow these steps carefully to create your own batch of refreshing cucumber soap.
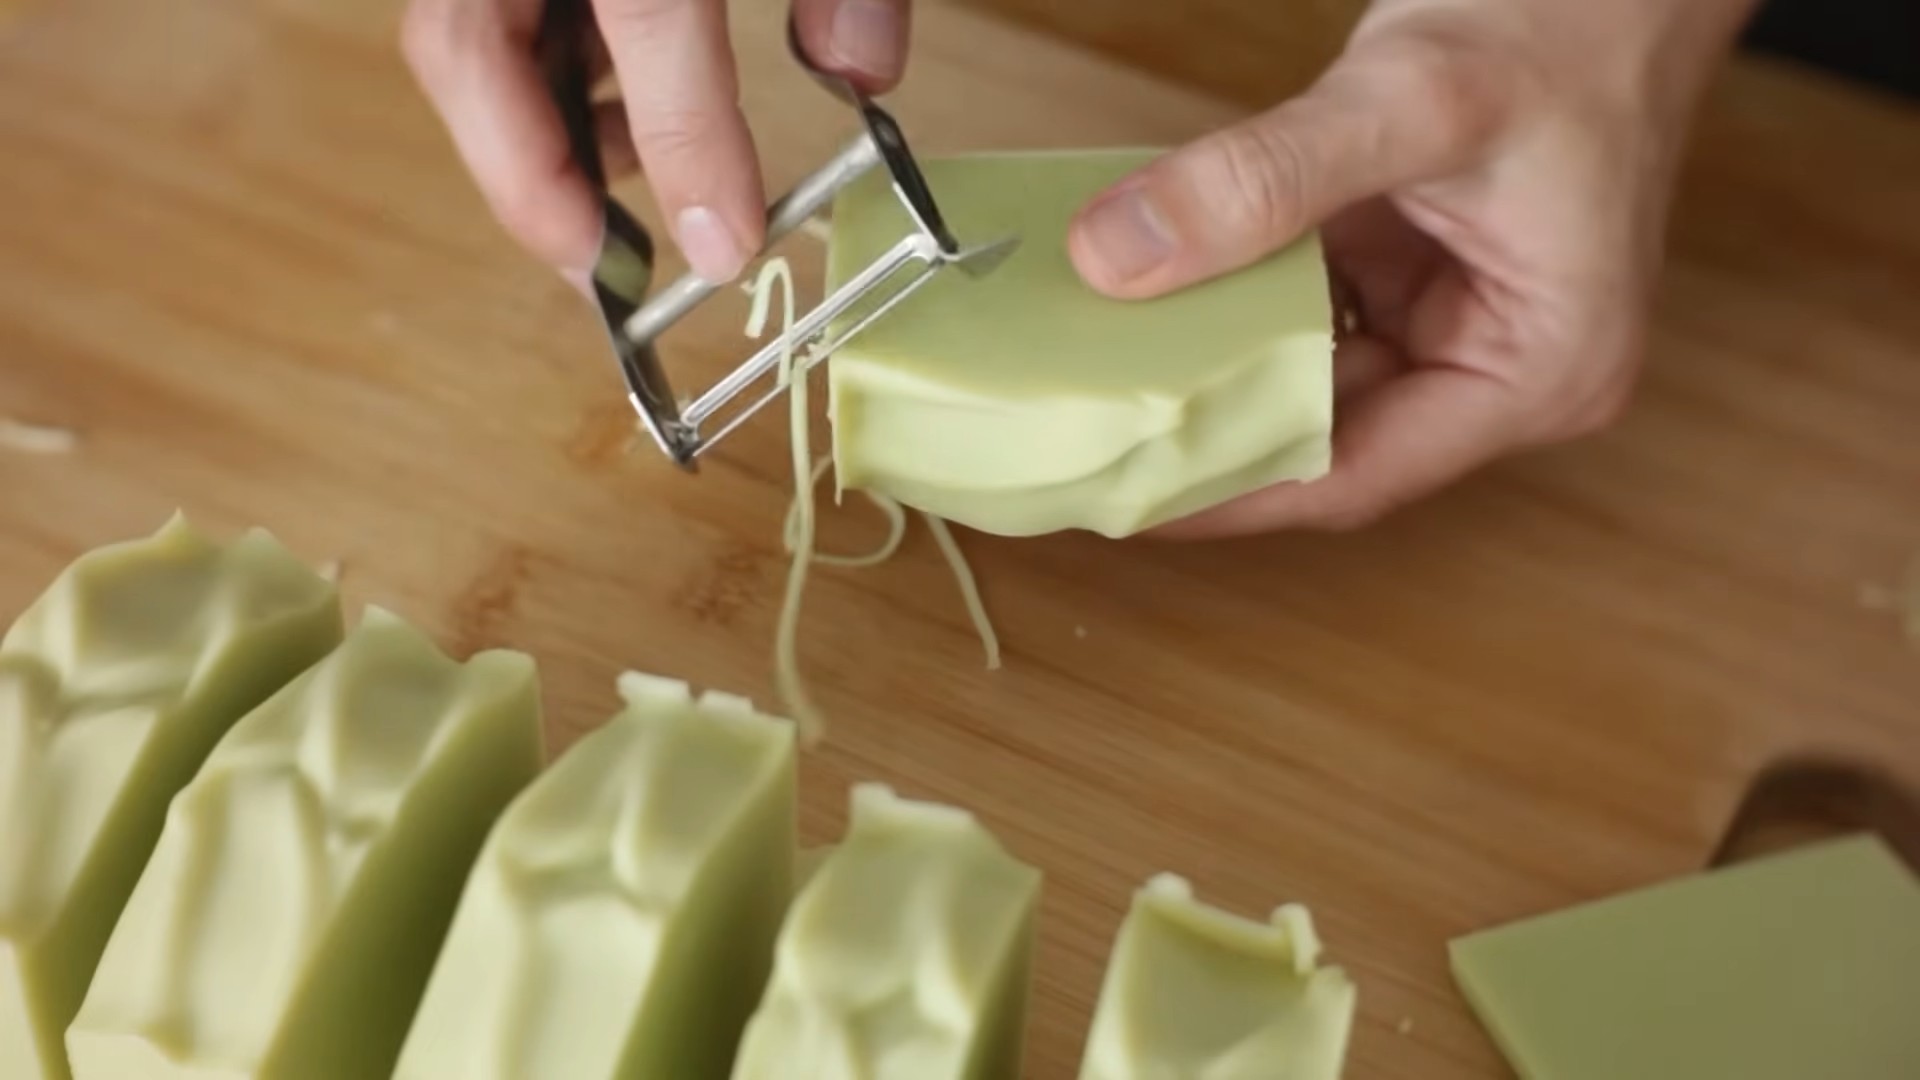
1. Prepare the Cucumber:
* Wash the cucumber thoroughly: Even if it’s organic, give it a good wash to remove any dirt or debris.
* Peel the cucumber (optional): You can leave the peel on for added nutrients and a slightly more textured soap, but peeling it will result in a smoother soap.
* Chop the cucumber into small pieces: This will make it easier to blend.
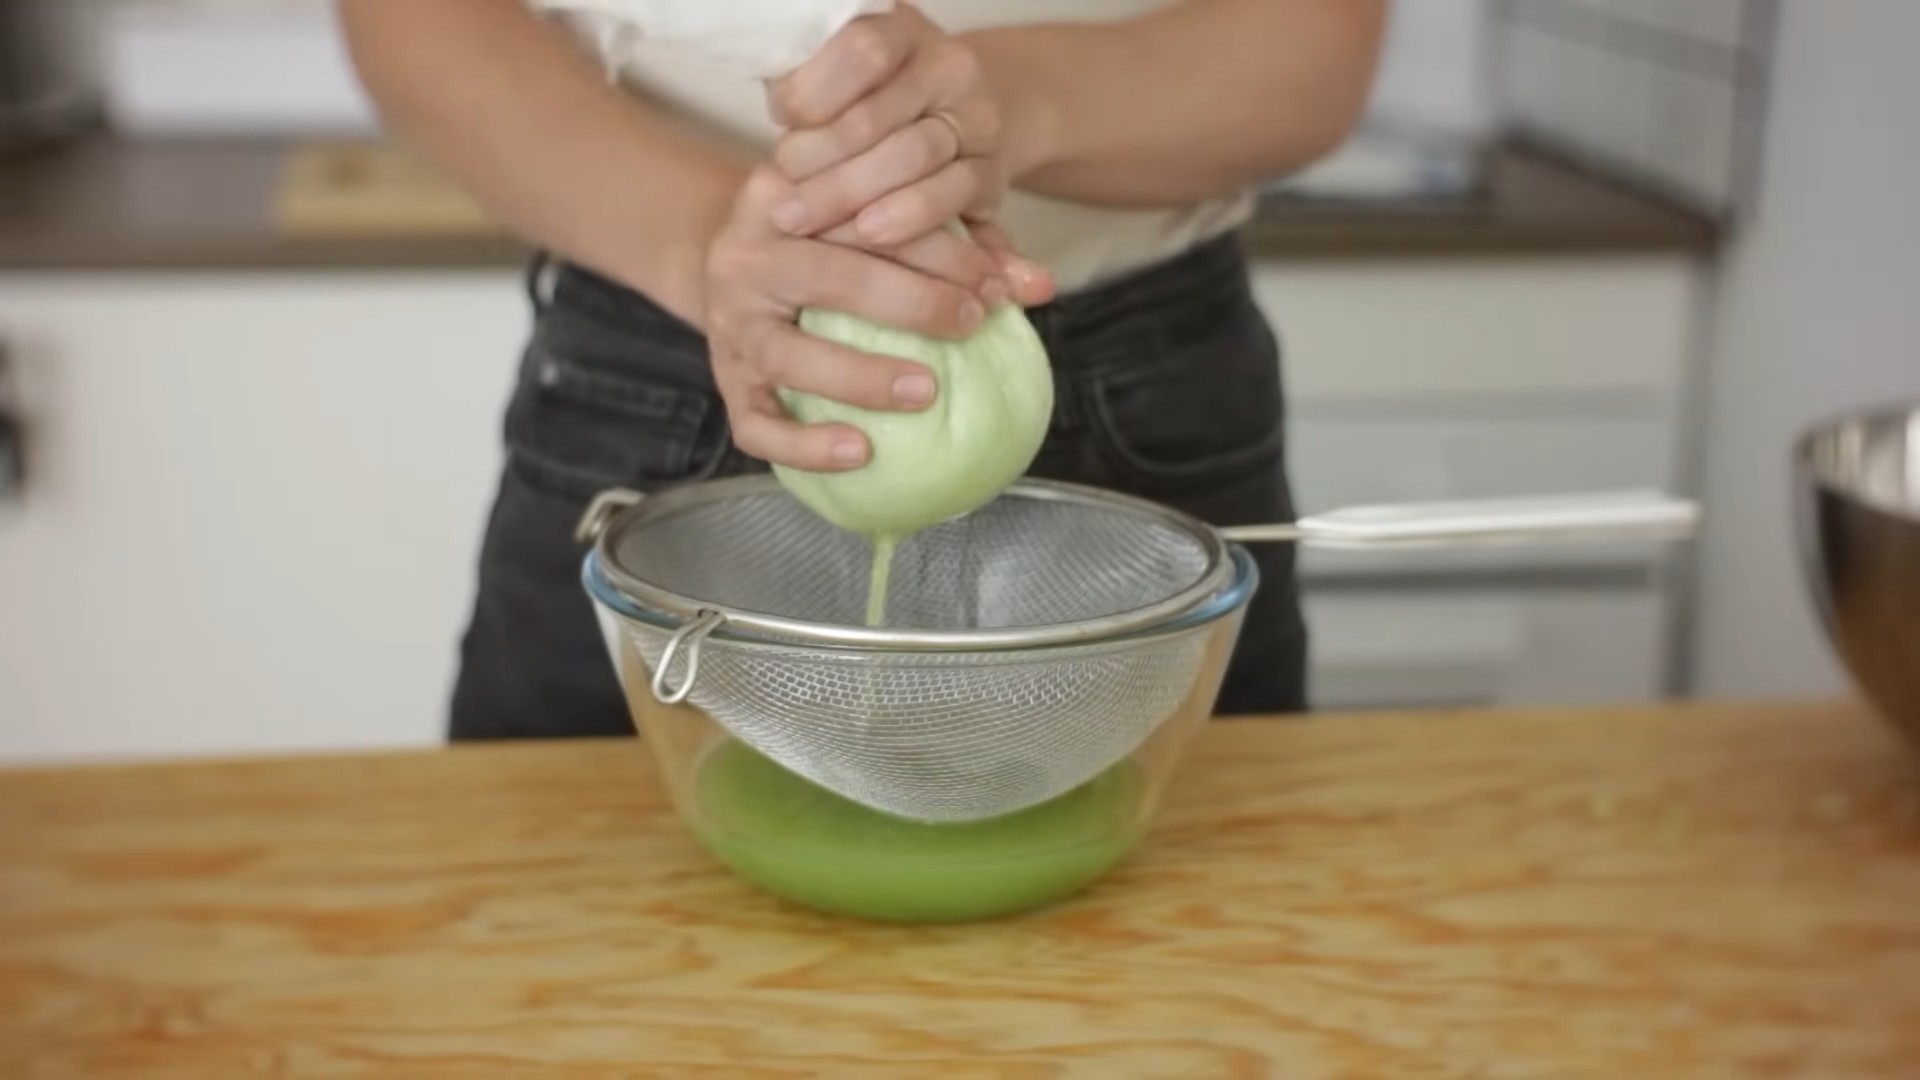
* Puree the cucumber: Place the chopped cucumber in a blender or food processor and blend until smooth. You should have about 1/2 cup of cucumber puree.
* Strain the cucumber puree (optional): If you want a very smooth soap, you can strain the puree through a fine-mesh sieve to remove any pulp. However, I personally like to leave the pulp in for added texture and nutrients.
2. Melt the Soap Base:
* Cut the soap base into small cubes: This will help it melt more evenly.
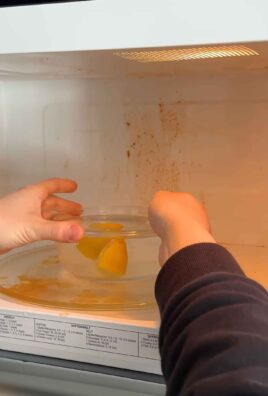
* Melt the soap base using a double boiler or microwave:
* Double Boiler: Place the soap base in the top of a double boiler over simmering water. Stir occasionally until completely melted.
* Microwave: Place the soap base in a microwave-safe bowl and microwave in 30-second intervals, stirring in between, until completely melted. Be careful not to overheat the soap, as this can cause it to burn.
* Remove the melted soap base from the heat.
3. Add the Cucumber and Other Ingredients:
* Let the soap base cool slightly: Allow the melted soap base to cool for a few minutes before adding the cucumber puree. This will prevent the heat from cooking the cucumber and potentially affecting its beneficial properties.
* Add the cucumber puree: Pour the cucumber puree into the melted soap base and stir gently until well combined.
* Add the carrier oil (optional): If using, add the carrier oil and stir gently.
* Add the essential oil (optional): If using, add the essential oil and stir gently.
* Add the soap colorant (optional): If using, add a few drops of soap colorant and stir gently until you achieve your desired color. Remember, a little goes a long way!
4. Pour into Molds:
* Pour the soap mixture into your chosen molds: Pour slowly and carefully to avoid creating bubbles.
* Spray the surface with rubbing alcohol: This will help remove any bubbles that may have formed on the surface of the soap.
* Add dried cucumber slices (optional): If using, gently press dried cucumber slices into the top of the soap for decoration.
5. Let the Soap Harden:
* Let the soap harden completely: This will usually take several hours, or even overnight. You can speed up the process by placing the molds in the refrigerator.
* Remove the soap from the molds: Once the soap is completely hardened, gently remove it from the molds. If you’re using silicone molds, you can simply push the soap out from the bottom. If you’re using other types of molds, you may need to loosen the edges with a knife.
6. Cure the Soap (Optional):
* Cure the soap for 1-2 weeks: Curing allows the soap to harden further and helps to improve its lather and longevity. To cure the soap, place it on a wire rack in a cool, dry place with good air circulation. Turn the soap occasionally to ensure even drying.
Tips and Tricks for Perfect Cucumber Soap
Here are a few extra tips and tricks to help you create the best cucumber soap possible:
* Use fresh, high-quality ingredients: The better the ingredients, the better the soap!
* Don’t overheat the soap base: Overheating can cause the soap to burn and become brittle.
* Stir gently: Avoid over-stirring the soap, as this can create bubbles.
* Experiment with different essential oils: Find a scent that you love!
* Get creative with your molds: Use different shapes and sizes to create unique soaps.
* Add other beneficial ingredients: Consider adding other skin-loving ingredients like honey, oatmeal, or clay.
* Adjust the recipe to your liking: Feel free to experiment with the amounts of cucumber puree, carrier oil, and essential oil to create a soap that’s perfect for your skin.
* Store your soap properly: Store your finished soap in a cool, dry place to prevent it from melting or becoming sticky.
Troubleshooting: Common Issues and Solutions
Sometimes, things don’t go exactly as planned. Here are a few common issues you might encounter when making cucumber soap, and how to fix them:
* Soap is too soft: This could be due to using too much cucumber puree or not letting the soap harden long enough. Try reducing the amount of cucumber puree in your next batch, and make sure to let the soap harden completely before removing it from the molds.
* Soap is too brittle: This could be due to overheating the soap base or using too little moisture. Try melting the soap base at a lower temperature, and consider adding a carrier oil to your next batch.
* Soap has bubbles: This is usually caused by over-stirring the soap. Try stirring more gently, and spray the surface of the soap with rubbing alcohol to remove any bubbles
Conclusion
So, there you have it! A simple, effective, and incredibly refreshing way to create your own DIY cucumber soap. This isn’t just about saving money; it’s about taking control of the ingredients you put on your skin and enjoying the satisfaction of crafting something beautiful and beneficial with your own two hands. The gentle cleansing properties of soap combined with the soothing and hydrating power of cucumber make this DIY project a true winner.
Why is this DIY trick a must-try? Because it offers a multitude of benefits that commercially produced soaps often lack. You’re eliminating harsh chemicals and artificial fragrances, opting instead for a natural, skin-loving alternative. Cucumber is naturally rich in antioxidants and vitamins, which can help to soothe irritated skin, reduce inflammation, and even promote a more even skin tone. Plus, the process itself is incredibly therapeutic. There’s something deeply satisfying about transforming simple ingredients into a luxurious bar of soap.
But the beauty of this DIY project lies in its versatility. Feel free to experiment with different variations to create a soap that perfectly suits your needs and preferences.
Here are a few suggestions to get you started:
* Add essential oils: A few drops of lavender, chamomile, or tea tree oil can enhance the soap’s aroma and provide additional therapeutic benefits. Lavender is known for its calming properties, chamomile for its soothing effects, and tea tree oil for its antibacterial qualities.
* Incorporate other natural ingredients: Consider adding a tablespoon of honey for extra moisturizing power, or a sprinkle of finely ground oatmeal for gentle exfoliation. You could even infuse your oil with calendula flowers for their anti-inflammatory properties.
* Customize the shape and size: Don’t limit yourself to standard rectangular bars. Use silicone molds in fun shapes like flowers, stars, or even seashells. This is a great way to personalize your soap and make it a unique gift.
* Add a touch of color: If you want to add a pop of color to your soap, use natural colorants like spirulina powder (for green), beetroot powder (for pink), or turmeric powder (for yellow). Remember to use these sparingly, as a little goes a long way.
* Create a layered effect: Pour different colored or scented soap mixtures into the mold in layers to create a visually stunning effect.
Remember to always test a small amount of the soap on a discreet area of your skin before using it all over your body, especially if you have sensitive skin.
We truly believe that this DIY cucumber soap recipe is a game-changer for anyone looking to simplify their skincare routine and embrace a more natural approach. It’s a fun, rewarding, and ultimately beneficial project that you can easily adapt to your own unique needs and preferences.
So, what are you waiting for? Gather your ingredients, follow the steps, and prepare to be amazed by the results. We’re confident that you’ll love the way your skin feels after using your homemade cucumber soap.
We’d love to hear about your experience! Share your creations, variations, and any tips or tricks you discover along the way in the comments below. Let’s build a community of DIY soap makers and inspire each other to create beautiful, natural products that nourish our skin and our souls. Happy soap making!
Frequently Asked Questions (FAQ)
Q: What kind of soap base should I use for this DIY cucumber soap recipe?
A: We recommend using a melt-and-pour soap base for this recipe, especially if you’re a beginner. Melt-and-pour bases are easy to work with and come in a variety of options, such as glycerin, goat’s milk, and shea butter. Glycerin soap base is a good choice for its moisturizing properties and clear appearance, which allows the cucumber to shine through. Goat’s milk soap base is also a great option for sensitive skin, as it’s gentle and nourishing. Shea butter soap base is known for its rich, creamy texture and moisturizing benefits. Choose the base that best suits your skin type and preferences.
Q: Can I use regular cucumbers from the grocery store, or do I need a specific type?
A: Regular cucumbers from the grocery store work perfectly well for this recipe. There’s no need to seek out a specific type. However, organic cucumbers are always a good choice if you want to avoid pesticides. Make sure to wash the cucumber thoroughly before using it.
Q: How long does the DIY cucumber soap last?
A: The shelf life of your homemade cucumber soap will depend on the ingredients you use and how you store it. Generally, melt-and-pour soaps have a shelf life of about one to two years. However, the fresh cucumber can shorten this lifespan slightly. To maximize the shelf life of your soap, store it in a cool, dry place away from direct sunlight. Wrapping the soap in plastic wrap or storing it in an airtight container can also help to prevent it from drying out or absorbing moisture. If you notice any changes in the soap’s appearance, texture, or smell, it’s best to discard it.
Q: My DIY cucumber soap is sweating. What am I doing wrong?
A: “Sweating,” or the formation of small droplets on the surface of your soap, is a common occurrence with melt-and-pour soaps, especially in humid environments. This happens because the soap base attracts moisture from the air. To prevent sweating, try these tips:
* Work in a cool, dry environment.
* Avoid overheating the soap base.
* Wrap the soap tightly in plastic wrap as soon as it’s cooled and hardened.
* Store the soap in an airtight container.
* Consider using a soap base with a lower glycerin content, as glycerin attracts moisture.
Q: Can I add other ingredients to my DIY cucumber soap?
A: Absolutely! One of the best things about making your own soap is the ability to customize it to your liking. As mentioned in the conclusion, you can add essential oils, herbs, exfoliants, and natural colorants to create a soap that perfectly suits your needs and preferences. Just be sure to research any new ingredients before adding them to your soap to ensure they are safe for topical use and compatible with the other ingredients.
Q: My skin is very sensitive. Is this DIY cucumber soap suitable for me?
A: Cucumber is generally considered to be very gentle and soothing, making it a good choice for sensitive skin. However, everyone’s skin is different, so it’s always a good idea to do a patch test before using the soap all over your body. Apply a small amount of the soap to a discreet area of your skin, such as your inner arm, and wait 24 hours to see if any irritation occurs. If you experience any redness, itching, or burning, discontinue use. You can also choose a soap base specifically formulated for sensitive skin, such as goat’s milk or hypoallergenic soap base.
Q: How do I properly clean my soap-making equipment?
A: Cleaning your soap-making equipment is essential to prevent contamination and ensure the quality of your future batches. Use hot, soapy water to wash all of your equipment immediately after use. For stubborn residue, you can try soaking the equipment in hot water with a bit of vinegar or baking soda. Make sure to rinse everything thoroughly and dry it completely before storing it.
Q: Can I sell the DIY cucumber soap I make?
A: If you plan to sell your homemade soap, it’s important to be aware of the regulations in your area. In many places, soap is considered a cosmetic product and is subject to labeling requirements and safety standards. Research the regulations in your area and make sure you comply with all applicable laws before selling your soap.
Q: What if I don’t have access to fresh cucumbers? Can I use cucumber juice or extract instead?
A: Yes, you can definitely use cucumber juice or extract as a substitute for fresh cucumbers. Cucumber juice can be added directly to the melted soap base, while cucumber extract should be used according to the manufacturer’s instructions. Keep in mind that the concentration of beneficial compounds may vary depending on the form of cucumber you use.
Q: How can I make my DIY cucumber soap more exfoliating?
A: To add exfoliating properties to your soap, you can incorporate ingredients like finely ground oatmeal, sugar, salt, or poppy seeds. Add these ingredients to the melted soap base just before pouring it into the mold. Be careful not to add too much, as this can make the soap too abrasive.
Leave a Comment