

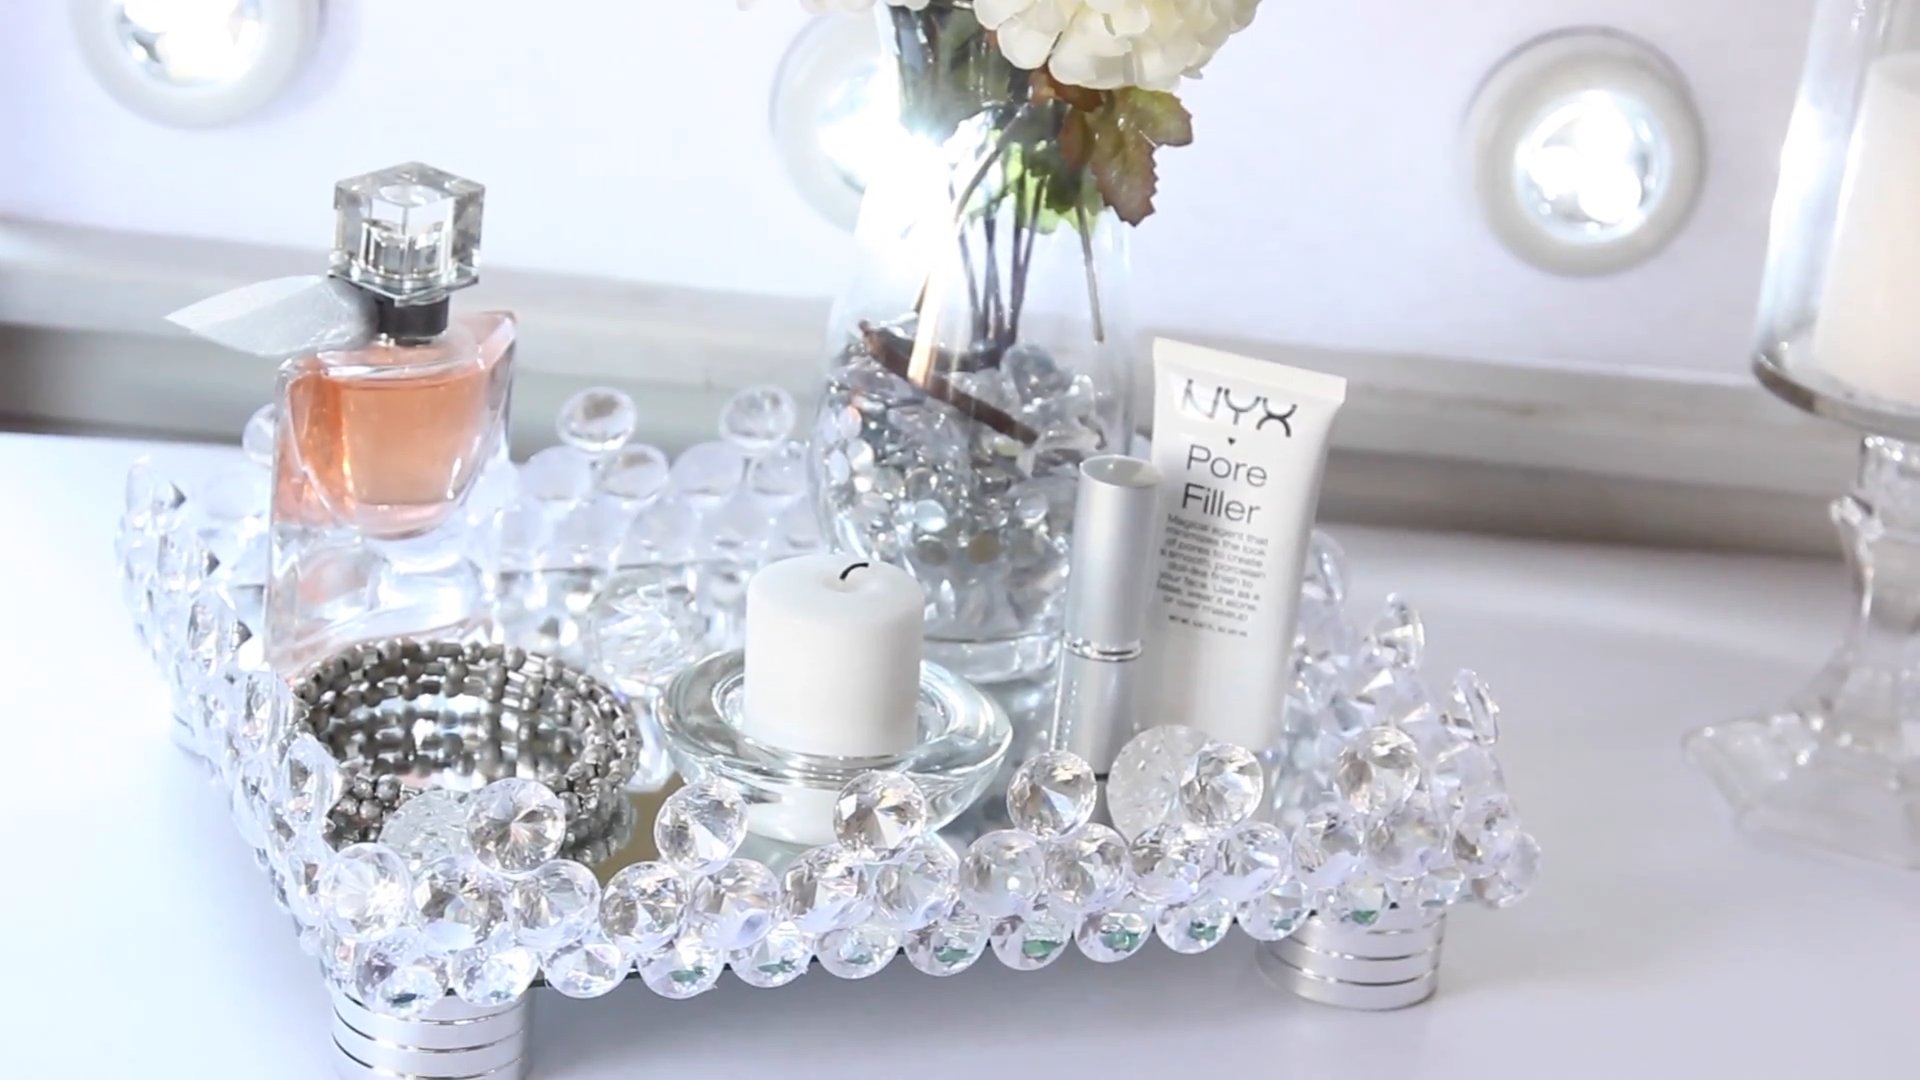
DIY vanity tray projects are a fantastic way to add a touch of personalized elegance to your home, and I’m so excited to share some amazing ideas with you! Have you ever looked at those gorgeous, perfectly styled vanities in magazines and thought, “I wish I could achieve that level of chic”? Well, you absolutely can, and it doesn’t require a fortune or a professional decorator.
The concept of a vanity tray, a designated space to organize and display your precious perfumes, jewelry, and makeup, has roots stretching back centuries. Think of the ornate dressing tables of royalty, where beautiful objects were carefully arranged to reflect status and taste. While we might not all be royalty, we can certainly embrace the spirit of creating a beautiful and functional space for ourselves.
In today’s busy world, a DIY vanity tray isn’t just about aesthetics; it’s about creating a sense of calm and order amidst the chaos. Let’s face it, a cluttered vanity can be incredibly stressful! By creating a dedicated space for your essentials, you’ll not only elevate the look of your bathroom or bedroom but also streamline your daily routine. No more frantic searching for your favorite lipstick or untangling necklaces! This guide will provide you with simple, budget-friendly DIY tricks and hacks to create a vanity tray that perfectly reflects your style and needs. Get ready to transform your space and add a touch of luxury to your everyday life!
DIY Glam Vanity Tray: A Step-by-Step Guide
Hey there, fellow DIY enthusiasts! I’m so excited to share this project with you – a gorgeous, personalized vanity tray that will add a touch of elegance to your space. Forget those expensive store-bought trays; we’re going to create something truly unique and budget-friendly. This project is perfect for organizing your makeup, perfumes, jewelry, or even as a stylish serving tray. Let’s get started!
Materials You’ll Need:
* A plain tray (I used a wooden one from a craft store, about 12×16 inches, but you can use any size or material you like – metal, plastic, even an old picture frame with the glass removed!).
* Spray paint (I chose a metallic gold for a glamorous look, but feel free to pick your favorite color).
* Decorative paper or fabric (Scrapbook paper, wrapping paper, or even a pretty piece of fabric will work wonders. Choose something that complements your decor).
* Mod Podge (This is our trusty adhesive and sealant).
* Glitter (Optional, but highly recommended for extra sparkle!).
* Rhinestones, pearls, or other embellishments (Get creative and personalize your tray!).
* Felt pads (To protect your furniture).
* Scissors or a craft knife.
* A ruler or measuring tape.
* A paintbrush or foam brush.
* Sandpaper (Fine-grit, for smoothing the tray).
* Clear acrylic sealer spray (To protect your finished tray).
* Pencil
Tools You’ll Need:
* A well-ventilated workspace.
* Protective gloves (For spray painting).
* Newspaper or a drop cloth (To protect your work surface).
Phase 1: Preparing the Tray
This is a crucial step, so don’t skip it! A well-prepared surface will ensure a smooth and professional-looking finish.
1. Sanding the Tray: If your tray is wooden, lightly sand the entire surface with fine-grit sandpaper. This will remove any imperfections and create a better surface for the paint to adhere to. Wipe away any sanding dust with a clean, damp cloth. Even if your tray isn’t wooden, giving it a light sanding can help the paint grip better.
2. Cleaning the Tray: Make sure your tray is clean and free of any dust, dirt, or grease. Use a damp cloth and a mild detergent if necessary. Let it dry completely before moving on to the next step.
3. Priming (Optional): If you’re using a dark-colored tray and want a vibrant color, consider applying a primer first. This will help the paint adhere better and prevent the original color from showing through. Let the primer dry completely according to the manufacturer’s instructions.
Phase 2: Painting the Tray
Now for the fun part! This is where you’ll transform your plain tray into something special.
1. Protect Your Workspace: Lay down newspaper or a drop cloth to protect your work surface from overspray.
2. Spray Painting: Put on your protective gloves and shake the spray paint can well. Hold the can about 8-10 inches away from the tray and apply a light, even coat of paint. Avoid spraying too much paint in one area, as this can cause drips and runs.
3. Multiple Coats: Let the first coat dry completely according to the manufacturer’s instructions (usually about 15-30 minutes). Then, apply a second coat of paint. You may need a third coat for full coverage, depending on the color and type of paint you’re using. Remember to let each coat dry completely before applying the next.
4. Drying Time: Once you’re happy with the coverage, let the paint dry completely. This may take several hours, or even overnight. Be patient! A fully dried surface is essential for the next steps.
Phase 3: Decorating the Tray
This is where your creativity can really shine! We’ll be adding the decorative paper or fabric and any embellishments you choose.
1. Measuring and Cutting: Measure the inside bottom of your tray. Use a ruler or measuring tape to get accurate measurements. Then, use scissors or a craft knife to cut your decorative paper or fabric to the exact size. It’s always better to cut it slightly larger than needed and then trim it down to fit perfectly.
2. Applying Mod Podge: Apply a thin, even layer of Mod Podge to the inside bottom of the tray. Work quickly, as Mod Podge can dry fast.
3. Placing the Paper/Fabric: Carefully place the cut paper or fabric onto the Mod Podge-covered surface. Smooth it out with your fingers or a brayer (a small roller) to remove any air bubbles or wrinkles. Start from the center and work your way outwards.
4. Sealing with Mod Podge: Once the paper or fabric is in place, apply another thin, even layer of Mod Podge over the top. This will seal the paper/fabric and protect it from damage. Again, smooth it out to remove any air bubbles.
5. Adding Glitter (Optional): If you want to add some sparkle, sprinkle glitter over the wet Mod Podge. Be generous! Once the Mod Podge is dry, you can shake off any excess glitter.
6. Drying Time: Let the Mod Podge dry completely. This usually takes a few hours. It will dry clear.
7. Embellishing: Now it’s time to add your rhinestones, pearls, or other embellishments. Use a small amount of Mod Podge or craft glue to attach them to the tray. Get creative with your placement! You can create a border around the edge of the paper/fabric, or scatter them randomly across the surface.
Phase 4: Finishing Touches
These final steps will protect your tray and make it look even more professional.
1. Sealing with Acrylic Sealer: Once everything is completely dry, apply a coat of clear acrylic sealer spray to the entire tray. This will protect the paint, Mod Podge, and embellishments from scratches and moisture. Follow the manufacturer’s instructions for application.
2. Multiple Coats (Sealer): You may want to apply two or three coats of sealer for extra protection, letting each coat dry completely before applying the next.
3. Attaching Felt Pads: Turn the tray over and attach felt pads to the bottom corners. This will protect your furniture from scratches.
4. Final Drying Time: Let the sealer dry completely before using your tray. This may take several hours, or even overnight.
Tips and Tricks:
* Practice Spray Painting: If you’ve never used spray paint before, practice on a piece of cardboard first to get a feel for the technique.
* Thin Coats are Key: Remember, thin coats of paint and Mod Podge are better than thick coats. This will prevent drips, runs, and wrinkles.
* Choose the Right Mod Podge: There are different types of Mod Podge available, such as matte, gloss, and satin. Choose the one that best suits your desired finish.
* Get Creative with Embellishments: Don’t be afraid to experiment with different types of embellishments. You can use beads, buttons, charms, or even dried flowers.
* Personalize It: This is your tray, so make it your own! Choose colors, patterns, and embellishments that reflect your personal style.
* Clean Up: Clean your brushes and tools immediately after use to prevent them from drying out.
* Consider the Tray’s Purpose: If you plan to use the tray for serving food, make sure to use food-safe materials and sealers.
* Upcycle: Instead of buying a new tray, consider upcycling an old one. This is a great way to save money and reduce waste. An old picture frame with the glass removed makes a fantastic base!
* Fabric Considerations: If using fabric, consider ironing it first to remove any wrinkles. You might also want to use a fabric stiffener before applying it to the tray to prevent fraying.
* Glitter Control: Glitter can be messy! Work over a large sheet of paper to catch any excess glitter. You can then pour the excess glitter back into the container.
* Sealer Alternatives: If you don’t have acrylic sealer spray, you can use a clear polyurethane varnish. Apply it with a brush in thin, even coats.
* Repairing Mistakes: If you make a mistake, don’t panic! You can usually fix it. If you get paint or Mod Podge where you don’t want it, wipe it off immediately with a damp cloth. If you have air bubbles under the paper/fabric, try poking them with a needle and then smoothing them out.
* Inspiration: Look online for inspiration! Pinterest and Instagram are great sources for DIY vanity tray ideas.
I hope you enjoyed this tutorial! I can’t wait to see
Conclusion
So, there you have it! Transforming an ordinary item into a stunning, personalized DIY vanity tray is not only incredibly simple, but also remarkably rewarding. Forget spending a fortune on store-bought trays that might not even perfectly match your aesthetic. This project empowers you to create a bespoke piece that reflects your unique style and perfectly complements your space.
Why is this DIY trick a must-try? Because it’s more than just a craft project; it’s an exercise in creativity, resourcefulness, and self-expression. It’s a chance to breathe new life into forgotten objects, reduce waste, and add a touch of handmade charm to your everyday life. Plus, the satisfaction of displaying your favorite perfumes, jewelry, or makeup on something you created yourself is simply unmatched.
But the beauty of this DIY vanity tray lies in its versatility. Feel free to experiment with different materials and techniques to truly make it your own.
* Embrace the Vintage Vibe: Scour thrift stores for antique plates or trays with intricate details. A coat of metallic paint or a distressed finish can enhance their vintage appeal.
* Go Glam with Glitter: Add a touch of sparkle by incorporating glitter into your resin or paint. A glitter-infused tray is perfect for showcasing your most glamorous accessories.
* Personalize with Photos: Create a collage of your favorite photos and seal them under a layer of resin for a truly unique and sentimental vanity tray.
* Incorporate Natural Elements: Embed dried flowers, leaves, or seashells into your resin for a beautiful and organic touch.
* Play with Patterns: Use stencils, tape, or freehand painting to create eye-catching patterns on your tray. Geometric designs, floral motifs, or abstract art can all add personality.
* Consider Different Shapes and Sizes: Don’t limit yourself to traditional rectangular or circular trays. Experiment with oval, square, or even asymmetrical shapes to create a truly unique piece. Think about the size of your vanity and the items you plan to display when choosing the dimensions of your tray.
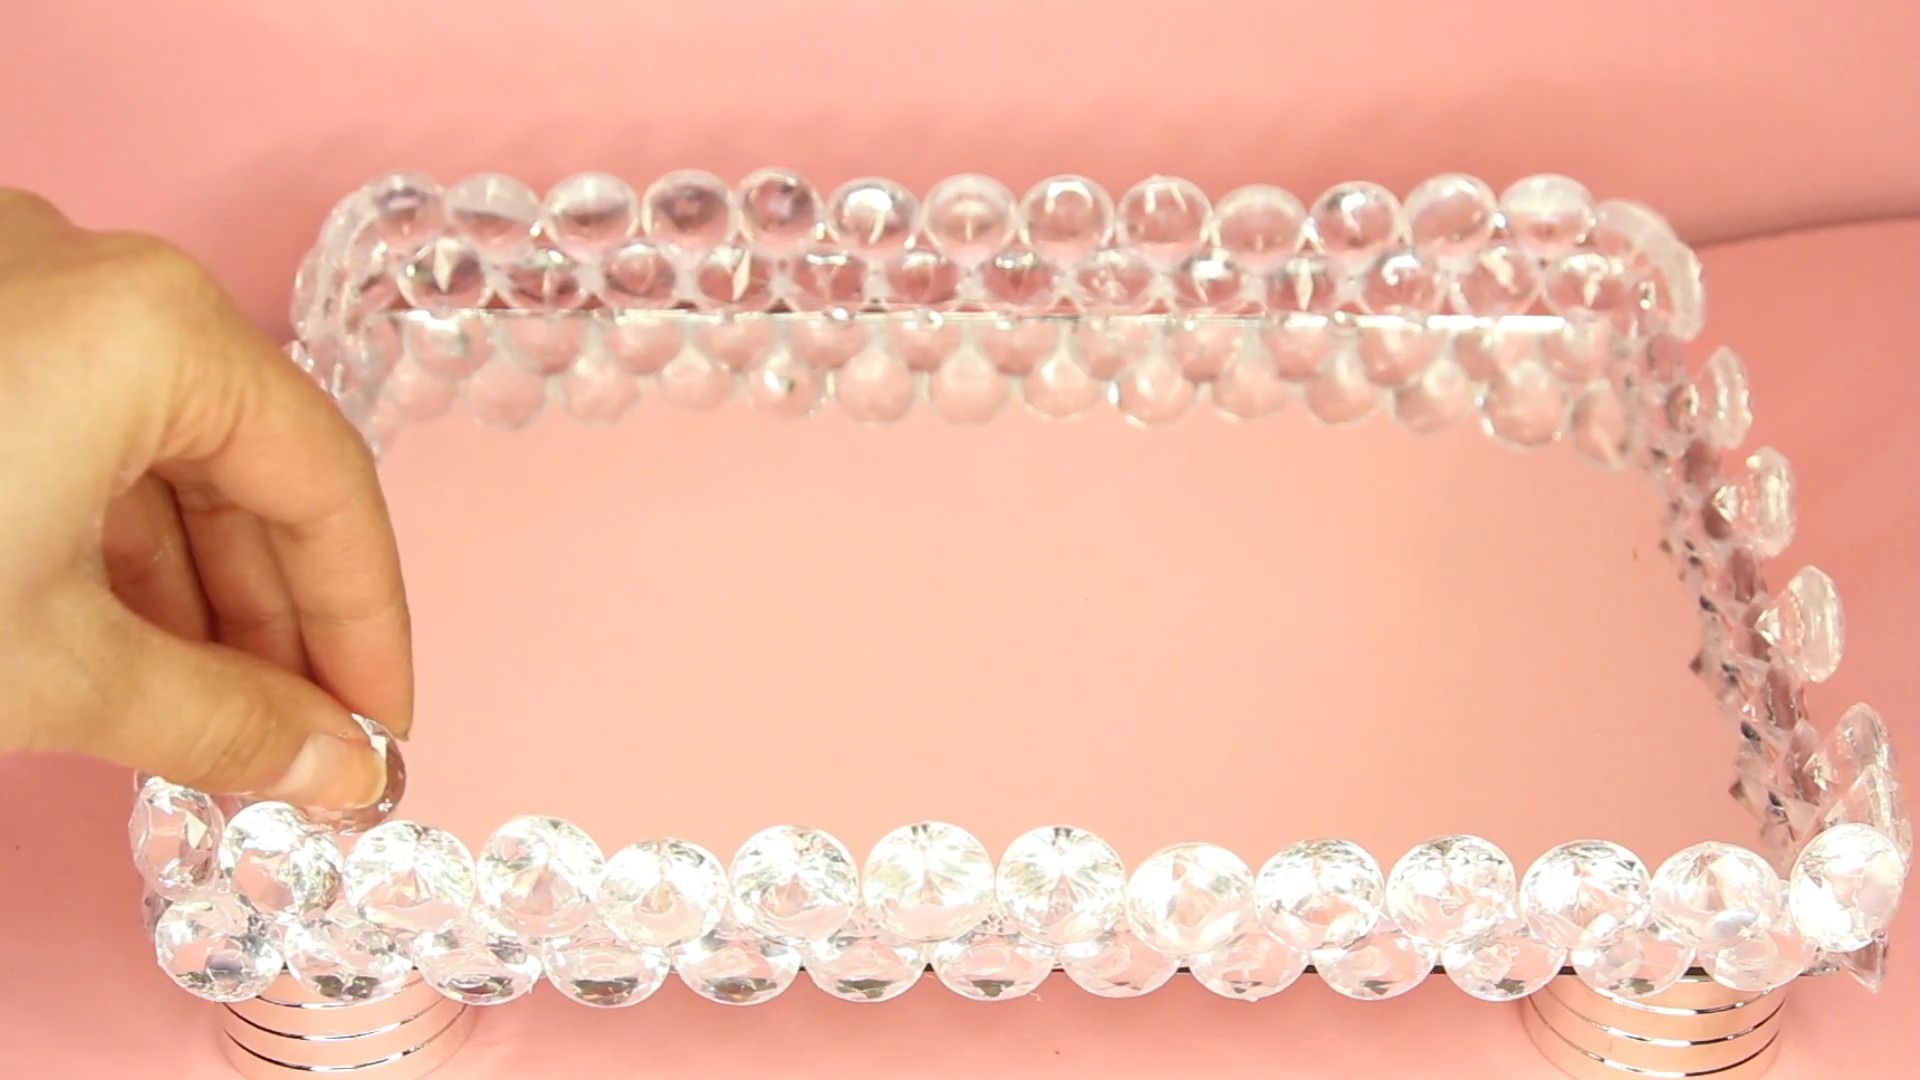
* Add Handles or Feet: For added functionality and style, consider attaching handles or feet to your tray. This can make it easier to move and elevate it for a more sophisticated look.
Ultimately, the possibilities are endless. The key is to let your imagination run wild and have fun with the process. This DIY vanity tray project is a fantastic way to unleash your inner artist and create something truly special.
We wholeheartedly encourage you to give this DIY trick a try. It’s a simple, affordable, and incredibly satisfying way to elevate your vanity and add a personal touch to your home decor. Once you’ve created your masterpiece, we’d love to see it! Share your creations with us on social media using [Your Hashtag] and tell us about your experience. What materials did you use? What challenges did you overcome? What are you most proud of? We can’t wait to see your unique and inspiring DIY vanity tray creations!
FAQ
What kind of tray should I use as a base for my DIY vanity tray?
The beauty of this project is its flexibility! You can use a wide variety of trays as a base. Consider these options:
* Ceramic Plates or Platters: These are readily available at thrift stores and come in various shapes, sizes, and patterns.
* Wooden Trays: Unfinished wooden trays are perfect for painting, staining, or decoupaging.
* Metal Trays: Metal trays offer a sleek and modern look. You can spray paint them in your desired color.
* Plastic Trays: Lightweight and durable, plastic trays are a budget-friendly option.
* Mirrored Trays: These add a touch of glamour and reflect light beautifully.
* Even Repurposed Items: Get creative! An old picture frame, a serving dish, or even a sturdy cardboard box can be transformed into a stunning vanity tray.
The key is to choose a tray that is sturdy, has a smooth surface, and is the right size and shape for your needs.
What kind of glue should I use for attaching embellishments?
The best type of glue depends on the materials you’re using. Here’s a breakdown:
* For lightweight embellishments (e.g., beads, sequins, small stones): Craft glue or hot glue works well.
* For heavier embellishments (e.g., larger stones, metal pieces): E6000 or a similar industrial-strength adhesive is recommended.
* For attaching fabric or paper: Mod Podge or fabric glue is ideal.
* For attaching glass or mirrors: A specialized glass adhesive is necessary.
Always read the instructions on the glue packaging and ensure it’s compatible with the materials you’re using.
How do I seal my DIY vanity tray to protect it from spills and scratches?
Sealing your tray is crucial for protecting it from everyday wear and tear. Here are a few options:
* Resin: A clear epoxy resin provides a durable, glossy finish that is resistant to water and scratches. This is a great option if you want to embed items into your tray.
* Polyurethane: This clear coat provides a tough, protective layer that is resistant to scratches and water damage. It’s available in various finishes, such as matte, satin, and gloss.
* Mod Podge: While not as durable as resin or polyurethane, Mod Podge can provide a decent level of protection, especially if you apply multiple coats.
* Acrylic Sealer: This is a good option for painted trays. It provides a clear, protective layer that is water-resistant.
Always follow the manufacturer’s instructions when applying a sealant. Apply thin, even coats and allow each coat to dry completely before applying the next.
How do I clean my DIY vanity tray?
The cleaning method depends on the materials you used to create your tray.
* For resin-coated trays: Wipe with a damp cloth and mild soap. Avoid using harsh chemicals or abrasive cleaners.
* For painted or sealed trays: Wipe with a damp cloth. If necessary, use a mild soap solution.
* For trays with delicate embellishments: Dust gently with a soft brush or cloth. Avoid getting the embellishments wet.
Can I use this DIY trick to create other types of trays?
Absolutely! The principles behind this DIY trick can be applied to create a variety of trays for different purposes. Consider these ideas:
* Serving Tray: Create a stylish serving tray for drinks and appetizers.
* Coffee Table Tray: Organize your remote controls, magazines, and other coffee table essentials.
* Desk Organizer Tray: Keep your pens, paperclips, and other desk supplies neatly organized.
* Jewelry Tray: Display your favorite necklaces, earrings, and bracelets.
* Bathroom Organizer Tray: Organize your toiletries, soaps, and lotions.
The possibilities are endless! Let your creativity guide you and adapt the techniques to suit your specific needs.
What if I don’t have any embellishments?
No problem! You can still create a beautiful and functional DIY vanity tray without embellishments. Focus on creating a stunning base using paint, decoupage, or other decorative techniques. You can also use simple materials like washi tape, stencils, or stamps to add visual interest. The key is to be creative and resourceful!
Where can I find inspiration for my DIY vanity tray?
There are countless sources of inspiration online and in the real world. Check out:
* Pinterest: Search for “DIY vanity tray” or “DIY tray ideas” to find a wealth of inspiration.
* Instagram: Follow DIY and home decor accounts for creative ideas.
* Home Decor Magazines: Browse magazines for inspiration on color palettes, patterns, and embellishments.
* Thrift Stores and Flea Markets: Look for unique trays and embellishments that can inspire your design.
* Nature: Draw inspiration from the colors, textures, and patterns found in nature.
Remember to adapt the ideas you find to your own personal style and preferences.
Leave a Comment