

DIY Canvas Art: Unleash your inner artist and transform your living space with stunning, personalized masterpieces! Have you ever looked at a blank canvas and felt a surge of creative energy, only to be intimidated by the thought of expensive art supplies or complicated techniques? Well, fear no more! This article is your ultimate guide to creating breathtaking DIY canvas art projects that are both budget-friendly and incredibly rewarding.
Canvas art has a rich history, dating back centuries when artists used stretched canvases to create enduring works of art. From the Renaissance masters to modern abstract expressionists, canvas has been the go-to medium for capturing imagination and emotion. But you don’t need to be a professional artist to enjoy the beauty and satisfaction of creating your own canvas art.
In today’s world, where personalization and self-expression are highly valued, DIY projects are more popular than ever. Creating your own canvas art allows you to infuse your personality into your home decor, adding a unique touch that reflects your individual style. Plus, it’s a fantastic way to de-stress, unwind, and tap into your creative potential. Whether you’re looking to create a statement piece for your living room or a heartfelt gift for a loved one, this guide will provide you with all the tips, tricks, and inspiration you need to get started. Let’s dive in and discover the joy of creating beautiful DIY canvas art!
DIY Canvas Art: Unleash Your Inner Artist (Even If You Think You Don’t Have One!)
Okay, let’s be honest. Sometimes, blank walls just scream for attention. And while expensive art is lovely, it’s not always in the budget. That’s where the magic of DIY canvas art comes in! I’m going to walk you through a few super fun and easy techniques to create stunning pieces that will have everyone asking, “Where did you BUY that?!”
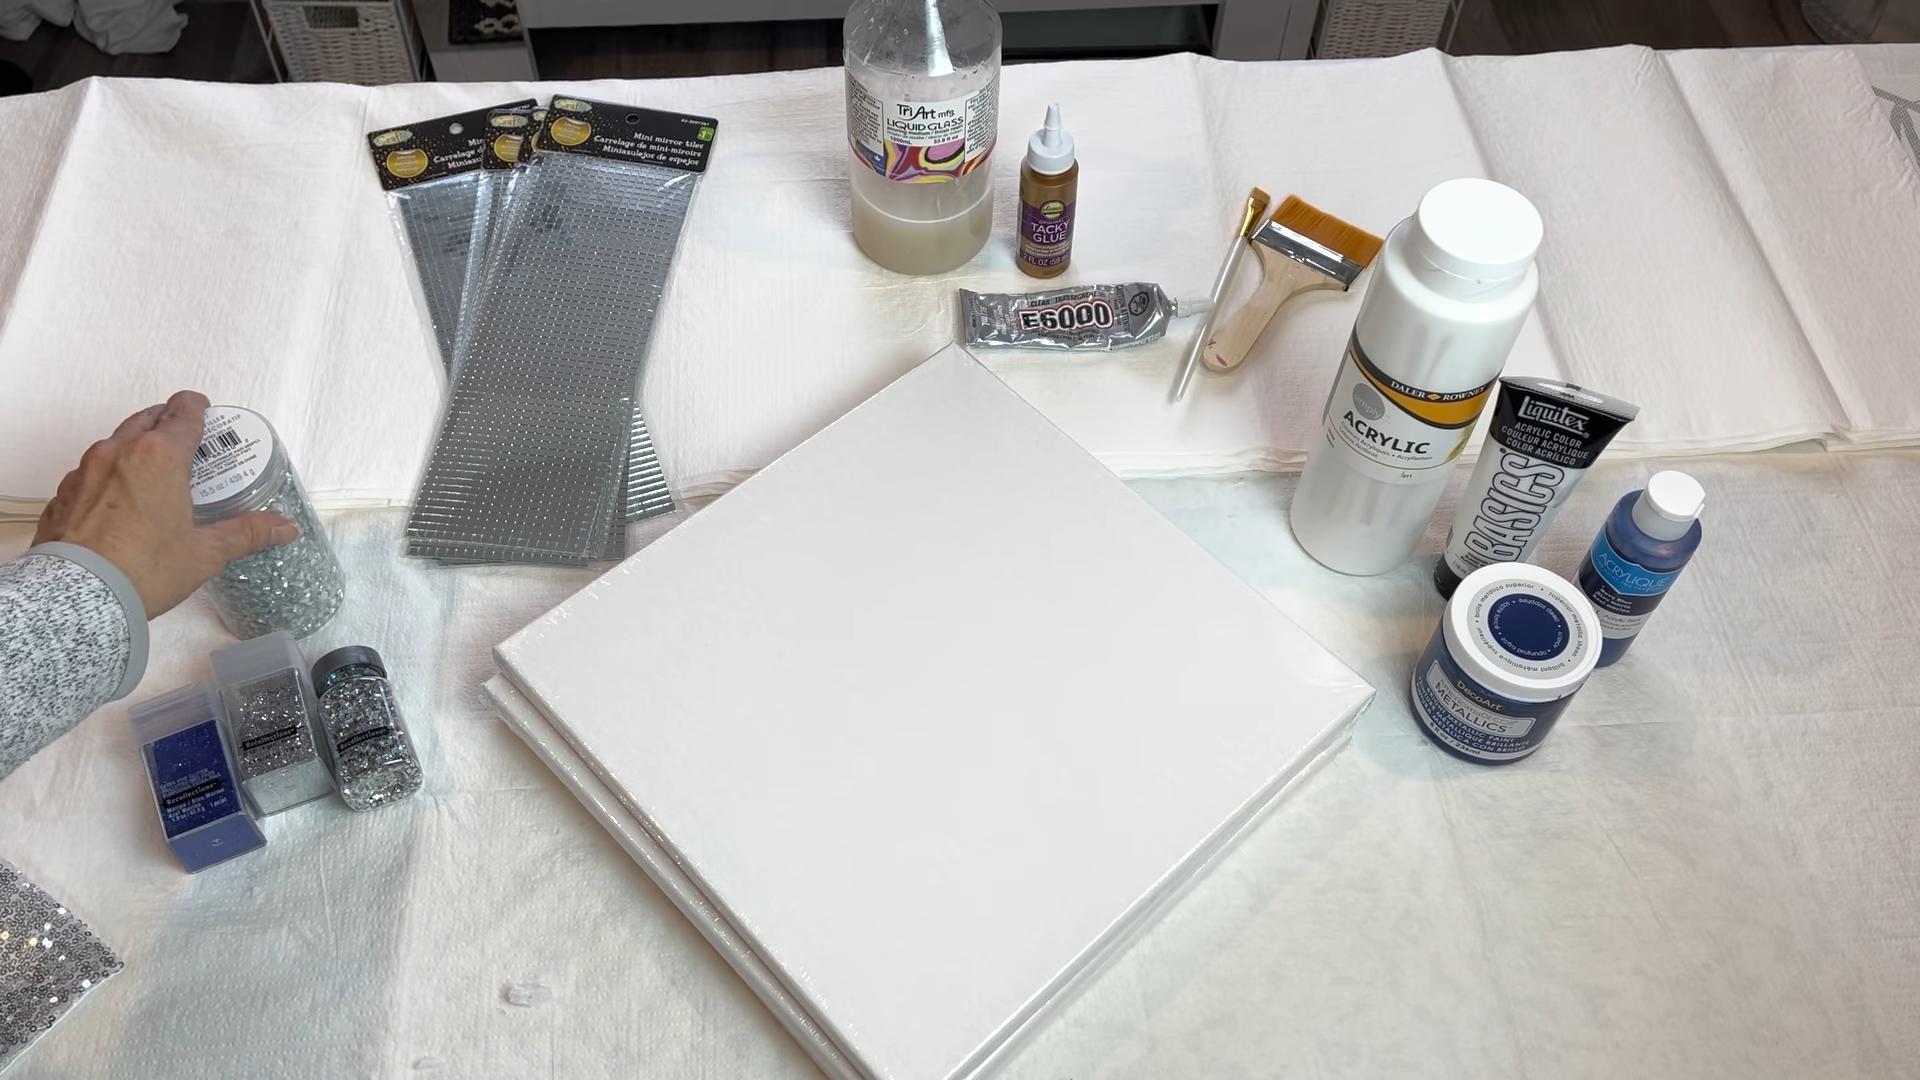
Gathering Your Supplies: The Artist’s Toolkit
Before we dive into the creative process, let’s make sure we have everything we need. This is like prepping your kitchen before baking – essential for a smooth and enjoyable experience.
* Canvas: Obviously! Choose the size that fits your space. I recommend starting with a smaller canvas (like 12×16 inches) if you’re a beginner. You can find these at any craft store or even online. Pre-primed canvases are the way to go – they save you a step!
* Acrylic Paints: These are your best friend! They’re affordable, easy to work with, and dry quickly. Get a variety of colors you love. Don’t be afraid to experiment! A basic set with primary colors, black, and white is a great starting point. You can mix them to create endless shades.
* Paintbrushes: A selection of brushes is key. You’ll want a few different sizes – a large flat brush for covering large areas, a medium round brush for details, and a small fine-tipped brush for intricate work.
* Palette: A palette is where you’ll mix your paints. You can use a fancy artist’s palette, a paper plate, or even a piece of wax paper.
* Water Container: For rinsing your brushes. Keep it clean! Dirty water will muddy your colors.
* Paper Towels or Rags: For wiping your brushes and cleaning up spills (because let’s face it, spills happen!).
* Optional but Helpful:
* Painter’s Tape: For creating clean lines and geometric designs.
* Palette Knife: For applying paint in thick, textured layers.
* Sponges: For creating interesting textures and effects.
* Hair Dryer: To speed up drying time (especially helpful for layered techniques).
* Easel: While not essential, an easel can make painting more comfortable.
Technique 1: Abstract Acrylic Pouring – The Swirling Symphony
Acrylic pouring is seriously addictive. It’s a fantastic way to create mesmerizing abstract art with minimal effort. The results are always unique and beautiful.
1. Prepare Your Workspace: This is crucial! Acrylic pouring can get messy. Cover your work surface with a plastic drop cloth or newspaper. Trust me, you’ll thank me later.
2. Prepare Your Paints: This is where the magic happens. You’ll need to thin your acrylic paints with a pouring medium. There are specific pouring mediums available at craft stores, but you can also use a mixture of clear glue and water (about 1 part glue to 2 parts water). The consistency should be similar to warm honey.
* In separate cups, mix each color with the pouring medium. Add enough medium until the paint flows smoothly.
* If you want to add silicone oil (optional, but it creates cells!), add a few drops to each color and gently stir. Don’t over-stir, or you’ll lose the cell effect.
3. Choose Your Pouring Method: There are several pouring techniques you can try:
* Dirty Pour: This is the easiest method. Layer your prepared paints into a single cup. Then, slowly pour the paint onto the canvas, tilting the canvas to spread the paint.
* Flip Cup: Pour your prepared paints into a cup. Place the canvas face down on top of the cup. Flip the canvas and cup over together. Let the paint sit for a minute or two, then lift the cup. The paint will flow out onto the canvas. Tilt the canvas to spread the paint.
* Puddle Pour: Pour small puddles of each color onto the canvas, overlapping them slightly. Then, tilt the canvas to let the colors flow together.
4. Pour and Tilt: Carefully pour your paint onto the canvas using your chosen method. Tilt the canvas in all directions to spread the paint and create interesting patterns. Don’t be afraid to experiment!
5. Pop the Bubbles: Use a heat gun or a lighter to gently pop any air bubbles that appear on the surface of the paint. This will help prevent imperfections in the final result.
6. Let it Dry: This is the hardest part! Acrylic pouring takes a long time to dry – usually 24-72 hours, depending on the thickness of the paint. Place the canvas in a dust-free area to dry.
7. Admire Your Masterpiece: Once the paint is completely dry, you’ll have a stunning abstract piece of art! You can seal it with a varnish for added protection and shine.
Technique 2: Geometric Tape Resist – Clean Lines and Bold Statements
This technique is perfect for creating modern and graphic designs. It’s all about using painter’s tape to create clean lines and geometric shapes.
1. Tape Your Design: This is where your creativity comes into play! Use painter’s tape to create your desired geometric design on the canvas. You can create stripes, triangles, squares, or any other shapes you can imagine. Press the tape firmly onto the canvas to prevent paint from seeping underneath.
2. Paint the Canvas: Choose your paint colors and apply them to the canvas, covering the entire surface, including the taped areas. You can use one color or multiple colors. If using multiple colors, let each color dry slightly before applying the next to prevent bleeding.
3. Let the Paint Dry: Allow the paint to dry completely. This is important to prevent smudging when you remove the tape.
4. Remove the Tape: Carefully peel off the painter’s tape to reveal the clean lines of your geometric design. Peel slowly and at a 45-degree angle to avoid lifting the paint.
5. Touch Up (Optional): If there are any imperfections or areas where the paint bled under the tape, you can touch them up with a small brush and the appropriate paint color.
6. Seal (Optional): Once you’re happy with your design, you can seal it with a varnish for added protection.
Technique 3: Sponge Painting – Texture and Depth
Sponge painting is a simple yet effective way to add texture and depth to your canvas art. It’s a great technique for creating landscapes, abstract backgrounds, or even whimsical patterns.
1. Base Coat: Apply a base coat of paint to your canvas. Choose a color that will complement the colors you’ll be using for the sponge painting. Let the base coat dry completely.
2. Prepare Your Sponges: You can use natural sea sponges or synthetic sponges. Tear the sponges into smaller pieces to create different textures.
3. Apply the Paint: Dip a sponge into your chosen paint color. Dab off any excess paint onto a paper towel. Gently dab the sponge onto the canvas, creating a textured effect.
4. Layer Colors: You can layer different colors of paint to create depth and dimension. Let each layer dry slightly before applying the next.
5. Experiment with Techniques: Try different sponge painting techniques, such as stippling (dabbing the sponge repeatedly in one spot) or dragging (dragging the sponge across the canvas).
6. Let it Dry: Allow the paint to dry completely.
7. Seal (Optional): Once you’re happy with your design, you can seal it with a varnish for added protection.
Technique 4: Palette Knife Painting – Impasto Magic
If you want to add serious texture to your art, palette knife painting is the way to go! This technique involves applying thick layers of paint to the canvas using a palette knife, creating a raised, sculptural effect.
1. Choose Your Colors: Select your paint colors. For palette knife painting, it’s best to use thicker acrylic paints or add a gel medium to your paints to increase their viscosity.
2. Load the Palette Knife: Use the palette knife to scoop up a generous amount of paint.
3. Apply the Paint: Apply the paint to the canvas using various strokes and techniques. You can spread the paint, scrape it, or create peaks and ridges.
4. Experiment with Textures: Don’t be afraid to experiment with different textures. You can create smooth, blended areas or rough, textured areas.
5. Layer the Paint: Layer different colors of paint to create depth and dimension.
6. Let it Dry: Palette knife paintings can take a long time to dry due to the thick layers of paint. Be patient and allow the paint to dry completely before handling the canvas.
Conclusion
So, there you have it! Transforming your blank walls into personalized masterpieces doesn’t require a hefty art budget or years of formal training. This DIY canvas art trick is a game-changer for anyone looking to inject creativity and personality into their living space without breaking the bank. It’s more than just a craft project; it’s an opportunity to express yourself, experiment with different styles, and create something truly unique.
Why is this a must-try? Because it’s incredibly versatile, budget-friendly, and surprisingly easy to execute. You can adapt it to match any décor style, from minimalist and modern to bohemian and eclectic. Imagine creating a stunning abstract piece that perfectly complements your living room furniture, or a vibrant, colorful canvas that brightens up your bedroom. The possibilities are truly endless.
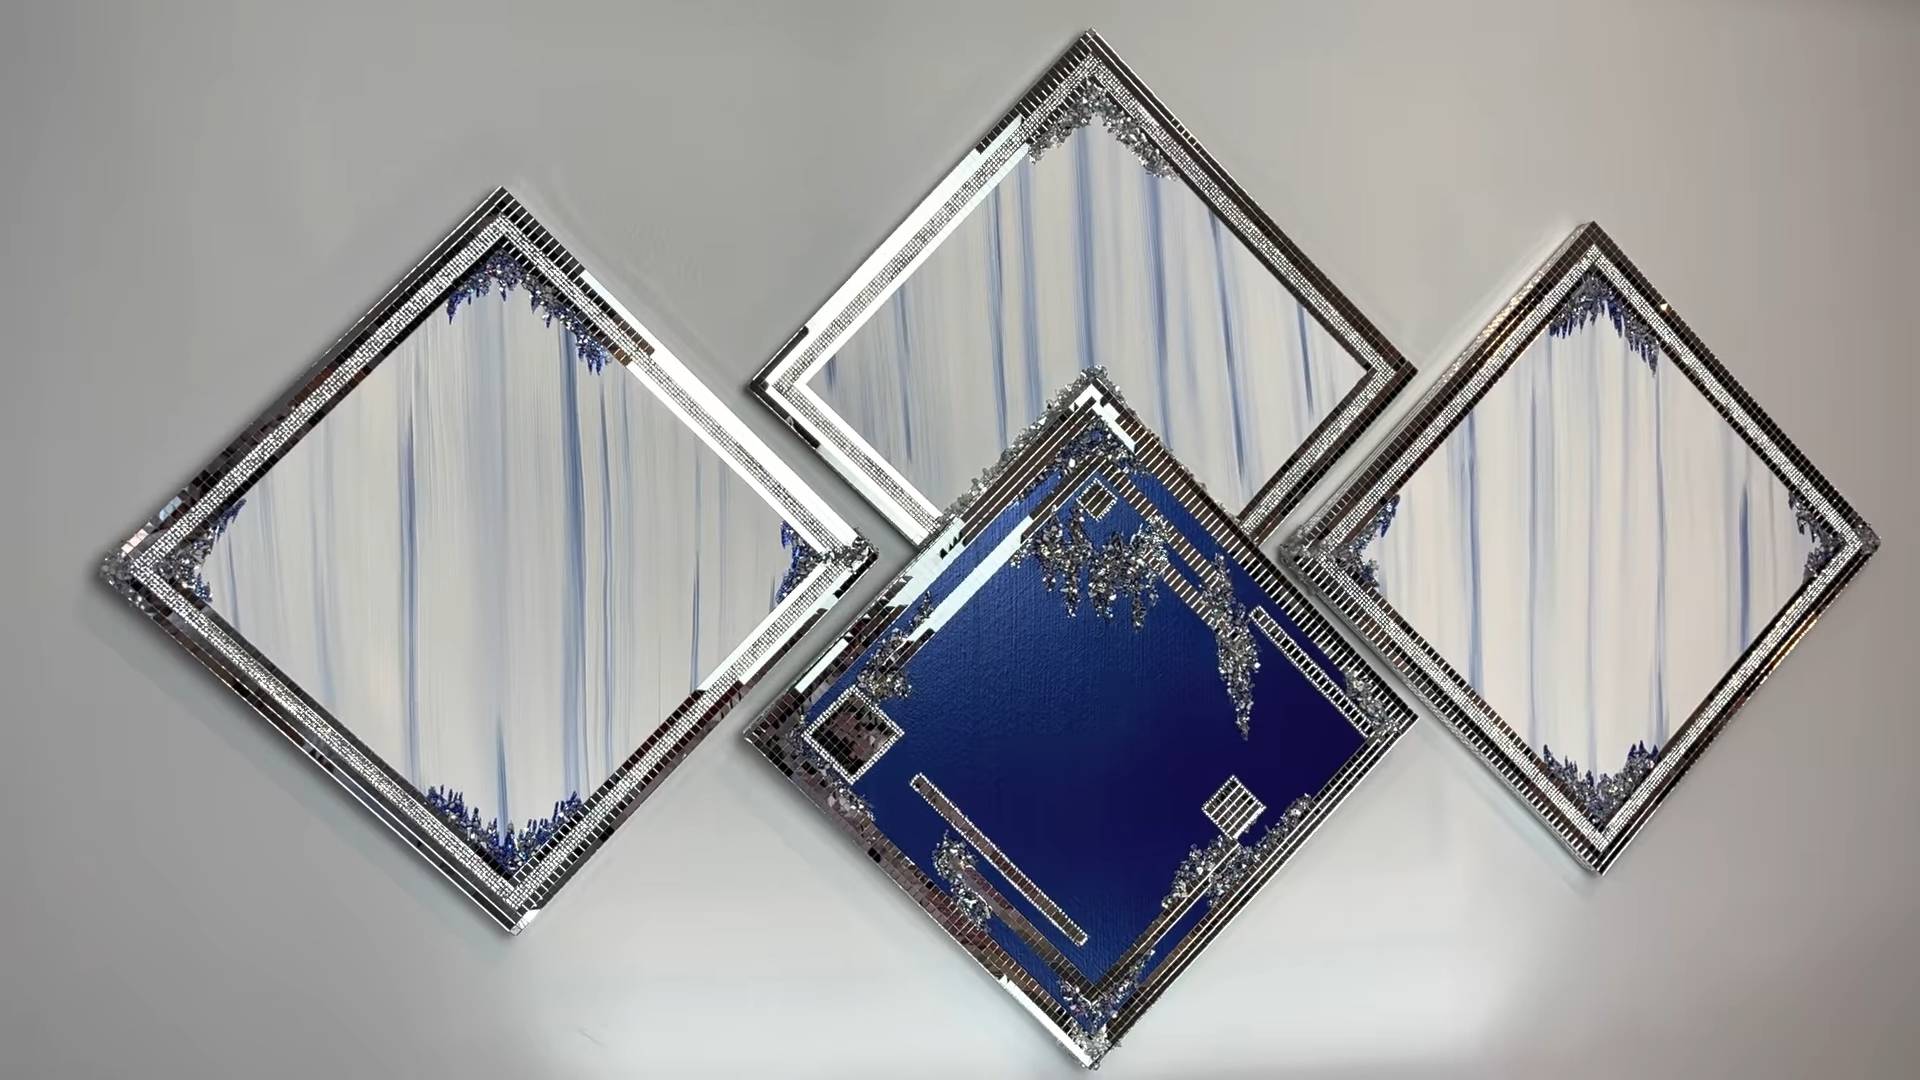
Looking for variations? Consider using different textures to add depth and interest to your canvas art. Try incorporating fabric scraps, dried flowers, or even textured paint to create a tactile experience. You could also experiment with different color palettes, from bold and contrasting hues to subtle and monochromatic tones. For a more personalized touch, consider using stencils or freehand painting to create intricate designs or patterns. Another fun idea is to create a gallery wall using multiple smaller canvases, each featuring a different design or color scheme. This allows you to showcase a variety of styles and create a visually dynamic display.
Don’t be afraid to get creative and experiment with different techniques. The beauty of DIY canvas art is that there are no rules! Let your imagination run wild and see what you can create. Remember, the most important thing is to have fun and enjoy the process.
We wholeheartedly encourage you to give this DIY canvas art trick a try. It’s a fantastic way to unleash your inner artist and create something beautiful and meaningful for your home. Once you’ve completed your masterpiece, we’d love to see it! Share your creations with us on social media using [Your Hashtag] and tell us about your experience. What colors did you use? What techniques did you try? What challenges did you overcome? We’re eager to hear your stories and see your amazing artwork.
This DIY canvas art project is not just about filling empty wall space; it’s about creating a home that reflects your personality and style. It’s about adding a touch of warmth, creativity, and individuality to your living space. So, grab your supplies, gather your inspiration, and get ready to transform your walls into works of art. You might just surprise yourself with what you can create! We are confident that this simple yet effective technique will become your go-to method for creating stunning and personalized wall décor. Happy crafting!
FAQ
What kind of canvas should I use for DIY canvas art?
The best type of canvas for DIY canvas art depends on your budget and the style of art you plan to create. Stretched canvases are a popular choice because they are readily available in various sizes and are relatively inexpensive. They are typically made of cotton or linen stretched over a wooden frame. Cotton canvases are a good option for beginners as they are more affordable, while linen canvases are more durable and have a finer texture, making them ideal for more detailed work. You can also find canvas boards, which are a more economical option, but they may not be as durable as stretched canvases. Consider the size of the canvas based on the space you have available and the complexity of your design.
What kind of paint is best for DIY canvas art?
Acrylic paint is generally considered the best option for DIY canvas art due to its versatility, affordability, and ease of use. Acrylics are water-based, dry quickly, and can be easily cleaned up with soap and water. They are also available in a wide range of colors and finishes, from matte to glossy. You can also use oil paints, but they require more specialized techniques and solvents for cleaning. Watercolors are another option, but they may not provide the same level of coverage and vibrancy as acrylics. Experiment with different types of paint to find what works best for your style and preferences.
How do I prepare the canvas before painting?
Before you start painting, it’s important to prepare the canvas to ensure that the paint adheres properly and the colors remain vibrant. Most pre-stretched canvases are already primed with gesso, which is a white, chalky substance that creates a smooth, even surface for painting. However, if your canvas is not primed, or if you want to add an extra layer of protection, you can apply a coat of gesso yourself. Use a wide brush or a roller to apply the gesso evenly over the entire surface of the canvas. Allow the gesso to dry completely before you start painting.
How can I create texture on my canvas art?
There are several ways to add texture to your DIY canvas art. One simple method is to use a palette knife to apply thick layers of paint. You can also use textured mediums, such as modeling paste or gel medium, to create raised surfaces and interesting patterns. Another option is to incorporate found objects, such as fabric scraps, dried flowers, or sand, into your artwork. Simply glue the objects onto the canvas and then paint over them to create a cohesive design. Experiment with different techniques to find what works best for you.
How do I protect my finished canvas art?
Once your DIY canvas art is complete, it’s important to protect it from dust, dirt, and UV damage. You can apply a coat of varnish or sealant to the finished artwork to create a protective barrier. Choose a varnish that is specifically designed for acrylic or oil paints, depending on the type of paint you used. Apply the varnish evenly over the entire surface of the canvas, following the manufacturer’s instructions. Allow the varnish to dry completely before hanging your artwork. You can also frame your canvas art to provide additional protection and enhance its appearance.
What if I make a mistake while painting?
Don’t worry if you make a mistake while painting your DIY canvas art! Acrylic paint is very forgiving and can be easily corrected. If you make a small mistake, simply wait for the paint to dry and then paint over it with the correct color. For larger mistakes, you can use a wet cloth or a sponge to wipe away the paint while it is still wet. If the paint has already dried, you can sand it down lightly with fine-grit sandpaper and then repaint the area. Remember, mistakes are a part of the creative process, so don’t be afraid to experiment and learn from your errors.
Can I use this DIY canvas art trick to create personalized gifts?
Absolutely! DIY canvas art makes a wonderful and thoughtful personalized gift for friends and family. You can create custom artwork that reflects their interests, hobbies, or favorite colors. Consider painting a portrait of their pet, creating an abstract piece that matches their home décor, or designing a motivational quote that inspires them. The possibilities are endless! Personalizing your canvas art adds a special touch that shows you put time and effort into creating a unique and meaningful gift.
Leave a Comment