

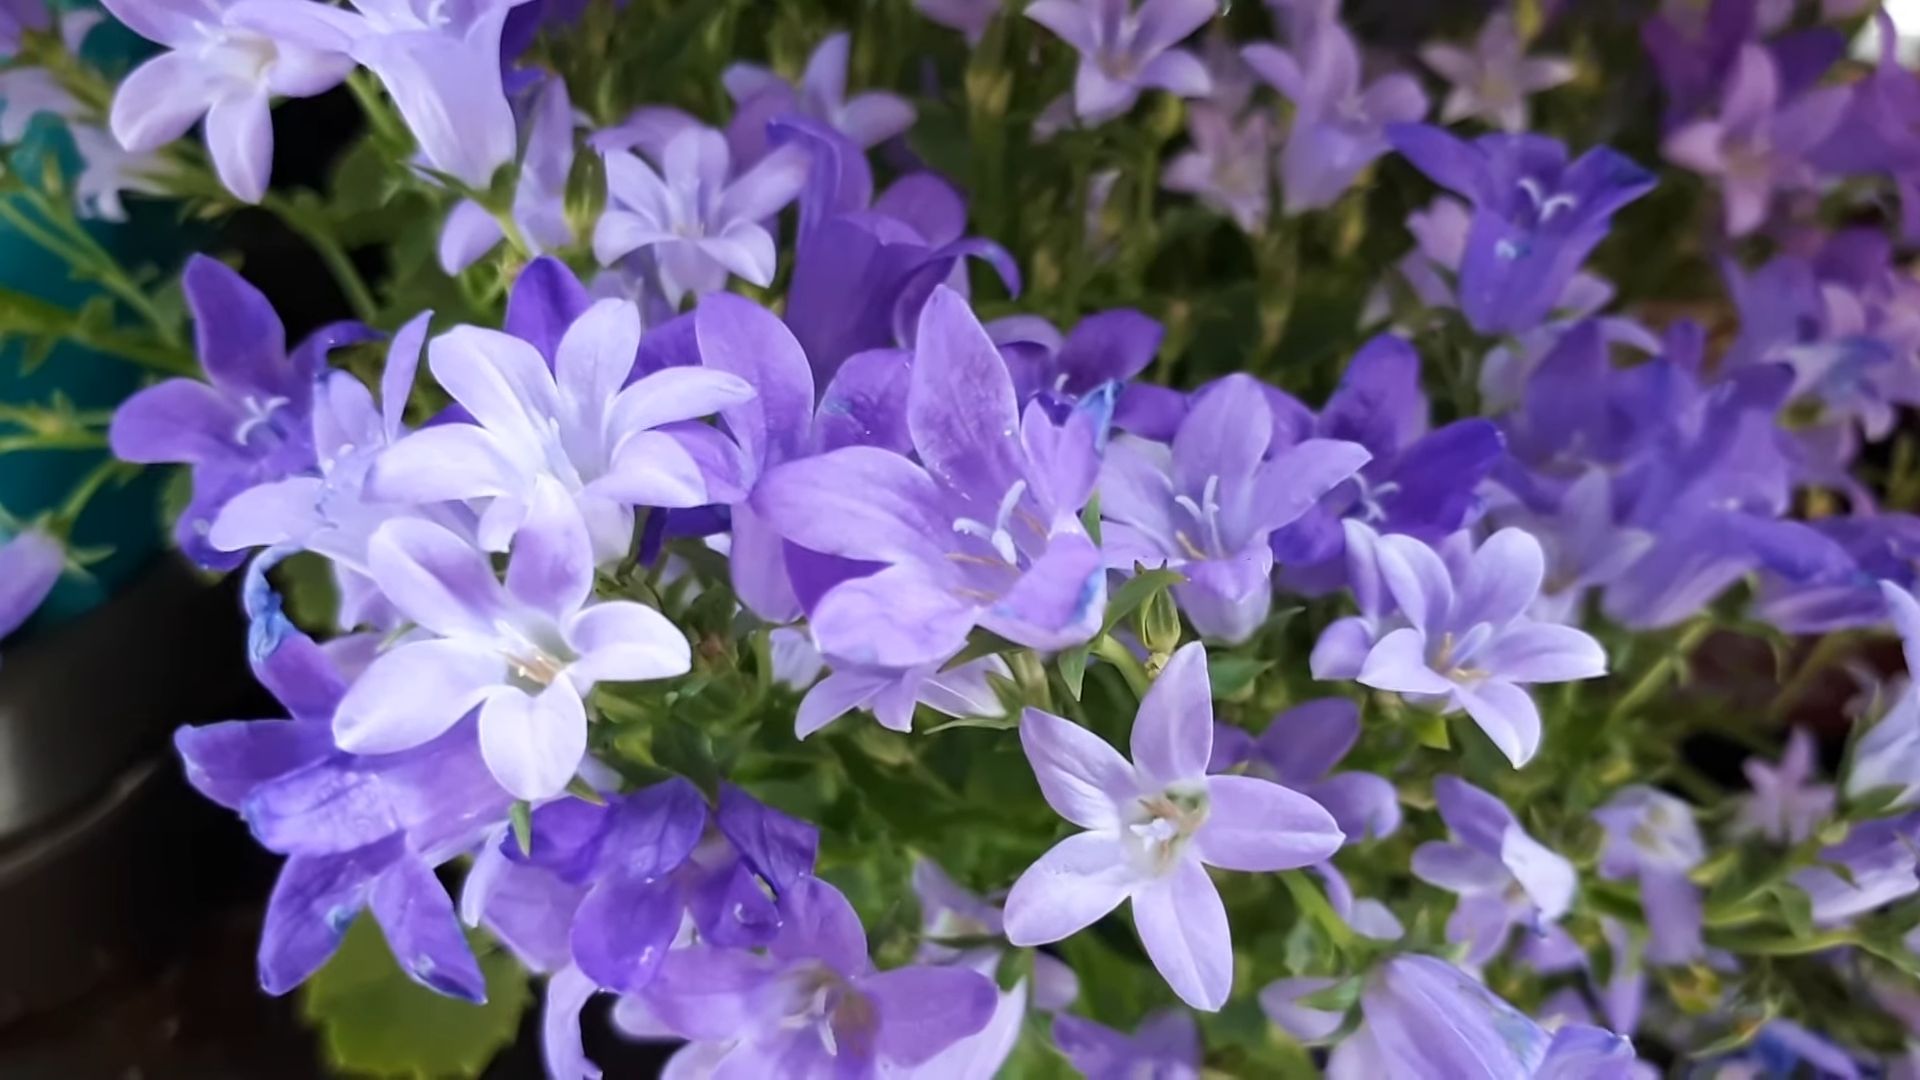
Grow Bellflowers at Home and transform your garden into a vibrant, cottage-style paradise! Have you ever dreamt of a garden bursting with charming, bell-shaped blooms in shades of blue, purple, pink, and white? Well, you’re in the right place! This DIY guide is packed with simple, effective tricks and hacks to help you cultivate these delightful flowers, even if you’re a complete beginner.
Bellflowers, also known as Campanula, have a rich history, gracing gardens for centuries. Their name, derived from the Latin word “campana” meaning bell, perfectly captures their delicate, bell-like shape. In folklore, they’re often associated with gratitude and humility, adding a touch of symbolism to their visual appeal. I’ve always been captivated by their whimsical charm, and I’m excited to share my secrets for successfully growing them at home.
Why do you need these DIY tricks? Because growing bellflowers can sometimes be a bit tricky! They have specific needs when it comes to sunlight, soil, and watering. Without the right knowledge, you might find yourself struggling to achieve those picture-perfect blooms. But don’t worry, I’m here to guide you through every step of the process. With these easy-to-follow tips, you’ll be able to grow bellflowers at home that will thrive and bring joy to your garden for years to come. Let’s get started!
DIY: Growing Bellflowers (Campanula) at Home – A Comprehensive Guide
Hey there, fellow gardening enthusiasts! I’m so excited to share my experience and guide you through growing beautiful bellflowers (Campanula) right in your own home or garden. These charming, bell-shaped blooms are a delightful addition to any space, and with a little know-how, you can enjoy their vibrant colors and graceful forms. Let’s dive in!
Choosing Your Bellflower Variety
Bellflowers come in a wide array of shapes, sizes, and colors. Before you even think about planting, it’s crucial to pick the right variety for your space and climate. Here are a few popular options:
* Canterbury Bells (Campanula medium): These are the classic bellflowers, known for their tall spires and large, cup-shaped flowers. They’re biennials, meaning they bloom in their second year.
* Peach-leaved Bellflower (Campanula persicifolia): These beauties offer elegant, upward-facing flowers on slender stems. They’re perennials and come back year after year.
* Creeping Bellflower (Campanula rapunculoides): While beautiful, be warned! This one can be quite invasive. Plant it in a container to control its spread.
* Fairy Thimbles (Campanula cochleariifolia): These are adorable, tiny bellflowers perfect for rock gardens or hanging baskets.
* Dalmatian Bellflower (Campanula portenschlagiana): A low-growing, spreading variety ideal for ground cover or spilling over walls.
Consider your garden’s size, sunlight exposure, and soil type when making your choice. Some bellflowers prefer full sun, while others thrive in partial shade.
Preparing for Planting: Seeds vs. Starts
You have two main options for starting your bellflowers: seeds or starter plants (also known as “starts”).
* Seeds: Starting from seed is more economical, but it requires more patience and attention.
* Starts: Buying starter plants gives you a head start and ensures you’re getting a healthy, established plant.
I’ve done both, and honestly, both methods have their pros and cons. If you’re a beginner, I’d recommend starting with starts.
Starting Bellflowers from Seed (Indoor Method)
If you’re feeling adventurous and want to start from seed, here’s how I do it:
1. Gather Your Supplies: You’ll need:
* Bellflower seeds
* Seed starting trays or small pots
* Seed starting mix (a fine, sterile soil mix)
* Spray bottle filled with water
* Clear plastic wrap or a humidity dome
* Grow lights (optional, but highly recommended)
2. Sow the Seeds: Bellflower seeds are tiny, so handle them carefully. Fill your seed starting trays or pots with the seed starting mix. Gently sprinkle the seeds on the surface of the soil. Don’t bury them too deep; they need light to germinate.
3. Water Gently: Use a spray bottle to mist the soil surface. You want to moisten the soil without disturbing the seeds.
4. Create a Humid Environment: Cover the trays or pots with clear plastic wrap or a humidity dome. This will help retain moisture and create a warm, humid environment that’s ideal for germination.
5. Provide Light: Place the trays or pots in a bright location, but avoid direct sunlight, which can scorch the seedlings. If you’re using grow lights, position them a few inches above the trays.
6. Monitor and Water: Check the soil moisture daily. Keep the soil consistently moist, but not soggy. Remove the plastic wrap or humidity dome for a few hours each day to allow for air circulation and prevent fungal growth.
7. Thin the Seedlings: Once the seedlings have developed a few sets of true leaves (the leaves that look like miniature versions of the adult plant’s leaves), thin them out, leaving only the strongest seedling in each pot or cell.
8. Harden Off the Seedlings: Before transplanting the seedlings outdoors, you need to “harden them off.” This means gradually exposing them to outdoor conditions over a period of a week or two. Start by placing them in a sheltered location for a few hours each day, gradually increasing the amount of time they spend outdoors.
Planting Bellflower Starts (Outdoor Method)
If you’re using starter plants, the process is a bit simpler:
1. Choose Your Planting Location: Select a location that receives the appropriate amount of sunlight for your chosen bellflower variety. Most bellflowers prefer well-drained soil.
2. Prepare the Soil: Dig a hole that’s slightly larger than the root ball of the starter plant. Amend the soil with compost or other organic matter to improve drainage and fertility.
3. Remove the Plant from its Container: Gently remove the starter plant from its container. Loosen the roots slightly if they’re tightly bound.
4. Plant the Bellflower: Place the plant in the hole, making sure the top of the root ball is level with the surrounding soil. Backfill the hole with soil and gently firm it around the plant.
5. Water Thoroughly: Water the newly planted bellflower thoroughly.
6. Mulch: Apply a layer of mulch around the base of the plant to help retain moisture and suppress weeds.
Caring for Your Bellflowers
Once your bellflowers are planted, here’s how to keep them happy and healthy:
* Watering: Water regularly, especially during dry periods. Bellflowers prefer consistently moist soil, but avoid overwatering, which can lead to root rot.
* Fertilizing: Fertilize your bellflowers with a balanced fertilizer in the spring and again in mid-summer.
* Deadheading: Deadhead spent flowers regularly to encourage more blooms. Simply snip off the faded flowers just below the flower head.
* Staking: Taller varieties of bellflowers may need staking to prevent them from flopping over.
* Pest and Disease Control: Bellflowers are generally pest and disease resistant, but keep an eye out for slugs, snails, and powdery mildew. Use appropriate control measures if necessary.
Dividing Bellflowers
Many perennial bellflower varieties can be divided every few years to rejuvenate the plants and create new ones.
1. When to Divide: The best time to divide bellflowers is in the spring or fall, when the plants are not actively blooming.
2. Dig Up the Plant: Carefully dig up the entire plant, being careful not to damage the roots.
3. Divide the Root Ball: Use a sharp knife or spade to divide the root ball into several sections, each with healthy roots and shoots.
4. Replant the Divisions: Replant the divisions in prepared soil, spacing them appropriately.
5. Water Thoroughly: Water the newly divided plants thoroughly.
Bellflowers in Containers
Bellflowers also thrive in containers, making them perfect for patios, balconies, or small gardens.
1. Choose the Right Container: Select a container that’s large enough to accommodate the bellflower’s root system. Make sure the container has drainage holes.
2. Use a Good Quality Potting Mix: Fill the container with a good quality potting mix that drains well.
3. Plant the Bellflower: Plant the bellflower in the container, following the same instructions as for planting in the ground.
4. Water and Fertilize Regularly: Water and fertilize the bellflower regularly, as container plants tend to dry out and deplete nutrients more quickly than plants in the ground.
5. Overwintering: In colder climates, you may need to overwinter your container-grown bellflowers indoors. Bring the containers indoors before the first frost and place them in a cool, bright location. Water sparingly during the winter months.
Troubleshooting Common Bellflower Problems
Even with the best care, you might encounter a few problems with your bellflowers. Here are some common issues and how to address them:
* Yellowing Leaves: This could be a sign of overwatering, underwatering, or nutrient deficiency. Check the soil moisture and adjust your watering accordingly. Fertilize the plant if necessary.
* Powdery Mildew: This fungal disease appears as a white, powdery coating on the leaves. Improve air circulation around the plant and treat with a fungicide if necessary.
* Slugs and Snails: These pests can damage the leaves and flowers of bellflowers. Use slug and snail bait or handpick them off the plants.
* Lack of Blooms: This could be due to insufficient sunlight, over-fertilizing with nitrogen, or not deadheading spent flowers. Make sure the plant is getting enough sunlight and avoid using high-nitrogen fertilizers. Deadhead spent flowers regularly.
Enjoying Your Bellflowers
The best part of growing bellflowers is, of
Conclusion
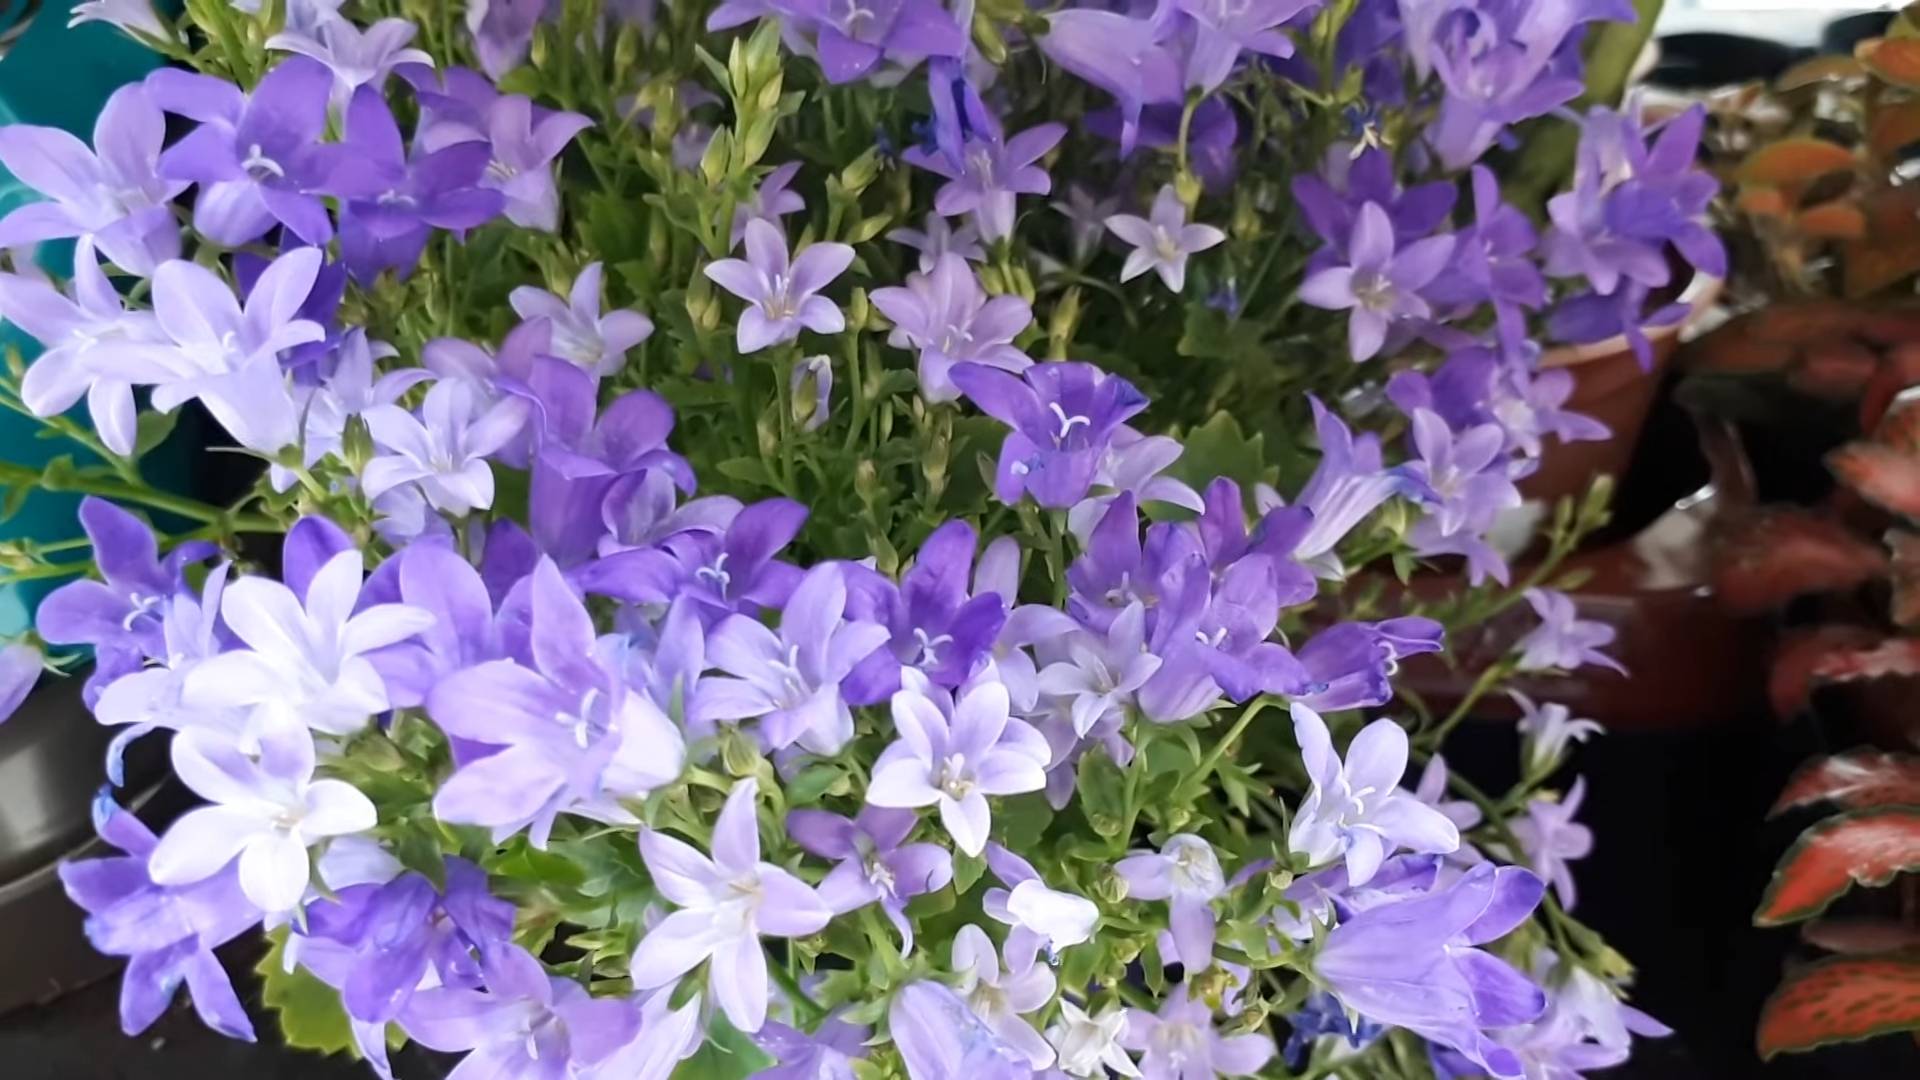
So, there you have it! Growing bellflowers at home, while it might seem daunting at first, is entirely achievable and incredibly rewarding. This DIY trick, focusing on proper soil preparation and consistent watering, is a must-try for any gardener, whether you’re a seasoned pro or just starting to cultivate your green thumb. The vibrant blues, purples, and whites of these charming blooms will transform your garden into a cottagecore dream, attracting pollinators and adding a touch of whimsical elegance to your outdoor space.
But why is this particular DIY approach so essential? Simply put, bellflowers, while relatively hardy, thrive when given the right foundation. Neglecting the soil’s pH or allowing the soil to dry out can lead to stunted growth, fewer blooms, and ultimately, disappointment. Our method ensures your bellflowers receive the nutrients they need and the moisture they crave, setting them up for success from the very beginning.
Beyond the basic method, there’s plenty of room for experimentation and personalization. Consider these variations to tailor the process to your specific needs and preferences:
* Container Gardening: If you’re short on space or prefer to keep your bellflowers portable, container gardening is an excellent option. Choose a pot that’s at least 12 inches in diameter to allow for adequate root growth. Use a high-quality potting mix amended with slow-release fertilizer.
* Companion Planting: Bellflowers benefit from companion planting. Consider planting them alongside other cottage garden favorites like roses, lavender, or daisies. These plants not only create a visually appealing display but also attract beneficial insects that can help protect your bellflowers from pests.
* Different Varieties: Don’t limit yourself to just one type of bellflower! Explore the diverse range of varieties available, from the towering Campanula pyramidalis to the delicate Campanula rotundifolia. Each variety offers its unique charm and can add depth and interest to your garden.
* Seed Starting Indoors: For an earlier bloom, start your bellflower seeds indoors 6-8 weeks before the last expected frost. This gives them a head start and allows you to enjoy their beauty sooner.
Growing bellflowers at home doesn’t have to be a chore. It can be a fun, relaxing, and deeply satisfying experience. Imagine the joy of watching your tiny seedlings transform into vibrant, blooming plants, attracting butterflies and hummingbirds to your garden.
We wholeheartedly encourage you to give this DIY trick a try. It’s a simple, effective, and affordable way to cultivate these beautiful flowers and create a garden you’ll be proud of. And once you’ve experienced the magic of bellflowers, we’d love to hear about it! Share your photos, tips, and experiences in the comments below. Let’s build a community of bellflower enthusiasts and inspire others to embrace the joy of gardening. Happy growing!
Frequently Asked Questions (FAQ)
What is the best time of year to plant bellflowers?
The ideal time to plant bellflowers depends on whether you’re starting from seeds or transplants. If you’re starting from seeds, sow them indoors 6-8 weeks before the last expected frost. If you’re using transplants, plant them outdoors in the spring or fall when the weather is mild. Avoid planting during the heat of summer, as this can stress the plants.
What kind of soil do bellflowers need?
Bellflowers prefer well-drained soil that is rich in organic matter. The ideal pH level is slightly acidic to neutral (around 6.0 to 7.0). Before planting, amend the soil with compost or well-rotted manure to improve drainage and fertility. If your soil is heavy clay, consider adding sand or perlite to improve drainage.
How much sun do bellflowers need?
Most bellflower varieties thrive in full sun to partial shade. They need at least 6 hours of sunlight per day to produce abundant blooms. However, in hot climates, they may benefit from some afternoon shade to protect them from scorching. Observe your plants carefully and adjust their location if they show signs of stress, such as wilting or leaf burn.
How often should I water bellflowers?
Bellflowers need consistent moisture, especially during hot, dry weather. Water them deeply whenever the top inch of soil feels dry to the touch. Avoid overwatering, as this can lead to root rot. When watering, aim for the base of the plant to avoid wetting the foliage, which can increase the risk of fungal diseases. Mulching around the plants can help retain moisture and suppress weeds.
Do bellflowers need fertilizer?
Bellflowers benefit from regular fertilization, especially during the growing season. Use a balanced fertilizer (e.g., 10-10-10) every 4-6 weeks, following the instructions on the package. Alternatively, you can use a slow-release fertilizer at the beginning of the growing season. Avoid over-fertilizing, as this can lead to excessive foliage growth at the expense of blooms.
How do I deadhead bellflowers?
Deadheading is the process of removing spent flowers to encourage more blooms. To deadhead bellflowers, simply snip off the faded flowers just below the flower head. This will prevent the plant from putting energy into seed production and encourage it to produce more flowers. Deadheading also helps to keep the plant looking neat and tidy.
Are bellflowers susceptible to any pests or diseases?
Bellflowers are generally resistant to pests and diseases, but they can occasionally be affected by aphids, slugs, or snails. Aphids can be controlled with insecticidal soap or neem oil. Slugs and snails can be controlled with slug bait or by handpicking them off the plants. Bellflowers can also be susceptible to fungal diseases, such as powdery mildew or rust. To prevent fungal diseases, ensure good air circulation around the plants and avoid overhead watering. If you notice signs of disease, treat the plants with a fungicide.
Can I grow bellflowers in containers?
Yes, bellflowers can be grown successfully in containers. Choose a pot that is at least 12 inches in diameter to allow for adequate root growth. Use a high-quality potting mix amended with slow-release fertilizer. Water the plants regularly and fertilize them every 4-6 weeks. Container-grown bellflowers may need to be watered more frequently than those grown in the ground, especially during hot weather.
How do I propagate bellflowers?
Bellflowers can be propagated by seeds, cuttings, or division. Seeds can be sown indoors or outdoors, as described above. Cuttings can be taken in the spring or summer. To take a cutting, snip off a 4-6 inch stem from a healthy plant. Remove the lower leaves and dip the cut end in rooting hormone. Plant the cutting in a pot filled with moist potting mix. Keep the soil moist and the cutting in a warm, humid location until it roots. Division is best done in the spring or fall. To divide a bellflower, carefully dig up the plant and separate the roots into smaller clumps. Replant the clumps in separate locations.
Are bellflowers deer resistant?
Bellflowers are considered to be moderately deer resistant. While deer may occasionally nibble on them, they are not usually a preferred food source. However, if deer pressure is high in your area, you may need to protect your bellflowers with fencing or deer repellent.
Leave a Comment