

DIY Gold Chain Wall Lamp: Ever dreamt of adding a touch of glamour and unique personality to your living space without breaking the bank? I know I have! Forget those generic, mass-produced lamps you see everywhere. We’re diving into the world of DIY to create a stunning, eye-catching wall lamp that’s as individual as you are.
Humans have been crafting light sources for millennia, from simple oil lamps to elaborate chandeliers. This project taps into that innate desire to create and illuminate our surroundings, but with a modern, chic twist. The use of gold chains adds a touch of luxury reminiscent of art deco design, a style known for its opulence and geometric patterns.
Why a DIY Gold Chain Wall Lamp, you ask? Because it’s the perfect solution for adding ambient lighting to a small space, creating a focal point in a larger room, or simply expressing your creativity. Plus, let’s be honest, who doesn’t love a good DIY project that results in a beautiful and functional piece of art? This project is not only budget-friendly but also allows you to customize the lamp to perfectly match your existing decor. So, grab your tools, unleash your inner artist, and let’s get crafting! I’m excited to show you how easy and rewarding it is to create your own stunning gold chain wall lamp.
DIY Gold Chain Wall Lamp: A Touch of Glam for Your Space
Hey there, fellow DIY enthusiasts! Today, I’m super excited to share a project that’s been lighting up my life (literally!). We’re going to create a stunning gold chain wall lamp that’s both chic and surprisingly easy to make. This project is perfect for adding a touch of glam to any room, and the best part? It’s way more affordable than buying a similar lamp from a store. Let’s get started!
What You’ll Need: The Supply List
Before we dive in, let’s gather all the necessary materials. Trust me, having everything on hand will make the process so much smoother.
* A Wall Sconce Base: I opted for a simple, inexpensive sconce base from a local hardware store. You can choose any style you like, but make sure it has a way to attach the chain. A metal one is preferable for durability.
* Gold Chain: This is the star of the show! I used a fairly thick, decorative gold chain. The amount you’ll need depends on the desired length and fullness of your lamp, but I recommend getting at least 6-8 feet to be safe. You can always trim it later.
* Light Bulb: Choose a bulb that complements the gold chain. I went with a warm, Edison-style bulb for a vintage vibe. Make sure it’s the correct wattage for your sconce.
* Light Socket and Wiring: If your sconce base doesn’t come with a pre-wired socket, you’ll need to purchase one separately. Make sure you get the right type for your bulb.
* Wire Strippers: Essential for safely working with electrical wires.
* Screwdrivers: A Phillips head and a flathead screwdriver will likely be needed.
* Pliers: Helpful for manipulating the chain and tightening screws.
* Electrical Tape: For insulating wire connections. Safety first!
* Wire Connectors (Wire Nuts): To securely connect the wires.
* Drill and Drill Bits: Depending on your wall and sconce base, you might need to drill holes for mounting.
* Mounting Hardware: Screws, anchors, or wall plugs suitable for your wall type.
* Optional: Gold Spray Paint: If your sconce base isn’t already gold, you can spray paint it to match the chain.
* Optional: Gloves: To protect your hands.
* Optional: Measuring Tape: To ensure even chain lengths.
Phase 1: Preparing the Sconce Base
This phase involves getting the sconce base ready for the gold chain transformation.
1. Disassemble the Sconce (If Necessary): If your sconce base is already assembled, carefully take it apart. You might need to remove the light socket or any decorative elements that will get in the way of attaching the chain.
2. Spray Paint (Optional): If your sconce base isn’t the desired color, now’s the time to spray paint it. I wanted mine to be a perfect match for the gold chain, so I gave it a few coats of gold spray paint. Remember to apply thin, even coats and let it dry completely between coats. Follow the instructions on the spray paint can for best results.
3. Prepare Attachment Points: Examine your sconce base and identify where you’ll be attaching the gold chain. If there aren’t already suitable holes or loops, you might need to drill some. Be careful not to damage the sconce base. I used a small drill bit to create a few evenly spaced holes around the perimeter of the sconce.
Phase 2: Wiring the Light Socket
Important Safety Note: If you’re not comfortable working with electrical wiring, please consult a qualified electrician. Electricity can be dangerous if not handled properly.
1. Turn Off the Power: Before you even think about touching any wires, make absolutely sure the power to the circuit you’re working on is turned off at the breaker box. Double-check with a voltage tester to be completely sure.
2. Connect the Wires: Carefully connect the wires from the light socket to the wires in the sconce base (or the wires coming from the wall, if you’re hardwiring the lamp). Use wire strippers to expose the ends of the wires. Twist the matching colored wires together (usually black to black and white to white) and secure them with wire connectors (wire nuts). Make sure the connections are tight and secure.
3. Grounding (If Applicable): If your sconce base has a grounding wire (usually green or bare copper), connect it to the grounding wire in the wall (if you’re hardwiring) or to the grounding screw on the sconce base.
4. Insulate the Connections: Wrap each wire connection with electrical tape to provide extra insulation and prevent shorts.
Phase 3: Attaching the Gold Chain
This is where the magic happens! We’ll transform the plain sconce base into a glamorous gold chain lamp.
1. Measure and Cut the Chain: Decide how long you want the gold chain strands to be. I wanted mine to vary in length for a more dynamic look. Use pliers to cut the chain into different lengths. I recommend starting with longer strands and trimming them down if needed.
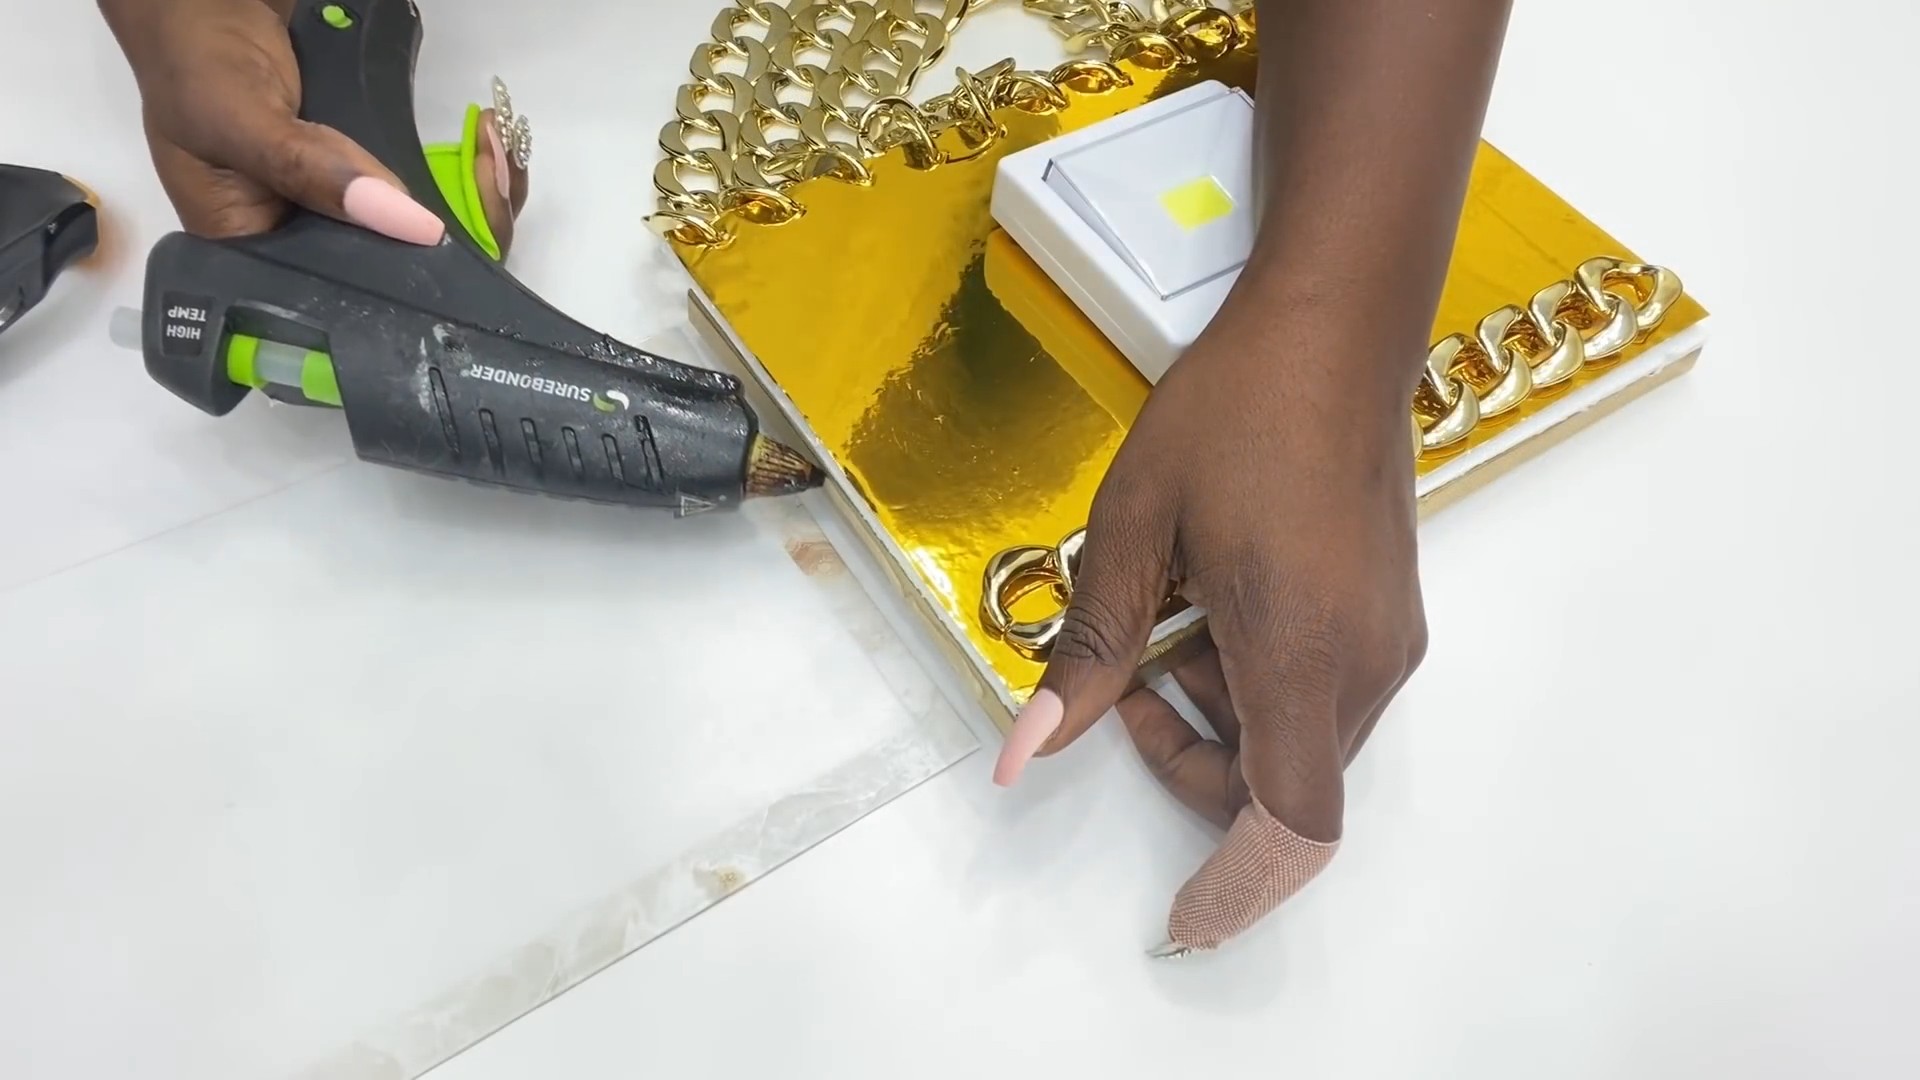
2. Attach the Chain to the Sconce Base: This is where your creativity comes into play! Use pliers to open the links of the chain and attach them to the holes or loops you prepared on the sconce base. I started by attaching the longest strands at the bottom and gradually worked my way up, using shorter strands towards the top.
3. Create a Full and Even Look: Make sure the chain is evenly distributed around the sconce base. You might need to adjust the placement of the chain strands to achieve the desired fullness and balance. Don’t be afraid to experiment!
4. Secure the Chain: Once you’re happy with the arrangement, make sure all the chain links are securely closed. You don’t want any strands falling off later.
Phase 4: Installing the Light Bulb and Mounting the Lamp
We’re almost there! Now it’s time to install the light bulb and mount the lamp on the wall.
1. Install the Light Bulb: Carefully screw the light bulb into the light socket. Make sure it’s snug but not too tight.
2. Mount the Lamp: Follow the instructions that came with your sconce base for mounting it on the wall. Depending on your wall type, you might need to drill holes and use anchors or wall plugs. Make sure the lamp is securely mounted and level.
3. Hardwiring (If Applicable): If you’re hardwiring the lamp, carefully connect the wires from the sconce base to the wires in the wall. Again, make sure the power is turned off at the breaker box before you do this. Use wire connectors to secure the connections and wrap them with electrical tape.
4. Turn on the Power: Once the lamp is securely mounted and all the wiring is complete, turn the power back on at the breaker box.
5. Test the Lamp: Flip the switch and admire your handiwork! If the lamp doesn’t turn on, double-check all the wiring connections.
Tips and Tricks for a Perfect Gold Chain Wall Lamp
* Experiment with Chain Types: Don’t be afraid to get creative with the type of gold chain you use. You could use different sizes, textures, or even mix different types of chain for a more unique look.
* Add Embellishments: Consider adding other embellishments to your lamp, such as crystals, beads, or tassels.
* Customize the Length: Adjust the length of the chain strands to suit your space. A longer chain will create a more dramatic effect, while a shorter chain will be more subtle.
* Use a Dimmer Switch: Install a dimmer switch to control the brightness of the lamp and create a more ambient atmosphere.
* Safety First: Always prioritize safety when working with electricity. If you’re not comfortable with any part of the process, consult a qualified electrician.
Enjoy Your Glamorous Creation!
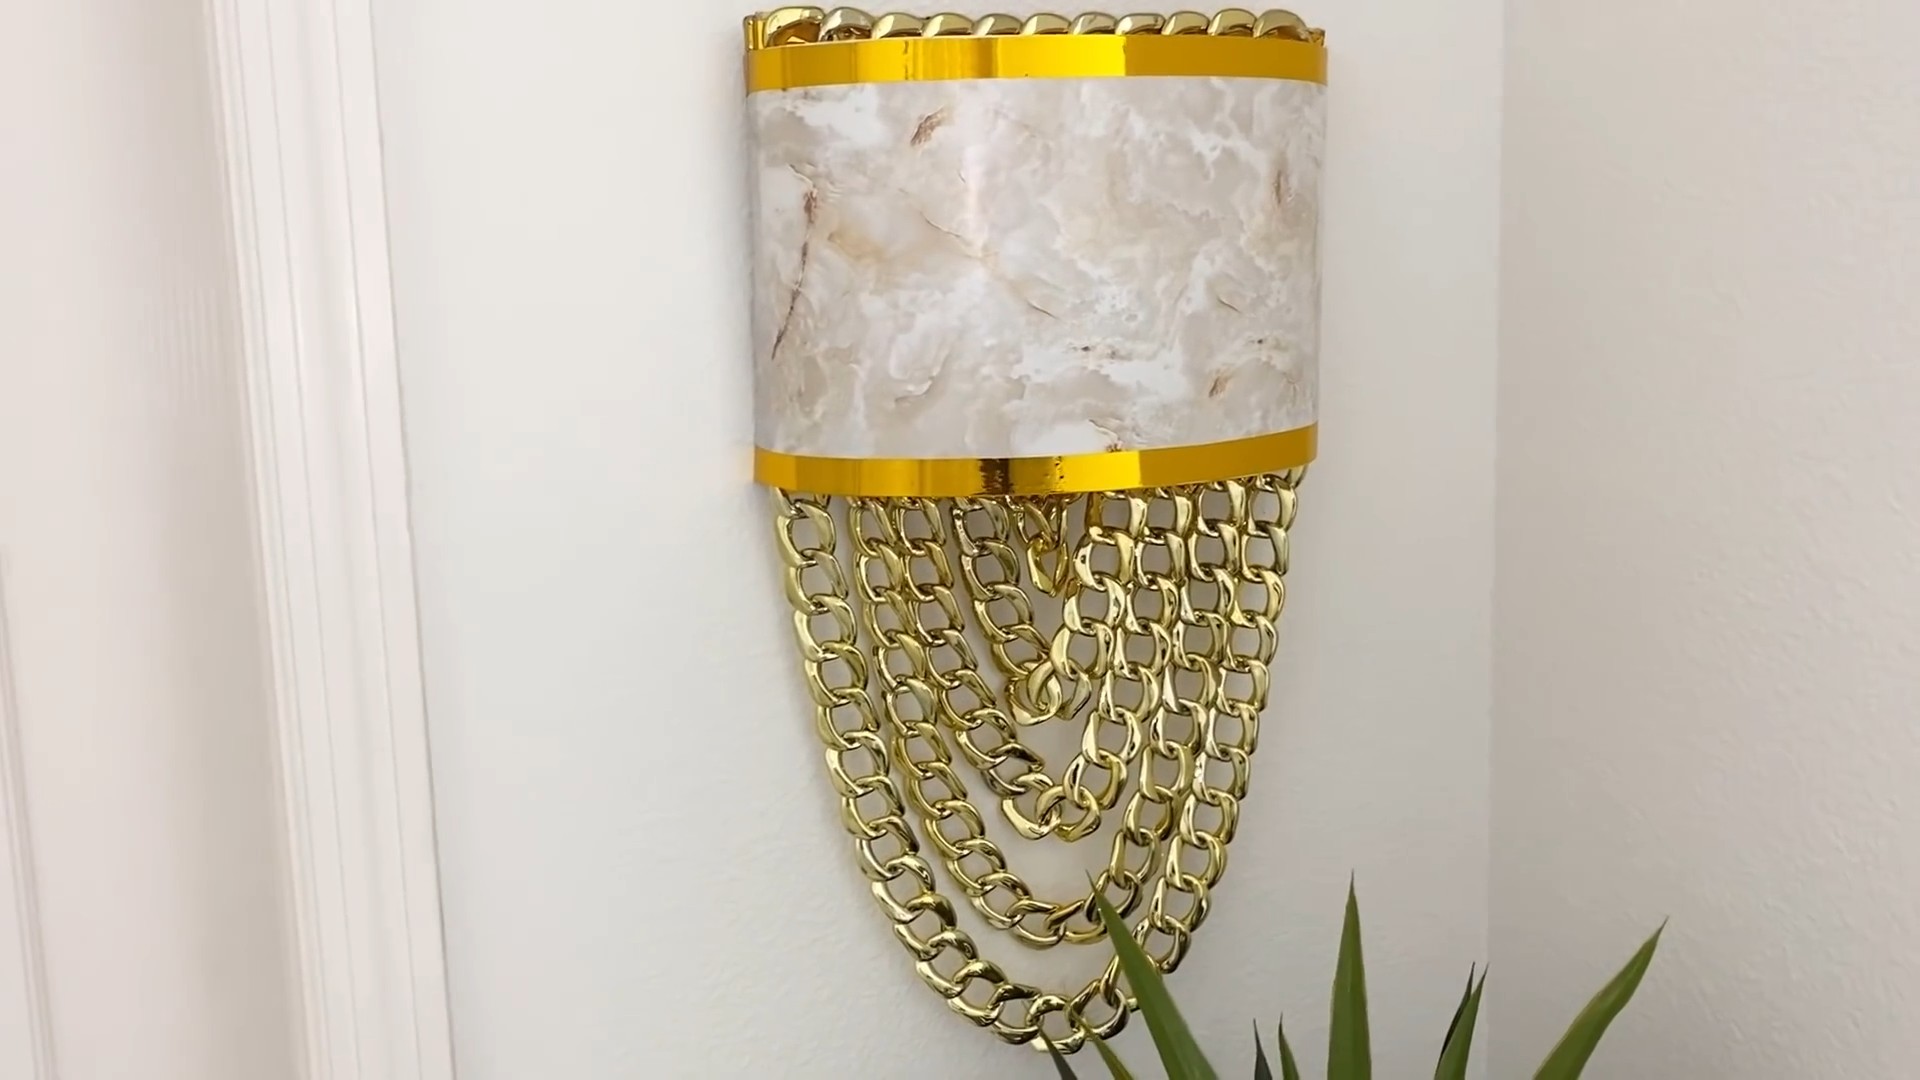
And there you have it! Your very own DIY gold chain wall lamp. I hope you enjoyed this project as much as I did. It’s a simple yet effective way to add a touch of luxury to your home decor. Now, go ahead and bask in the golden glow of your creation! I’m sure it will be a conversation starter for years to come. Happy crafting!
Conclusion
So, there you have it! Transforming an ordinary space into a haven of chic elegance is now within your reach, thanks to this incredibly simple yet stunning DIY gold chain wall lamp project. Forget those exorbitant price tags attached to designer lighting; with a little creativity and minimal effort, you can achieve a similar, if not superior, aesthetic for a fraction of the cost. This isn’t just about saving money; it’s about injecting your personality and style into your home decor, creating a piece that’s uniquely yours.
The beauty of this DIY project lies in its adaptability. Feel free to experiment with different chain lengths to achieve your desired drape and light diffusion. Consider using chains of varying thicknesses for a more textured and dynamic look. If gold isn’t your color of choice, explore other metallic finishes like silver, copper, or even a painted matte black for a more industrial vibe. You could even incorporate beads or crystals into the chain for added sparkle and glamour. Think about using smart bulbs to control the brightness and color temperature of your lamp, allowing you to set the perfect mood for any occasion.
Beyond the aesthetic appeal, this DIY gold chain wall lamp offers a practical lighting solution. It’s perfect for adding ambient light to a bedroom, living room, or hallway. Its unique design makes it a conversation starter and a focal point in any room. And because you’re building it yourself, you have complete control over the size and scale, ensuring it fits perfectly into your space.
But the real magic happens when you personalize it. Consider adding a fabric shade to soften the light and introduce a pop of color. Or, for a more minimalist look, leave the bulb exposed for a raw, industrial feel. The possibilities are truly endless.
We understand that embarking on a DIY project can sometimes feel daunting, but trust us, this one is incredibly beginner-friendly. The steps are straightforward, the materials are readily available, and the satisfaction of creating something beautiful with your own hands is immeasurable.
We wholeheartedly encourage you to give this DIY gold chain wall lamp a try. It’s a fantastic way to add a touch of luxury and sophistication to your home without breaking the bank. And more importantly, it’s a chance to unleash your creativity and express your unique style.
Once you’ve completed your masterpiece, we’d absolutely love to see it! Share your creations with us on social media using [Your Hashtag Here] and let us know what variations you tried. Your experiences and insights can inspire others to embark on their own DIY adventures. Let’s build a community of creative individuals who are passionate about transforming their homes into personalized havens. So, grab your tools, gather your materials, and get ready to create a stunning DIY gold chain wall lamp that will illuminate your space and your spirit!
Frequently Asked Questions
What type of chain is best for this project?
The best type of chain for this project depends on the aesthetic you’re aiming for and the weight you want the lamp to support. A lightweight, decorative chain is ideal for a delicate and airy look. However, if you’re using a heavier bulb or adding embellishments, opt for a sturdier chain with a higher weight capacity. Consider the size of the links as well; smaller links create a more refined appearance, while larger links offer a bolder, more industrial feel. Ultimately, the choice is yours, so experiment with different options to find the perfect fit for your vision.
How do I hang the chain securely on the wall?
Safety is paramount when hanging anything on the wall, especially something that involves electricity. Use appropriate wall anchors that are rated for the weight of the lamp and chain. The type of wall anchor you need will depend on the type of wall you have (drywall, plaster, brick, etc.). For drywall, self-drilling anchors or toggle bolts are good options. For heavier items or brick walls, use masonry screws or expansion anchors. Always follow the manufacturer’s instructions for installing the wall anchors. Before drilling, double-check for any hidden wires or pipes behind the wall to avoid potential hazards.
Can I use a different type of light bulb?
Absolutely! The type of light bulb you use can significantly impact the overall look and feel of the lamp. Edison bulbs with their warm, vintage glow are a popular choice for creating a cozy and inviting atmosphere. LED bulbs are a more energy-efficient option and come in a variety of colors and brightness levels. Smart bulbs offer even more control, allowing you to adjust the color temperature and brightness from your smartphone. Consider the size and shape of the bulb as well; a larger bulb will create a more dramatic effect, while a smaller bulb will be more subtle.
How do I hide the electrical cord?
Hiding the electrical cord is crucial for achieving a clean and polished look. There are several options available, depending on your preferences and the layout of your room. You can use cord covers or cable concealers to run the cord along the wall and hide it from view. These come in various colors and styles to match your decor. Another option is to run the cord behind furniture or along the baseboard. If you’re comfortable with electrical work, you can also hardwire the lamp directly into the wall, eliminating the need for a visible cord altogether. However, this should only be done by a qualified electrician.
What if I don’t want to use gold chain? What are some alternatives?
The beauty of this DIY project is its versatility! If gold isn’t your style, there are plenty of other options to explore. Silver chain offers a sleek and modern look, while copper chain adds a touch of warmth and rustic charm. You can also use other materials like rope, twine, or even beads to create a unique and eye-catching wall lamp. Consider painting the chain a different color to match your decor. A matte black chain can create an industrial vibe, while a bright and bold color can add a playful touch. Don’t be afraid to experiment and get creative!
How do I clean the gold chain?
To keep your gold chain wall lamp looking its best, regular cleaning is essential. Dust the chain regularly with a soft cloth or duster to prevent buildup. For more stubborn dirt or grime, you can use a mild soap and water solution. Gently wipe the chain with a damp cloth, then dry it thoroughly with a clean towel. Avoid using harsh chemicals or abrasive cleaners, as these can damage the finish of the chain. For tarnished gold chain, you can use a specialized gold cleaner, but always test it on a small, inconspicuous area first to ensure it doesn’t cause any discoloration.
Can I make this lamp dimmable?
Yes, you can make this lamp dimmable by using a dimmable light bulb and a dimmer switch. Ensure that both the bulb and the switch are compatible with each other. You can install a dimmer switch in place of the standard on/off switch on the lamp’s cord. Alternatively, if you’re hardwiring the lamp into the wall, you can install a dimmer switch on the wall. Dimmable lamps allow you to adjust the brightness of the light to create the perfect ambiance for any occasion.
Is this project safe for renters?
This project can be renter-friendly with a few modifications. Instead of permanently mounting the chain to the wall with screws and anchors, consider using removable adhesive hooks or command strips. These are designed to hold a certain amount of weight without damaging the walls. However, be sure to choose hooks or strips that are rated for the weight of the lamp and chain. You can also use a plug-in pendant light kit instead of hardwiring the lamp, which eliminates the need for any electrical work. When you move out, simply remove the hooks or strips and take the lamp with you.


Leave a Comment