

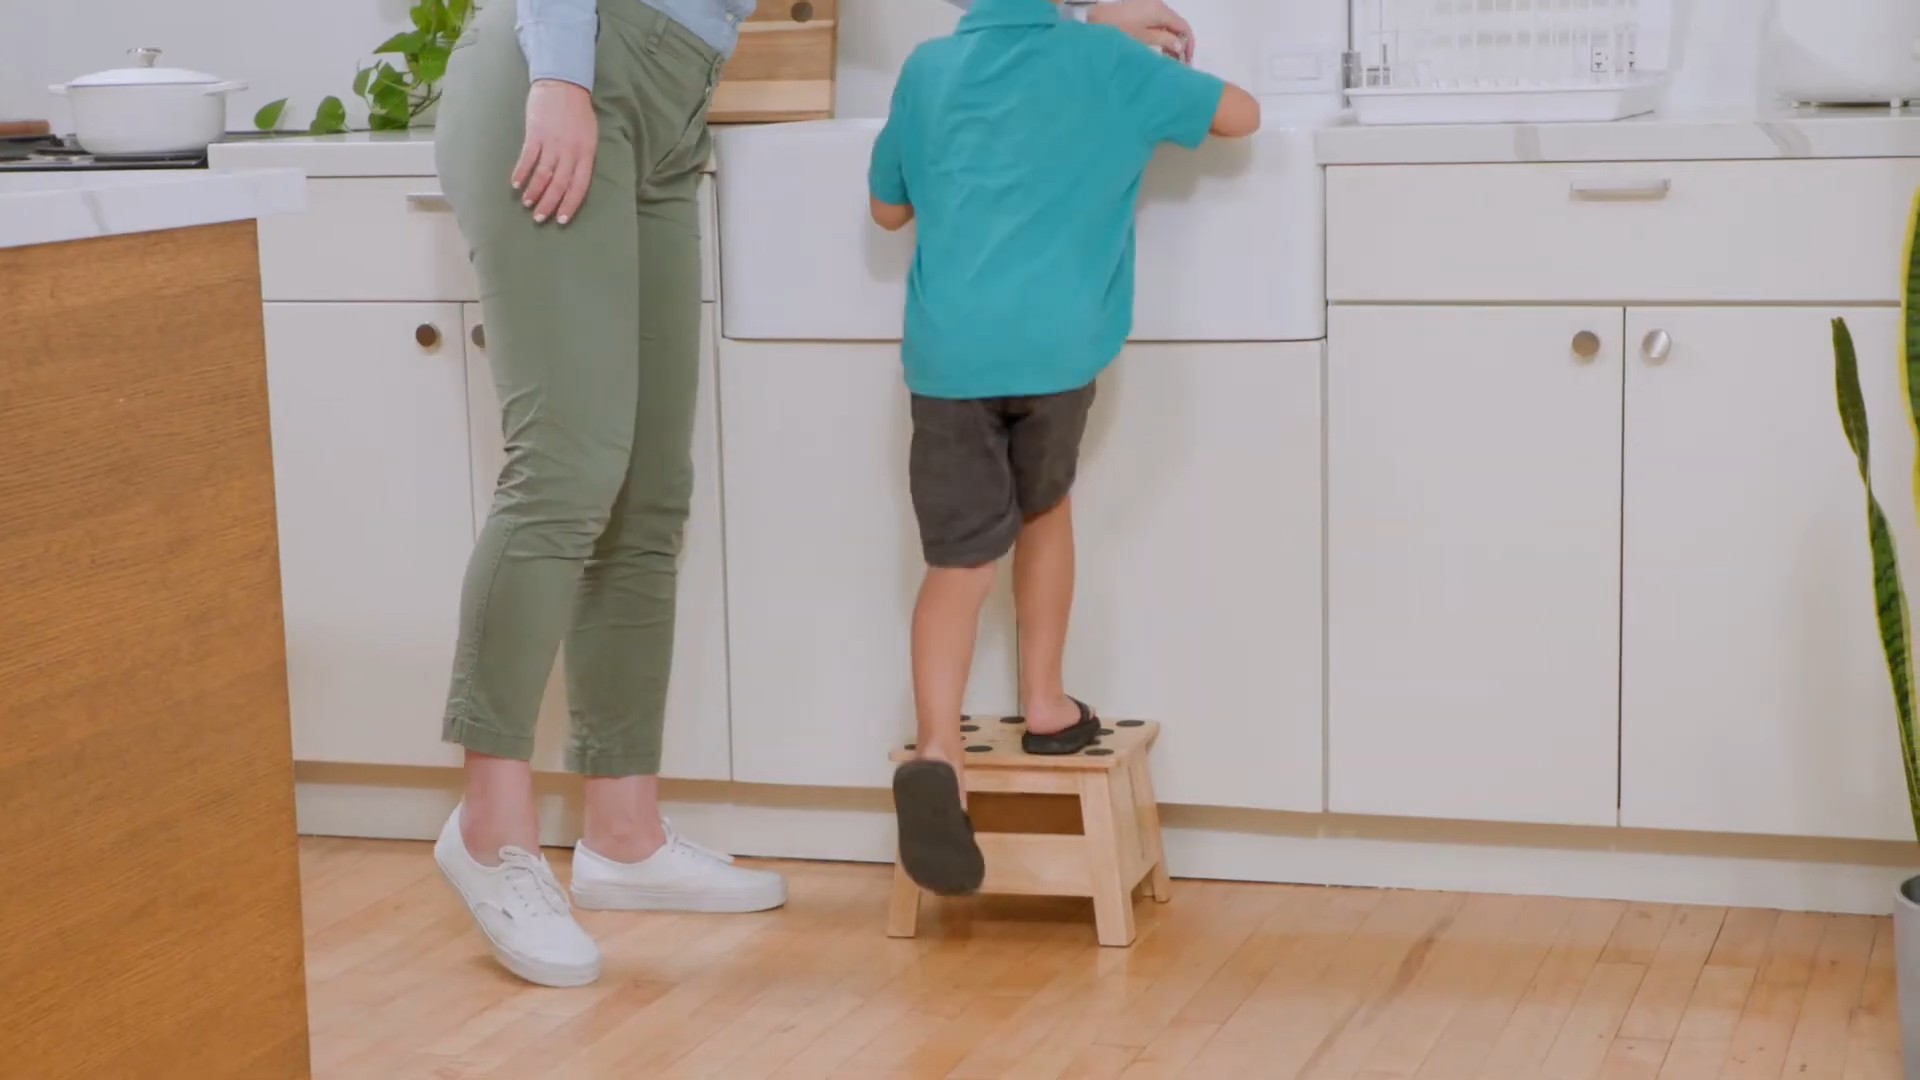
DIY Kids Step Stool: Ever feel like your little ones are constantly asking for help reaching things? I know I do! From grabbing a snack from the top shelf to washing their hands in the sink, it seems like they always need a boost. That’s where a DIY kids step stool comes in handy – and trust me, building one yourself is easier than you think!
Step stools have been around for ages, evolving from simple wooden blocks to more elaborate designs. Historically, they were essential tools in homes, allowing children and shorter adults to access higher spaces. Think about it – before standardized counter heights, a step stool was a necessity, not a luxury. Today, while commercially made options abound, there’s something special about crafting a step stool with your own hands, especially one tailored to your child’s needs and your home’s aesthetic.
Why should you embark on this DIY adventure? Well, for starters, you’ll save money compared to buying a pre-made stool. More importantly, you’ll have complete control over the materials, ensuring they’re safe and non-toxic for your child. Plus, it’s a fantastic opportunity to bond with your kids and teach them valuable skills. Imagine the pride they’ll feel using a DIY kids step stool that they helped create! This article will guide you through the process step-by-step, making it a fun and rewarding project for the whole family. Let’s get building!
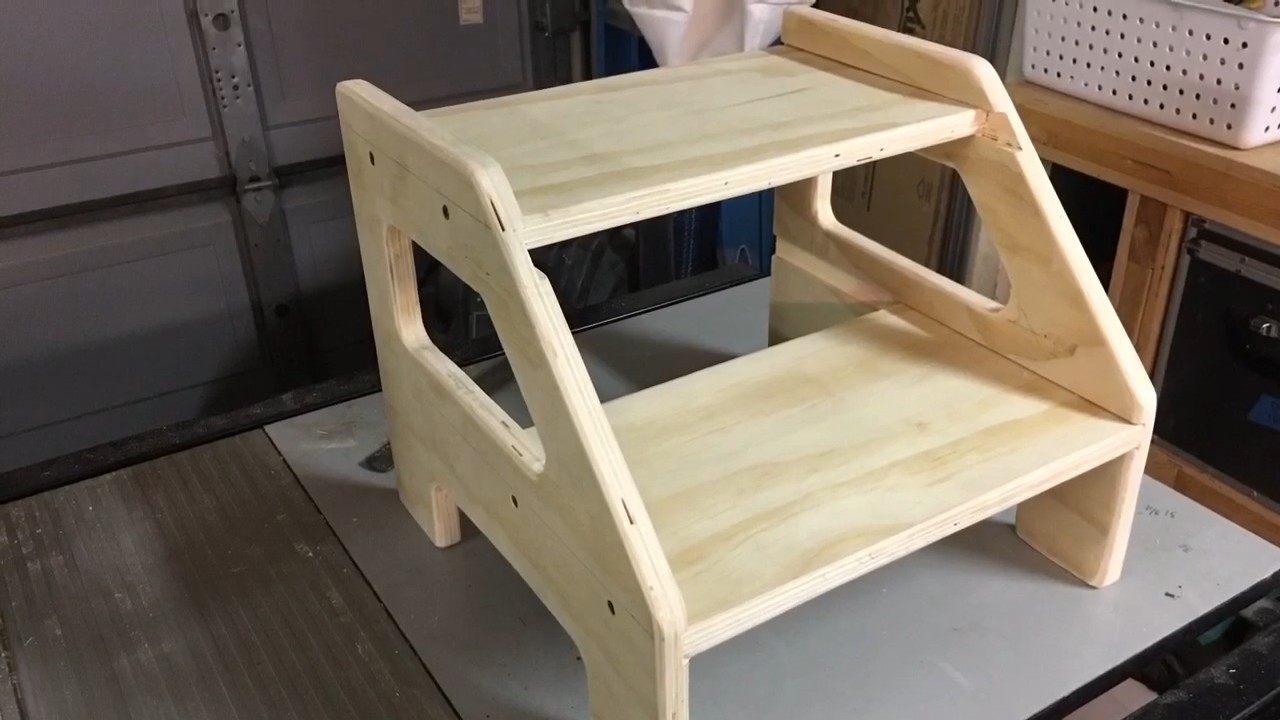
DIY Kids Step Stool: A Weekend Project for Little Helpers
Hey there, fellow DIY enthusiasts! Today, I’m super excited to share a project that’s not only fun but also incredibly practical: building a kids’ step stool. This little stool will empower your little ones to reach those high shelves, help in the kitchen, or even just feel a bit more independent. Plus, it’s a fantastic way to spend a weekend afternoon and create something lasting together. Let’s get started!
Materials You’ll Need
Before we dive into the building process, let’s gather all the necessary materials. This will save you time and frustration later on.
* Wood:
* One 1″ x 12″ x 8′ pine board (This will be enough for the steps and sides)
* One 2″ x 2″ x 8′ pine board (For the support braces)
* Fasteners:
* 1 1/4″ wood screws
* Wood glue
* Finishing Supplies:
* Primer
* Paint (Choose a kid-friendly, non-toxic paint in their favorite color!)
* Clear coat sealant (Optional, but recommended for durability)
* Tools:
* Measuring tape
* Pencil
* Safety glasses
* Ear protection
* Circular saw or hand saw
* Drill with drill bits
* Screwdriver or drill with screwdriver bits
* Sander or sandpaper (various grits)
* Clamps
* Paintbrushes or rollers
* Wood filler (Optional, for filling any imperfections)
Cutting the Wood
Okay, now for the fun part – cutting the wood! Accuracy is key here, so take your time and double-check your measurements. Remember, measure twice, cut once!
1. Cutting the Sides:
* We’ll start with the sides of the step stool. Cut two pieces from the 1″ x 12″ board. Each piece should be 12″ tall.
* Now, we need to create the angled shape. On each side piece, measure 8″ up from the bottom along the front edge. Mark this point.
* Draw a line from the top back corner of the board to the 8″ mark you just made. This is your cut line.
* Carefully cut along this line using your saw. You should now have two side pieces that are taller in the back and shorter in the front.
2. Cutting the Steps:
* Next, we’ll cut the steps. From the 1″ x 12″ board, cut two pieces.
* The top step should be 12″ wide.
* The bottom step should be 10″ wide.
* Both steps should be 6″ deep.
3. Cutting the Support Braces:
* Now, let’s cut the support braces from the 2″ x 2″ board.
* Cut four pieces, each 8″ long. These will provide extra stability to the steps.
Assembling the Step Stool
Alright, with all the pieces cut, it’s time to put everything together! This is where the magic happens.
1. Attaching the Bottom Step:
* Apply wood glue to the edges of the bottom step (the 10″ wide piece).
* Position the bottom step between the two side pieces, ensuring it’s flush with the bottom of the side pieces and centered.
* Clamp the pieces together to hold them in place.
* Pre-drill pilot holes through the side pieces and into the edges of the bottom step. This will prevent the wood from splitting when you drive in the screws.
* Secure the bottom step to the side pieces using 1 1/4″ wood screws. Use at least two screws per side.
2. Attaching the Top Step:
* Now, let’s attach the top step (the 12″ wide piece).
* Measure 6″ up from the top of the bottom step along the inside of the side pieces. Mark this point. This will be the bottom edge of the top step.
* Apply wood glue to the edges of the top step.
* Position the top step between the side pieces, aligning the bottom edge with the marks you made. Make sure it’s centered.
* Clamp the pieces together.
* Pre-drill pilot holes and secure the top step to the side pieces using 1 1/4″ wood screws. Again, use at least two screws per side.
3. Adding the Support Braces:
* The support braces will add extra strength and stability to the step stool.
* Apply wood glue to one end of each support brace.
* Position two support braces underneath the bottom step, one on each side, flush with the inside of the side pieces.
* Clamp the braces in place.
* Pre-drill pilot holes and secure the braces to the bottom step and side pieces using 1 1/4″ wood screws.
* Repeat this process for the top step, attaching the remaining two support braces.
Sanding and Filling
Now that the step stool is assembled, it’s time to smooth out any rough edges and fill any imperfections. This will ensure a professional-looking finish.
1. Sanding:
* Use a medium-grit sandpaper (around 120 grit) to sand the entire step stool. Pay close attention to the edges and corners, rounding them slightly to prevent splinters.
* Switch to a fine-grit sandpaper (around 220 grit) to smooth out the surface even further.
* Wipe away any sanding dust with a clean cloth.
2. Filling Imperfections (Optional):
* If you notice any gaps, cracks, or imperfections in the wood, now is the time to fill them with wood filler.
* Apply the wood filler according to the manufacturer’s instructions.
* Allow the wood filler to dry completely.
* Sand the filled areas smooth with fine-grit sandpaper.
Painting and Finishing
Finally, it’s time to add some color and protect your creation with a durable finish!
1. Priming:
* Apply a coat of primer to the entire step stool. This will help the paint adhere better and provide a more even finish.
* Allow the primer to dry completely according to the manufacturer’s instructions.
* Lightly sand the primed surface with fine-grit sandpaper to remove any imperfections.
* Wipe away any sanding dust.
2. Painting:
* Apply two coats of your chosen paint color to the step stool, allowing each coat to dry completely before applying the next.
* Use smooth, even strokes to avoid drips and brush marks.
* If you’re using a roller, make sure to use a high-quality roller cover for a smooth finish.
3. Applying a Clear Coat Sealant (Optional):
* For added durability and protection, consider applying a clear coat sealant to the painted step stool.
* Apply the sealant according to the manufacturer’s instructions.
* Allow the sealant to dry completely.
Safety First!
Before letting your little one use their new step stool, make sure it’s stable and secure. Place it on a level surface and supervise them while they’re using it.
Personalizing Your Step Stool
Want to make your step stool even more special? Here are a few ideas:
* Add their name: Use stencils or freehand to paint their name on the side of the stool.
* Decorate with stickers: Let them choose their favorite stickers to personalize their stool.
* Paint a fun design: Get creative with patterns, shapes, or characters.
* Add non-slip pads: Attach non-slip pads to the bottom of the legs to prevent the stool from sliding.
And there you have it! A beautiful, functional, and personalized kids’ step stool that you built yourself. I hope you and your little one enjoy this project as much as I did. Happy building!
Conclusion
So, there you have it! Creating your own DIY Kids Step Stool isn’t just about saving money; it’s about crafting a piece of furniture that perfectly fits your child’s needs and your home’s aesthetic. It’s about the satisfaction of building something with your own hands, knowing exactly what materials went into it, and ensuring its safety and durability. Forget those flimsy, mass-produced plastic stools that crack under pressure or wobble precariously. This DIY project empowers you to create a sturdy, reliable, and even beautiful step stool that will serve your little one for years to come.
But the real magic lies in the personalization. Think about adding non-slip treads to the steps for extra safety, especially if you have hardwood floors. Consider painting it in your child’s favorite colors or decorating it with their beloved cartoon characters. You could even incorporate storage into the design, creating a step stool that doubles as a toy box or a place to stash books. The possibilities are truly endless!
And don’t feel limited by the basic design we’ve outlined. Experiment with different wood types to achieve a specific look or feel. Perhaps you’d prefer a rustic, reclaimed wood step stool, or maybe a sleek, modern design using plywood and minimalist hardware. You could even try adding a handle for easier carrying or adjusting the height to perfectly suit your child’s reach.
This DIY Kids Step Stool project is more than just a weekend craft; it’s an investment in your child’s independence and your peace of mind. It’s a chance to bond with your little one as you work together on a fun and rewarding project. Imagine the pride they’ll feel knowing they helped build their own step stool!
We wholeheartedly encourage you to give this DIY project a try. Don’t be intimidated if you’re not a seasoned woodworker; the instructions are straightforward, and the materials are readily available. And most importantly, have fun with it! Let your creativity shine, and don’t be afraid to experiment.
Once you’ve completed your masterpiece, we’d love to see it! Share your photos and experiences with us in the comments below. Tell us about any modifications you made, any challenges you encountered, and any tips you have for other DIY enthusiasts. Let’s build a community of creative parents who are passionate about crafting safe, functional, and beautiful furniture for their children. Your insights could inspire others to embark on their own DIY adventures! So, grab your tools, gather your materials, and get ready to create a DIY Kids Step Stool that your child will cherish for years to come.
Frequently Asked Questions (FAQ)
What type of wood is best for a DIY Kids Step Stool?
The best type of wood depends on your budget, desired aesthetic, and woodworking skill level. Pine is a popular choice because it’s affordable, readily available, and easy to work with. However, it’s a softer wood and may be more prone to dents and scratches. Hardwoods like maple, oak, or birch are more durable and offer a more refined look, but they are also more expensive and can be more challenging to work with. Plywood is another option, especially for the sides of the stool, as it’s strong and stable. Consider using a hardwood plywood for a more durable and attractive finish. Ultimately, choose a wood that you feel comfortable working with and that fits your budget and design preferences. Ensure the wood is untreated and safe for children, avoiding any woods treated with harmful chemicals.
How do I ensure the step stool is safe for my child?
Safety is paramount when building anything for children. First, use non-toxic paints and finishes. Look for products labeled as “child-safe” or “low-VOC.” Second, round all sharp edges and corners to prevent injuries. A router with a rounding-over bit is ideal for this, but sandpaper can also be used. Third, ensure all screws and fasteners are countersunk and flush with the surface to prevent snagging or scratching. Fourth, apply non-slip treads or a non-slip coating to the steps to prevent slipping, especially on smooth surfaces like hardwood or tile. Finally, regularly inspect the step stool for any signs of wear and tear, such as loose screws or cracks in the wood. Repair any damage immediately to maintain its safety and stability.
Can I customize the height and dimensions of the step stool?
Absolutely! Customizing the height and dimensions is one of the biggest advantages of building your own step stool. Consider your child’s height and the height of the surfaces they’ll be using the stool to reach. Measure the distance from the floor to the countertop or sink and subtract a few inches to determine the ideal height of the top step. Adjust the dimensions of the side supports and steps accordingly. Remember to maintain a stable base and ensure the stool is wide enough to prevent tipping. You can also adjust the depth of the steps to provide more or less standing room. Before cutting any wood, create a simple sketch or diagram with your desired dimensions to ensure everything fits together properly.
What tools do I need for this DIY project?
The essential tools for this project include a saw (circular saw, jigsaw, or hand saw), a drill with various drill bits, a screwdriver (or drill with screwdriver bits), a measuring tape, a pencil, sandpaper, and clamps. A power sander can speed up the sanding process, but it’s not essential. A router with a rounding-over bit is helpful for rounding edges, but sandpaper can be used as an alternative. Safety glasses and a dust mask are also crucial for protecting your eyes and lungs. Depending on the complexity of your design, you may also need a wood glue, a countersink bit, and a level.
How can I add storage to the step stool?
Adding storage to your DIY Kids Step Stool is a great way to maximize its functionality. One simple option is to create a small compartment under the top step. This can be done by adding a hinged lid to the top step, allowing access to the storage space below. Alternatively, you could create open shelves on the sides of the stool. This is a great way to store books, toys, or other small items. When designing the storage compartment, consider the size and weight of the items you plan to store. Ensure the stool remains stable and doesn’t become top-heavy when the storage compartment is full. Use strong hinges and latches for the lid to ensure it stays securely closed.
What kind of paint or finish should I use?
Choose a non-toxic, child-safe paint or finish that is durable and easy to clean. Water-based acrylic paints are a good option because they are low-VOC and dry quickly. Milk paint is another natural and non-toxic option that provides a unique, matte finish. Polyurethane is a durable finish that protects the wood from scratches and moisture, but make sure to choose a water-based polyurethane to minimize VOCs. Avoid oil-based paints and finishes, as they contain harmful chemicals. Before applying any paint or finish, sand the wood smooth and apply a primer to ensure proper adhesion. Follow the manufacturer’s instructions for application and drying times.
How do I prevent the step stool from wobbling?
A wobbly step stool can be dangerous, so it’s important to ensure it’s stable. First, make sure all the legs are the same length. Use a level to check the stool on a flat surface and adjust the legs as needed. If the legs are slightly uneven, you can use sandpaper to sand them down until they are level. Second, ensure all the joints are tight and secure. Use wood glue and screws to reinforce the joints. Third, consider adding small rubber feet to the bottom of the legs. This will not only prevent the stool from wobbling but also protect your floors from scratches. Finally, test the stool on different surfaces to ensure it remains stable on various types of flooring.
How long will this DIY project take?
The time required to complete this DIY project depends on your woodworking skill level, the complexity of your design, and the tools you have available. A basic step stool can be completed in a weekend, while a more elaborate design with storage or intricate details may take longer. Allow ample time for cutting the wood, assembling the stool, sanding, painting or finishing, and allowing the paint or finish to dry completely. Rushing the process can lead to mistakes and compromise the quality and safety of the stool. Take your time, follow the instructions carefully, and enjoy the process of creating something special for your child.
Leave a Comment