

Grow Jerusalem Artichokes, and unlock a world of culinary possibilities right in your backyard! Have you ever dreamt of harvesting your own nutty, slightly sweet tubers? Well, dream no more! This DIY guide is your passport to cultivating these fascinating plants, also known as sunchokes, with ease.
Jerusalem Artichokes, despite their name, have no connection to Jerusalem and aren’t actually artichokes. They are native to North America, where indigenous peoples cultivated them for centuries. Imagine, you’ll be participating in a long tradition of sustainable food production! These plants were a vital food source, providing nourishment throughout the year.
Why should you grow Jerusalem Artichokes? Because they are incredibly easy to grow, even for beginner gardeners! They’re also packed with nutrients and offer a unique flavor profile that elevates any dish. Plus, in a world increasingly focused on self-sufficiency and sustainable living, having your own source of delicious, healthy food is more important than ever. I’m here to guide you through every step, from planting to harvesting, ensuring you have a bountiful crop of these amazing tubers. Let’s get started!
Growing Jerusalem Artichokes: A Beginner’s Guide to Sunroots
Okay, so you’re thinking about growing Jerusalem artichokes, also known as sunroots? Awesome! They’re surprisingly easy to grow, produce delicious and nutritious tubers, and the tall, sunflower-like plants are beautiful in the late summer garden. I’ve been growing them for years, and I’m excited to share my tips and tricks with you. Let’s dive in!
What are Jerusalem Artichokes Anyway?
Before we get started, let’s clarify what these things actually *are*. Despite the name, they have nothing to do with Jerusalem or artichokes! They’re actually a type of sunflower native to North America. The “Jerusalem” part is thought to be a corruption of the Italian word “girasole,” meaning sunflower. The “artichoke” part comes from the taste of the tubers, which some people find similar to artichoke hearts.
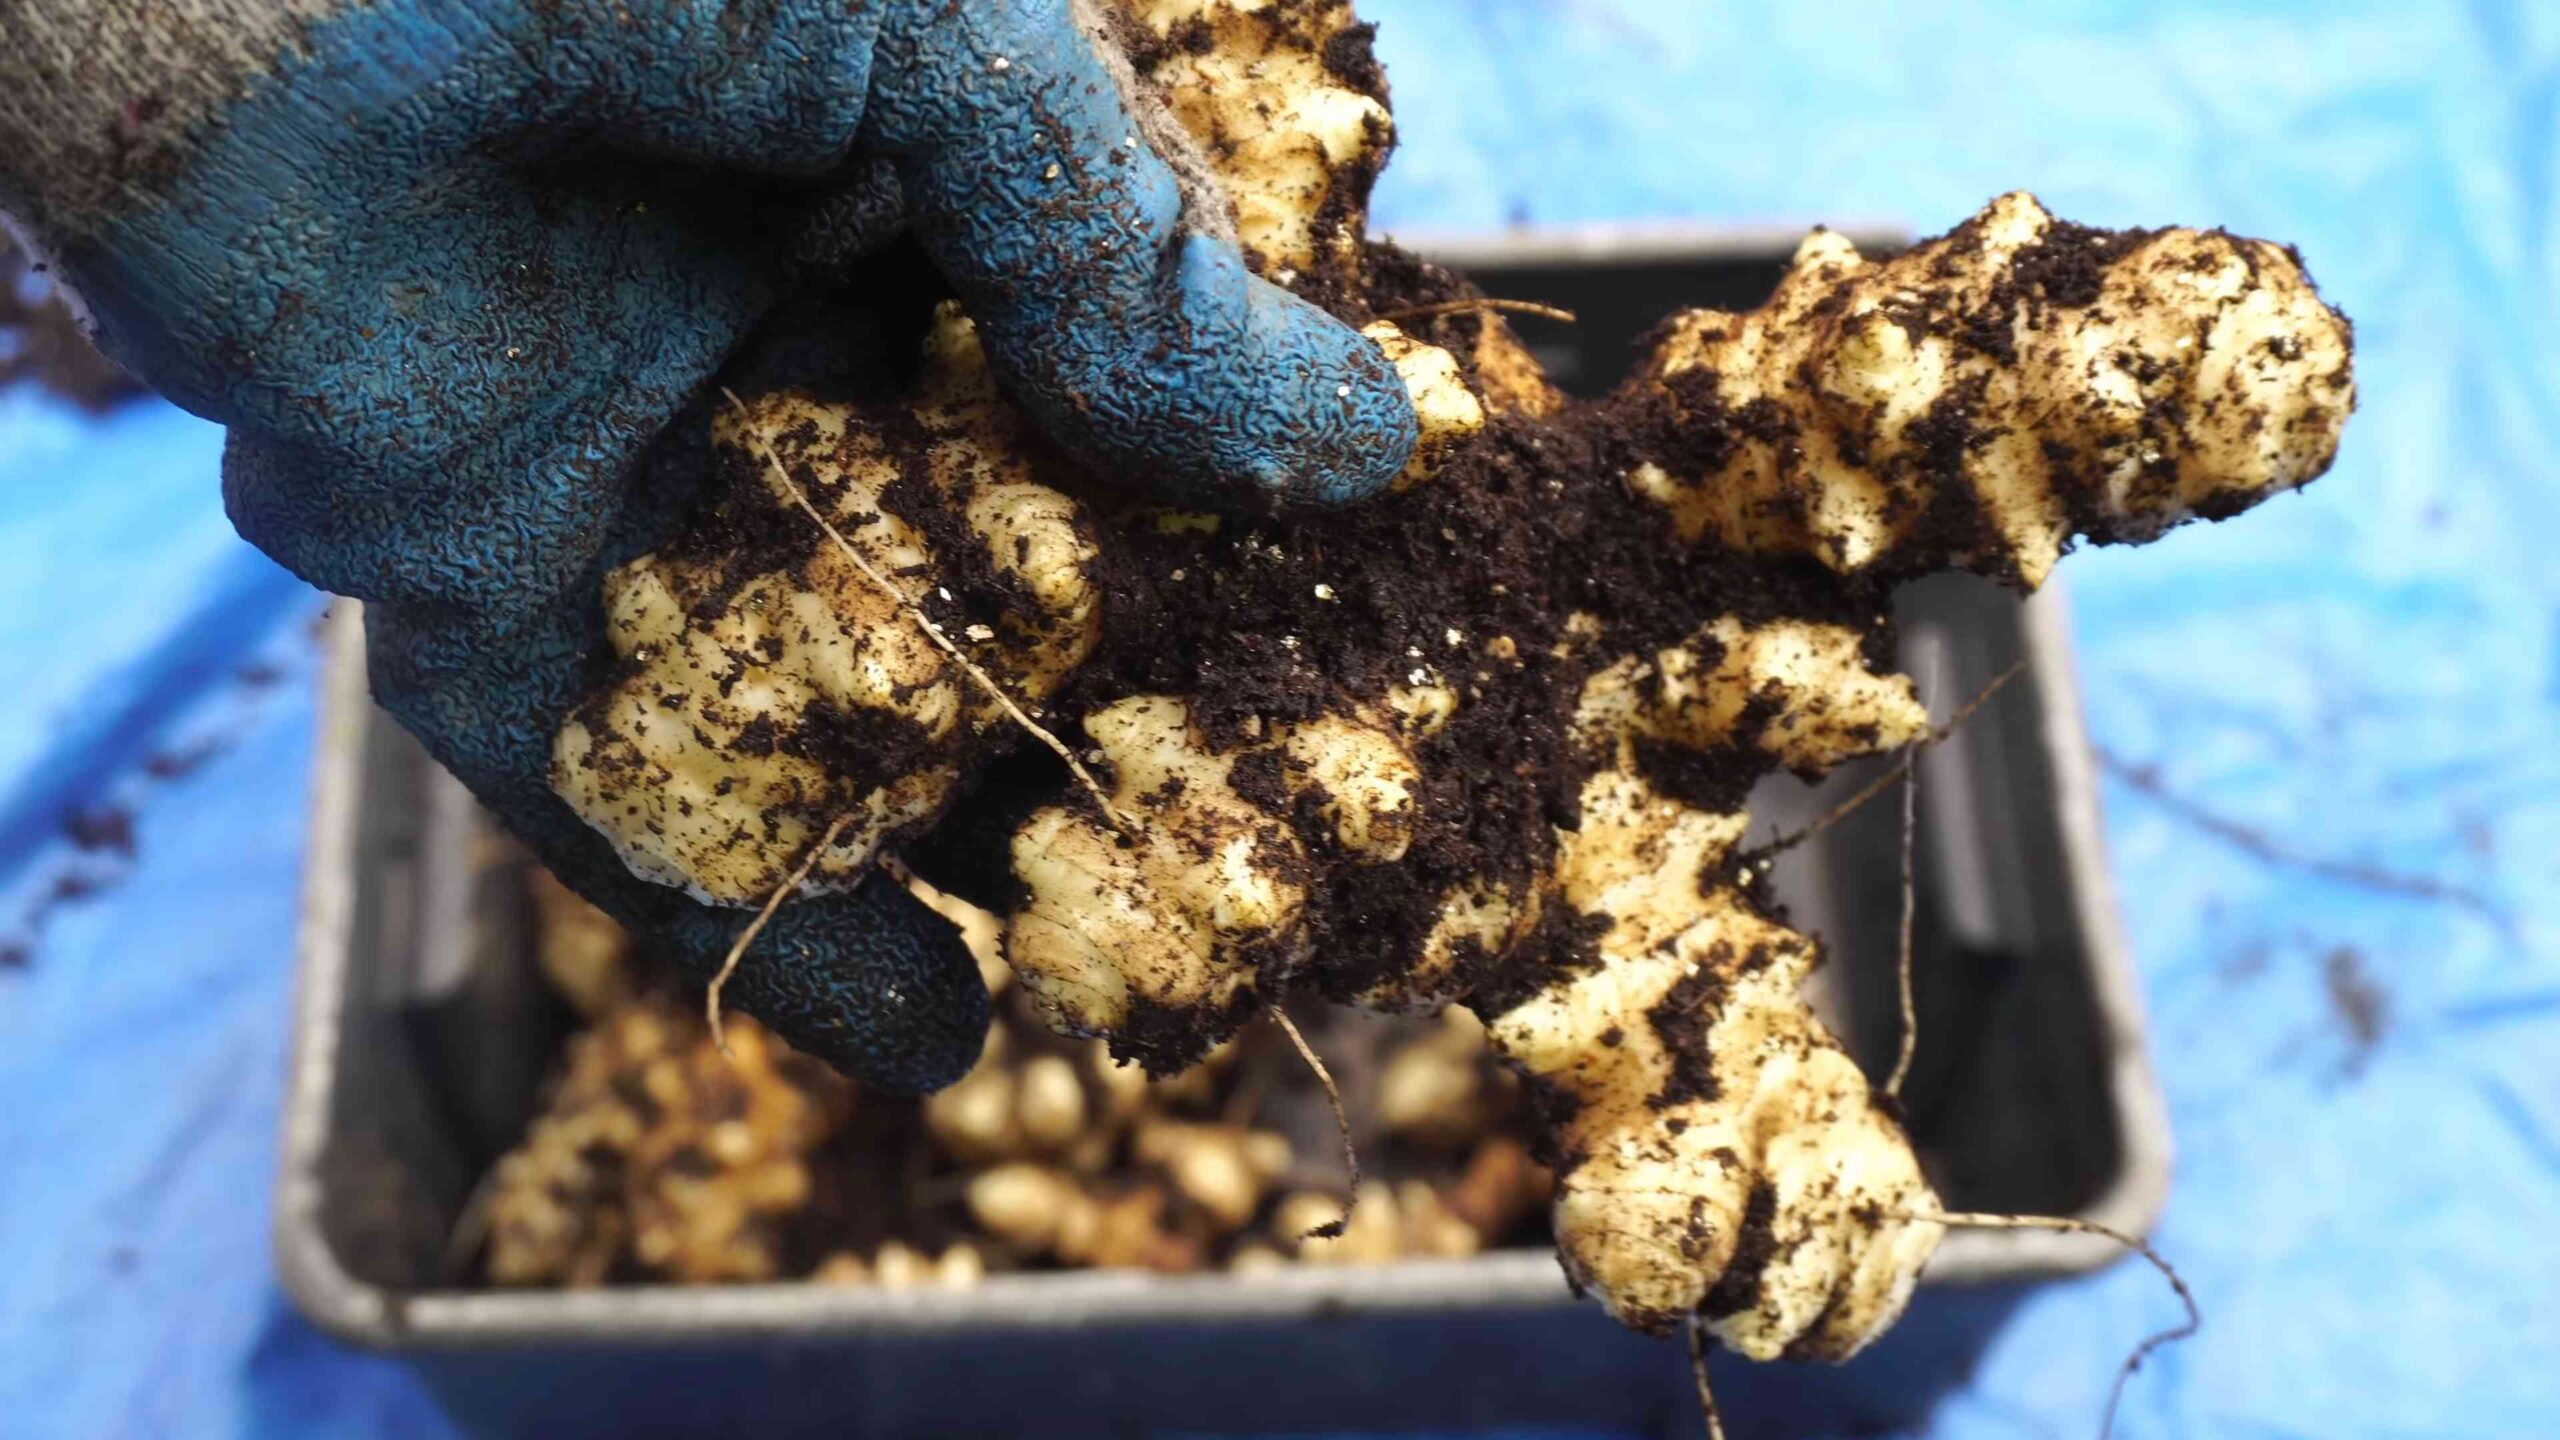
The edible part is the tuber, which looks a bit like ginger root. You can eat them raw, roasted, boiled, mashed, or even pickled. They have a slightly sweet, nutty flavor that I personally love.
Choosing Your Planting Location
Sunroots are pretty adaptable, but they do have some preferences. Here’s what to consider when choosing a spot in your garden:
* Sunlight: They need at least 6 hours of direct sunlight per day. The more sun, the better the tuber production.
* Soil: They prefer well-drained soil. While they can tolerate a variety of soil types, heavy clay soil can lead to rot. Amend your soil with compost or other organic matter to improve drainage.
* Space: This is important! Jerusalem artichokes are vigorous growers and can spread quickly. They can easily reach 6-12 feet tall, so give them plenty of room. Consider planting them in a contained area, like a raised bed or a large pot, to prevent them from taking over your garden. I learned this the hard way!
* Wind Protection: Because they grow so tall, they can be susceptible to wind damage. Choose a location that is sheltered from strong winds, or provide support with stakes or a trellis.
Planting Jerusalem Artichokes
The best time to plant Jerusalem artichokes is in the spring, after the last frost. You can also plant them in the fall, about 4-6 weeks before the ground freezes.
Here’s a step-by-step guide to planting:
1. Prepare the Soil: Dig a hole that is about 4-6 inches deep. Amend the soil with compost or other organic matter to improve drainage and fertility.
2. Select Your Tubers: You can purchase Jerusalem artichoke tubers from a garden center or online. Look for firm, healthy tubers with “eyes” (small buds) on them. You can also use tubers from a previous harvest.
3. Cut the Tubers (Optional): If you have large tubers, you can cut them into smaller pieces, making sure each piece has at least one or two eyes. This will increase the number of plants you get.
4. Plant the Tubers: Place the tubers in the hole, with the eyes facing up. Space them about 12-18 inches apart.
5. Cover the Tubers: Cover the tubers with soil and gently pat it down.
6. Water Well: Water the area thoroughly after planting.
Caring for Your Jerusalem Artichokes
Once planted, Jerusalem artichokes are relatively low-maintenance. Here’s what you need to do to keep them happy and healthy:
* Watering: Water regularly, especially during dry periods. They need about 1 inch of water per week.
* Weeding: Keep the area around the plants free of weeds. Weeds can compete with the Jerusalem artichokes for nutrients and water.
* Fertilizing: You can fertilize them with a balanced fertilizer in the spring. I like to use compost tea or fish emulsion.
* Staking (Optional): If your plants are getting too tall and are at risk of falling over, you can stake them.
* Pest Control: Jerusalem artichokes are generally pest-resistant. However, they can be susceptible to aphids and slugs. You can control aphids with insecticidal soap or by hand-picking them off the plants. Slugs can be controlled with slug bait or by hand-picking them off the plants at night.
Harvesting Jerusalem Artichokes
The best time to harvest Jerusalem artichokes is in the fall, after the plants have died back. The tubers will continue to improve in flavor after a frost. You can also harvest them in the spring, before the plants start to grow again.
Here’s how to harvest them:
1. Cut Back the Stalks: Cut the stalks down to the ground.
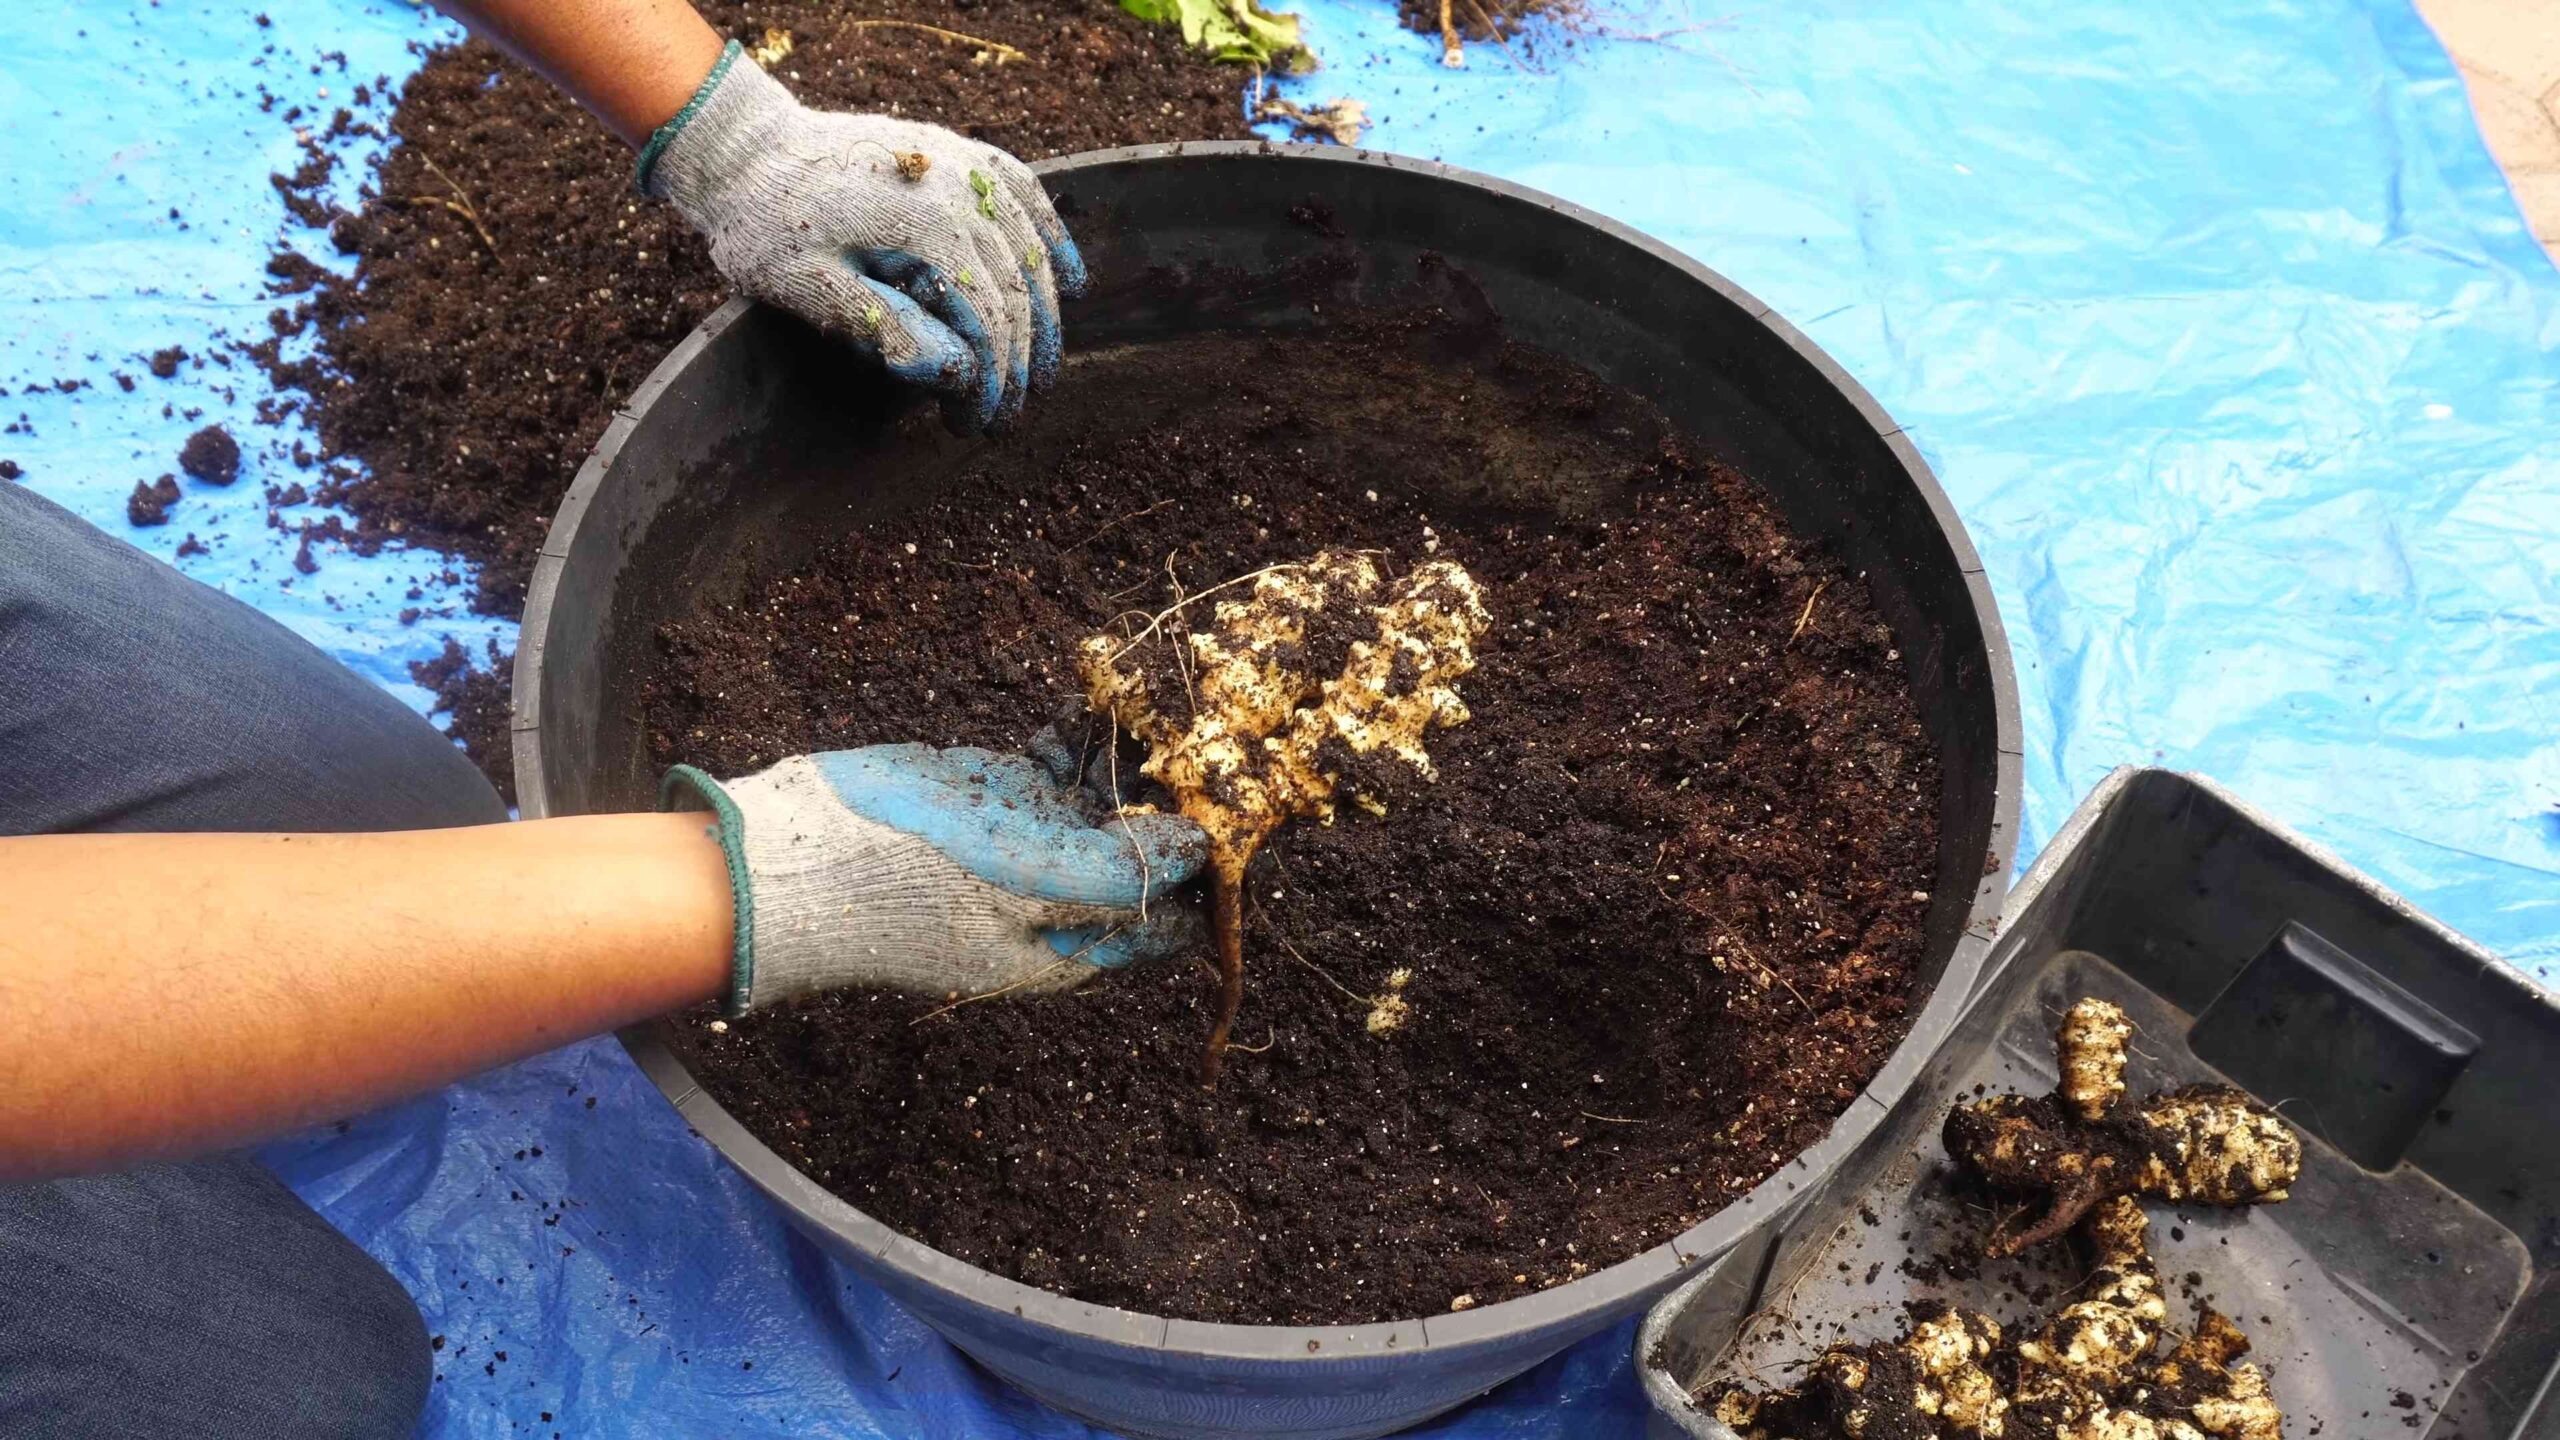
2. Dig Up the Tubers: Use a garden fork or shovel to carefully dig up the tubers. Be careful not to damage them.
3. Clean the Tubers: Brush off any dirt from the tubers.
4. Store the Tubers: Store the tubers in a cool, dark place. They will keep for several months. I usually store mine in the refrigerator in a plastic bag.
Controlling Spread: The Most Important Tip!
I cannot stress this enough: Jerusalem artichokes are prolific! They spread via their tubers, and even a small piece of tuber left in the ground can sprout into a new plant. Here’s how to manage their spread:
* Harvest Thoroughly: When harvesting, make sure you dig up all the tubers. It’s nearly impossible to get them all, but the more you remove, the less they’ll spread.
* Containment: As I mentioned earlier, consider planting them in a contained area, like a raised bed or a large pot. This will help prevent them from spreading into other parts of your garden.
* Monitor and Remove: Keep an eye out for new plants sprouting up in unwanted areas. Dig them up as soon as you see them.
* Don’t Compost Tubers: Never compost Jerusalem artichoke tubers, as they will likely sprout in your compost pile and spread from there.
Cooking with Jerusalem Artichokes
Now for the fun part: eating your harvest! Jerusalem artichokes are incredibly versatile. Here are a few ideas:
* Raw: Slice them thinly and add them to salads. They have a crisp, slightly sweet flavor.
* Roasted: Toss them with olive oil, salt, and pepper, and roast them in the oven until tender.
* Boiled: Boil them until tender and then mash them with butter and milk, like mashed potatoes.
* Soup: Add them to soups and stews for a creamy, nutty flavor.
* Pickled: Pickle them for a tangy and crunchy snack.
Troubleshooting
Even with the best care, you might encounter a few problems. Here are some common issues and how to address them:
* Poor Tuber Production: This could be due to a lack of sunlight, poor soil, or insufficient watering. Make sure your plants are getting enough sun and water, and amend your soil with compost.
* Plants Falling Over: This is usually due to strong winds. Stake your plants to provide support.
* Aphids: Control aphids with insecticidal soap or by hand-picking them off the plants.
* Slugs: Control slugs with slug bait or by hand-picking them off the plants at night.
* Disease: Jerusalem artichokes are generally disease-resistant. However, they can be susceptible to fungal diseases in wet conditions. Ensure good air circulation around the plants and avoid overwatering.
Why Grow Jerusalem Artichokes?
Besides being delicious, Jerusalem artichokes offer several benefits:
* Nutritious: They are a good source of fiber, potassium, and iron.
* Easy to Grow: They are relatively low-maintenance and can thrive in a variety of conditions.
* Sustainable: They are a perennial crop, meaning you only need to plant them once.
* Attract Pollinators: The sunflower-like flowers attract bees and other pollinators to your garden.
* Beautiful: The tall plants add a touch of beauty to the late summer garden.
Final Thoughts
Growing Jerusalem artichokes is a rewarding experience. With a little planning and care, you can enjoy a bountiful harvest of these delicious and nutritious tubers. Just remember to manage their spread, and you’ll be all set! Happy gardening!
Conclusion
So, there you have it! Growing Jerusalem artichokes at home is not just a gardening project; it’s an investment in delicious, nutritious food and a sustainable lifestyle. We’ve walked you through the simple steps, from selecting the right tubers to harvesting your bountiful crop. But why is this DIY trick a must-try?
Firstly, the taste. Forget bland, store-bought vegetables. Homegrown Jerusalem artichokes offer a unique, nutty flavor that elevates any dish. They’re incredibly versatile, lending themselves to everything from creamy soups and roasted side dishes to crispy chips and even fermented delights. You control the quality, ensuring you’re getting the freshest, most flavorful tubers possible.
Secondly, the health benefits are undeniable. Jerusalem artichokes are packed with inulin, a prebiotic fiber that promotes gut health and aids digestion. They’re also a good source of iron, potassium, and other essential nutrients. By growing your own, you’re taking control of your health and nourishing your body with wholesome goodness.
Thirdly, it’s incredibly rewarding. There’s something deeply satisfying about nurturing a plant from a small tuber to a thriving crop. Watching your Jerusalem artichokes grow tall and strong, knowing you’re providing them with the care they need, is a truly fulfilling experience. Plus, they are relatively low maintenance, making them perfect for beginner gardeners.
Variations and Suggestions:
Don’t be afraid to experiment! Try different varieties of Jerusalem artichokes to discover your favorite flavor profile. Some varieties are smoother and sweeter, while others have a more pronounced earthy taste.
Consider companion planting. Jerusalem artichokes thrive alongside certain plants, such as beans and peas, which can help fix nitrogen in the soil. Avoid planting them near sunflowers, as they compete for resources.
Get creative in the kitchen! Jerusalem artichokes can be used in countless ways. Roast them with herbs and garlic, add them to soups and stews, or even pickle them for a tangy treat. You can even make flour from them!
Think about succession planting. Plant tubers at different times throughout the spring to extend your harvest season. This will ensure you have a steady supply of Jerusalem artichokes throughout the fall and winter.
Finally, consider the aesthetic appeal. Jerusalem artichokes produce beautiful, sunflower-like blooms that can add a touch of beauty to your garden. They also provide valuable habitat for pollinators.
We strongly encourage you to give this DIY trick a try. It’s a simple, rewarding, and delicious way to connect with nature and enjoy the fruits (or rather, tubers) of your labor. And remember, the key to success is patience and observation. Pay attention to your plants, learn their needs, and adapt your approach as needed.
Once you’ve harvested your first crop of homegrown Jerusalem artichokes, we’d love to hear about your experience! Share your photos, recipes, and tips in the comments below. Let’s build a community of Jerusalem artichoke enthusiasts and inspire others to embrace the joys of gardening. We are confident that you will find that growing Jerusalem artichokes is a rewarding experience.
Frequently Asked Questions (FAQ)
What are Jerusalem artichokes, exactly?
Jerusalem artichokes, also known as sunchokes, are the edible tubers of a sunflower-like plant (Helianthus tuberosus). Despite their name, they have no relation to Jerusalem or artichokes. They are native to North America and have a nutty, slightly sweet flavor.
When is the best time to plant Jerusalem artichokes?
The ideal time to plant Jerusalem artichokes is in early spring, after the last frost. You can also plant them in the fall, a few weeks before the ground freezes. This allows the tubers to establish themselves over the winter and get a head start in the spring.
How do I prepare the soil for planting?
Jerusalem artichokes prefer well-drained soil that is rich in organic matter. Before planting, amend the soil with compost or well-rotted manure. This will improve drainage and provide essential nutrients for the plants. A slightly acidic to neutral pH (around 6.0 to 7.0) is ideal.
How deep and far apart should I plant the tubers?
Plant the tubers about 4-6 inches deep and 12-18 inches apart. Space rows about 3 feet apart to allow for adequate growth. Remember that Jerusalem artichokes can grow quite tall, so give them plenty of room to spread out.
Do Jerusalem artichokes need a lot of sunlight?
Yes, Jerusalem artichokes thrive in full sun, meaning at least 6-8 hours of direct sunlight per day. They can tolerate partial shade, but they will produce fewer tubers.
How often should I water Jerusalem artichokes?
Water regularly, especially during dry periods. Aim to keep the soil consistently moist, but not waterlogged. A good rule of thumb is to water deeply once or twice a week, depending on the weather.
Do I need to fertilize Jerusalem artichokes?
While Jerusalem artichokes are not heavy feeders, a light application of fertilizer can help boost growth. Use a balanced fertilizer, such as 10-10-10, or a fertilizer specifically formulated for root vegetables. Apply the fertilizer according to the package directions.
How tall do Jerusalem artichoke plants grow?
Jerusalem artichoke plants can grow quite tall, typically reaching heights of 6-12 feet. This is something to consider when choosing a planting location, as they can cast shade on other plants.
When is the best time to harvest Jerusalem artichokes?
The best time to harvest Jerusalem artichokes is in the late fall or early winter, after the foliage has died back. You can also harvest them in the spring, before the plants start to grow again. The flavor of the tubers is often sweeter after they have been exposed to frost.
How do I harvest Jerusalem artichokes?
To harvest Jerusalem artichokes, carefully dig around the base of the plant with a garden fork or shovel. Gently lift the plant and loosen the soil to expose the tubers. Harvest only what you need, as the tubers store best in the ground.
How do I store Jerusalem artichokes?
Jerusalem artichokes store best in a cool, dark, and humid place. You can store them in the refrigerator in a plastic bag or container, or in a root cellar. They will typically last for several months if stored properly.
Are Jerusalem artichokes invasive?
Jerusalem artichokes can be somewhat invasive, as they spread readily through their tubers. To prevent them from spreading, consider planting them in a contained area, such as a raised bed or large container. You can also remove any unwanted shoots as they appear.
Can I eat the leaves and flowers of Jerusalem artichokes?
While the tubers are the most commonly consumed part of the plant, the leaves and flowers are also edible. The young leaves can be eaten raw in salads or cooked like spinach. The flowers can be used as a garnish or added to salads.
Why do Jerusalem artichokes sometimes cause gas?
Jerusalem artichokes contain inulin, a type of fiber that can cause gas in some people. To minimize this effect, start by eating small amounts of Jerusalem artichokes and gradually increase your intake. Cooking them thoroughly can also help reduce gas production.
Can I grow Jerusalem artichokes in containers?
Yes, you can grow Jerusalem artichokes in containers, but you will need a large container with good drainage. Choose a container that is at least 18 inches deep and wide. Fill the container with a well-draining potting mix and plant the tubers as described above.

Leave a Comment