

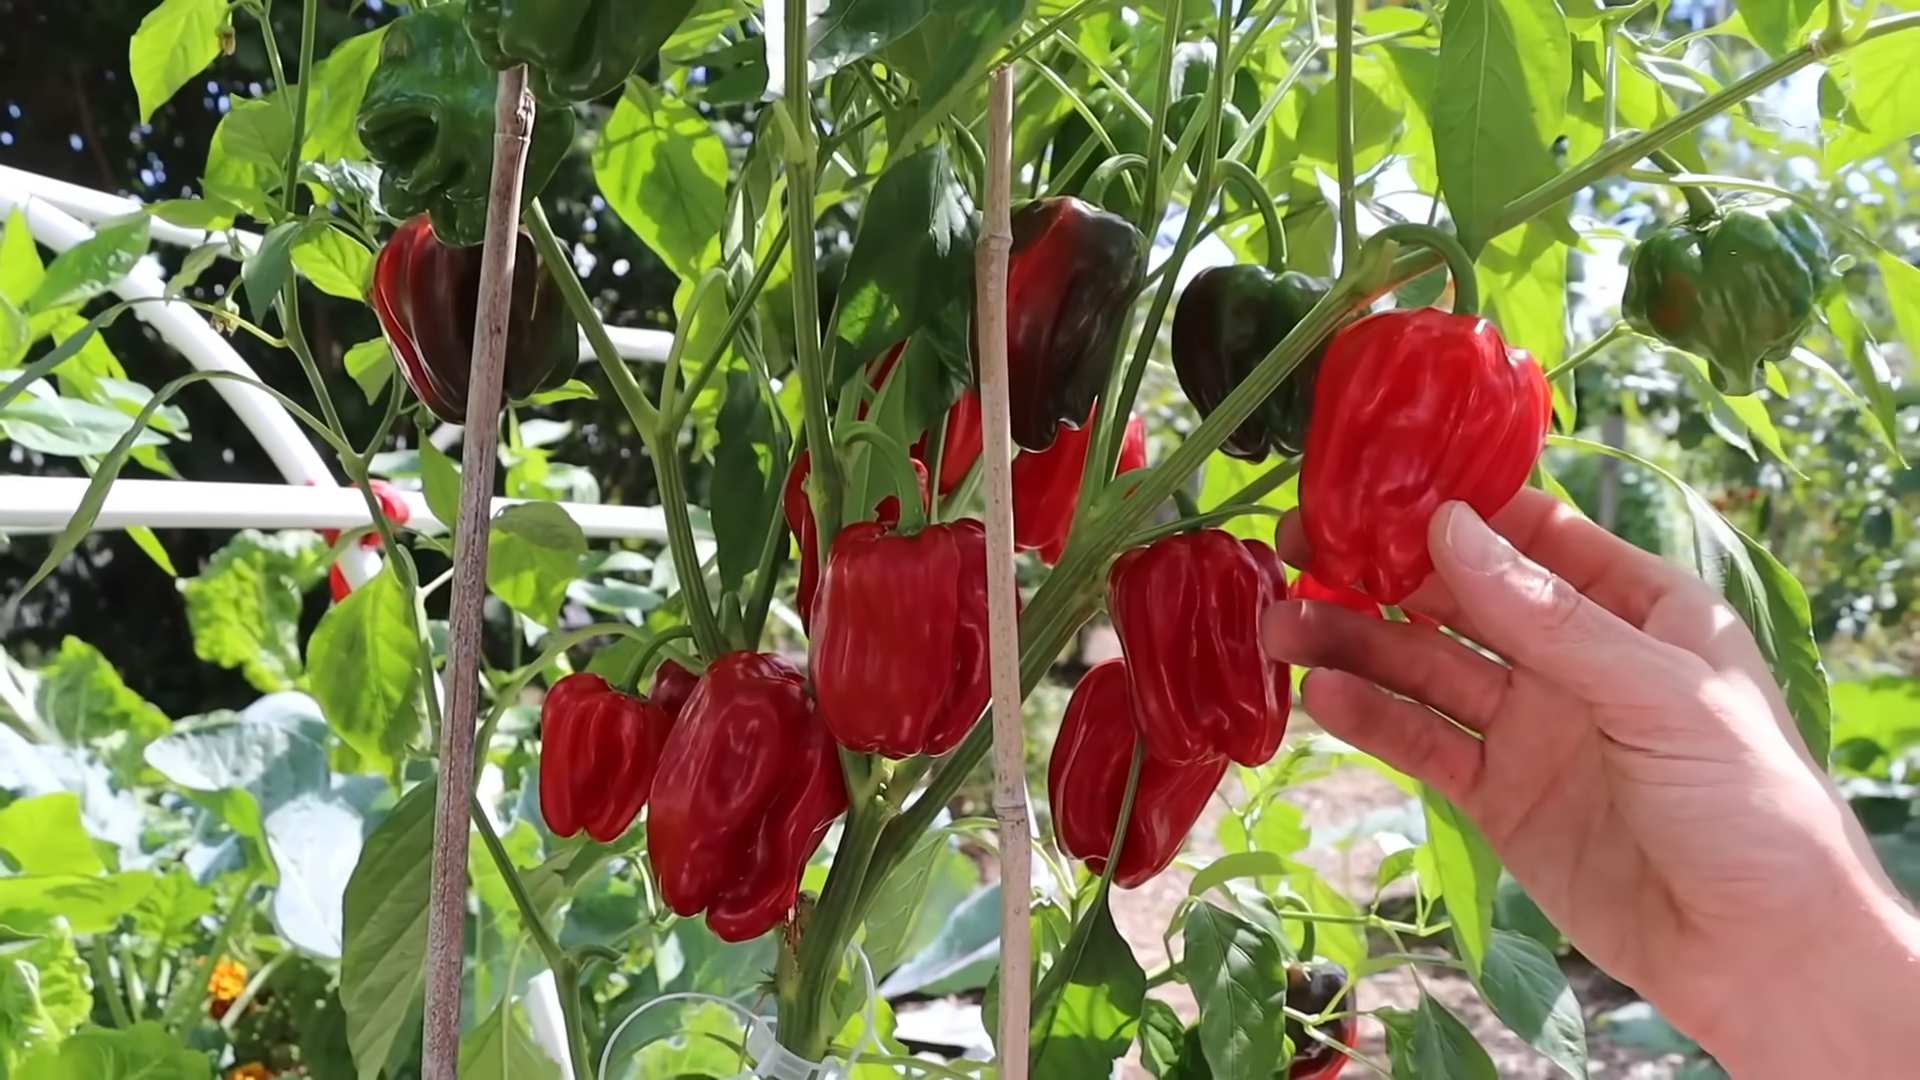
Growing Peppers Backyard can be incredibly rewarding, transforming your outdoor space into a vibrant and productive mini-farm! Have you ever imagined plucking a perfectly ripe, sun-kissed bell pepper straight from your garden and adding it to your dinner? Or maybe spicing things up with a fiery habanero you nurtured yourself? It’s an achievable dream, and I’m here to show you how!
For centuries, peppers have been cultivated across the globe, with roots tracing back to South America. They’ve been prized not only for their culinary uses but also for their medicinal properties and cultural significance. From the ancient Aztecs using chili peppers in rituals to the vibrant pepper markets of modern-day India, these plants have a rich and fascinating history.
But why should you consider growing peppers backyard? Well, store-bought peppers can be expensive and sometimes lack the fresh, robust flavor of homegrown varieties. Plus, gardening is a fantastic way to connect with nature, reduce stress, and enjoy the satisfaction of nurturing something from seed to harvest. In this article, I’m going to share some of my favorite DIY tricks and hacks to help you cultivate a thriving pepper patch, even if you’re a complete beginner. Get ready to unleash your inner gardener and enjoy a bounty of delicious peppers!
Growing Peppers Like a Pro: My Backyard Pepper Paradise Guide
Hey fellow gardeners! I’m so excited to share my tried-and-true method for growing a bumper crop of peppers right in your backyard. Forget those flimsy grocery store peppers – we’re talking vibrant, flavorful, and oh-so-satisfying homegrown goodness. I’ve spent years perfecting this process, and I’m confident you can achieve pepper perfection too!
Choosing Your Pepper Varieties
Before we get our hands dirty, let’s talk peppers! The world of peppers is vast and exciting, ranging from sweet bell peppers to scorching hot habaneros. Consider your taste preferences and growing conditions when making your selections.
* Sweet Peppers: Bell peppers (red, yellow, orange, green), banana peppers, pimento peppers. These are great for salads, stuffing, and grilling.
* Mildly Spicy Peppers: Poblano peppers, Anaheim peppers, jalapeños. Perfect for adding a touch of heat to your dishes.
* Hot Peppers: Serrano peppers, cayenne peppers, Thai peppers. These pack a serious punch!
* Super Hot Peppers: Habanero peppers, Scotch bonnet peppers, ghost peppers, Carolina Reaper. Handle with extreme caution!
Pro Tip: Start with a mix of sweet and mildly spicy peppers. As you gain experience, you can experiment with hotter varieties.
Getting Started: Seeds vs. Seedlings
You have two options for starting your pepper plants: seeds or seedlings.
* Seeds: Starting from seed gives you more control over the varieties you grow and can be more cost-effective. However, it requires more time and effort.
* Seedlings: Buying seedlings from a local nursery is a convenient option, especially if you’re short on time or space.
I personally prefer starting from seed because I love the entire process, but both methods work great!
Starting Peppers from Seed (My Preferred Method!)
Starting peppers from seed requires a little patience, but it’s incredibly rewarding. Here’s my step-by-step guide:
1. Gather Your Supplies:
* Pepper seeds (choose your favorite varieties!)
* Seed starting trays or small pots
* Seed starting mix (a light, well-draining mix is essential)
* Spray bottle
* Heat mat (optional, but highly recommended)
* Grow light (optional, but helpful for strong seedlings)
* Humidity dome (or plastic wrap)
2. Sow the Seeds:
* Fill your seed starting trays or pots with seed starting mix.
* Moisten the mix with a spray bottle until it’s damp but not soggy.
* Sow 2-3 seeds per cell or pot, about ¼ inch deep.
* Gently cover the seeds with more seed starting mix.
* Mist the surface with water.
3. Create a Warm and Humid Environment:
* Place the seed starting trays or pots on a heat mat (if using).
* Cover them with a humidity dome or plastic wrap to retain moisture.
* Keep the temperature between 75-85°F (24-29°C).
4. Provide Light:
* If you’re using a grow light, position it a few inches above the seed starting trays or pots.
* If you’re not using a grow light, place the trays or pots in a sunny window.
5. Monitor and Water:
* Check the seed starting mix daily and mist with water as needed to keep it moist.
* Once the seeds germinate (sprout), remove the humidity dome or plastic wrap.
* Continue to provide light and warmth.
6. Thin the Seedlings:
* Once the seedlings have their first true leaves (the second set of leaves), thin them to one seedling per cell or pot.
* Choose the strongest seedling and snip off the others at the soil line.
7. Harden Off the Seedlings:
* Before transplanting the seedlings outdoors, you need to harden them off. This process gradually acclimates them to outdoor conditions.
* Start by placing the seedlings outdoors in a sheltered location for an hour or two each day.
* Gradually increase the amount of time they spend outdoors each day, over a period of 1-2 weeks.
* Protect them from strong winds and direct sunlight during the hardening off process.
Preparing Your Garden Bed
Peppers thrive in warm, sunny locations with well-drained soil. Here’s how to prepare your garden bed for pepper planting:
1. Choose a Sunny Location:
* Peppers need at least 6-8 hours of direct sunlight per day.
2. Test Your Soil:
* A soil test will tell you the pH and nutrient levels of your soil. Peppers prefer a slightly acidic soil pH of 6.0-6.8.
3. Amend the Soil:
* If your soil is heavy clay or sandy, amend it with compost or other organic matter to improve drainage and fertility.
* Work the amendments into the soil to a depth of at least 12 inches.
4. Add Fertilizer:
* Peppers are heavy feeders, so add a balanced fertilizer to the soil before planting.
* Follow the instructions on the fertilizer package.
Transplanting Your Pepper Plants
Once your pepper plants are hardened off and the danger of frost has passed, it’s time to transplant them into your garden bed.
1. Choose a Cloudy Day:
* Transplanting on a cloudy day will help reduce stress on the plants.
2. Dig Holes:
* Dig holes that are slightly larger than the root balls of your pepper plants.
* Space the holes 18-24 inches apart, depending on the variety of pepper.
3. Remove the Plants from Their Containers:
* Gently squeeze the sides of the containers to loosen the root balls.
* Carefully remove the plants from their containers.
4. Plant the Peppers:
* Place the pepper plants in the holes, making sure the top of the root ball is level with the surrounding soil.
* Backfill the holes with soil and gently firm the soil around the plants.
5. Water Thoroughly:
* Water the pepper plants thoroughly after transplanting.
6. Mulch:
* Apply a layer of mulch around the pepper plants to help retain moisture, suppress weeds, and regulate soil temperature. I like to use straw or shredded leaves.
Caring for Your Pepper Plants
Proper care is essential for healthy pepper plants and a bountiful harvest.
1. Watering:
* Water your pepper plants regularly, especially during hot, dry weather.
* Water deeply, allowing the soil to dry out slightly between waterings.
* Avoid overhead watering, as this can promote fungal diseases.
2. Fertilizing:
* Fertilize your pepper plants every 2-3 weeks with a balanced fertilizer.
* You can also use a liquid fertilizer, such as fish emulsion or seaweed extract.
3. Pruning:
* Pruning can help improve air circulation and encourage bushier growth.
* Remove any suckers (small shoots that grow from the base of the plant) and any yellowing or diseased leaves.
4. Pest and Disease Control:
* Monitor your pepper plants regularly for pests and diseases.
* Common pepper pests include aphids, flea beetles, and spider mites.
* Common pepper diseases include blossom end rot, fungal leaf spot, and verticillium wilt.
* Use organic pest and disease control methods whenever possible. I like using neem oil for many issues.
5. Support:
* As your pepper plants grow, they may need support to prevent them from falling over.
* You can use stakes, cages, or trellises to support your plants.
Harvesting Your Peppers
The moment you’ve been waiting for! Harvesting your peppers at the right time is crucial for optimal flavor and texture.
1. Sweet Peppers:
* Harvest sweet peppers when they are fully colored and firm to the touch.
* Use pruning shears or a sharp knife to cut the peppers from the plant.
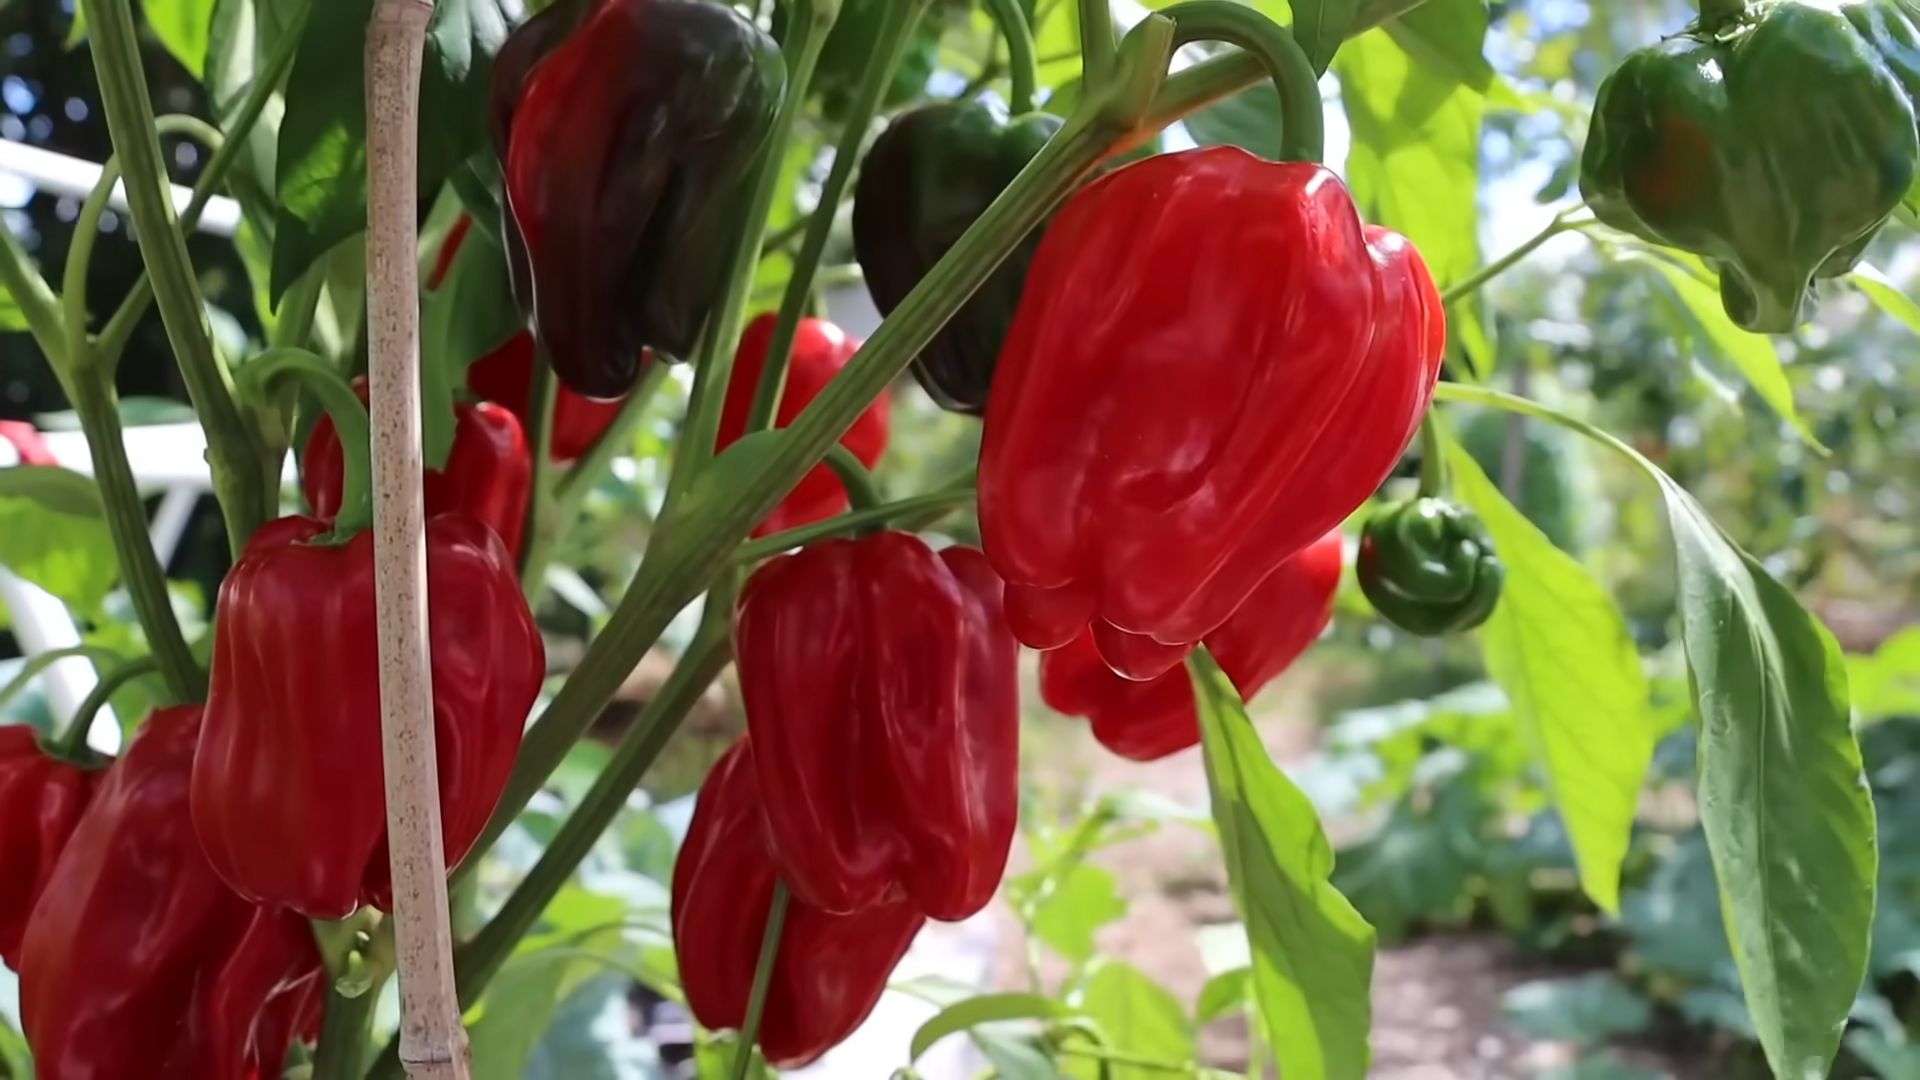
2. Hot Peppers:
* Harvest hot peppers when they are fully colored and have reached their mature size.
* Wear gloves when harvesting hot peppers to protect your skin from the capsaicin (the compound that makes peppers hot).
* Use pruning shears or a sharp knife to cut the peppers from the plant.
Pro Tip: The longer you leave hot peppers on the plant, the hotter they will become.
Troubleshooting Common Pepper Problems
Conclusion
So, there you have it! Mastering the art of growing peppers in your backyard is not only achievable but also incredibly rewarding. We’ve walked through the essential steps, from selecting the right pepper varieties to nurturing them through their growth cycle. But why is this DIY approach a must-try?
Firstly, the flavor. Store-bought peppers, while convenient, often lack the vibrant, nuanced taste that homegrown peppers possess. Imagine biting into a sun-ripened bell pepper, bursting with sweetness, or adding a fiery kick to your salsa with a chili pepper you nurtured from a tiny seed. The difference is undeniable.
Secondly, control. When you grow your own peppers, you have complete control over the growing environment. You can choose organic methods, avoiding harmful pesticides and herbicides. You know exactly what’s going into your food, providing peace of mind and healthier produce for you and your family.
Thirdly, the sheer satisfaction. There’s something deeply fulfilling about watching a tiny seed sprout and transform into a plant laden with colorful peppers. It’s a connection to nature, a learning experience, and a source of immense pride.
But the journey doesn’t end here! Feel free to experiment with different pepper varieties. Try growing sweet peppers like bell peppers, banana peppers, or pimentos. Or, if you’re feeling adventurous, explore the world of hot peppers, from jalapeños and serranos to habaneros and ghost peppers. Consider companion planting to enhance growth and deter pests. Basil, for example, is a great companion for peppers, as it repels aphids and other insects. Marigolds are also excellent for deterring nematodes.
Another variation to consider is container gardening. If you have limited space, growing peppers in pots is a fantastic option. Choose containers that are at least 12 inches in diameter and ensure they have good drainage. You can even grow peppers indoors with the help of grow lights.
Don’t be afraid to get creative with your **growing peppers backyard** setup. Build a raised garden bed, create a vertical garden, or simply dedicate a sunny corner of your yard to your pepper plants. The possibilities are endless!
We encourage you to embrace this DIY project and experience the joy of growing your own peppers. It’s a rewarding, flavorful, and sustainable way to enhance your culinary creations.
Now, we want to hear from you! Have you tried growing peppers in your backyard before? What challenges did you face? What successes did you celebrate? Share your experiences, tips, and tricks in the comments below. Let’s create a community of pepper-growing enthusiasts and learn from each other. Happy gardening!
Frequently Asked Questions (FAQ)
What are the best pepper varieties for beginners?
For beginners, bell peppers are an excellent choice due to their mild flavor and relatively easy cultivation. Jalapeños are also a good option, as they are relatively hardy and produce a good yield. Banana peppers are another beginner-friendly variety, offering a sweet and tangy flavor. Avoid extremely hot peppers like ghost peppers or Scotch bonnets until you have more experience, as they require more specific growing conditions and can be more challenging to cultivate. Remember to choose varieties that are well-suited to your local climate and growing season.
How much sunlight do pepper plants need?
Pepper plants thrive in full sun, requiring at least 6-8 hours of direct sunlight per day. Insufficient sunlight can lead to leggy growth, reduced fruit production, and smaller peppers. If you’re growing peppers indoors, supplement natural light with grow lights to ensure they receive adequate illumination. When transplanting seedlings outdoors, gradually acclimate them to the full sun to prevent sunburn.
What type of soil is best for growing peppers?
Peppers prefer well-draining, fertile soil with a slightly acidic pH (around 6.0-6.8). Amend your garden soil with compost or other organic matter to improve drainage and nutrient content. Avoid heavy clay soils, as they can become waterlogged and inhibit root growth. If you’re growing peppers in containers, use a high-quality potting mix specifically formulated for vegetables.
How often should I water my pepper plants?
Water pepper plants deeply and regularly, especially during hot, dry weather. Aim to keep the soil consistently moist but not waterlogged. Overwatering can lead to root rot, while underwatering can stress the plants and reduce fruit production. Check the soil moisture level regularly by sticking your finger about an inch into the soil. If it feels dry, it’s time to water. Mulching around the base of the plants can help retain moisture and suppress weeds.
How do I fertilize my pepper plants?
Pepper plants are heavy feeders and benefit from regular fertilization. Use a balanced fertilizer (e.g., 10-10-10) at planting time and then side-dress with a nitrogen-rich fertilizer every few weeks during the growing season. You can also use organic fertilizers like compost tea or fish emulsion. Avoid over-fertilizing, as this can lead to excessive foliage growth at the expense of fruit production.
What are common pests and diseases that affect pepper plants?
Common pests that affect pepper plants include aphids, whiteflies, spider mites, and pepper weevils. Diseases include blossom-end rot, fungal leaf spot, and verticillium wilt. Regularly inspect your plants for signs of pests or diseases and take action promptly. Use insecticidal soap or neem oil to control pests, and apply fungicides to prevent or treat fungal diseases. Ensure good air circulation around the plants to reduce the risk of disease. Blossom-end rot is often caused by calcium deficiency, so amend your soil with calcium or use a calcium-rich fertilizer.
How do I prevent blossom-end rot in peppers?
Blossom-end rot, a common problem in peppers, is caused by a calcium deficiency in the developing fruit. While the soil may contain enough calcium, the plant may not be able to absorb it properly due to inconsistent watering or high levels of nitrogen or potassium. To prevent blossom-end rot, ensure consistent watering, avoid over-fertilizing with nitrogen or potassium, and amend your soil with calcium before planting. You can also use a calcium-rich foliar spray to help the plants absorb calcium directly through their leaves.
When should I harvest my peppers?
The timing of pepper harvest depends on the variety and your desired level of ripeness. Bell peppers are typically harvested when they are fully colored and firm to the touch. Hot peppers can be harvested at any stage of ripeness, depending on your preference for heat. The longer they stay on the plant, the hotter they will become. Use pruning shears or a sharp knife to cut the peppers from the plant, leaving a small stem attached.
Can I save seeds from my homegrown peppers?
Yes, you can save seeds from your homegrown peppers, but it’s important to note that hybrid varieties may not produce true-to-type offspring. Open-pollinated varieties are more likely to produce plants that resemble the parent plant. To save seeds, allow the peppers to fully ripen on the plant and then remove the seeds. Dry the seeds thoroughly and store them in an airtight container in a cool, dark place.
How can I extend the pepper growing season?
To extend the pepper growing season, start your seeds indoors 6-8 weeks before the last expected frost. Use row covers or cold frames to protect your plants from frost in the spring and fall. You can also grow peppers in containers and move them indoors when the weather turns cold. Another option is to use a greenhouse or high tunnel to provide a protected growing environment.
Leave a Comment