

Dust Mite Lemon Treatment: Are you tired of those microscopic critters turning your cozy home into an itchy battleground? I know I was! Before I discovered this simple, all-natural solution, I was constantly battling allergies and waking up with that dreaded congested feeling. But guess what? You don’t need harsh chemicals or expensive professional services to reclaim your space.
For centuries, lemons have been revered not just for their zesty flavor, but also for their powerful cleaning and disinfecting properties. From ancient civilizations using lemon juice to purify water to modern-day DIY enthusiasts harnessing its antibacterial power, this humble fruit has a rich history as a natural remedy. And now, we’re bringing that time-tested wisdom to the fight against dust mites!
Why is a Dust Mite Lemon Treatment so essential? Well, dust mites are a common household allergen that thrive in bedding, carpets, and upholstery. They feed on dead skin cells and their waste products can trigger allergic reactions, asthma, and eczema. This DIY trick is a game-changer because it offers a safe, effective, and affordable way to reduce dust mite populations without exposing yourself or your family to harmful chemicals. I’m excited to share this easy-to-follow guide that will help you create your own powerful dust mite lemon treatment and breathe easier in your home. Let’s get started!

DIY Dust Mite Lemon Treatment: A Fresh Approach to Allergy Relief
Okay, so you’re battling dust mites, those microscopic critters that can wreak havoc on your allergies and overall well-being? I totally get it! I’ve been there, sneezing and itching my way through life. But fear not! I’ve discovered a fantastic, natural solution that’s not only effective but also smells amazing: a DIY dust mite lemon treatment. Forget harsh chemicals; we’re going the natural route with the power of citrus!
Why Lemon?
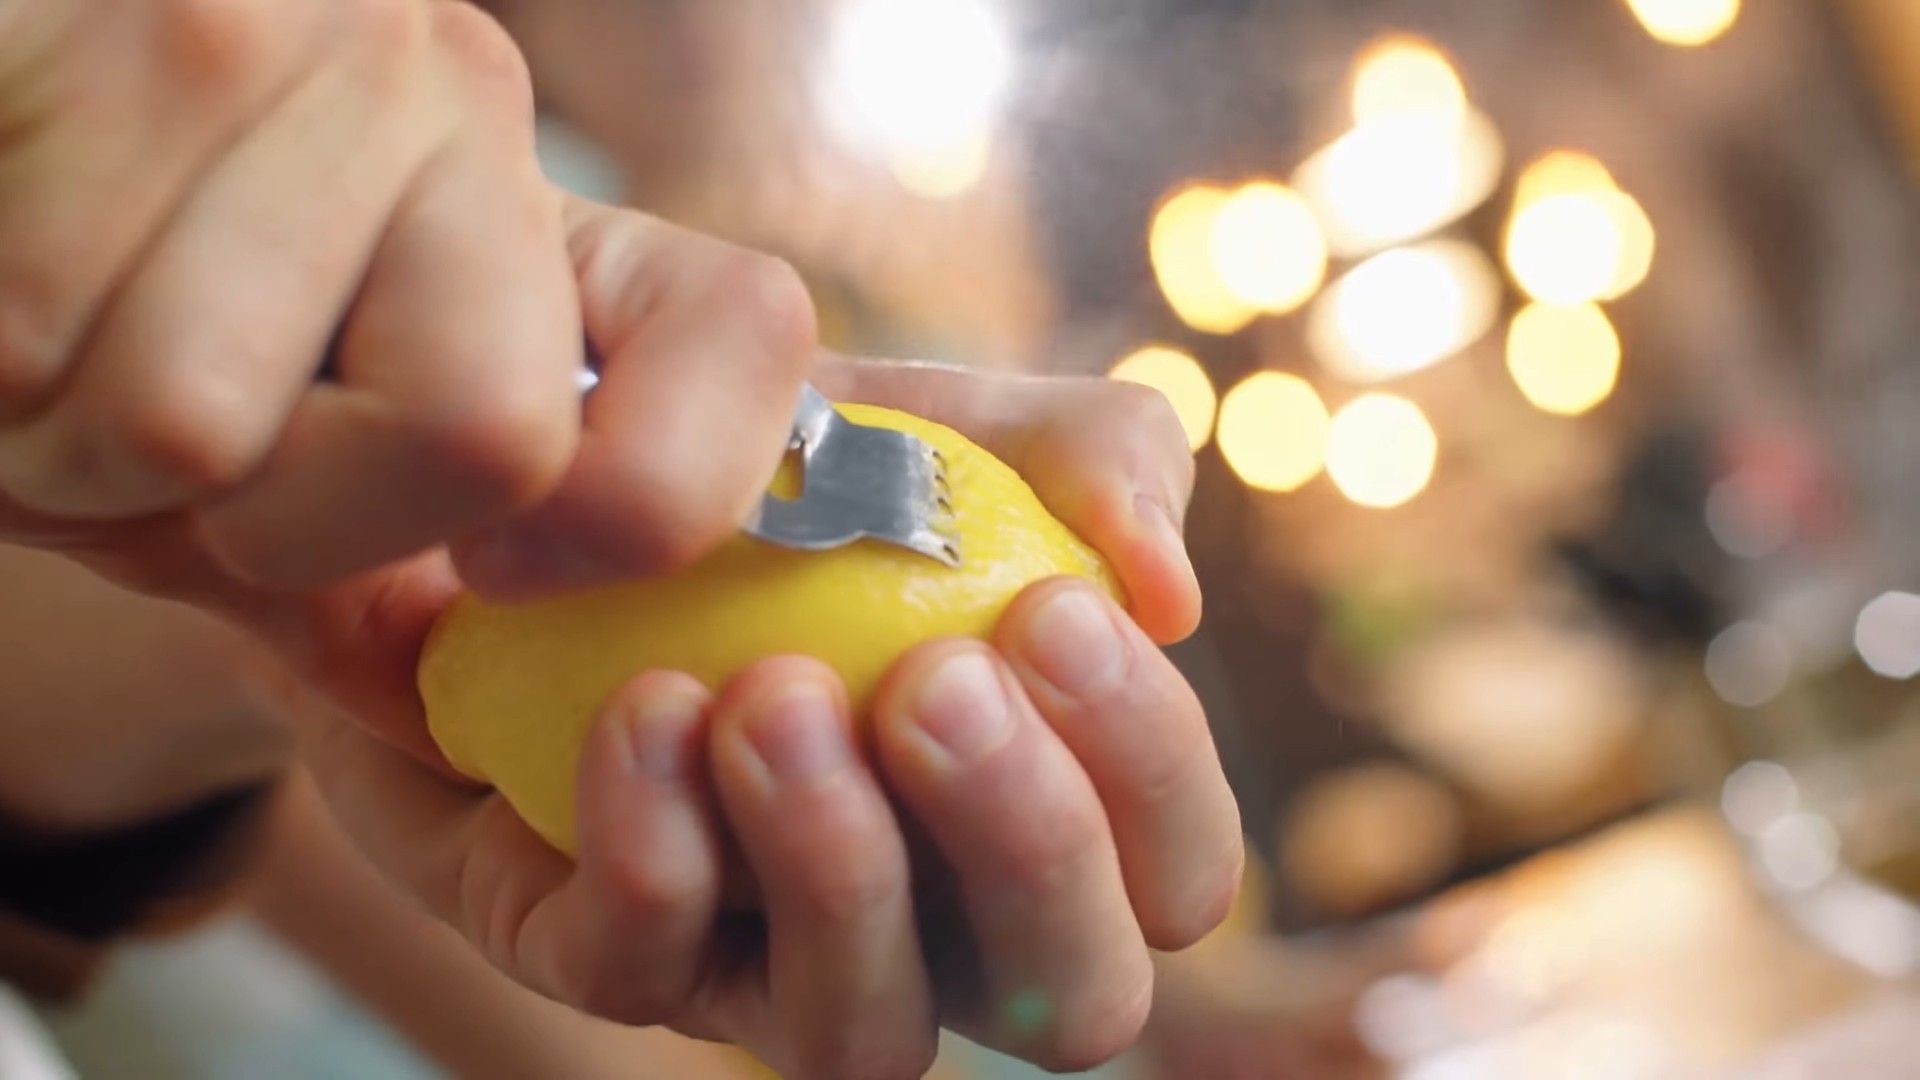
Lemons are more than just a refreshing drink ingredient. They contain citric acid, which is a natural disinfectant and cleaning agent. This acid helps to break down the proteins in dust mite waste, which is what triggers allergic reactions. Plus, the fresh scent of lemon is a bonus – it leaves your home smelling clean and revitalized.
What You’ll Need
Before we dive in, let’s gather our supplies. This is a pretty straightforward project, so you probably have most of these items already:
* Fresh lemons (4-6, depending on size and how much treatment you want to make)
* Distilled water (about 2 cups)
* Spray bottle (a clean, empty one)
* Microfiber cloths
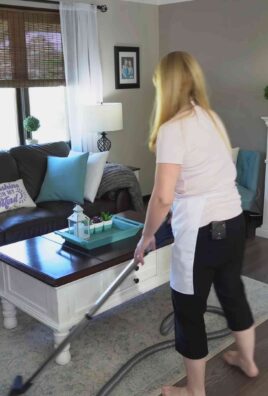
* Vacuum cleaner with a HEPA filter (essential for dust mite removal!)
* Optional: A few drops of lemon essential oil (for an extra boost of scent and cleaning power)
* Optional: A small saucepan (if you choose to simmer the lemon mixture)
Making the Lemon Treatment
This is where the magic happens! We’re going to create our potent lemon solution. You have two options here: a cold infusion or a simmered version. I’ll explain both, and you can choose whichever suits you best.
Option 1: Cold Infusion (The Easy Way)
This method is super simple and requires no heat. It’s perfect if you’re short on time or prefer a no-fuss approach.
1. Prepare the Lemons: Thoroughly wash the lemons to remove any dirt or residue. Then, slice them into thin rounds. The thinner the slices, the more easily the lemon’s properties will infuse into the water.
2. Combine Lemons and Water: Place the lemon slices into a clean spray bottle. Pour the distilled water over the lemon slices, filling the bottle almost to the top. Leave a little space at the top for shaking.
3. Infuse the Mixture: Seal the spray bottle tightly and shake well. Then, let the mixture sit for at least 24-48 hours in a cool, dark place. This allows the lemon’s natural acids and oils to infuse into the water, creating our dust mite-fighting solution. The longer it sits, the stronger it will be.
4. Strain (Optional): If you prefer a clearer spray, you can strain the mixture through a fine-mesh sieve or cheesecloth before using it. This will remove any lemon pulp or seeds that may have made their way into the solution. I usually skip this step, but it’s up to you!
Option 2: Simmered Version (For a Stronger Solution)
This method involves simmering the lemon mixture, which helps to extract more of the lemon’s beneficial properties. It’s a bit more involved, but it results in a more concentrated solution.
1. Prepare the Lemons: Wash and slice the lemons as described in the cold infusion method.
2. Combine Lemons and Water: Place the lemon slices into a small saucepan. Pour the distilled water over the lemon slices.
3. Simmer the Mixture: Bring the mixture to a gentle simmer over low heat. Let it simmer for about 20-30 minutes, allowing the lemon’s oils and acids to infuse into the water. Be careful not to boil the mixture, as this can degrade the lemon’s properties.
4. Cool and Strain: Remove the saucepan from the heat and let the mixture cool completely. Once cooled, strain the mixture through a fine-mesh sieve or cheesecloth to remove the lemon pulp and seeds.
5. Transfer to Spray Bottle: Pour the strained lemon solution into a clean spray bottle.
Applying the Lemon Treatment
Now for the fun part – putting our lemon treatment to work! Remember to always test a small, inconspicuous area first to ensure the solution doesn’t damage or discolor the fabric.
1. Vacuum Thoroughly: Before applying the lemon treatment, it’s crucial to vacuum the area thoroughly with a HEPA filter vacuum cleaner. This will remove as many dust mites and their waste products as possible. Pay special attention to mattresses, carpets, rugs, upholstery, and curtains.
2. Spray Lightly: Lightly spray the lemon treatment onto the affected areas. Don’t saturate the fabric; a light mist is all you need. Focus on areas where dust mites are likely to thrive, such as mattresses, pillows, carpets, and upholstery.
3. Let it Dry: Allow the lemon treatment to air dry completely. This may take a few hours, depending on the humidity and the amount of solution you used. Avoid using the treated area until it’s completely dry.
4. Vacuum Again: Once the treated area is completely dry, vacuum it again with your HEPA filter vacuum cleaner. This will remove any remaining dust mites and their waste products that may have been loosened by the lemon treatment.
5. Repeat Regularly: For best results, repeat this treatment every 1-2 weeks. Regular application will help to keep dust mite populations under control and reduce allergy symptoms.
Where to Use the Lemon Treatment
This lemon treatment is versatile and can be used on a variety of surfaces. Here are some of the most common areas to target:
* Mattresses: Mattresses are a prime breeding ground for dust mites. Spray the lemon treatment lightly over the entire surface of the mattress, paying special attention to seams and crevices.
* Pillows: Pillows are another favorite hangout for dust mites. Spray the lemon treatment on both sides of the pillow, and consider using pillow protectors to further reduce dust mite exposure.
* Carpets and Rugs: Carpets and rugs can trap dust mites and their waste products. Spray the lemon treatment lightly over the entire surface of the carpet or rug, and vacuum thoroughly after it dries.
* Upholstery: Upholstered furniture, such as sofas and chairs, can also harbor dust mites. Spray the lemon treatment lightly over the upholstery, and vacuum thoroughly after it dries.
* Curtains and Drapes: Curtains and drapes can collect dust and dust mites. Spray the lemon treatment lightly over the curtains or drapes, and consider washing them regularly in hot water.
* Pet Bedding: If you have pets, their bedding can also be a source of dust mites. Spray the lemon treatment lightly over the pet bedding, and wash it regularly in hot water.
Extra Tips and Tricks
* Add Essential Oils: For an extra boost of cleaning power and a more pleasant scent, add a few drops of lemon essential oil or eucalyptus essential oil to the lemon treatment. Eucalyptus oil is known for its anti-inflammatory and antimicrobial properties, which can further help to reduce allergy symptoms.
* Sunlight is Your Friend: Whenever possible, expose mattresses, pillows, and rugs to direct sunlight. Sunlight is a natural disinfectant and can help to kill dust mites.
* Wash Bedding Regularly: Wash your bedding, including sheets, pillowcases, and blankets, in hot water (at least 130°F or 54°C) every week. This will kill dust mites and remove their waste products.
* Use Dust Mite-Proof Covers: Consider using dust mite-proof covers on your mattresses and pillows. These covers create a barrier that prevents dust mites from infesting your bedding.
* Maintain Low Humidity: Dust mites thrive in humid environments. Keep the humidity in your home below 50% to discourage dust mite growth. Use a dehumidifier if necessary.
* Air Purifier: Invest in a good quality air purifier with a HEPA filter. This will help to remove dust mites and other allergens from the air.
* Regular Cleaning: Regular cleaning is essential for controlling dust mite populations. Dust and vacuum frequently, and pay special attention to areas where dust mites are likely to thrive.
Important Considerations
While this lemon treatment is generally safe and effective, there are a few things to keep in mind:
* Test First: Always test the lemon treatment on a small, inconspicuous area before applying it to a larger surface. This will help to ensure that it doesn’t damage or discolor the fabric.
* Avoid Saturation: Don’t saturate the fabric with the lemon treatment. A light mist is all you need. Over-saturation can lead to mold growth or damage to the fabric.
* Allergies: If you are allergic to lemons or citrus fruits, avoid using this treatment.
* Professional Help: If your dust mite infestation is severe or if you have persistent allergy symptoms, consult with a professional pest control company or allergist
Conclusion
So, there you have it! This simple, yet incredibly effective, DIY dust mite lemon treatment is a game-changer for anyone battling allergies or simply striving for a cleaner, healthier home. We’ve walked you through the easy steps, highlighting the power of lemon’s natural acidity to combat those microscopic menaces. Why is this a must-try? Because it’s a natural, affordable, and readily available alternative to harsh chemical treatments that can often do more harm than good, especially for those with sensitivities or young children.
Think about it: no more expensive sprays filled with unpronounceable ingredients. No more worrying about lingering chemical odors. Just the fresh, clean scent of lemon and the peace of mind knowing you’re creating a safer environment for yourself and your loved ones. This DIY dust mite lemon treatment is not just about eliminating dust mites; it’s about embracing a more holistic approach to home hygiene.
But the beauty of this method lies in its adaptability. Feel free to experiment with variations to suit your specific needs and preferences. For instance, if you find the lemon scent a bit too strong, consider adding a few drops of lavender or eucalyptus essential oil for a more calming and therapeutic aroma. These oils also possess their own anti-microbial properties, further boosting the effectiveness of the treatment.
Another variation involves the application method. While we recommend spraying the solution onto surfaces, you can also use it as a laundry additive. Simply add a cup of the lemon solution to your washing machine along with your regular detergent to help eliminate dust mites from bedding, clothing, and other washable fabrics. Just be sure to test a small, inconspicuous area first to ensure the solution doesn’t affect the color or texture of the fabric.
For those with particularly stubborn dust mite infestations, consider increasing the concentration of lemon juice in the solution. However, always exercise caution and test the solution on a small area before applying it to larger surfaces, especially delicate fabrics or painted surfaces.
Ultimately, the success of this DIY dust mite lemon treatment hinges on consistency. Regular application, combined with other preventative measures like frequent vacuuming and washing bedding in hot water, will significantly reduce dust mite populations and alleviate allergy symptoms.
We are confident that this simple trick will make a noticeable difference in your home and your well-being. So, go ahead, give it a try! We encourage you to embrace this natural solution and experience the benefits firsthand. And most importantly, we want to hear about your results! Share your experiences, tips, and variations in the comments below. Let’s build a community of dust mite-fighting champions! Your feedback will not only help others but also contribute to refining and improving this already fantastic DIY dust mite lemon treatment. Let us know what worked best for you, any challenges you encountered, and any creative solutions you came up with. Together, we can create a cleaner, healthier, and happier world, one lemon at a time.
Frequently Asked Questions
What exactly are dust mites, and why should I be concerned about them?
Dust mites are microscopic creatures, related to spiders, that thrive in warm, humid environments and feed on dead skin cells. They are commonly found in bedding, carpets, upholstery, and other soft furnishings. While they don’t bite or sting, their waste products and decaying bodies are potent allergens that can trigger a range of symptoms, including sneezing, runny nose, itchy eyes, coughing, wheezing, and skin rashes. For individuals with asthma or allergies, dust mites can significantly worsen their condition. Therefore, controlling dust mite populations is crucial for maintaining a healthy indoor environment, especially for those with sensitivities.
How often should I apply the DIY dust mite lemon treatment?
The frequency of application depends on the severity of your dust mite problem and your individual sensitivity. For initial treatment, we recommend applying the solution every 2-3 days for the first week. After that, you can reduce the frequency to once a week or every other week for maintenance. If you notice a resurgence of allergy symptoms, increase the frequency of application accordingly. Remember to vacuum thoroughly before each application to remove loose dust and debris, allowing the lemon solution to penetrate deeper into the fibers.
Is the lemon treatment safe for all types of fabrics and surfaces?
While lemon juice is generally safe, it’s always a good idea to test the solution on a small, inconspicuous area before applying it to larger surfaces, especially delicate fabrics, painted surfaces, or leather. Lemon juice contains citric acid, which can potentially cause discoloration or damage to certain materials. If you’re unsure, consult the manufacturer’s instructions or a professional cleaner. For sensitive fabrics, consider diluting the lemon solution further with water.
Can I use bottled lemon juice instead of fresh lemon juice?
While fresh lemon juice is generally preferred due to its higher concentration of citric acid and natural oils, bottled lemon juice can be used as a substitute in a pinch. However, be sure to choose a bottled lemon juice that is 100% pure and does not contain any added sugars, preservatives, or artificial flavors. These additives can potentially attract other pests or leave a sticky residue. Keep in mind that bottled lemon juice may be less potent than fresh lemon juice, so you may need to use a slightly higher concentration to achieve the same results.
Will the lemon treatment stain my fabrics or leave a residue?
When properly diluted and applied, the lemon treatment should not stain most fabrics. However, as mentioned earlier, it’s always best to test the solution on a small, inconspicuous area first. If you notice any discoloration or residue, try diluting the solution further or blotting the area with a clean, damp cloth. Avoid oversaturating the fabric with the solution, as this can increase the risk of staining or residue buildup.
Besides the lemon treatment, what other steps can I take to control dust mites?
The DIY dust mite lemon treatment is a valuable tool, but it’s most effective when combined with other preventative measures. These include:
* **Washing bedding regularly:** Wash bedding, including sheets, pillowcases, and blankets, in hot water (at least 130°F or 54°C) every week to kill dust mites.
* **Using allergen-proof bedding covers:** Encase mattresses, pillows, and comforters in allergen-proof covers to prevent dust mites from infesting them.
* **Vacuuming frequently:** Vacuum carpets, rugs, and upholstery regularly with a vacuum cleaner equipped with a HEPA filter to trap dust mites and their allergens.
* **Reducing humidity:** Maintain a low humidity level in your home (ideally below 50%) using a dehumidifier or air conditioner.
* **Removing clutter:** Reduce clutter to minimize dust accumulation and provide fewer hiding places for dust mites.
* **Choosing washable fabrics:** Opt for washable fabrics for curtains, rugs, and other soft furnishings whenever possible.
* **Regularly cleaning or replacing air filters:** Clean or replace air filters in your HVAC system regularly to remove dust and allergens from the air.
How long will it take to see results from the DIY dust mite lemon treatment?
The time it takes to see results can vary depending on the severity of your dust mite infestation and your individual sensitivity. Some people may notice a significant improvement in their allergy symptoms within a few days of starting the treatment, while others may need several weeks to see a noticeable difference. Consistency is key. Regular application of the lemon treatment, combined with other preventative measures, will gradually reduce dust mite populations and alleviate allergy symptoms over time.
Can I use this treatment on my pet’s bedding?
Yes, the DIY dust mite lemon treatment can be used on pet bedding, but it’s essential to exercise caution and ensure that your pet doesn’t ingest the solution. Test the solution on a small area of the bedding first to ensure it doesn’t cause any irritation or discoloration. Allow the bedding to dry completely before allowing your pet to use it. If your pet has any sensitivities or allergies, consult with your veterinarian before using the lemon treatment.
Is there anything else I should know about using this DIY dust mite lemon treatment?
Always store the lemon solution in a cool, dark place away from direct sunlight and heat. Use the solution within a few days of making it, as the citric acid can degrade over time. If you experience any adverse reactions, such as skin irritation or respiratory problems, discontinue use immediately and consult with a healthcare professional. Remember, this DIY dust mite lemon treatment is a natural and effective way to control dust mites, but it’s not a substitute for professional medical advice or treatment.

Leave a Comment