

Bottle Gourd Growing Tips: Ever dreamt of harvesting your own fresh, homegrown bottle gourds, ready for delicious curries or even crafting into unique, eco-friendly containers? I know I have! There’s something incredibly satisfying about nurturing a plant from seed to table, and with bottle gourds, the rewards are plentiful. But let’s be honest, sometimes gardening feels more like a battle against pests, diseases, and unpredictable weather than a relaxing hobby. That’s where these DIY tricks and hacks come in!
Bottle gourds, also known as calabash, have a rich history, dating back thousands of years. They weren’t just a food source; ancient civilizations used them for everything from water vessels to musical instruments. Imagine, a plant that feeds you and provides you with tools! Today, while we might not rely on them for survival in the same way, the joy of growing your own bottle gourds remains a powerful connection to our agricultural past.
Why do you need these bottle gourd growing tips? Because let’s face it, gardening guides can sometimes be overwhelming and overly complicated. I’m here to share simple, practical, and effective DIY solutions that will help you overcome common challenges and maximize your harvest. Whether you’re dealing with powdery mildew, struggling with pollination, or just want to encourage vigorous growth, these hacks will empower you to become a bottle gourd growing pro. Get ready to unlock the secrets to a thriving bottle gourd patch, even if you’re a beginner gardener!
Growing Bottle Gourds: A Comprehensive DIY Guide
Hey there, fellow gardening enthusiasts! I’m so excited to share my experience and knowledge on growing bottle gourds. These fascinating plants are not only fun to cultivate but also incredibly versatile. From crafting birdhouses to making unique utensils, the possibilities are endless once you harvest your own bottle gourds. So, let’s dive in and get our hands dirty!
Choosing the Right Variety and Preparing Your Garden
Before we even think about planting, it’s crucial to select the right bottle gourd variety for your needs and prepare your garden bed. This sets the stage for a successful and bountiful harvest.
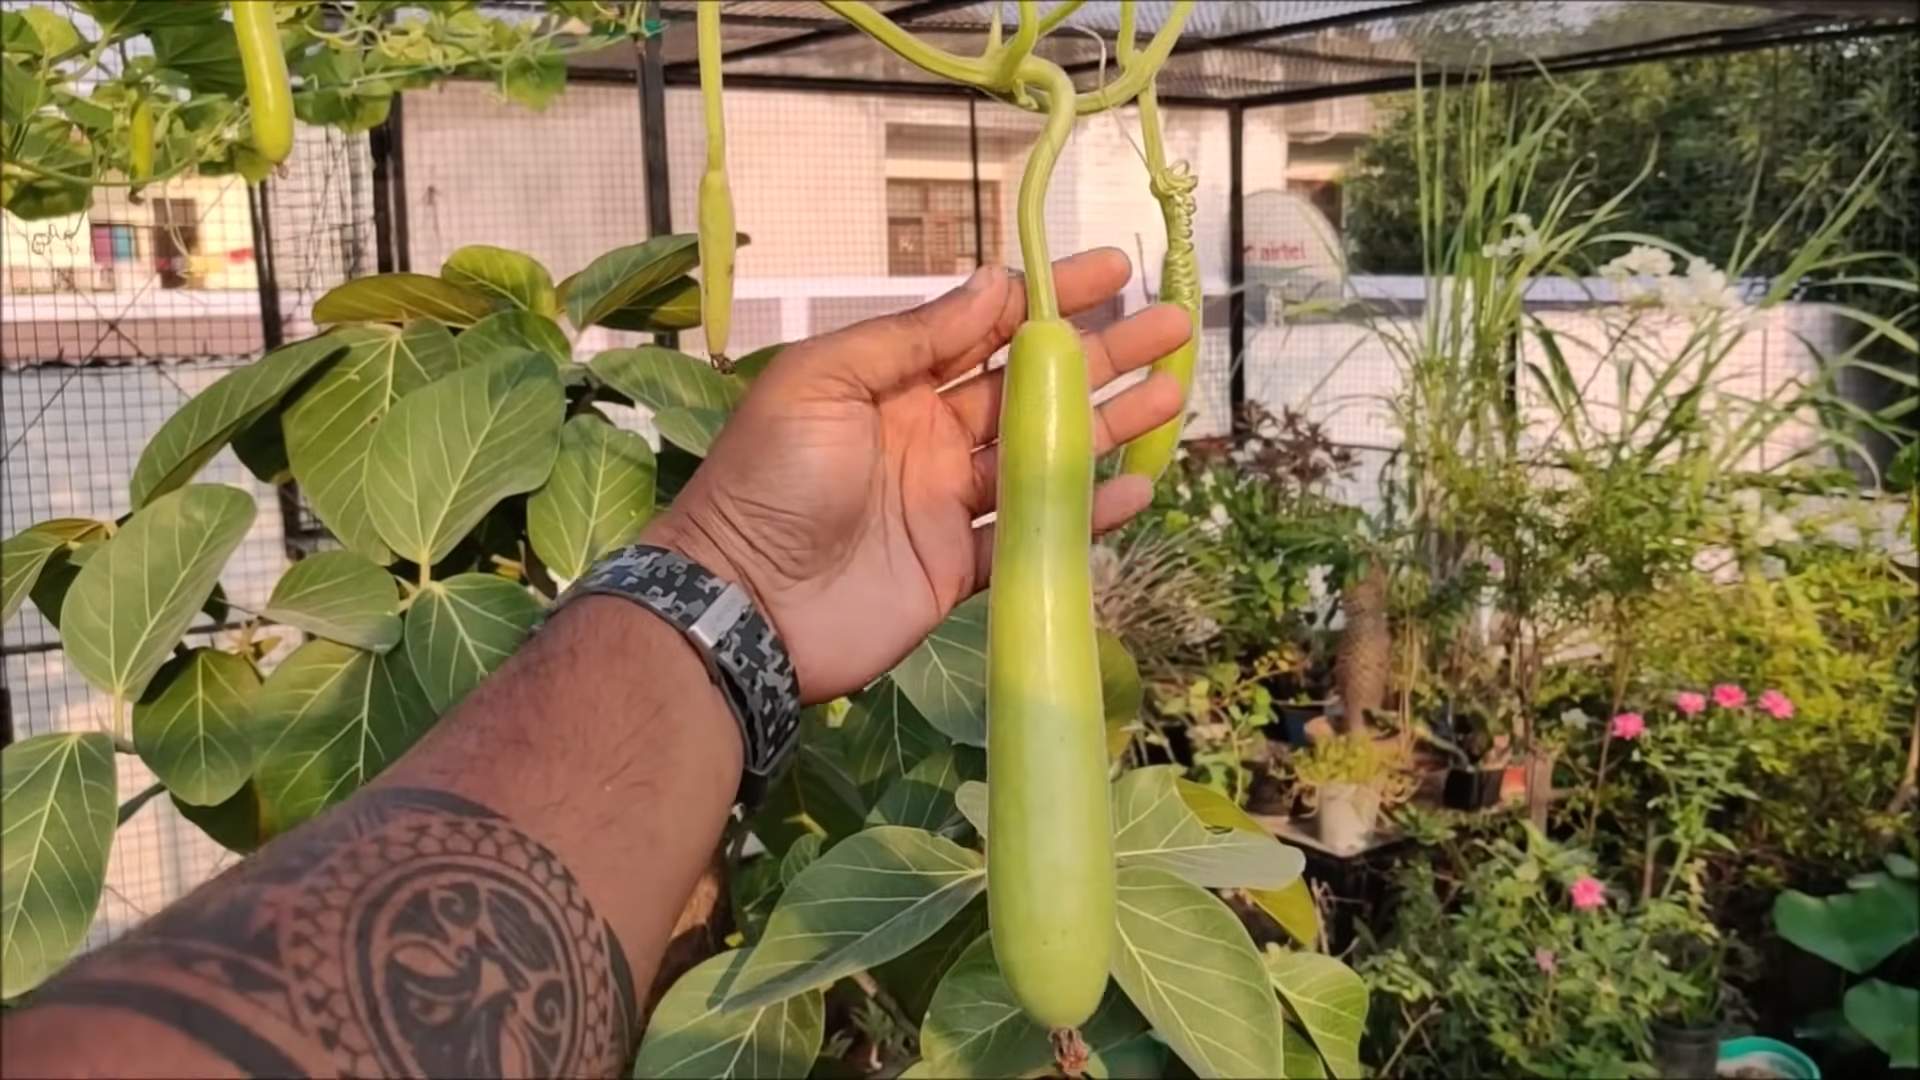
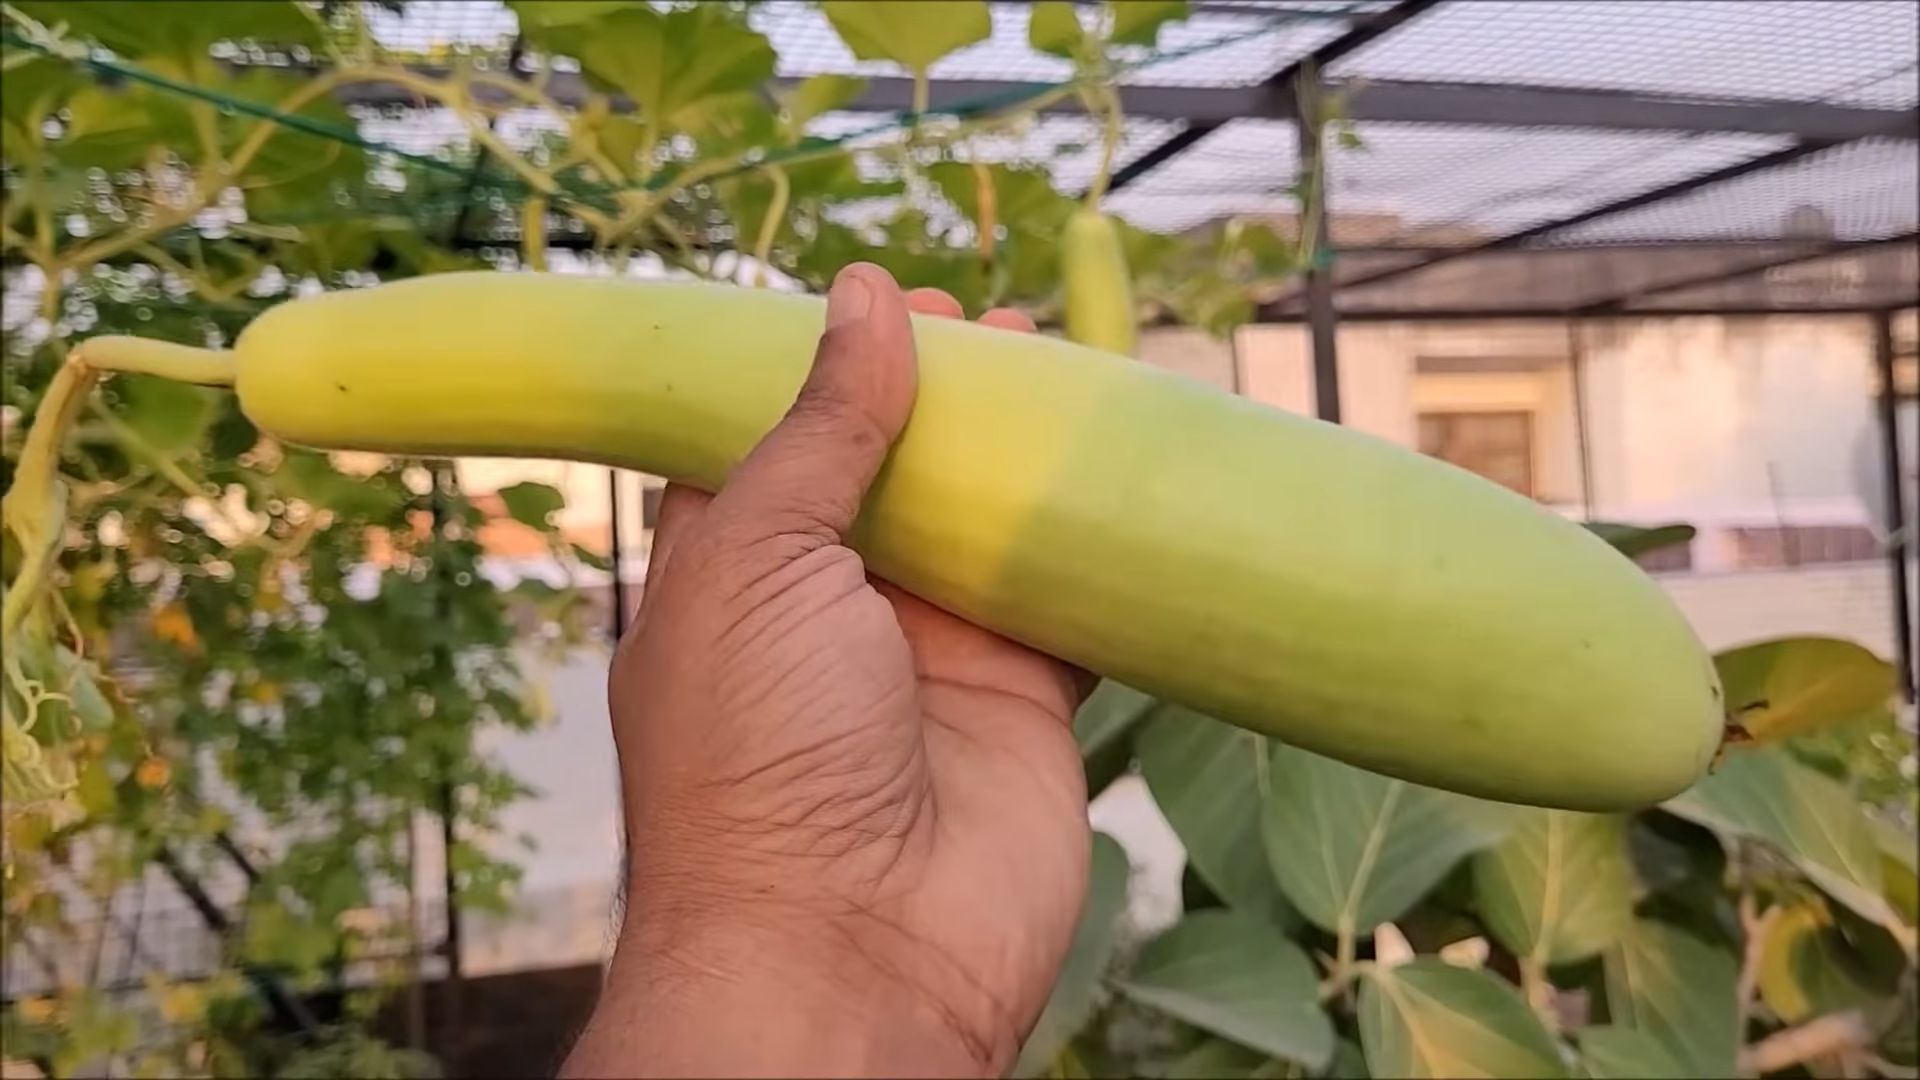
* Variety Selection: Bottle gourds come in various shapes and sizes, from the classic bowling pin shape to long, snake-like varieties. Consider what you plan to use the gourds for. If you’re aiming to make birdhouses, a rounder variety might be ideal. For dippers or ladles, a gourd with a long neck would be more suitable. Research different varieties available in your region and choose one that aligns with your desired outcome. I personally love the ‘Long Handle’ variety for making dippers.
* Sunlight Requirements: Bottle gourds are sun-worshippers! They need at least 6-8 hours of direct sunlight each day to thrive. Choose a location in your garden that receives ample sunlight throughout the day.
* Soil Preparation: Bottle gourds prefer well-drained, fertile soil. Before planting, amend your soil with plenty of organic matter, such as compost or well-rotted manure. This will improve drainage, provide essential nutrients, and create a healthy environment for your gourd plants to flourish. I usually dig in about 4-6 inches of compost into my garden bed.
* Support System: These plants are vigorous climbers, so you’ll need to provide them with a sturdy support system. A trellis, fence, or even a strong pergola will work wonders. Make sure the support is strong enough to handle the weight of the mature gourds. I’ve found that a trellis made from cattle panels works exceptionally well.
Starting Your Bottle Gourd Seeds
You can either directly sow the seeds in your garden or start them indoors. I prefer starting them indoors, especially if you live in an area with a shorter growing season.
* Soaking the Seeds: Bottle gourd seeds have a hard outer shell. To improve germination rates, soak the seeds in warm water for 24-48 hours before planting. This helps soften the shell and allows the seedlings to emerge more easily.
* Starting Seeds Indoors (Optional): If you’re starting seeds indoors, use biodegradable pots filled with a seed-starting mix. Plant 2-3 seeds per pot, about 1 inch deep. Keep the soil consistently moist but not waterlogged. Place the pots in a warm location, ideally with a temperature of around 70-80°F (21-27°C). A heat mat can be helpful in maintaining the optimal temperature.
* Direct Sowing: If you’re directly sowing the seeds in your garden, wait until the soil has warmed up and the danger of frost has passed. Plant the seeds about 1 inch deep and space them 2-3 feet apart.
Planting and Caring for Your Bottle Gourd Seedlings
Once your seedlings have developed a few true leaves (or if you’ve directly sown the seeds and they’ve emerged), it’s time to transplant them to their permanent location in the garden.
1. Transplanting Seedlings: If you started your seeds indoors, gently transplant the seedlings to your prepared garden bed. Be careful not to damage the roots during the transplanting process. Plant them at the same depth they were growing in the pots. If you used biodegradable pots, you can plant the entire pot directly into the ground.
2. Watering: Bottle gourds need consistent watering, especially during hot and dry weather. Water deeply and regularly, ensuring the soil remains moist but not soggy. I usually water them deeply every 2-3 days, depending on the weather conditions.
3. Fertilizing: Feed your bottle gourd plants with a balanced fertilizer every 2-3 weeks. Look for a fertilizer that is rich in phosphorus and potassium, as these nutrients are essential for fruit development. You can also use organic fertilizers, such as compost tea or fish emulsion.
4. Pruning: Pruning can help improve air circulation and encourage fruit production. Remove any yellowing or diseased leaves. You can also prune back some of the lateral vines to encourage the plant to focus its energy on producing gourds.
5. Pollination: Bottle gourds produce both male and female flowers. The female flowers have a small gourd-like structure at the base. If pollination is insufficient, the female flowers may drop off without producing fruit. You can hand-pollinate the flowers by transferring pollen from the male flowers to the female flowers using a small brush. I usually do this early in the morning when the flowers are fully open.
6. Pest and Disease Control: Keep an eye out for common garden pests, such as aphids, squash bugs, and vine borers. You can control these pests with organic insecticides, such as neem oil or insecticidal soap. Bottle gourds can also be susceptible to fungal diseases, such as powdery mildew. To prevent fungal diseases, ensure good air circulation around the plants and avoid overhead watering. If you notice any signs of disease, treat the plants with a fungicide.
Harvesting and Curing Your Bottle Gourds
Harvesting and curing are crucial steps in preparing your bottle gourds for crafting. Proper curing ensures that the gourds are strong, durable, and resistant to rot.
1. Harvesting: Harvest your bottle gourds when they are fully mature and the stems have dried out and turned brown. The gourd should feel hard and lightweight. Use pruning shears or a sharp knife to cut the gourd from the vine, leaving a few inches of stem attached.
2. Cleaning: Gently wash the gourds with soapy water to remove any dirt or debris. Avoid using harsh chemicals or abrasive cleaners, as these can damage the gourd’s surface.
3. Curing: This is the most important step! Place the gourds in a well-ventilated area, such as a garage or shed. Avoid placing them in direct sunlight, as this can cause them to crack. The gourds should be elevated off the ground to allow for good air circulation. You can use a wire rack or wooden pallets to elevate them.
4. Monitoring: Check the gourds regularly for signs of rot or mold. If you notice any soft spots or discoloration, remove the affected gourd immediately to prevent the spread of disease.
5. Curing Time: The curing process can take several weeks or even months, depending on the size and thickness of the gourds. The gourds are fully cured when they are lightweight and the seeds rattle inside.
Crafting with Your Bottle Gourds
Once your bottle gourds are fully cured, the fun begins! There are countless ways to craft with these versatile materials.
* Birdhouses: Bottle gourds make excellent birdhouses. Simply cut a hole in the side of the gourd, clean out the inside, and add a perch. You can decorate the birdhouse with paint, wood carvings, or other embellishments.
* Dippers and Ladles: Cut the gourd in half lengthwise and clean out the inside. Sand the edges smooth and attach a handle made from wood or bamboo.
* Bowls and Containers: Cut the gourd in half or into other desired shapes. Clean out the inside and sand the edges smooth. You can decorate the bowls with paint, carvings, or other embellishments.
* Musical Instruments: Bottle gourds can be used to make a variety of musical instruments, such as rattles, drums, and shekeres.
* Decorative Items: The possibilities are endless! You can paint, carve, burn, or otherwise decorate your bottle gourds to create unique and beautiful decorative items for your home or garden.
Troubleshooting Common Problems
Even with the best care, you might encounter some challenges while growing bottle gourds. Here are a few common problems and how to address them:
* Poor Germination: If your seeds aren’t germinating, make sure they are fresh and have been properly soaked. The soil temperature should also be warm enough for germination.
* Lack of Fruit Production: If your plants are producing flowers but not fruit, it could be due to insufficient pollination. Try hand-pollinating the flowers.
* Pest Infestations: Regularly inspect your plants for pests and take action promptly to control them.
* Fungal Diseases: Ensure good air circulation around the plants and avoid overhead watering to prevent fungal diseases.
Growing bottle gourds is a rewarding experience that allows you to connect with nature and create unique and beautiful crafts. With a little patience and care, you can enjoy a bountiful harvest of these fascinating plants. Happy gardening!
Conclusion
So, there you have it! Mastering the art of growing bottle gourds doesn’t require a green thumb blessed by the gardening gods. It simply requires a bit of knowledge, patience, and the willingness to try these simple yet effective DIY tricks. From boosting germination rates with scarification to creating your own nutrient-rich compost tea, these methods are designed to give your bottle gourd plants the best possible start and ensure a bountiful harvest.
Why is this a must-try? Because it empowers you to take control of your garden’s success. Instead of relying solely on commercially available products, you’re harnessing the power of natural processes and readily available materials. This not only saves you money but also reduces your environmental impact. Plus, there’s an undeniable satisfaction in knowing you nurtured your bottle gourds from seed to table using your own ingenuity.
Consider these variations to further personalize your bottle gourd growing experience:
* Vertical Gardening: Bottle gourds are vigorous climbers. Train them up sturdy trellises or arches to maximize space and create a stunning visual display. This also improves air circulation, reducing the risk of fungal diseases.
* Companion Planting: Plant basil, marigolds, or nasturtiums near your bottle gourds to deter pests and attract beneficial insects. These companion plants can create a healthier and more balanced garden ecosystem.
* Seed Saving: Once you’ve successfully grown your bottle gourds, save the seeds from the best fruits for future planting. This allows you to develop your own strain of bottle gourds adapted to your specific climate and growing conditions. Remember to properly dry and store the seeds in a cool, dark place.
* Gourd Art: After harvesting, don’t just limit yourself to culinary uses. Dried bottle gourds can be transformed into beautiful and functional art pieces. Explore carving, painting, or pyrography to create unique bowls, lamps, or decorative items.
Don’t be intimidated by the prospect of trying something new. These DIY tricks are designed to be accessible to gardeners of all skill levels. The key is to start small, experiment, and learn from your experiences. Remember, gardening is a journey, not a destination.
We wholeheartedly encourage you to give these bottle gourd growing tips a try. We are confident that you’ll be amazed by the results. And most importantly, we want to hear about your experiences! Share your successes, challenges, and any variations you’ve discovered in the comments section below. Let’s build a community of bottle gourd enthusiasts and learn from each other. Happy gardening! Let us know if you have any questions about bottle gourd growing tips.
Frequently Asked Questions (FAQs)
Q: How long does it take for bottle gourds to mature?
A: Bottle gourds typically take between 90 to 120 days to mature from planting. However, this can vary depending on the variety, climate, and growing conditions. Warmer temperatures and consistent watering will generally lead to faster growth. Keep an eye on the size and shape of the gourds, and harvest them when they reach the desired size and the skin is firm.
Q: What are the best soil conditions for growing bottle gourds?
A: Bottle gourds thrive in well-drained, fertile soil with a pH between 6.0 and 7.0. Amend your soil with compost or well-rotted manure before planting to improve drainage and nutrient content. If your soil is heavy clay, consider adding sand or perlite to improve drainage. A soil test can help you determine the specific nutrient needs of your soil.
Q: How often should I water my bottle gourd plants?
A: Bottle gourds require consistent watering, especially during hot and dry periods. Water deeply and regularly, aiming to keep the soil consistently moist but not waterlogged. Check the soil moisture level regularly by sticking your finger into the soil. If the top inch feels dry, it’s time to water. Mulching around the plants can help retain moisture and reduce the need for frequent watering.
Q: What are some common pests and diseases that affect bottle gourds?
A: Common pests that can affect bottle gourds include aphids, squash bugs, and vine borers. Regularly inspect your plants for signs of infestation and take appropriate action, such as hand-picking pests, using insecticidal soap, or applying neem oil. Diseases that can affect bottle gourds include powdery mildew and downy mildew. Ensure good air circulation around your plants and avoid overhead watering to prevent these diseases. Fungicides can be used if necessary.
Q: How do I prevent blossom end rot in my bottle gourds?
A: Blossom end rot is a common problem in bottle gourds, caused by a calcium deficiency. Ensure your soil has adequate calcium levels by amending it with bone meal or lime before planting. Consistent watering is also crucial, as fluctuations in soil moisture can hinder calcium uptake. Avoid over-fertilizing with nitrogen, as this can also contribute to blossom end rot.
Q: Can I grow bottle gourds in containers?
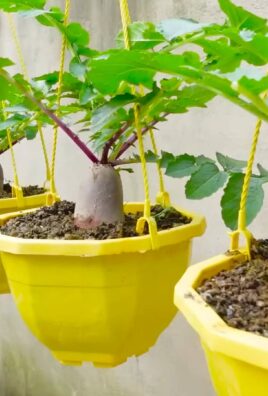
A: Yes, you can grow bottle gourds in containers, but you’ll need a large container (at least 20 gallons) to accommodate their extensive root system. Choose a container with good drainage and use a high-quality potting mix. Provide a sturdy trellis or support structure for the vines to climb. Water and fertilize regularly, as container-grown plants tend to dry out and deplete nutrients more quickly.
Q: How do I harvest bottle gourds?
A: Harvest bottle gourds when they reach the desired size and the skin is firm and hard. Use a sharp knife or pruning shears to cut the gourd from the vine, leaving a few inches of stem attached. Handle the gourds carefully to avoid bruising or damaging the skin.
Q: How do I cure bottle gourds for crafting purposes?
A: To cure bottle gourds for crafting, wash them thoroughly with soapy water and dry them completely. Place them in a well-ventilated area, away from direct sunlight and moisture. Turn them regularly to ensure even drying. The curing process can take several weeks or even months, depending on the size of the gourd and the humidity levels. The gourd is fully cured when it is lightweight and the seeds rattle inside.
Q: Are there any specific bottle gourd varieties that are easier to grow for beginners?
A: Some bottle gourd varieties that are known for their ease of growth and adaptability include ‘Long Handle Dipper’, ‘Birdhouse’, and ‘Bushel Basket’. These varieties are relatively disease-resistant and produce a good yield. Check with your local nursery or seed supplier for varieties that are well-suited to your specific climate and growing conditions.
Q: What are some creative ways to use bottle gourds in cooking?
A: Bottle gourds can be used in a variety of culinary dishes. They can be added to soups, stews, curries, and stir-fries. They can also be grated and used in fritters or pancakes. Young, tender bottle gourds can be eaten raw in salads. In some cultures, bottle gourds are used to make refreshing drinks or fermented beverages. The possibilities are endless!
Leave a Comment