

Grow Pechay in Pots? Absolutely! Imagine stepping outside your door and harvesting fresh, crisp pechay for your dinner, all grown with your own two hands. It’s not just a dream; it’s a deliciously achievable reality, even if you don’t have a sprawling garden.
For generations, cultivating your own food has been a source of pride and sustenance. From ancient civilizations tending their kitchen gardens to modern urban dwellers embracing container gardening, the desire to connect with our food source remains strong. Pechay, also known as Chinese cabbage, is a staple in many Asian cuisines, offering a mild, slightly sweet flavor that’s incredibly versatile. But what if you live in an apartment or have limited outdoor space? That’s where the magic of growing pechay in pots comes in!
This DIY guide is your passport to a bountiful pechay harvest, no matter your space constraints. We’ll walk you through every step, from selecting the right pot and soil to nurturing your plants for optimal growth. Why is this important? Because fresh, homegrown produce tastes better, is often more nutritious, and saves you money at the grocery store. Plus, there’s something incredibly rewarding about watching your little seedlings transform into leafy greens ready for your table. So, let’s get our hands dirty and discover the secrets to successfully grow pechay in pots!
Grow Your Own Delicious Pechay in Pots: A Beginner’s Guide
Hey there, fellow gardening enthusiasts! Ever dreamt of having fresh, crisp pechay right at your fingertips? Well, dream no more! Growing pechay in pots is surprisingly easy, even if you’re a complete beginner like I was. This guide will walk you through every step, from choosing the right pot to harvesting your very own homegrown goodness. Let’s get our hands dirty!
What You’ll Need
Before we dive in, let’s gather our supplies. Here’s a checklist of everything you’ll need to successfully grow pechay in pots:
* Pechay Seeds: Choose your favorite variety! There are several types of pechay, like the regular green variety or the more compact white stem variety.
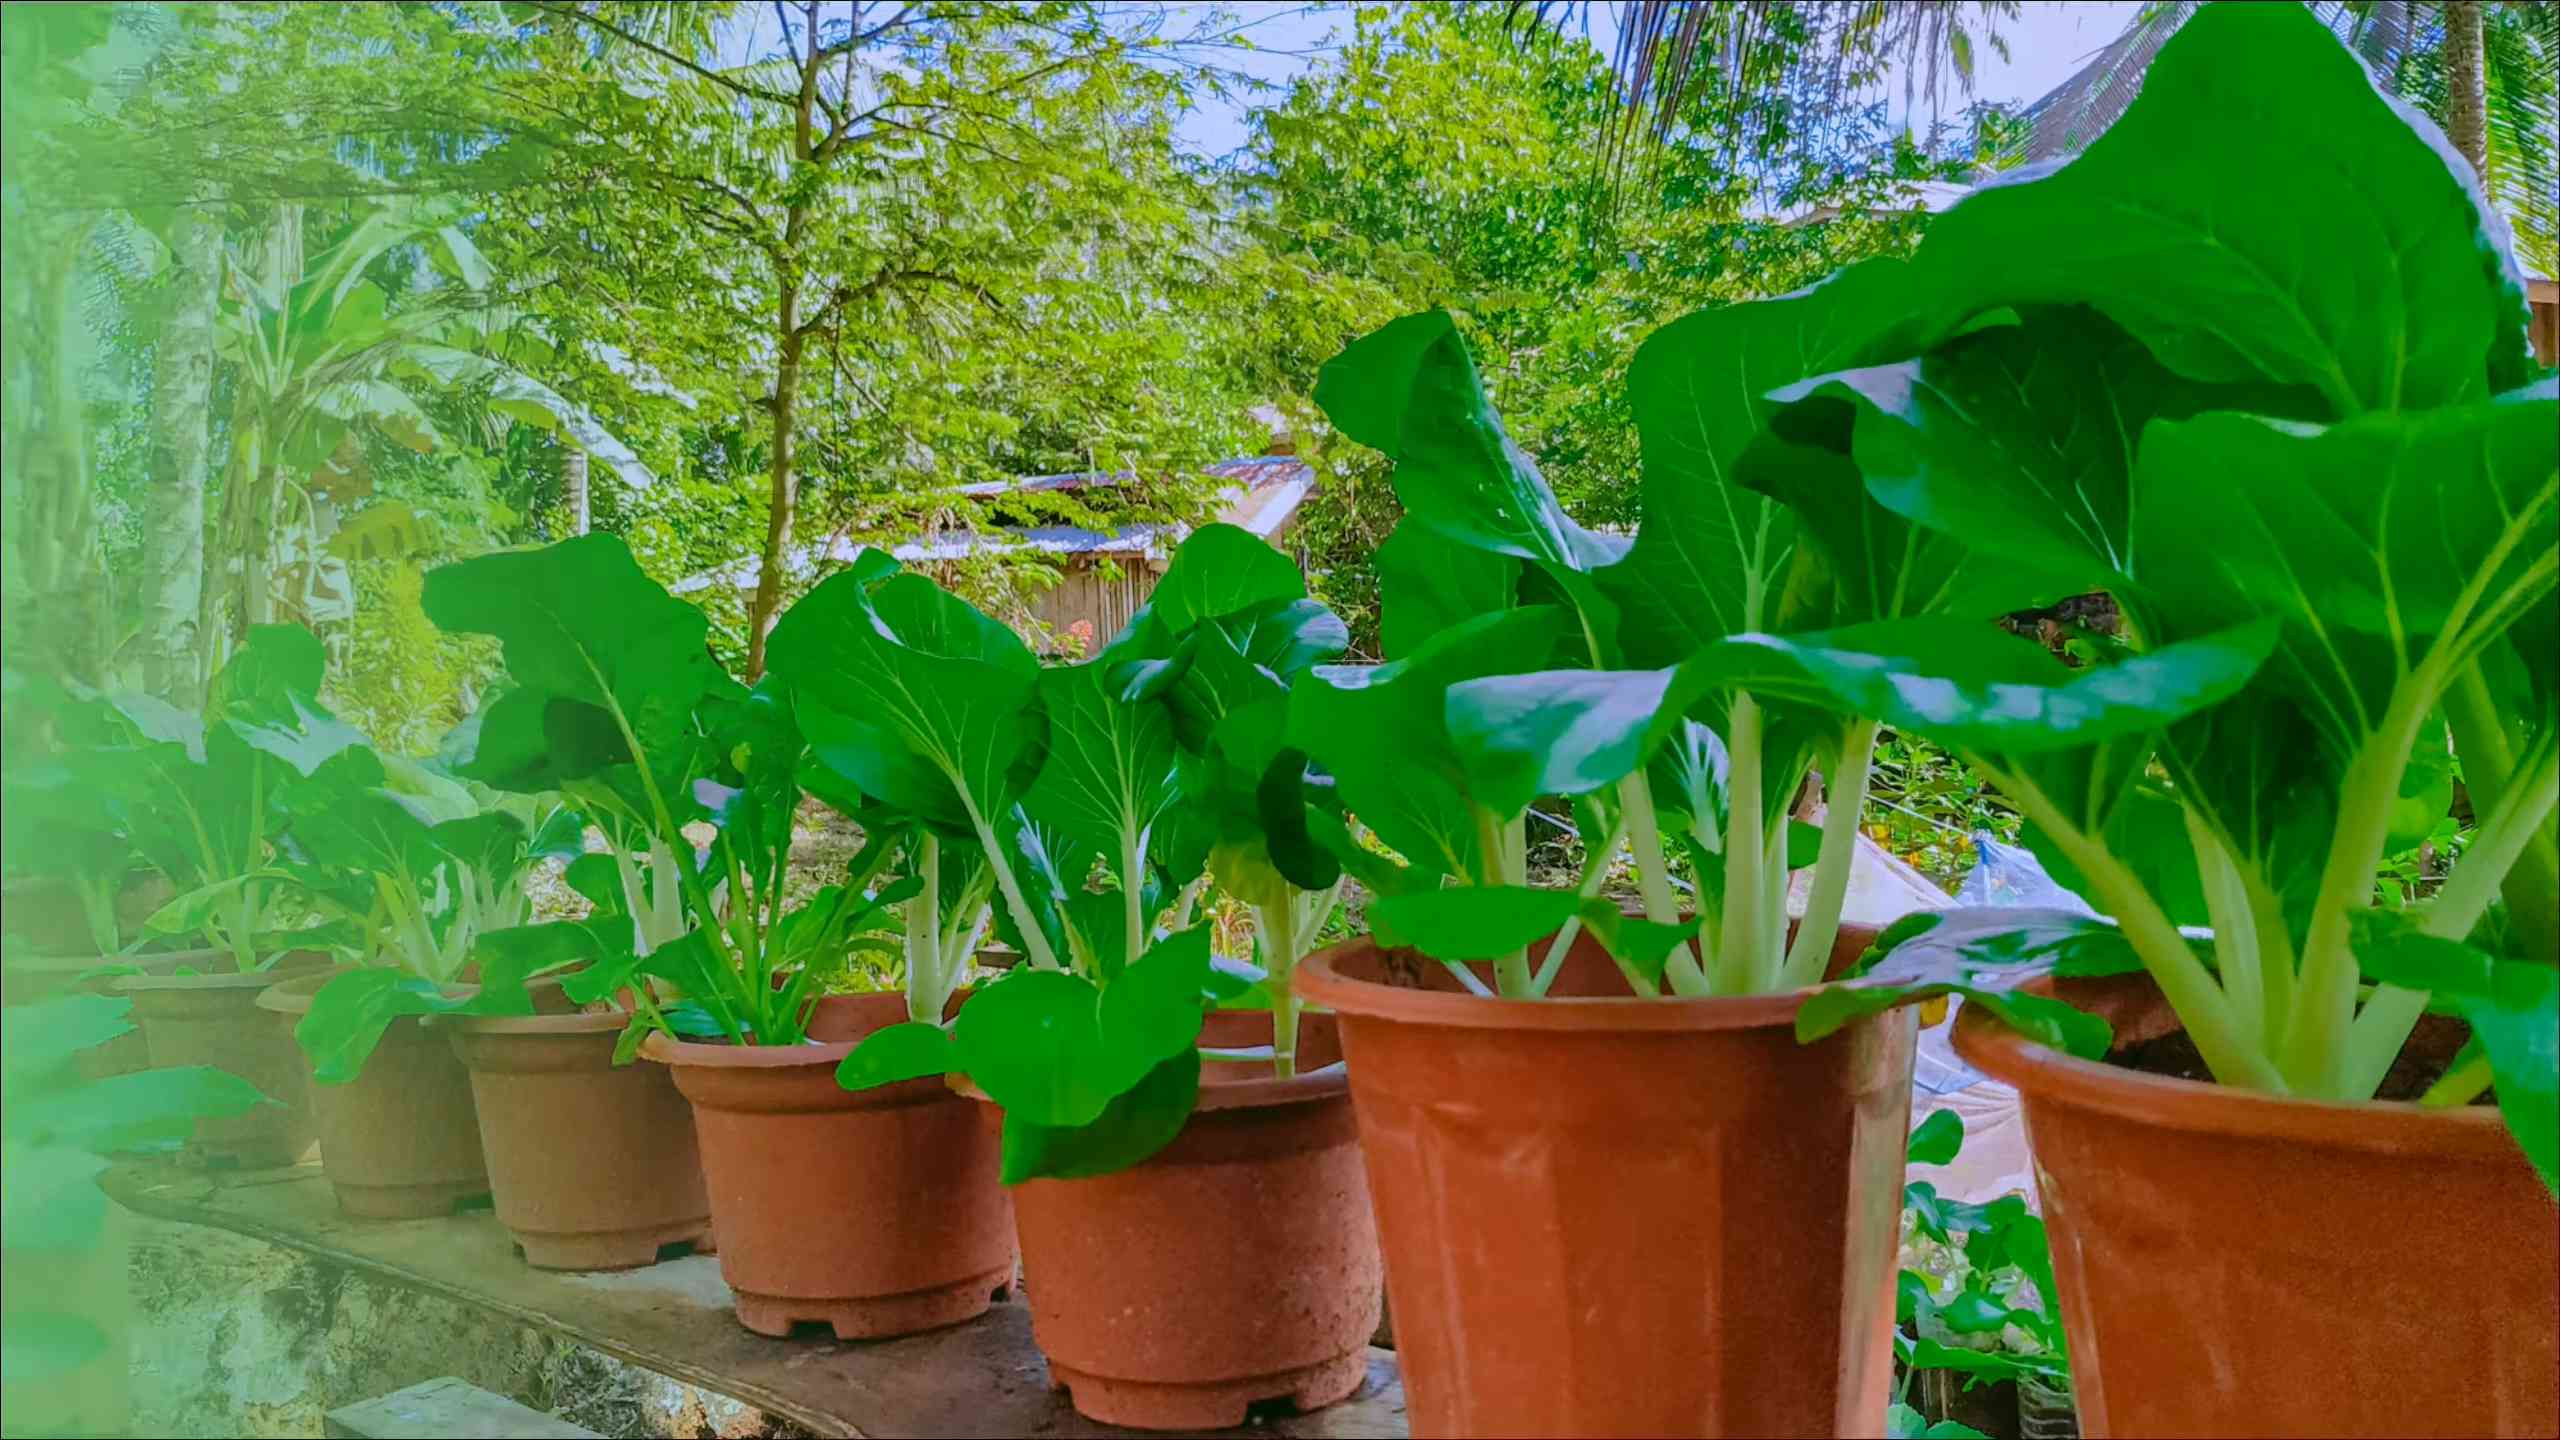
* Pots: Opt for pots that are at least 6-8 inches deep and wide. Good drainage is key, so make sure your pots have drainage holes.
* Potting Mix: Use a high-quality potting mix that’s well-draining and rich in organic matter. Avoid using garden soil, as it can compact in pots and hinder drainage.
* Watering Can or Hose: For gentle and consistent watering.
* Fertilizer: A balanced liquid fertilizer or slow-release granular fertilizer will provide your pechay with the nutrients it needs.
* Trowel or Small Shovel: For planting and transplanting.
* Sunlight: Pechay needs at least 4-6 hours of sunlight per day.
* Optional:
* Seed starting tray or small pots for starting seeds indoors.
* Organic pest control solutions (like neem oil) to protect your plants from pests.
* Mulch (like straw or wood chips) to help retain moisture and suppress weeds.
Step-by-Step Planting Guide
Alright, let’s get planting! I’ve broken down the process into easy-to-follow steps.
1. Starting Seeds (Optional): You can directly sow pechay seeds into your pots, but starting them indoors gives them a head start, especially if you live in a cooler climate.
* Fill a seed starting tray or small pots with potting mix.
* Sow 2-3 seeds per cell or pot, about ¼ inch deep.
* Gently water the soil and keep it moist but not soggy.
* Place the tray or pots in a warm, sunny location or under grow lights.
* Seeds should germinate in about 5-7 days.
* Once the seedlings have a few true leaves (the second set of leaves), thin them out, leaving only the strongest seedling in each cell or pot.
2. Preparing Your Pots: Whether you’re starting seeds indoors or directly sowing, this step is crucial.
* Ensure your pots are clean and have adequate drainage holes.
* Fill the pots with your chosen potting mix, leaving about an inch of space from the top.
* Gently tap the pot to settle the soil.
3. Sowing Seeds Directly (If Not Starting Indoors):
* Make small holes about ½ inch deep and 2-3 inches apart in the potting mix.
* Place 2-3 seeds in each hole.
* Cover the seeds with a thin layer of potting mix.
* Gently water the soil.
4. Transplanting Seedlings (If Starting Indoors):
* Once your seedlings are strong enough (a few true leaves), it’s time to transplant them into your pots.
* Gently remove the seedlings from the seed starting tray or small pots, being careful not to damage the roots.
* Make a small hole in the potting mix in your prepared pot.
* Place the seedling in the hole and gently cover the roots with soil.
* Water the seedling thoroughly.
* Space the seedlings about 4-6 inches apart in the pot. If your pot is smaller, you might only want to plant one or two seedlings per pot.
5. Watering:
* Water your pechay plants regularly, especially during hot weather.
* Keep the soil consistently moist but not waterlogged.
* Water deeply, allowing the water to drain out of the drainage holes.
* Avoid watering the leaves directly, as this can promote fungal diseases. I prefer to water at the base of the plant.
6. Sunlight:
* Place your pots in a location that receives at least 4-6 hours of sunlight per day.
* If you live in a very hot climate, provide some afternoon shade to prevent the leaves from scorching.
7. Fertilizing:
* Feed your pechay plants with a balanced liquid fertilizer every 2-3 weeks.
* Alternatively, you can use a slow-release granular fertilizer at planting time.
* Follow the instructions on the fertilizer packaging for proper application rates.
8. Mulching (Optional):
* Apply a layer of mulch around your pechay plants to help retain moisture, suppress weeds, and regulate soil temperature.
* Use organic mulches like straw, wood chips, or shredded leaves.
Pest and Disease Management
Even in pots, pechay can be susceptible to pests and diseases. Here’s how to keep your plants healthy:
* Common Pests: Aphids, cabbage worms, and slugs are common pests that can attack pechay.
* Aphids: These tiny insects suck the sap from the leaves, causing them to curl and distort. You can control aphids by spraying them with a strong stream of water, insecticidal soap, or neem oil.
* Cabbage Worms: These caterpillars chew holes in the leaves. Handpick them off the plants or use Bacillus thuringiensis (Bt), a natural insecticide that targets caterpillars.
* Slugs: These slimy creatures feed on the leaves at night. You can trap them with beer traps or use diatomaceous earth around the plants.
* Common Diseases: Fungal diseases like damping-off and downy mildew can affect pechay.
* Damping-Off: This fungal disease affects seedlings, causing them to rot at the base. Prevent damping-off by using a sterile potting mix and avoiding overwatering.
* Downy Mildew: This fungal disease causes yellow spots on the upper surface of the leaves and a white, downy growth on the underside. Improve air circulation around the plants and avoid overhead watering to prevent downy mildew. You can also use a fungicide if necessary.
Regular Inspection: Regularly inspect your plants for signs of pests or diseases. Early detection is key to preventing serious problems.
Organic Solutions: I always prefer to use organic pest control and disease management methods whenever possible. Neem oil, insecticidal soap, and Bt are all effective and safe options.
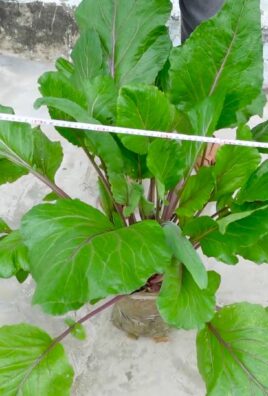
Harvesting Your Pechay
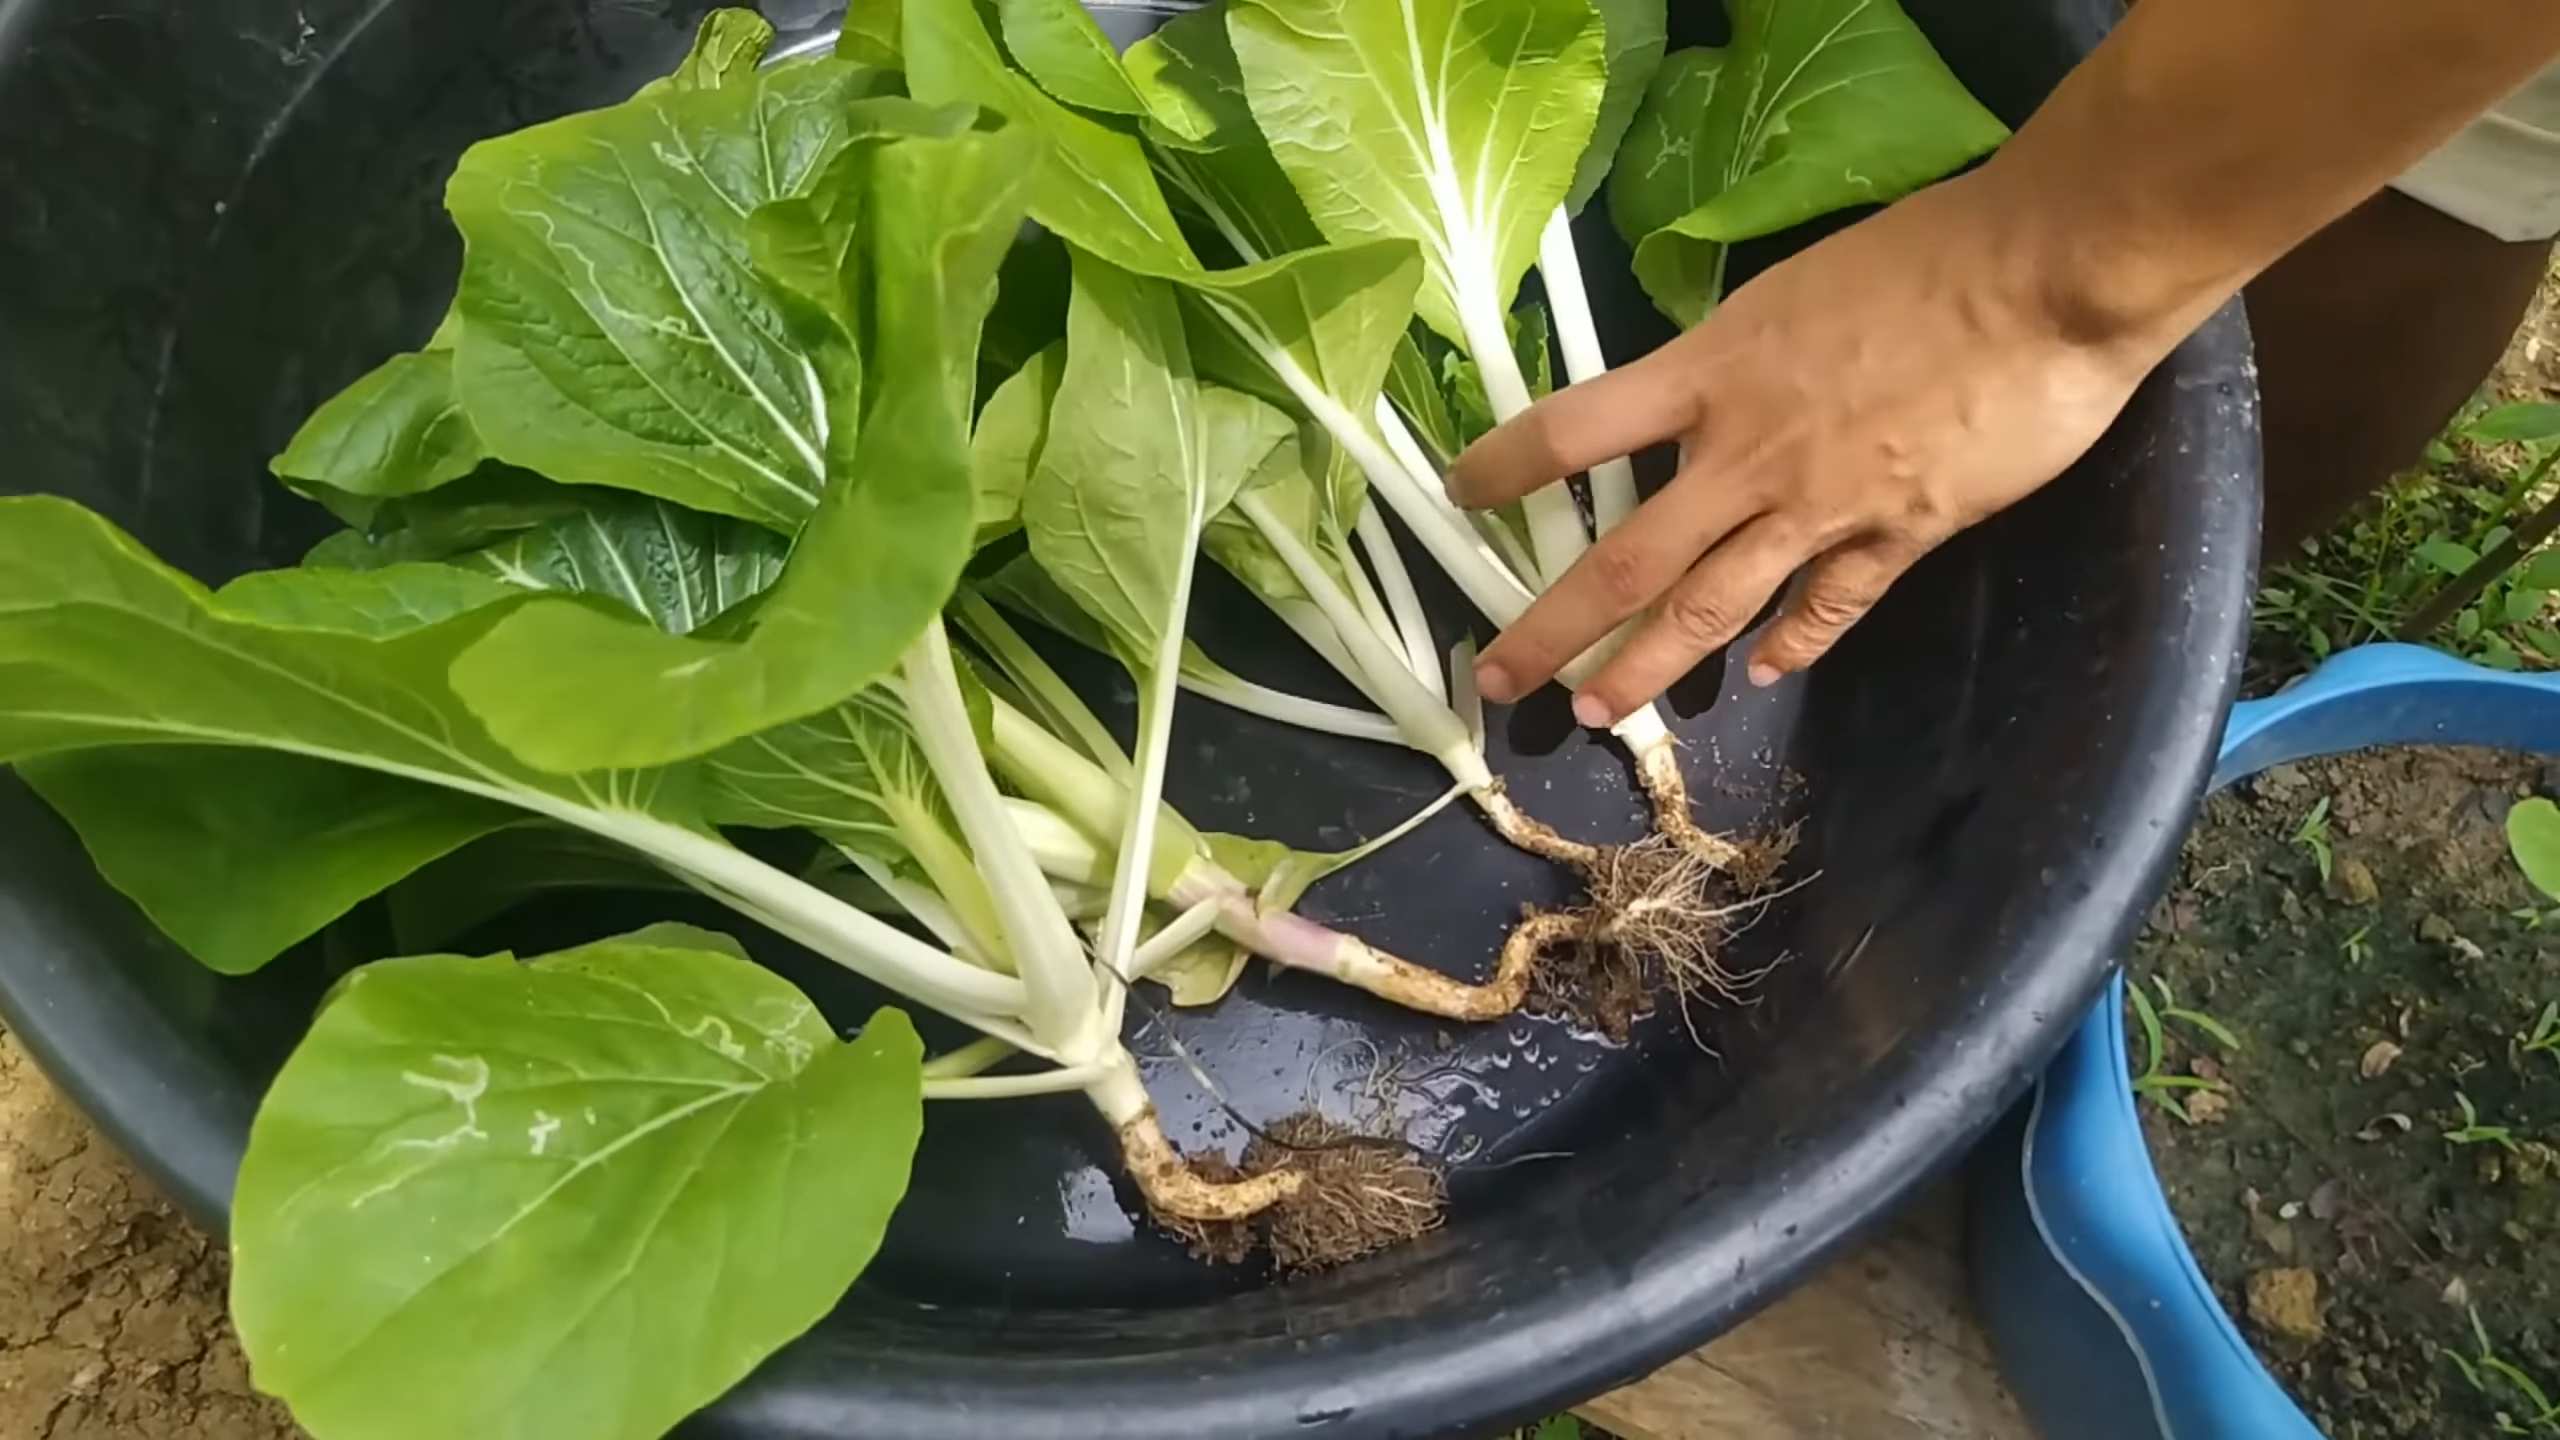
The best part! You can start harvesting your pechay when the leaves are about 6-8 inches long, usually around 4-6 weeks after planting.
* Harvesting Method: You can harvest the entire plant at once or harvest individual leaves as needed.
* Harvesting the Entire Plant: Cut the plant at the base with a sharp knife.
* Harvesting Individual Leaves: Harvest the outer leaves first, leaving the inner leaves to continue growing. This will allow you to harvest pechay over a longer period.
* Best Time to Harvest: Harvest your pechay in the morning, when the leaves are crisp and fresh.
* Storage: Store harvested pechay in the refrigerator for up to a week. Wrap the leaves in a damp paper towel and place them in a plastic bag.
Tips for Success
Here are a few extra tips to help you grow the best pechay possible:
* Choose the Right Variety: Some pechay varieties are better suited for container gardening than others. Look for compact varieties that don’t get too large.
* Provide Adequate Drainage: Good drainage is essential for preventing root rot. Make sure your pots have drainage holes and use a well-draining potting mix.
* Don’t Overwater: Overwatering can lead to fungal diseases. Water your pechay only when the soil is dry to the touch.
* Protect from Extreme Weather: Pechay is sensitive to extreme temperatures. Protect your plants from frost and scorching sun.
* Succession Planting: Plant new seeds every few weeks to ensure a continuous harvest of fresh pechay.
Growing pechay in pots is a rewarding experience that allows you to enjoy fresh, homegrown vegetables even if you don’t have a large garden. With a little care and attention, you can have a bountiful harvest of delicious pechay right on your patio or balcony. Happy gardening!
Conclusion
So, there you have it! Growing your own pechay in pots is not only achievable, but it’s also incredibly rewarding. From the vibrant green leaves gracing your balcony or patio to the fresh, crisp taste enhancing your meals, the benefits are undeniable. This DIY trick transforms even the smallest spaces into productive mini-gardens, allowing you to enjoy the freshest produce without ever leaving home.
Why is this a must-try? Because it puts you in control. You know exactly what goes into your pechay – no harmful pesticides, no questionable fertilizers, just pure, homegrown goodness. Plus, it’s a fantastic way to connect with nature, de-stress, and learn a new skill. Imagine the satisfaction of harvesting your own pechay and knowing you nurtured it from seed to table.
But the beauty of this DIY project lies in its adaptability. Feel free to experiment with different pot sizes and materials. Terracotta pots offer excellent drainage, while plastic pots are lightweight and retain moisture well. Consider using self-watering pots for added convenience, especially if you’re prone to forgetting to water your plants.
For variations, try companion planting. Marigolds, for example, can help deter pests, while basil can improve the flavor of your pechay. You can also explore different varieties of pechay. Some are more compact and better suited for smaller pots, while others offer unique flavors and textures. Don’t be afraid to get creative and tailor the process to your specific needs and preferences.
Growing pechay in pots is a fantastic way to enjoy fresh, homegrown vegetables, even with limited space. It’s a simple, cost-effective, and incredibly satisfying project that anyone can undertake.
We wholeheartedly encourage you to give this DIY trick a try. Start small, learn as you go, and don’t be discouraged by initial setbacks. Gardening is a journey, and every mistake is a learning opportunity.
Once you’ve harvested your first batch of homegrown pechay, we’d love to hear about your experience! Share your photos, tips, and challenges in the comments below. Let’s build a community of pechay-growing enthusiasts and inspire others to embrace the joys of urban gardening. Happy planting!
Frequently Asked Questions (FAQs)
What is the best type of soil to use for growing pechay in pots?
The ideal soil for growing pechay in pots is a well-draining, nutrient-rich potting mix. Avoid using garden soil directly, as it can become compacted in pots and hinder drainage. Look for a potting mix that contains a blend of peat moss, perlite, and vermiculite. You can also amend your potting mix with compost or aged manure to provide additional nutrients. A slightly acidic to neutral pH (around 6.0 to 7.0) is optimal for pechay growth.
How often should I water my pechay plants in pots?
Pechay plants need consistent moisture, but they don’t like to be waterlogged. Water your pechay plants when the top inch of soil feels dry to the touch. The frequency of watering will depend on factors such as the weather, the size of the pot, and the type of potting mix you’re using. In hot, dry weather, you may need to water your plants daily. In cooler, wetter weather, you may only need to water them every few days. Always check the soil moisture before watering to avoid overwatering, which can lead to root rot.
How much sunlight do pechay plants need?
Pechay thrives in full sun, which means they need at least 6 hours of direct sunlight per day. However, they can also tolerate partial shade, especially in hot climates. If you’re growing your pechay plants indoors, place them near a sunny window or use grow lights to provide adequate light. Insufficient sunlight can result in leggy growth and reduced yields.
What kind of fertilizer should I use for pechay plants in pots?
Pechay plants are heavy feeders and benefit from regular fertilization. Use a balanced, water-soluble fertilizer with an NPK ratio of around 10-10-10 or 20-20-20. Apply the fertilizer according to the package instructions, usually every 2-3 weeks. You can also use organic fertilizers such as compost tea or fish emulsion. Avoid over-fertilizing, as this can burn the roots and damage the plants.
How do I protect my pechay plants from pests and diseases?
Pechay plants can be susceptible to pests such as aphids, cabbage worms, and slugs. Regularly inspect your plants for signs of infestation and take action promptly. You can handpick pests off the plants, use insecticidal soap, or apply neem oil. To prevent diseases, ensure good air circulation around your plants and avoid overwatering. If you notice any signs of disease, such as yellowing leaves or spots, remove the affected leaves immediately.
When is the best time to harvest pechay?
Pechay is typically ready to harvest about 45-50 days after planting. You can harvest the entire plant at once or harvest individual leaves as needed. To harvest the entire plant, cut it off at the base. To harvest individual leaves, start with the outer leaves and work your way inwards. Harvesting regularly will encourage the plant to produce more leaves.
Can I grow pechay in pots during the winter?
Yes, you can grow pechay in pots during the winter, especially in regions with mild climates. However, you may need to provide some protection from frost and cold temperatures. You can move your pots indoors or cover them with a frost blanket. Also, reduce watering frequency during the winter months.
What are some common problems when growing pechay in pots?
Some common problems when growing pechay in pots include:
* **Yellowing leaves:** This can be caused by overwatering, underwatering, nutrient deficiencies, or pests.
* **Leggy growth:** This is usually caused by insufficient sunlight.
* **Root rot:** This is caused by overwatering and poor drainage.
* **Pest infestations:** Regularly inspect your plants for pests and take action promptly.
By addressing these problems promptly, you can ensure a healthy and productive pechay crop.
Can I regrow pechay from the base after harvesting?
Yes, you can often regrow pechay from the base after harvesting. After cutting the leaves, leave about 2-3 inches of the base intact. Keep the soil moist and provide adequate sunlight. New leaves should start to emerge from the base within a few weeks. This is a great way to get multiple harvests from a single plant.
Is growing pechay in pots organically possible?
Absolutely! In fact, growing pechay in pots lends itself well to organic practices. Use organic potting mix, amend with compost, and fertilize with organic options like compost tea or worm castings. Control pests with natural methods like neem oil or introducing beneficial insects. This ensures you’re enjoying the freshest, healthiest pechay possible.
Leave a Comment