

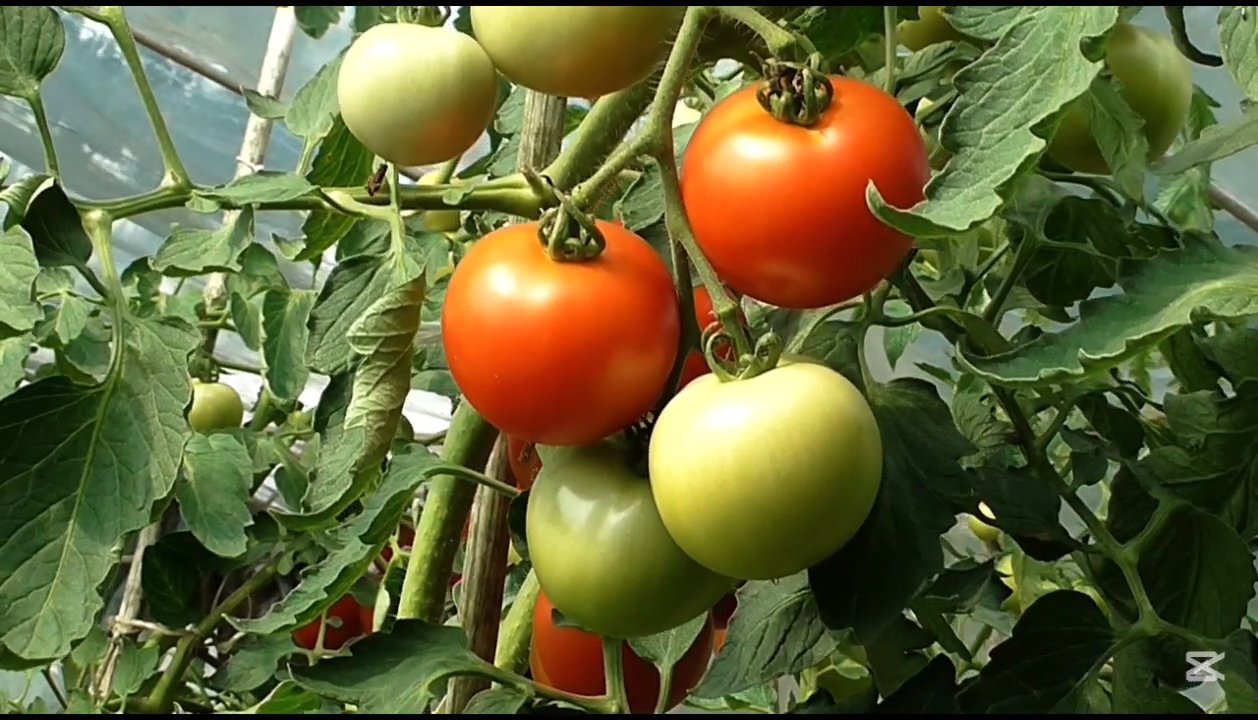
Container Gardening Tomatoes: Imagine plucking a sun-ripened, juicy tomato straight from your patio, bursting with flavor far superior to anything you’d find in a grocery store. Sounds idyllic, right? Well, it’s absolutely achievable, even without a sprawling backyard! For centuries, humans have cultivated food in limited spaces, from ancient rooftop gardens in bustling cities to Renaissance-era orangeries, proving that a green thumb can thrive anywhere.
In today’s fast-paced world, many of us crave a connection to nature and a source of fresh, healthy produce. But who has the time or space for a traditional garden? That’s where container gardening tomatoes comes to the rescue! I’m here to share some simple, effective DIY tricks and hacks that will empower you to grow delicious tomatoes in pots, even if you’re a complete beginner.
This article is your ultimate guide to successful container gardening tomatoes. We’ll cover everything from choosing the right varieties and containers to mastering watering and fertilization techniques. Say goodbye to bland, store-bought tomatoes and hello to a bountiful harvest of homegrown goodness! Let’s get started and transform your balcony, patio, or even a sunny windowsill into a thriving tomato paradise.
DIY Container Gardening: Grow Delicious Tomatoes Anywhere!
Hey there, fellow gardening enthusiasts! I’m so excited to share my tried-and-true method for growing juicy, flavorful tomatoes right in containers. Whether you have a sprawling backyard or just a sunny balcony, this guide will walk you through every step, ensuring a bountiful harvest. Let’s get our hands dirty!
Choosing the Right Tomato Variety
Before we even think about soil, let’s talk tomatoes! Not all varieties thrive in containers, so selecting the right one is crucial. I’ve had the best luck with these:
* Determinate Tomatoes: These are bush-type tomatoes that grow to a specific size and produce all their fruit at once. They’re perfect for containers because they don’t require extensive staking. Think Roma, Celebrity, or Patio.
* Dwarf Tomatoes: As the name suggests, these are compact varieties specifically bred for container gardening. They’re super manageable and produce surprisingly large yields. Look for Tiny Tim, or Bush Early Girl.
* Indeterminate Tomatoes (with caution): While these vining tomatoes can grow quite large, some smaller indeterminate varieties can be successful in large containers with proper support. Cherry tomatoes like Sungold or Black Cherry are good options, but be prepared to prune and stake them diligently.
My personal recommendation: Start with a determinate variety like Roma. They’re reliable, easy to grow, and produce tons of delicious tomatoes perfect for sauces and salads.
Gathering Your Supplies
Okay, now for the fun part – gathering our supplies! Here’s what you’ll need:
* Large Containers: This is non-negotiable. Tomatoes need space for their roots to grow. I recommend containers that are at least 20 inches in diameter and 24 inches deep. Fabric pots (grow bags) are also a great option as they allow for better drainage and aeration.
* High-Quality Potting Mix: Don’t skimp on this! Garden soil is too heavy and compacts in containers. You need a light, well-draining potting mix specifically formulated for container gardening. Look for mixes that contain peat moss, perlite, and vermiculite.
* Tomato Cage or Stake: Even determinate varieties benefit from some support, especially when loaded with fruit. Choose a sturdy tomato cage or a strong stake that’s at least 4-5 feet tall.
* Slow-Release Fertilizer: This will provide your tomato plants with a steady supply of nutrients throughout the growing season. Look for a fertilizer specifically formulated for tomatoes or vegetables.
* Watering Can or Hose: Essential for keeping your plants hydrated.
* Hand Trowel: For planting and transplanting.
* Gardening Gloves: To keep your hands clean and protected.
* Optional: Epsom salts, bone meal, fish emulsion. These can provide extra nutrients and promote healthy growth.
Step-by-Step Planting Guide
Alright, let’s get planting! Follow these steps for a successful start:
1. Prepare Your Container: Make sure your container has drainage holes. If not, drill some! Good drainage is crucial to prevent root rot. I like to add a layer of gravel or broken pottery at the bottom of the container to further improve drainage, but this is optional.
2. Fill with Potting Mix: Fill your container with potting mix, leaving about 2-3 inches of space at the top. Don’t pack the soil down too tightly.
3. Add Slow-Release Fertilizer: Sprinkle the recommended amount of slow-release fertilizer over the potting mix. Follow the instructions on the fertilizer package.
4. Dig a Hole: Dig a hole in the center of the container that’s large enough to accommodate the root ball of your tomato plant.
5. Plant Your Tomato Plant: Gently remove the tomato plant from its nursery pot. If the roots are tightly bound, gently loosen them with your fingers. Place the plant in the hole, making sure the top of the root ball is level with the surrounding soil.
6. Bury the Stem (Optional, but Recommended): This is a trick I swear by! Tomatoes can grow roots along their stems, so burying a portion of the stem will encourage a stronger root system. Remove the lower leaves from the stem and bury the stem up to the first set of leaves.
7. Fill in with Potting Mix: Fill in the hole with potting mix, gently firming the soil around the plant.
8. Water Thoroughly: Water the plant thoroughly until water drains out of the drainage holes. This will help settle the soil and hydrate the roots.
9. Add Support: Install your tomato cage or stake now, before the plant gets too big. This will prevent you from damaging the plant later.
10. Mulch (Optional): Adding a layer of mulch around the base of the plant will help retain moisture, suppress weeds, and regulate soil temperature. I like to use straw or shredded bark.
Caring for Your Container Tomatoes
Now that your tomato plant is happily settled in its container, it’s time to provide it with the care it needs to thrive.
* Watering: Tomatoes need consistent watering, especially during hot weather. Water deeply whenever the top inch of soil feels dry to the touch. Avoid overwatering, as this can lead to root rot. I usually water in the morning so the foliage has time to dry before nightfall, which helps prevent fungal diseases.
* Sunlight: Tomatoes need at least 6-8 hours of sunlight per day. Choose a sunny location for your container garden. If you live in a particularly hot climate, you may need to provide some afternoon shade to prevent the plants from scorching.
* Fertilizing: In addition to the slow-release fertilizer you added at planting, you may need to supplement with liquid fertilizer throughout the growing season. I like to use fish emulsion or compost tea every 2-3 weeks.
* Pruning: Pruning is essential for indeterminate tomato varieties to encourage fruit production and prevent overcrowding. Remove suckers (the small shoots that grow between the main stem and the branches) regularly. For determinate varieties, pruning is less critical, but you can still remove any yellowing or diseased leaves.
* Staking/Caging: As your tomato plant grows, make sure it’s adequately supported by its cage or stake. Tie the plant to the support with soft twine or plant ties.
* Pest and Disease Control: Keep an eye out for common tomato pests like aphids, whiteflies, and tomato hornworms. Handpick any pests you find or use an insecticidal soap. To prevent fungal diseases, avoid overhead watering and ensure good air circulation. You can also use a fungicide if necessary.
* Blossom End Rot Prevention: Blossom end rot, characterized by a dark, leathery spot on the bottom of the tomato, is caused by a calcium deficiency. To prevent this, ensure your soil is rich in calcium and water consistently. You can also add bone meal to the soil at planting or spray the plants with a calcium solution. Epsom salts can also help with calcium uptake.
Troubleshooting Common Problems
Even with the best care, you might encounter some challenges along the way. Here are some common problems and how to address them:
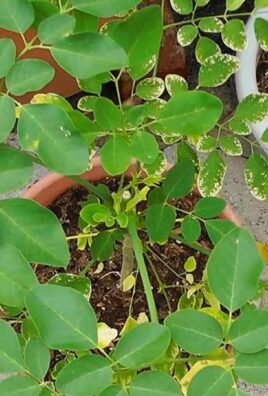
* Yellowing Leaves: This can be caused by a variety of factors, including overwatering, underwatering, nutrient deficiencies, or disease. Check the soil moisture and adjust your watering accordingly. Fertilize with a balanced fertilizer to address any nutrient deficiencies. If you suspect disease, treat with an appropriate fungicide.
* Lack of Fruit: This can be caused by a lack of pollination, high temperatures, or nutrient deficiencies. Gently shake the tomato plants to encourage pollination. Ensure the plants are getting enough sunlight and fertilize with a fertilizer high in phosphorus.
* Blossom Drop: This is when the tomato blossoms fall off before setting fruit. It’s often caused by extreme temperatures (too hot or too cold), inconsistent watering, or stress. Provide shade during hot weather and water consistently.
* Pests: As mentioned earlier, keep an eye out for common tomato pests and take action promptly.
Harvesting Your Tomatoes
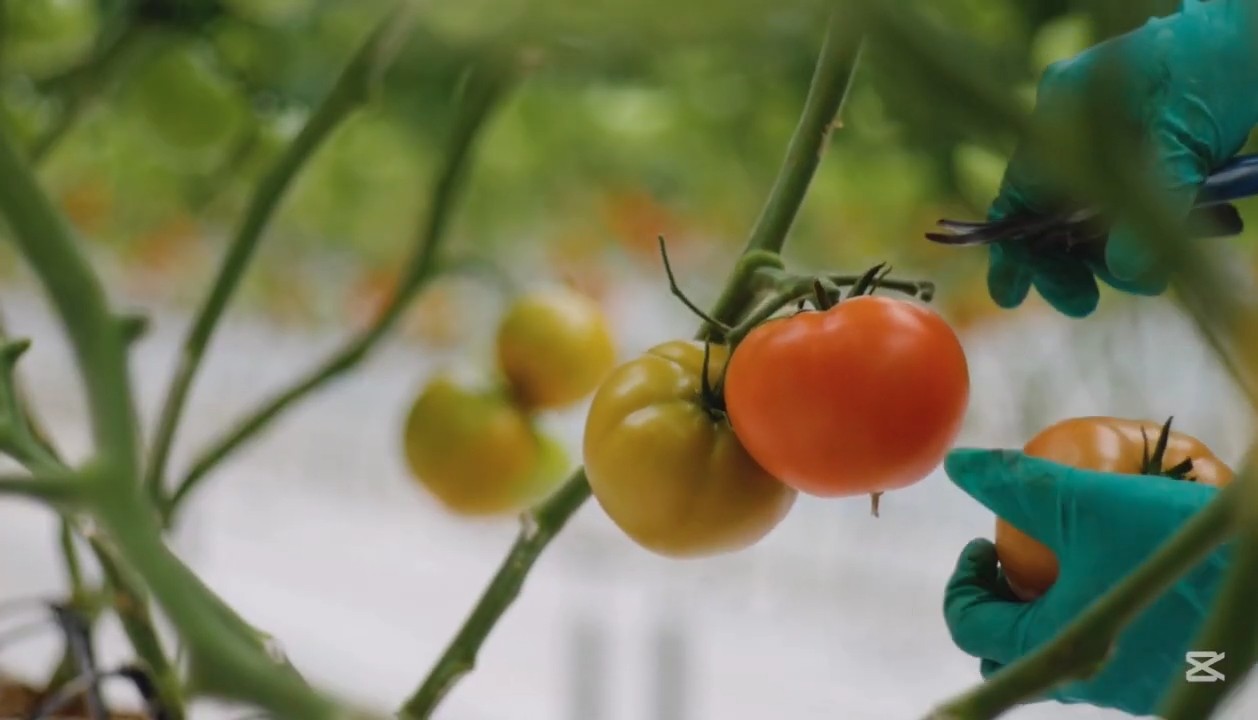
The moment we’ve all been waiting for – harvesting! You’ll know your tomatoes are ripe when they’re fully colored, slightly soft to the touch, and easily detach from the vine. Gently twist the tomato off the vine, being careful not to damage the plant.
Pro Tip: Tomatoes will continue to ripen off the vine, so you can harvest them slightly underripe if you’re worried about pests or weather conditions.
Enjoying Your Harvest
Congratulations! You’ve successfully grown your own container tomatoes. Now it’s time to enjoy the fruits (or vegetables!) of your labor. Use your homegrown tomatoes in salads, sauces, sandwiches, or simply enjoy them fresh off the vine. The possibilities are endless!
I hope this guide has inspired you to try container gardening tomatoes. It’s a rewarding experience that allows you to enjoy fresh, delicious tomatoes no matter where you live. Happy gardening!
Conclusion
So, there you have it! Mastering container gardening tomatoes doesn’t have to be a daunting task. By implementing this simple yet effective DIY trick, you’re not just growing tomatoes; you’re cultivating a thriving ecosystem in a pot, maximizing your yield, and minimizing common problems like blossom end rot and nutrient deficiencies. Think of it as giving your tomato plants the VIP treatment they deserve, all from the comfort of your patio, balcony, or even a sunny windowsill.
Why is this a must-try? Because it addresses the core challenges of container gardening: limited space and nutrient availability. This method ensures your tomato plants receive a consistent supply of the essential elements they need to flourish, leading to healthier plants, more abundant harvests, and, ultimately, tastier tomatoes. It’s a game-changer for anyone who’s struggled with container gardening in the past or who simply wants to take their tomato-growing game to the next level.
But don’t stop there! Feel free to experiment and adapt this technique to suit your specific needs and preferences. For example, if you’re growing heirloom varieties, you might consider adding a touch of Epsom salts to the soil mix to provide extra magnesium, which can enhance their flavor. Or, if you live in a particularly hot climate, you could incorporate water-retaining crystals into the container to help prevent the soil from drying out too quickly. You can also try different types of organic fertilizers to see which ones work best for your plants. Consider using a slow-release fertilizer specifically formulated for tomatoes for a consistent nutrient supply.
The possibilities are endless, and that’s part of the fun! The key is to observe your plants closely, pay attention to their needs, and adjust your approach accordingly. Remember, gardening is a journey, not a destination. There will be successes and setbacks along the way, but with a little patience and experimentation, you’ll be rewarded with a bountiful harvest of delicious, homegrown tomatoes.
We wholeheartedly encourage you to give this DIY trick a try. It’s easy, affordable, and incredibly effective. And once you’ve experienced the joy of harvesting your own juicy, sun-ripened tomatoes, you’ll wonder why you didn’t try it sooner.
Don’t keep your success a secret! We’d love to hear about your experience with this DIY trick. Share your photos, tips, and stories in the comments below. Let’s create a community of container gardening enthusiasts who are passionate about growing their own food and sharing their knowledge with others. Together, we can make container gardening tomatoes accessible and rewarding for everyone. So, get your hands dirty, embrace the challenge, and enjoy the fruits (or rather, the vegetables) of your labor! Happy gardening!
Frequently Asked Questions (FAQ)
What exactly is the DIY trick you’re referring to?
The DIY trick we’re emphasizing involves creating a nutrient-rich soil mix specifically tailored for container gardening tomatoes. This typically includes a base of high-quality potting mix amended with organic materials like compost, aged manure, and slow-release fertilizer. The key is to provide a balanced and sustained release of nutrients throughout the growing season, addressing the limited nutrient availability in containers. It also involves proper watering techniques and potentially adding supplements like Epsom salts or bone meal depending on the specific needs of your tomato variety.
Why is container gardening tomatoes different from growing them in the ground?
Container gardening presents unique challenges compared to growing tomatoes in the ground. In containers, the root system is confined, limiting access to nutrients and water. The soil in containers also tends to dry out faster and can become compacted over time. Furthermore, the smaller volume of soil means that nutrients are depleted more quickly, requiring more frequent fertilization. This DIY trick helps overcome these challenges by creating an optimal growing environment within the container.
What kind of potting mix should I use for container gardening tomatoes?
It’s crucial to use a high-quality potting mix specifically designed for containers, not garden soil. Garden soil is too dense and doesn’t drain well in containers, which can lead to root rot. Look for a potting mix that contains ingredients like peat moss, perlite, and vermiculite, which provide good drainage and aeration. You can also make your own potting mix by combining equal parts of peat moss, perlite, and compost.
How often should I fertilize my container tomatoes?
The frequency of fertilization depends on the type of fertilizer you’re using. If you’re using a slow-release fertilizer, you may only need to apply it once at planting time. However, if you’re using a liquid fertilizer, you’ll need to fertilize more frequently, typically every 2-3 weeks. Always follow the instructions on the fertilizer label. Look for a fertilizer that is specifically formulated for tomatoes and has a balanced NPK ratio (nitrogen, phosphorus, and potassium).
What are some common problems I might encounter when container gardening tomatoes, and how can this DIY trick help?
Common problems include blossom end rot (caused by calcium deficiency), nutrient deficiencies (yellowing leaves, stunted growth), and pests and diseases. This DIY trick helps prevent these problems by providing a consistent supply of nutrients, improving drainage, and creating a healthier growing environment. A well-nourished plant is more resistant to pests and diseases. Adding compost to your soil mix also introduces beneficial microbes that can help protect your plants.
Can I use this DIY trick for other vegetables besides tomatoes?
Yes, this DIY trick can be adapted for other vegetables that thrive in containers, such as peppers, eggplants, and cucumbers. However, you may need to adjust the soil mix and fertilizer to meet the specific needs of each vegetable. For example, peppers prefer a slightly acidic soil, while cucumbers benefit from a fertilizer that is high in potassium.
What size container should I use for container gardening tomatoes?
The size of the container depends on the type of tomato you’re growing. Determinate tomatoes (bush varieties) can be grown in smaller containers (at least 5 gallons), while indeterminate tomatoes (vining varieties) require larger containers (at least 10 gallons). Make sure the container has drainage holes to prevent waterlogging.
How much sunlight do container tomatoes need?
Tomatoes need at least 6-8 hours of sunlight per day to thrive. Choose a location that receives full sun for most of the day. If you don’t have a sunny spot, you can supplement with grow lights.
How often should I water my container tomatoes?
Water your container tomatoes regularly, especially during hot, dry weather. The soil should be kept consistently moist but not waterlogged. Check the soil moisture by sticking your finger into the soil. If the top inch of soil is dry, it’s time to water.
What if I don’t have access to all the ingredients for the soil mix?
Don’t worry if you can’t find all the ingredients listed. The most important thing is to start with a good quality potting mix and amend it with some organic matter, such as compost or aged manure. You can also use a slow-release fertilizer to provide a consistent supply of nutrients. The key is to experiment and see what works best for you and your plants.
How do I know if my tomato plants are getting enough nutrients?
The appearance of your tomato plants can tell you a lot about their nutrient status. Yellowing leaves can indicate a nitrogen deficiency, while stunted growth can indicate a phosphorus deficiency. Blossom end rot is a sign of calcium deficiency. If you notice any of these symptoms, adjust your fertilization accordingly. You can also get your soil tested to determine its nutrient levels.
Is organic fertilizer better than synthetic fertilizer for container gardening tomatoes?
Both organic and synthetic fertilizers can be effective for container gardening tomatoes. Organic fertilizers release nutrients slowly over time, while synthetic fertilizers provide a quick boost of nutrients. Organic fertilizers also improve soil health by adding organic matter and promoting beneficial microbes. Ultimately, the choice is up to you. Consider the environmental impact of each type of fertilizer and choose the one that best suits your needs and preferences.
How can I prevent pests and diseases in my container tomatoes?
Prevention is key when it comes to pests and diseases. Start by choosing disease-resistant tomato varieties. Keep your plants well-watered and fertilized to make them more resistant to pests and diseases. Inspect your plants regularly for signs of pests or diseases. If you find any, take action immediately. You can use organic pesticides or fungicides to control pests and diseases. Also, ensure good air circulation around your plants to prevent fungal diseases.
What are some good companion plants for container tomatoes?
Companion planting can help improve the health and yield of your container tomatoes. Some good companion plants include basil, marigolds, and nasturtiums. Basil repels tomato hornworms and other pests, while marigolds deter nematodes. Nasturtiums attract aphids away from your tomato plants.
How do I prune my container tomatoes?
Pruning can help improve air circulation and sunlight penetration, which can lead to healthier plants and more abundant harvests. Remove suckers (the small shoots that grow between the main stem and the branches) to encourage the plant to focus its energy on producing fruit. You can also remove yellowing or diseased leaves.


Leave a Comment